MR.BEER LBK User manual

BREWING
INSTRUCTIONS
You can do it!
www.mrbeer.com

2Order online at www.mrbeer.com
NOTES:
• Complete video instructions can be found on the DVD
included with your brewing system. Visit www.youtube.
com/mrbeer for additional basic and advanced video
instructions.
• For even more detailed brewing instructions, download
our free book: Advanced Brewing Instructions. It can be
found here: www.mrbeer.com/help
• Be sure to check out the footnotes throughout the
instructions for important tips and insight into the
brewing process.
WELCOME TO
THE ART OF
HOME BREWING!
These instructions will familiarize you with the basic brewing procedures
of the MR.BEER® Home Brewing System.
Once you are familiar with these principles, you’ll be able to brew a huge
range of other beer styles using MR.BEER® ingredients and your own
creativity.
HAVE AN ORDERING OR BREWING QUESTION?
• CUSTOMER SERVICE – customerservice@mrbeer.com
•BREWMASTER – brewmaster@mrbeer.com
•TOLL FREE SUPPORT – 800 - 852 - 4263
• JOIN OUR BREWING COMMUNITY – community.mrbeer.com
• TO ORDER – www.mrbeer.com
•ONLINE CHAT SERVICE – www.mrbeer.com
•REGISTER – www.mrbeer.com/register
Pricing and product availability are subject to change without notice.
PRODUCT KEY

3
800-852-4263
1Not included with the Barrel of Beer Kit. Instead, collect plastic soda bottles and caps. You’ll need enough to
hold 8 liters or 256 ounces. Bottling systems are available at www.mrbeer.com for as little as $17.95 plus S&H.
2Some Refills may come with an additional pouch of LME (Liquid Malt Extract).
3Do not use a wooden spoon, as it can harbor bacteria.
WHAT‘S INCLUDED &
WHAT YOU’LL NEED
1
• (1) 8-Liter Keg Fermenter & Lid
• (1) MR.BEER® Keg Logo Label
• (11) 740-mL PET Bottles, Caps and Labels1
• (1) Spigot, Washer and Nut
• (1) Can of Hopped Malt Extract (HME)2
• (1) Packet of Yeast (Under lid of the HME)
• (1) Packet of No-Rinse Cleanser
• (1) Bag of Carbonation Drops
• (1) Brewing With Mr.Beer® DVD
8 Liter Kit
WHAT YOU’LL NEED
• (3) Gallons Water
• (1) 1-Gallon Container (Jug)
• (1) 3-Quart Pot (or Larger)
• (1) Metal or Hard Plastic Spoon/Whisk3
• (1) Can Opener
• (1) Measuring Cup
• (1) Large Mixing Bowl

4Order online at www.mrbeer.com
WHAT YOU’LL NEED
• (3) Gallons Water
• (1) 1-Gallon Container (Jug)
• (1) 3-Quart Pot (or Larger)
• (1) Metal or Hard Plastic Spoon/Whisk3
• (1) Can Opener
• (1) Measuring Cup
• (1) Large Mixing Bowl
• (1) 8+ Liter, UV-resistant Fermenter with Lid
• (1) Krausen Kollar + Clips
• (1) Spigot Assembly and Bottling Wand
• (1) Can of Hopped Malt Extract (HME)2
• (1) Packet of Yeast (Under lid of the HME)
• (11) 740-mL PET Bottles, Caps and Labels
• (2) Packets of No-Rinse Cleanser
• (1) Bag of Carbonation Drops
• (1) Brewing With Mr.Beer® DVD
8Liter Extra Kit

5
800-852-4263
WHAT’S INCLUDED
WHAT YOU’LL NEED
• (6) Gallons Water
• (1) Food Grade Bucket or Large Pot
• 1) 8-Quart Pot (or Larger)
• (1) Metal or Hard Plastic Spoon/Whisk3
• (1) Can Opener
• (1) Measuring Cup
• (1) Pitcher
• (1) Large Mixing Bowl
• (1) 24 Liter, UV-resistant Fermenter with Lid
• (1) Krausen Kollar with Clips
• (1) Spigot Assembly and Bottling Wand
• (3) Cans of Hopped Malt Extract (HME)2
• (3) Packets of Yeast(Under lids of the HME)
• (30) 740-mL Plastic Bottles, Caps and Labels
• (2) Packets of No-Rinse Cleanser
• (3) Bags of Carbonation Drops
• (1) Brewing With Mr.Beer® DVD
24 Liter Kit
2Some Refills may come with an additional pouch of LME (Liquid Malt Extract).
3Do not use a wooden spoon, as it can harbor bacteria.

6Order online at www.mrbeer.com
1. Place washer on the spigot with the beveled (narrower) edge facing the threads 4, then insert spigot into keg.
Place the nut with the wide flat side against the inside keg wall and gently hand tighten.5
2. Fill the keg with water then let the keg sit for a few minutes to test for leaks.
3. Apply keg label to front of keg.
HOW TO ASSEMBLE THE SPIGOT
2
4 The most common problem in assembling the tap is installing the washer backward, or inside the keg, which can cause
leakage.
5 Hand tighten only. Do not over tighten. Do not use pliers or a wrench as it will damage the assembly.
Spigot
Washer Keg Wall Nut
1. With the spigot handle facing up, slide the spigot into the fermenter hole until the clip snaps into place.
2. Fill the fermenter with water, then let it sit for a few minutes to test for leaks.

7
800-852-4263
GETTING STARTED
1. Fill clean6keg with warm water to the 4-liter mark on the back, then add ½ pack (about 1 tablespoon) of
No-Rinse Cleanser7 and stir until dissolved. Once dissolved, the solution is ready to use.
2. Screw on lid and swirl the keg so that the sanitizing solution makes contact with the entire interior of the
keg, including the underside of the lid.8Allow to sit for 2 minutes, and then swirl again.
3. Dispense all of the sanitizing solution into a large bowl. Place your spoon, can opener, and measuring cup
into the bowl to sanitize and keep them sanitized throughout the brewing process.9Allow 2 minutes in
sanitizing solution before using utensils.
4. After all surfaces have been thoroughly sanitized, do not rinse or dry the fermenter or utensils.10 Proceed
immediately to the brewing process.
Sanitize your spoon and other utensils in solution.Pour half of No-Rinse Cleanser packet.
The Importance of Sanitization
Sanitation is the most crucial step in the brewing process. Brewers have
often been jokingly referred to as glorified janitors because of how
important cleaning and sanitation is in order to make a clean, fresh tasting
beer. Anything that comes into contact with the brewing ingredients
must be both physically clean as well as sanitized. Otherwise, wild yeast
or bacteria can overtake your beer, producing off flavors as well as some
ghastly sights! Follow these steps carefully in order to make a clean
environment for the yeast.
SANITIZING
3
6See Care and Cleaning Instructions regarding washing your equipment if your keg has previously been used.
7You will use the other half of the No-Rinse Cleanser packet during bottling. Once mixed, the sanitizing solution
cannot be saved and reused at a later date.
8 The keg has ventilation notches in the threads of the lid. Water will leak from these notches when the keg is tipped,
so you may want to do this step over the sink.
9 After each use, rinse utensils before placing back into the sanitizing solution to keep everything clean and sanitary.
10 Any small amount of remaining sanitizing solution will not harm you or your beer.

8Order online at www.mrbeer.com
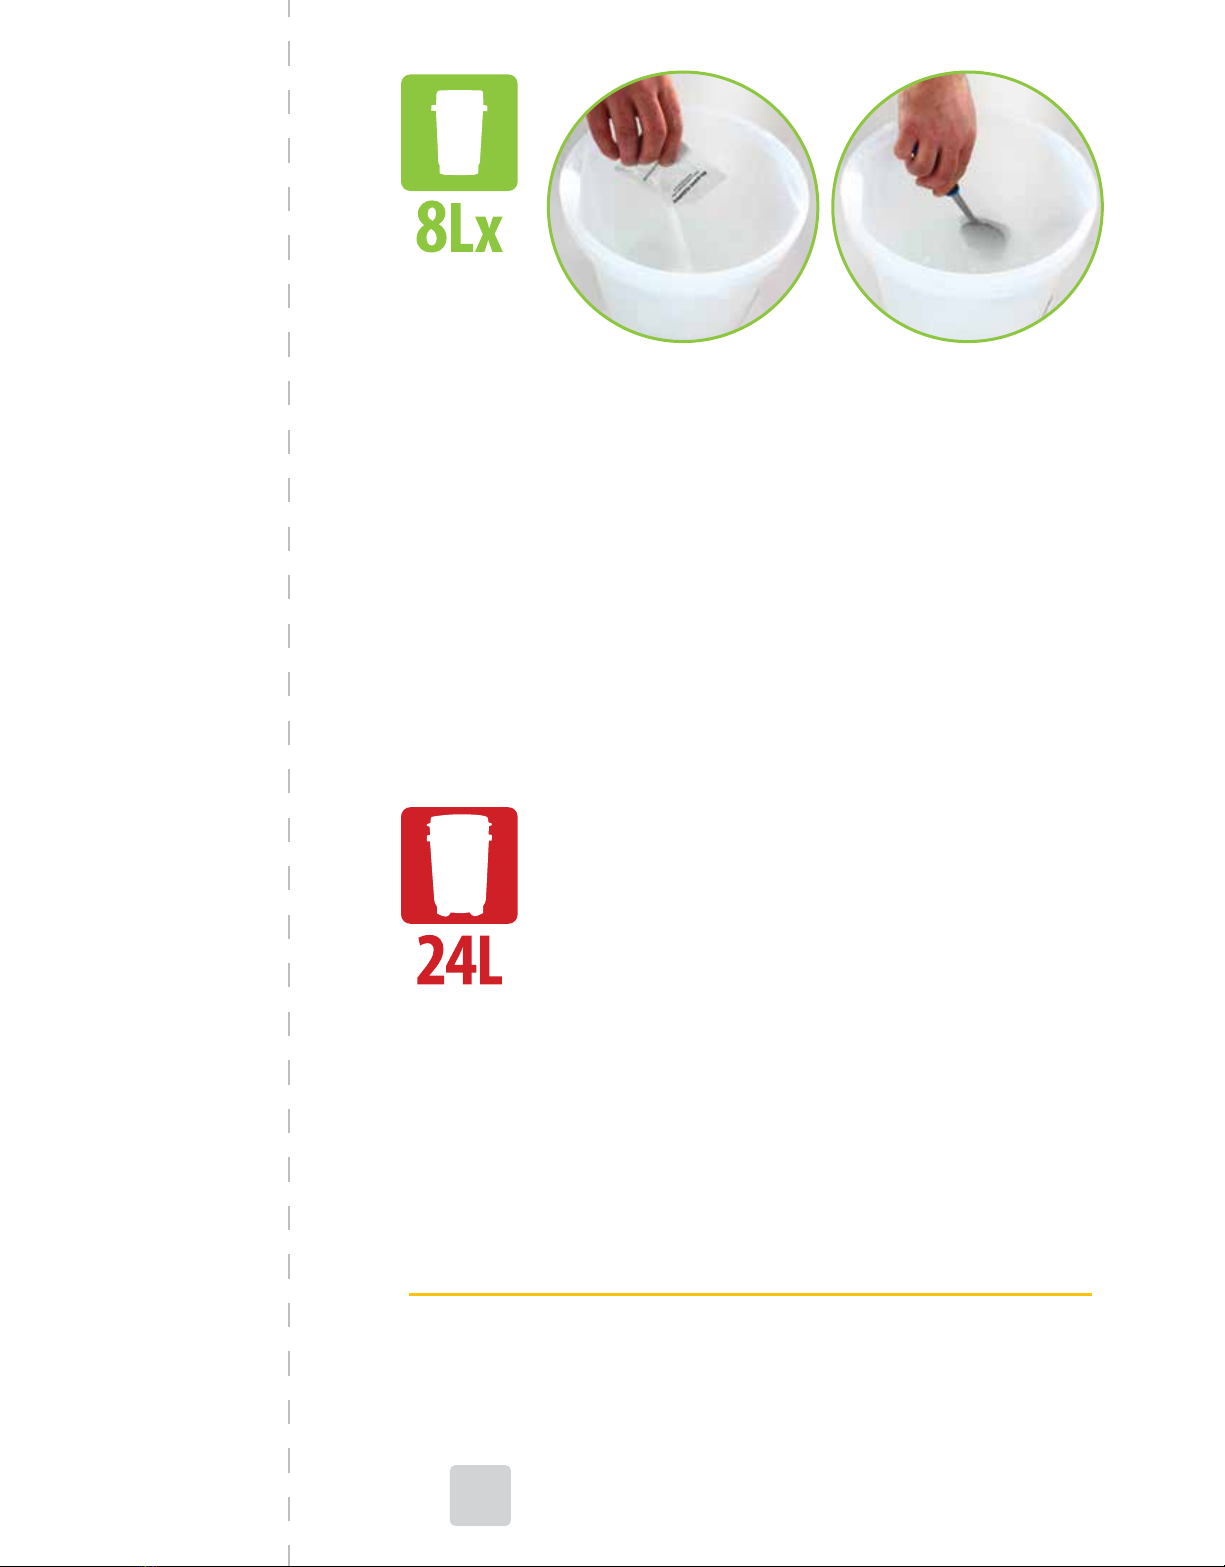
1. Fill the clean6 fermenter with warm water to the 4-liter mark on the side, then add one entire packet of
No-Rinse Cleanser and stir until dissolved. Once dissolved, it is ready to use.
2. Using a measuring cup, scoop the sanitizing solution and pour along the inner walls of the fermenter and
krausen kollar. Make sure to coat all parts of the inside with the sanitizing solution. Continue this for 2
minutes.
3. Place the lid underneath the spigot, open the spigot and fill the lid. Once filled, pour the No-Rinse solution
back into the fermenter, coating the entire inner surface of the lid as you pour. Then, place the lid back onto
the fermenter.
4. Dispense all of the sanitizing solution into a large bowl. Place your spoon, can opener, and measuring cup
into the bowl to sanitize and keep them sanitized throughout the brewing process.9Allow 2 minutes in
sanitizing solution before using utensils.
5. After all surfaces have been thoroughly sanitized, do not rinse or dry the fermenter or utensils.10 Proceed
immediately to the brewing process.
Stir until cleanser is dissolved.Pour in No-Rinse Cleanser.
1. Fill clean6fermenter with warm water to the 8-liter mark, then add one entire
packet of No-Rinse Cleanser and stir until dissolved. Once dissolved, it is ready to
use.
2. Using a pitcher, scoop the sanitizing solution and pour the solution along the inner
walls of the fermenter and krausen kollar. Make sure to coat all parts of the inside
with the sanitizing solution. Continue this for 2 minutes.
3. Place the lid underneath the spigot, open the spigot and fill the lid up. Once filled,
pour the No-Rinse solution back into the fermenter, coating the entire inner surface
of the lid as you pour. Then place the lid back onto the fermenter.
4. Dispense all of the sanitizing solution into a large bowl. Place your spoon, can
opener, and measuring cup into the bowl to sanitize and keep them sanitized
throughout the brewing process.9Allow 2 minutes in sanitizing solution before
using utensils.
5. After all surfaces have been thoroughly sanitized, do not rinse or dry the fermenter
or utensils.10 Proceed immediately to the brewing process.
6See Care and Cleaning Instructions regarding washing your equipment if your keg has previously been used.
9 After each use, rinse utensils before placing back into the sanitizing solution to keep everything clean and sanitary.
10 Any small amount of remaining sanitizing solution will not harm you or your beer.

9
800-852-4263
What is Hopped Malt Extract?
Hopped Malt Extract (HME) is a highly concentrated form of wort, which has been
professionally crafted for MR.BEER® by Coopers Brewery, LTD in one of the most
advanced brewhouses in the world. With the use of HME, all you need to do is add the
2 remaining ingredients — yeast and water. This cuts down your typical homebrew day
from 9 hours to about 30 minutes! Here is how to finish the brewing process in your own
home.
See the Brewing with MR.BEER® Guide for more
details on the Coopers brewing process.
Now, you’re ready to brew!
There are four ingredients needed to produce beer: malted barley, hops, yeast,
and water. The brewing process combines malt, hops and water to produce
wort (pronounced wert). The wort is then combined with yeast, and with a
little patience, the wort is transformed into beer. As any commercial brewer
can attest, producing wort is a highly labor-intensive process that requires
thousands of dollars of equipment in order to produce high quality beer.
Fortunately, we do that work for you in our state-of-the art brewery and deliver
it to you in the form of hopped malt extract.
BREWING
4
1. Remove the yeast packet from under the lid of the can
of hopped malt extract (HME), then place the unopened
can in hot tap water.11
2. Using the sanitized measuring cup, pour 4 cups of water
into your 3-quart or larger pot. Bring water to a boil, and then remove from heat.
3. Open the can of HME12 and pour it into the boiled water. If your refill includes liquid malt extract (LME), pour it
into the boiled water as well. Stir until thoroughly mixed. This mixture is called wort.
4. Fill fermenter with cold (40-55°F or 4-12°C) water to the 4-liter mark on the back.
5. Pour the wort into the keg, and then bring the volume of the keg to the 8.5-liter mark by adding more cold water.
Mix vigorously with the spoon or whisk.
6. Sprinkle the entire yeast packet into the keg, then screw on the lid. Do not stir.

10 Order online at www.mrbeer.com
1. Remove the yeast packet from under the lid of the can
of hopped malt extract (HME), then place the unopened
can in hot tap water.11
2. Using the sanitized measuring cup, pour 4 cups of water
into your 3-quart or larger pot. Bring water to a boil, and then remove from heat.
3. Open the can of HME12 and pour it into the boiled water. If your refill includes liquid malt extract (LME), pour it
into the boiled water as well. Stir until thoroughly mixed. This mixture is called wort.
4. Fill fermenter with cold water (40-55°F or 4-12°C) to the 4-liter mark on the side.
5. Pour the wort into the fermenter, and then bring the volume of the keg to 8.5 liters by adding more cold water.
Mix vigorously with the spoon or whisk.
6. Sprinkle the entire yeast packet into the fermenter, then place the krausen kollar and lid on. Do not stir. Insert clips
into clip notches.
8L continued:
After a few days, the foam and activity will subside and your batch will appear to be
dormant. However, the yeast is still at work, slowly finishing the fermentation process.
Allow the fermentation approximately 2 weeks to ensure the process is complete, and
that the beer is well clarified and ready for bottling.
1. Remove the yeast packets from under the lids of the cans of hopped malt extract (HME), then place the unopened
cans in hot tap water.11
2. In an 8-quart or larger pot, bring 3 liters of water to a boil and then remove from heat.
3. Open the cans of HME12 and pour the contents into the boiled water. If your refill includes liquid malt extract
(LME), pour it into the boiled water as well. Stir until thoroughly mixed. This mixture is called wort.
4. Fill fermenter with cold water (40-55°F or 4-12°C) to the 8-liter mark.
5. Pour the wort into the fermenter, and then bring the volume of the fermenter to the 24-liter mark with more cold
water. Mix vigorously with the spoon or whisk.
6. Sprinkle all three yeast packets into the fermenter, then place the krausen kollar and lid on. Do not stir. Insert clips
into clip notches.

11
800-852-4263
BREWING
11If your refill comes with a pouch of liquid malt extract (LME), place the unopened LME in the hot tap water with your HME.
This is meant to make the HME/LME pour more easily.
12 The can is more easily opened from the bottom.
13If it is difficult to see activity, use a flashlight to see through the fermenter wall. Avoid opening the lid of the fermenter, as
this can risk contaminating your beer.
8Lx & 24L
After a few days, the foam and activity will subside and your batch will appear to
be dormant. Your beer is still fermenting, the yeast at work slowly finishing the
fermentation process. When you notice that most of the visible activity has stopped,
it’s time to remove the krausen kollar, which is designed to collect the bulk of the foam
residue. Take off the fermenter lid, remove the kollar, and then simply place the lid back
on. Allow the fermentation approximately 2 weeks to ensure the process is complete,
and that the beer is well clarified and ready for bottling.
What Happens During Fermentation?
Usually within 1 to 3 days, you will be able to see the fermentation process begin.13
The liquid will be opaque and milky, foam will exist on top of the liquid, bubbles will be
rising from the liquid, and a layer of sediment (trub) will accumulate at the bottom of
the fermenter. All of these are perfectly normal and are signs of a healthy fermentation.
To see a time-lapse video of a fermentation visit: www.youtube.com/mrbeer.
Advanced Brewing Instructions
For even more detailed brewing instructions, download our free, printable book
Advanced Brewing Instructions. Find it at: www.mrbeer.com/help
IMPORTANT:
Be sure to place your fermenter in a safe area
where any possible leakage can be contained. It is
extremely important that you maintain a steady
temperature between 68° and 76°F. Too cold and the
yeast will go dormant. Too warm and the yeast will
produce off-flavors.

12 Order online at www.mrbeer.com
Bubble Up!
Once fermentation is complete, you will transfer the beer into bottles and,
depending on bottle size, add a certain amount of priming sugar to produce the
proper level of carbonation. Carbonation is created when yeast metabolizes the
priming sugar to create carbon dioxide. Under pressure, the CO2 bubbles have
nowhere to go but to remain in solution.14 In order to carbonate the beer, it must
be transferred into bottles.15 After two weeks, you will know the beer is ready
to bottle and carbonate by tasting a small sample. The beer should taste like flat
beer. If the beer is sweet, make sure that it is in the correct temperature range
(68°F-76°F or 20°C-24°C) and let it ferment for a few days longer, but no longer
than one more week.
BOTTLING &CARBONATING
5
14Due to this natural carbonation, there will always be a small amount of sediment at the bottom of each bottle. This is
perfectly natural and you can still have a crystal clear beer by gently pouring it into a glass. The sediment also aids in flavor
development over time.
15It is impossible to carbonate inside the fermenter, as it cannot hold pressure.
(Included in
most kits)
500ml 740ml 1 Liter
1
Carbo
Drop
or
1 tsp
sugar
2
Carbo
Drops
or
2 tsp
sugar
2.5
Carbo
Drops
or
2.5 tsp
sugar
PRIMING SUGAR
BOTTLE SIZE
½ Liter
¾ Liter (Incl. 740ml)
1 Liter
2 Liter
3 Liter
12 Ounce
16 Ounce
20 Ounce
22 Ounce
32 Ounce (1 Quart)
CARBO DROPS OR
1
2
2½
5
7½
¾
1
1½
1½
2½
TABLE SUGAR
1 tsp
2 tsp
2½ tsp
1½ tbsp
2½ tbsp
¾ tsp
1 tsp
1½ tsp
1½ tsp
2½ tsp
tsp = teaspoon tbsp = tablespoon
NOTE: Carbo Drops® can be easily cut in half using a pill cutter.

13
800-852-4263
BOTTLING &CARBONATING
1. When your beer is ready to bottle, fill a 1-gallon container with warm water, then add the remaining ½ pack of the No-Rinse
Cleanser and stir until dissolved. Once dissolved, it is ready to use.
2. Distribute the sanitizing solution equally among the bottles. Screw on caps and shake bottles vigorously. Allow to sit 10
minutes, then shake the bottles again. Remove caps16 and empty all sanitizing solution into a large bowl. Use this solution to
sanitize any other equipment you may be using for bottling. Do not rinse.
3. Add 2 carbonation drops to each 740-mL bottle. For 1-liter bottles, add 2½ drops; for ½-liter bottles add, 1 drop. For other
bottle sizes see: http://www.mrbeer.com/help.17
4. Holding the bottle at an angle, fill each bottle to about 2 inches from the bottle’s top.18
5. Place caps on bottles, hand tighten, and gently turn the bottle over to check the bottle’s seal. It is not necessary to shake them.
&
1. When your beer is ready to bottle, pour one entire pack of
No-Rinse Cleanser into 8 liters (2 gallons) of water and stir until
dissolved. Once dissolved, it is ready to use.
2. Distribute the sanitizing solution equally among the bottles. Screw on caps and shake bottles vigorously. Allow to sit 10
minutes, then shake the bottles again. Remove caps16 and empty all sanitizing solution into a large bowl. Use this solution to
sanitize any other equipment you may be using for bottling. Do not rinse.
3. Add 2 carbonation drops to each 740-mL bottle. For 1-liter bottles, add 2½ drops; for ½-liter bottles, add 1 drop. For other
bottle sizes see: http://www.mrbeer.com/help.17
4. With your included bottling wand, insert the bottling wand into the spigot tap. Slide the bottling wand into the bottle and
allow beer to flow through by pushing the bottle up against the bottling wand’s check valve.
5. Fill each bottle to the top. When the wand is removed from the bottle, it will provide proper head space.
6. Place caps on bottles, hand tighten, and then gently turn the bottle over to check the bottle’s seal. It is not necessary to shake
them.

14 Order online at www.mrbeer.com
16 The rings at the bottom of the caps may come off. Don’t worry, that will not affect the cap’s ability to seal. They merely let you know
that the cap has never been used before.
17One teaspoon (tsp) of white granulated sugar can replace one carbonation drop. Carbonation drops typically take 1 to 3 days longer to
carbonate than granulated sugar, as it takes longer for them to completely dissolve.
18 If you have a bottling wand, connect the bottling wand to the spigot. Slide the bottling wand into the bottle and allow beer to flow
through by pushing the bottle up against the bottle wand’s check valve.
19 If your bottles turn soft in the refrigerator, bring them back up to room temperature and condition longer in order to build up more
carbonation.
After Bottling
Store the bottles upright and out of direct sunlight
in a location with a consistent temperature between
68° and 76° F (20-24°C). If the bottles are exposed to
a colder temperature, they will take much longer to
carbonate. If warmer than 76°F, off flavors or staling
can be accelerated in the bottles. Allow to sit for a
minimum of 14-21 days to allow full carbonation.
One sure way to know your beer is carbonated is to
squeeze the bottles; if they are hard as a rock then
your beer is fully carbonated.19 Some bottles may finish more quickly than others, but given more
time, all will fully carbonate.
Your beer will always taste best if chilled for at least
two days before drinking. Slowly pour it into a
frosty glass and enjoy!
Flavor develops over time. Some young flavors (green apple, cidery flavors, etc.) will
subside with aging. A properly aged beer will always be better than a young one.
CONGRATULATIONS! YOU ARE NOW A HOME BREWER!
Enjoy Your Beer!
Sugar priming is easy with Mr.Beer® Carbo Drops.

15
800-852-4263
CARE &CLEANING
Clean Gear = Tasty Beer!
To ensure your next batch of beer is as good as the first, you need to clean your equipment
immediately after use with soap and water. While rinsing is good, only soap and water will result
in clean equipment for your next brew. The best cleaner to use on your brewing equipment is
Oxygen Brewery Wash, available at www.mrbeer.com. Oxygen Brewery Wash effectively breaks
down residue without leaving any flavor or foam-damaging residues after rinsing. If you do not
have Oxygen Brewery Wash, liquid soap works fine, as long as it is unscented and is thoroughly
rinsed off with warm water (105-115°F or 41-46°C). Scented soap or improper rinsing can leave a
film on your equipment that ruins beer foam and leaves off flavors in your next beer.
CARE &CLEANING
6
1. Immediately after use, remove and disassemble the spigot assembly from the
keg, then thoroughly wash all parts in warm water using a clean soft cloth and
clear unscented liquid soap.
2. Do not use scouring pads, wire brushes, sponges or abrasives during cleaning
as they can harbor bacteria and create small scratches that may infect your
beer.
3. Always clean all equipment immediately after use and sanitize immediately before brewing/bottling again.
1. Immediately after use, remove the spigot assembly from the fermenter and disassemble the spigot into 2 parts by grasping the top and
turning it counterclockwise. Thoroughly wash all parts of the fermenter and spigot in warm water using a clean soft cloth and clear
unscented liquid soap.
2. Do not use scouring pads, wire brushes, sponges or abrasives during cleaning as they can harbor bacteria and create small scratches that
may infect your beer.
3. Always clean all equipment immediately after use and sanitize immediately before brewing/bottling again.
&
(Optional)

BREWING LOG
REFILL NAME:
DATE BREWED:
DATE BOTTLED:
DRINKING DATE:
NOTES:
PRODUCT KEY

CATALOG
Mr.Beer® REFILLS
For ordering information, visit www.mrbeer.com
STANDARD/DELUXE REFILLS
3.7 - 4.6% ABV
American Ale
Rich golden color, light toasty malt character with a citrusy hop aroma and crisp bitterness. American Porter Dark mahogany color,
medium body with roasted caramel malt character, mild bitterness and a creamy head.
American Porter
Dark mahogany color, medium body with roasted caramel malt character, mild bitterness and a creamy head.
Aztec Mexican Cerveza
Light gold, clean refreshing taste with a crisp finish, this is a classic Mexican-style beer best served ice cold. Bavarian Weissbier Pale gold
in color with a subtle, fruity flavor and a soft clove palate, this is a favorite beer of Bavaria in Southern Germany. Just add a slice of lime or
orange for the ultimate, zesty thirst quencher.
Bavarian Weissbier
Pale gold in color with a subtle fruity avor and a soft clove palate, this is a favorite beer of Bavaria, Southern Germany. Just add a slice of
lime or orange for the ultimate zesty thirst quencher.
Canadian Blonde
Lightly colored, clean, fresh palate, well balanced with subtle hop notes and a crisp finish, this is a classic, easy-drinking Canadian-style
beer.
Classic American Light
Pale straw color, mild in flavor and lighter bodied with a crisp, dry finish. A true to character representation of our nation’s favorite beer
style. Serve ice cold for a clean, refreshing taste that has passed the test of time.
Grand Bohemian Czech Pilsner
A characteristically bright golden pilsner brewed with premium pale malt, displaying traditional, spicy Saaz hop aroma and a dry,
refreshing bitter finish.
Oktoberfest Lager
Also referred to as Märzenbier, this malty, deep amber colored beer features a smooth body, toffee like malt richness and a full, biscuit
like bouquet. Sample the celebrated beer of Munich’s world famous Oktoberfest.
St. Patrick’s Irish Stout
An authentic blend of grainy, roasted malt, malted barley and hops, this is a rich, dark brew exhibiting coffee and chocolate aromas, a
perfectly balanced, roasted bitter character and dry finish.
CIDER REFILLS
4.0% ABV
Hard Apple Cider Rell
A cider that would do Johnny Appleseed proud with a crisp, clean finish and dry undertones. 100% GLUTEN FREE!
Hard Pear Cider Rell
Known more properly as perry, this distinctive pear treat is a clear, bubbly concoction perfect for any occasion! 100% GLUTEN FREE!
800-852-4263 • Pricing and product availability are subject to change without notice.
CATALOG

Order online at www.mrbeer.com
CRAFT SERIES REFILLS
5.5% ABV
Bewitched Amber Ale
She’s a feisty one, but not too bitter. Showcasing vibrant amber hues, velvety smooth caramel malt character, even bitterness and
delicate citrus hop aroma, this amber ale epitomizes the characteristics that make this style a microbrewery standard.
Diablo IPA
A fiendishly hopped American IPA. Fiery amber in color with intense mouthfeel, displaying a blend of floral spice and stone fruit aromas
ending with a firm and lingering bitter finish. For those not afraid of hops!
Northwest Pale Ale
A classic US craft style, this pale ale is a rich amber color, with a full malt character. A highly refreshing woodsy hop aroma and clean bite
make this beer a standout. It’s a genuine craft classic.
Winter Dark Ale
This winter warmer will cure what ales you with its lush ruby color, roasted malty character, and perfectly balanced hop bitterness. The
generous mouthfeel, smooth creamy head and roasted malt aromas finishing with a hint of chocolate will keep you cozy during the long
cold winter nights.
SEASONAL REFILLS
6.5+% ABV
Dopplebock
Gold with copper hues, displaying a creamy compact white head, this full-bodied extra strong lager exhibits a sweet, malty aroma with
a hint of fruitiness. The high alcohol content creates a warming sensation on the back of the palate whilst the high malt level produces a
toffee “liquid bread”
Dortmunder Export
Originating in the industrial city of Dortmund Germany to satisfy the thirst of the local coal miners, this deep gold colored lager displays
a white, frothy head whilst the cleansing bitterness levels and subtle malt aromas balance perfectly with the lighter body. The result is a
refreshing, thirst quenching beer with a crisp finish.
ESB
A traditional “Real Ale” version of an ESB where drinkability is a priority, this light copper colored, light to medium bodied bitter with off
white head will exhibit a soft malt aroma with a mild fruitiness. The crystal malt adds a roundness to the palate with caramel overtones
whilst emphasis on the bittering hop addition rather than late hopping results in an earthy, dry, bitter finish.
Belgian Spiced Ale
It was such a hit that it’s back! This Belgian Spiced Ale is a rich copper to amber color, with a creamy white head. Full bodied caramel malt
flavors combine with clove, cinnamon and dark fruits. A complex aroma with a hint of aniseed and a warming finish make this a perfect
winter accompaniment.

800-852-4263 • Pricing and product availability are subject to change without notice.
CATALOG
Coopers® REFILLS
For ordering information, visit www.mrbeer.com
ORIGINAL SERIES REFILLS
3.7 - 4.6% ABV
Coopers Draught
Light yellow-gold colour with a tightly packed white head, floral nose with a hint of malt, medium bodied palate with delicate hopping
and a slightly bitter finish. The most discerning draught drinker will appreciate this beer.
Coopers Real Ale
Traditional ale like it should be -- bright golden color, strong head, generous mouthfeel and a moderately bitter finish.
Coopers Stout
Dark brown color with a persistent head resembling espresso creamer, a blend of coffee, chocolate and grain aromas, exceptional mouth
feel and dark malt characteristics, the combination of malt tannins and hop bitterness results in a dry finish. Can be consumed young or
cellared for a number of years with excellent results.
Coopers Ginger Beer
A Traditional flavored ginger beer with a hint of spice and plenty of bite, sure to quench the deepest thirst. Can be made as an alcoholic
drink with 1kg of raw sugar (approx. 3.5%A/Vol) or a non-alcoholic drink with 115g white sugar.
Coopers Lager
Straw color with golden hues and a lacy white head. Light floral aromas follow through on a light to medium bodied palate with subtle
malt and hop flavors and a clean finish. An Australian Lager style with plenty of character.
Coopers Dark Ale
Rich mahogany colour and a creamy head. Roasted malt aromas with a hint of chocolate, generous mouthfeel dominated by roasted
malt flavours, sufficient hop bitterness to give balance and a dry finish. A favourite amongst dark beer drinkers.
COOPERS INTERNATIONAL SERIES REFILLS
5.5% ABV
Coopers Australian Pale Ale
The finest 2-row barley, hops and specially selected yeast combine to produce a beer with fruity and floral characters, balanced with a
crisp bitterness and compelling flavour perfect for every occasion.
Coopers Mexican Cerveza
Coopers Mexican Cerveza emulates the style of the finest quality beers exported from Mexico. This premium beer is light in style with a
fresh clean taste, ideally served ice-cold with a wedge of lime or lemon.
Coopers Canadian Blonde
Pale Straw colour. Crisp pale malt aromas with a hint of spicy hops, clean pale malt flavours and a light-bodied palate that finishes with
obvious hop bitterness. Perfect for summer drinking.
Coopers English Bitter
Coopers English Bitter is a brown copper colour with red hues and a creamy head. It displays a pleasing floral aroma with a blend of
toasty/sweet malt flavours finishing with a firm bitter finish. It may be served slightly less chilled, if desired.
Coopers European Lager
Coopers European Lager captures the style of the finest quality lagers exported from Northern Europe. Serve well chilled in a tall, narrow
glass with a generous head of 5cm or so and savour the herbaceous hop aroma and crisp finish.
CATALOG

Order online at www.mrbeer.com
THOMAS COOPERS SERIES REFILLS
5.5% ABV
Coopers Australian Bitter
A beer style that captures the characteristics of popular Australian bitters, light in color, clean mouth feel with a quenching bitter finish.
Coopers Heritage Lager
A perfect representation of a premium lager with a rich yellow-gold colour and a tightly packed, white head. Prominent European hop
aroma with sufficient hop bitterness and a clean finish.
Coopers Traditional Draught
Discerning draught lovers will delight at the combination of hops and malt and the palate cleansing freshness of this outstanding beer.
Coopers Sparkling Ale
An ale that displays fruity esters on the nose, full malty palate with a generously hopped clean finish in the style of Coopers world famous
Sparkling Ale.
Coopers Pilsener
A pale straw coloured beer with a bold, spicy Saaz hop aroma. Crisp and dry with cleansing bitterness. Thomas Coopers Pilsener is made
from premium 2 - row pale malt and barley, bittering hops and a generous amount of aromatic Saaz hops. Fermentation with the true
lager yeast, supplied, at temperatures below 68F (20C) will produce an excellent example of the pilsener style.
Coopers IPA (India Pale Ale)
Early records of “Cooper and Sons” producing India Pale Ale can be found in the South Australian Advertiser, dated February 1868.
Thomas Coopers IPA (India Pale Ale) produces a beer with all the hallmarks of a genuine IPA from the “mother land”. A strong ale with
robust malt characters and very high hopping levels.
Coopers Wheat
A pale, cloudy beer, refreshingly spritzy and tart with a delicious creamy frothiness. Thomas Coopers Wheat Beer is made from premium
malted wheat, pale malted barley and selected hops. Wheat beers are a great summer refresher, low in bitterness and considered by
many as the “champagne” of the beer world.
Coopers Irish Stout
Thomas Coopers Irish Stout is an authentic recipe containing a blend of malted barley, roasted barley, flaked barley and hops. The pour
will show a turbulent, cascading tan foaming action. Eventually, this settles into a creamy beige coloured head that rests atop the beer.
This manual suits for next models
2
Table of contents
Other MR.BEER Brewing System manuals
Popular Brewing System manuals by other brands

KegLand
KegLand KL20671 instruction manual

Fetco
Fetco TBS-2121XTS user guide

Blichmann Engineering
Blichmann Engineering TOWER of POWER Operation, Assembly & maintenance manual

American Metal Ware
American Metal Ware Shuttle P300 Operator's manual

Sprowt Labs
Sprowt Labs Acro user manual

Newco
Newco LITTLE JOE COMPONENT ACCESS instructions

Keurig
Keurig K-Supreme Plus Use & care guide

Ss Brewtech
Ss Brewtech E-Kettle 304 Product guide

WILLIAMSWARN
WILLIAMSWARN generation 2 personal brewery user manual

BROOD
BROOD DRNX SLM manual

BRAVILOR BONAMAT
BRAVILOR BONAMAT Aurora GTBSH-001 user manual

KegLand
KegLand Fermzilla All-Rounder Starter Kit instruction manual