MS INTELLI 3 User manual

WE ARE THE GOOD GUYS
USER MANUAL
for
Battery Charger and Guardian
INTELLI 3

Battery Charger INTELLI 3
1
Read this instruction manual carefully before the commissioning and preserve it.
If you transfer this appliance to anyone else, please also pass on this manual.
CONTENTS
Introduction 2
Notes 2
1. Usage conformant with intended purpose 2
2. Warnings 2
3. Hazards 3
4. Safety 3
5. Restricted user base 3
6. Fault indications 4
7. Cleaning 4
8. Packaging/environment protection 4
9. Recycling Information 4
Scope of supply 4
Technical Description 5
Areas of application 6
Preparation of the battery 6
Charging Time 6
Settings 7
1. Menu language 7
2. Type of Battery 7
3. Power supply 7
4. Carrying out a battery test 8
5. Force charging 8
6. Force desulphation 8
7. CAN-Bus 9
8. Quitting the menu 9
Connecting / Disconnecting 9
Special Instruction 9
Notifi cations 10
Technical Description 12
Appendix: Information about the charging programs 12
Technical Data 16
Declaration of Conformity 17
Service Address/Imprint 17
Limited manufacturer guarantee in Europe 18

WE ARE THE GOOD GUYS
2
INTRODUCTION
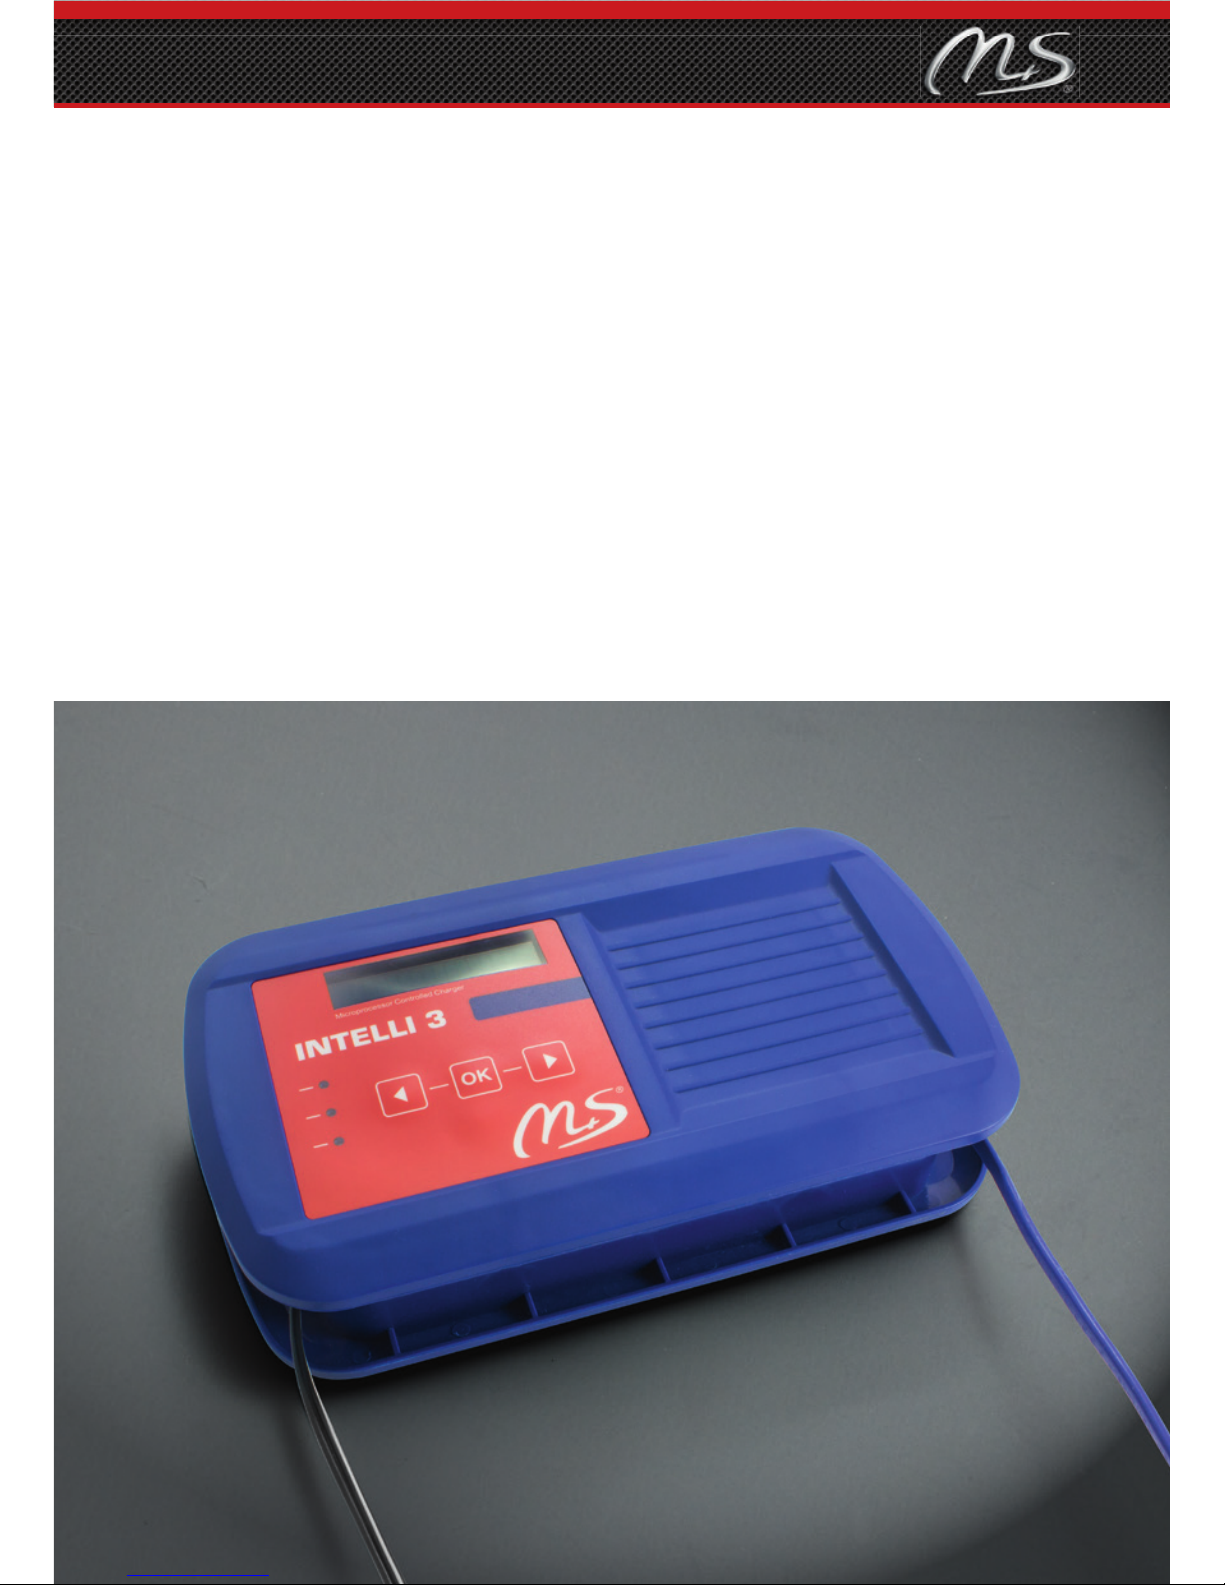
With the INTELLI 3, you have a versatile charging and maintenance device for all types of
rechargeable 12V lead batteries as well as 12V lithium-iron-phosphate (LiFePo) batteries.
With this appliance, you can:
• charge a discharged or partly discharged battery
• maintain the fully charged state of a battery that is not being used over a long time
• test the charged condition of a battery under partial load
• restore sulphated and deep-discharged batteries
• signifi cantly increase the lifetime of a battery with regular use
• continue to supply the vehicle with power if the battery needs to be removed.
The settings are thereby retained (e.g. radio PIN code).
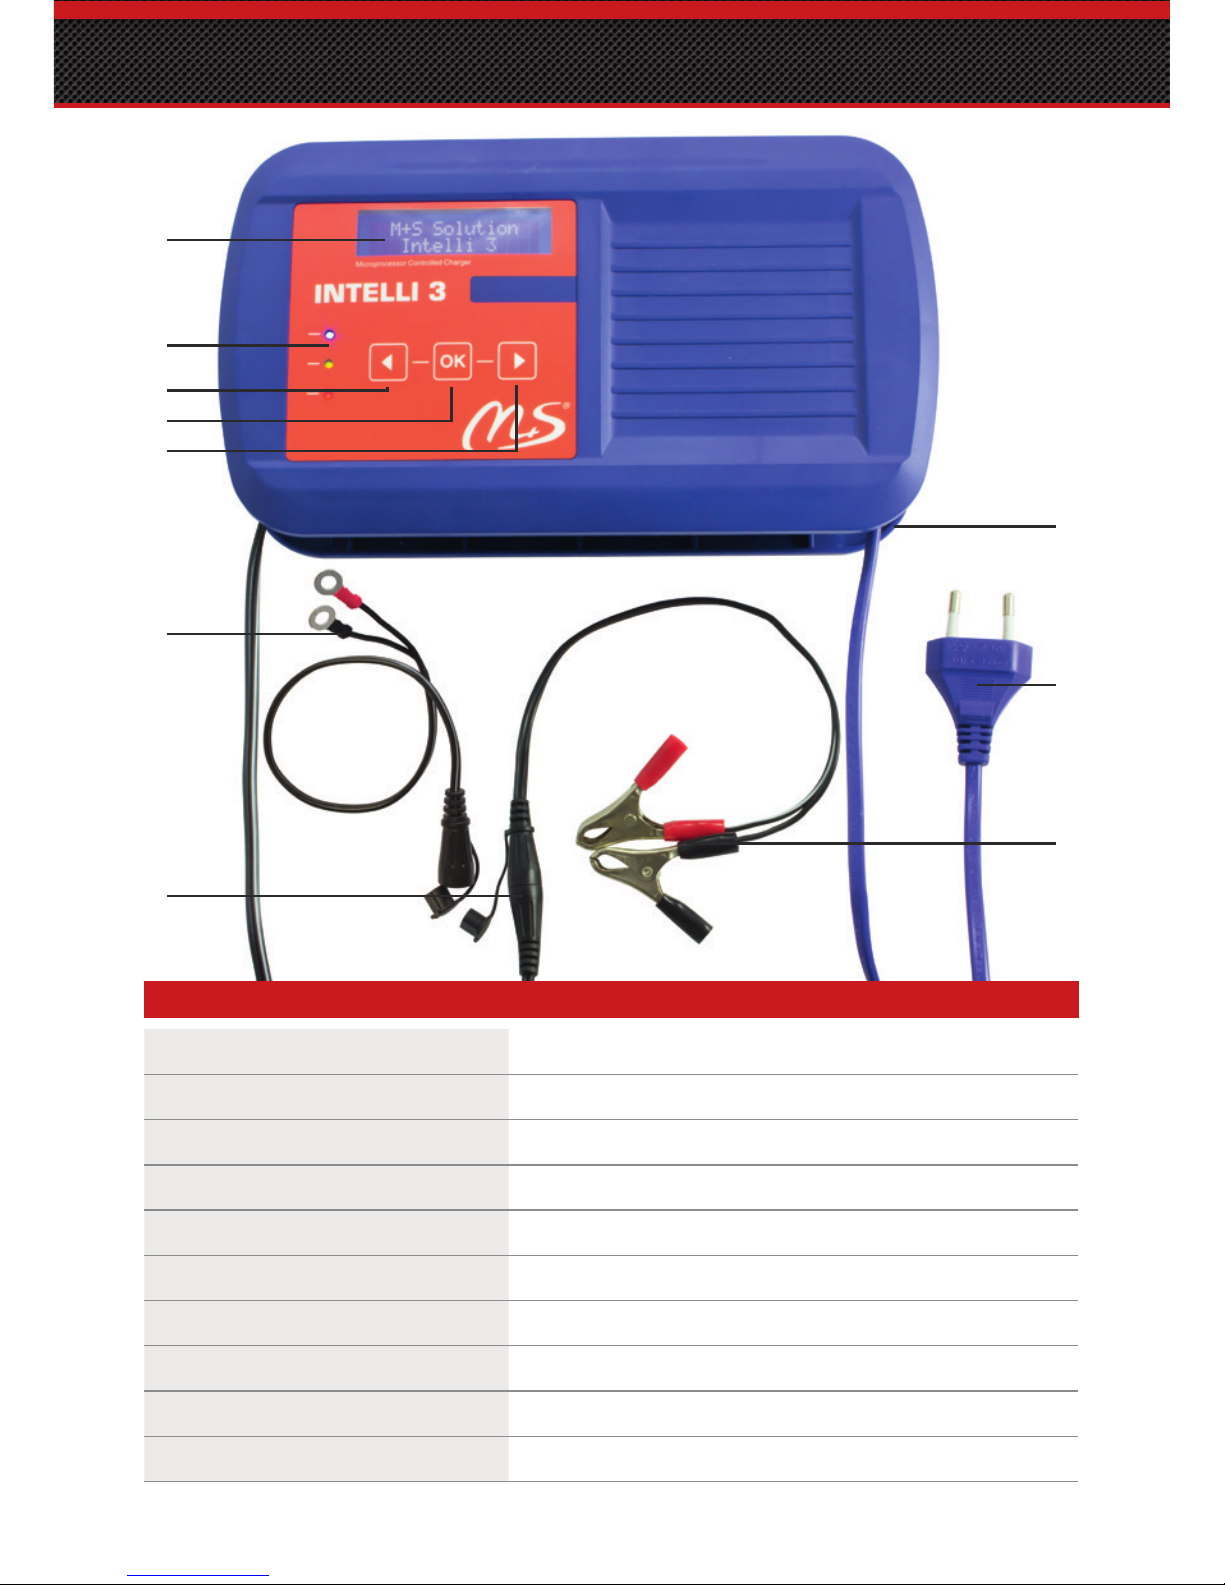
The plain text display, the three LEDs and a buzzer give you complete information at any time
on the state of the battery and the operational state of the charger.
After completely charging, the INTELLI 3 switches to sleep mode. This saves power and
money. The integrated timer regularly wakes the device. It tests the battery, recharges it, if
required, and then returns to sleep mode. It can thereby remain attached to the battery for
several months.
NOTES
1. Usage Conformant with intended purpose
• The intended use of the charger includes the loading and conservation of charge
of rechargeable vehicle batteries. Type, voltage, and capacity of the suitable
batteries can be found in the technical specifi cations.
• The device may only be used in compliance with the relevant user manual and
these instructions.
• Any other usage exceeding this will be considered to be non-conformant with the
intended purpose. The user alone is liable for any damage caused from neglect of
the manual and the notes and instructions in it.
2. Warnings
• Operate the appliance only in dry, closed rooms!
• Prevent any fl uid from penetrating into the appliance!
• Never cover the ventilating slits or the housing!
• Keep the charger away from heat sources!
• Do not expose the charger to direct sunlight, dust or shock.
• Use the appliance only at ambient temperatures between –15°C and +40°C.
• Do not use the charger in the vicinity of fl ammable fl uids, gases and vapours, dusty
environments, atmospheric humidity above 80% or in wet conditions.
• If safe, hazard-less operation is not possible, disconnect the charger from the
mains supply and from the battery, and secure it against unintentional use.

Battery Charger INTELLI 3
3
Safe, hazard-free operation is not possible, if:
- the appliance does not show any functions
- shows visible damage
- the mains cable is damaged
- parts are loose.
3. Hazards
• Service and repair work may only be carried out by technical personnel or trained
persons under the management and supervision of a qualifi ed electrical technician.
• In case of visible damage, such as the development of smoke, penetration of fl uids
etc., immediately disconnect the appliance from the mains supply and disconnect
the battery. Have the fault repaired immediately.
• Hazard from interchanging of the poles, short-circuits and contact with battery
acid – follow the safety instructions of the battery manufacturer without fail.
Caution! Battery acid has a strong corrosive action. If acid gets splashed on
the skin or the clothing, immediately treat it with soap suds and rinse there-
after with plenty of water. If acid has splashed into the eyes, immediately
rinse with plenty of water and consult a doctor as quickly as possible.
4. Safety
• Ensure suffi cient room ventilation during the charging!
• In case of non-maintenance-free batteries, before charging, open the cell lids and
check the acid level. In case of long charge-retention periods of non-maintenance
free storage batteries, check the acid level from time to time.
• Regularly check the charging process.
• Avoid naked fi re, naked light and sparks in the vicinity of the storage battery to
be charged (explosion hazard from electrolytic gas). Please follow the charging
instructions of the battery manufacturer.
5. Restricted user base
The device is not intended for use by
• persons (including children) whose
- physical, sensory, or metal capabilities; or
- lack of experience and knowledge prevents them from using the appliance
safely without supervision or instruction;
• children playing with the appliance.

WE ARE THE GOOD GUYS
4
6. Fault Indications
If the appliance does not work, check the following points:
• Is the socket ok and does it carry a voltage?
• Is the connected battery faulty or deep-discharged?
• Has the appliance been connected with correct polarity?
• To avoid damage to batteries, it is imperative to always ensure that batteries are
never deep-discharged.
7. Cleaning
• Before cleaning, pull the mains plug.
• Clean the housing only with a moist cloth and then wipe it dry. Solvents like
thinners and benzene as well as scouring agents destroy the surface and the
printing.
• • Prevent the penetration of cleaners into the inside of the appliance.
8. Packaging/Environment protection
• When disposing of the packaging, please follow the applicable laws for environ-
ment protection and trash disposal.
• Disposal of the outer packaging with the normal domestic trash or paper recyc-
ling is permitted.
9. Recycling Information
• According to the electrical and electronic appliances law, owners of electrical
appliances are legally obliged to take old electrical and electronic appliances to a
separate waste collection facility. Help along and make a contribution to envi-
ronment protection by bringing used appliances to a collection centre of your
communal disposal agency (e.g. materials yard); collection is free of cost.
• Disposal with the normal household trash is prohibited.
• The symbol alongside means that the appliance must be disposed of separately
from the normal household trash.
SCOPE OF SUPPLY
Delivery includes:
1x INTELLI 3 charger with mains cable and charging cable
1x battery clips with M+S system plug
1x eyelet cable
1x user manual

Battery Charger INTELLI 3
5
TECHNICAL DESCRIPTION
1 Display Displays all messages
2 LED displays Indicate the current operation (red/green/blue).
3 Left arrow button Scrolls the menu to the left or changes value
4 OK button Confi rm the input or continue in the menu
5 Right arrow button Scrolls the menu to the right or changes value
6 Winding edge Takes up the cable, holes for wall mounting
7 Battery clips Separable connection on M+S system plug
8 Mains cable Connection to the mains supply
9 M+S system plug Connection of different charging cable
10 M+S Battery cable with ring eyes For battery charging with M+S system plug
1
4
7
2
6
5
3
8
9
10

WE ARE THE GOOD GUYS
6
AREAS OF APPLICATION
• For all types of 12 V start batteries, e.g. for motorcycles, motorcars, caravans,
boats and lawn tractors regardless of whether lead/acid, lead/gel, AGM, mainte-
nance free, pure lead or lithium-iron-phosphate (LiFePo).
Warning: Never use the appliance for charging non-rechargeable batteries.
Ensure without fail that batteries are charged in well-ventilated rooms (danger
of explosion owing to the formation of electrolytic gas).
In order to avoid hazards, if the mains supply cable gets damaged, it should be
replaced by the manufacturer, his customer service department or a similarly
qualifi ed person!
• The charger must be protected from moisture and splashes!
• During operation, the charger can become warm to the touch.
• Das Ladegerät kann im Betrieb handwarm werden!
PREPARATION OF THE BATTERY
1. DURING CHARGING IN INSTALLED STATE, THE IGNITION OF THE VEHICLE
MUST ALWAYS BE TURNED OFF!
2. If present: remove the closing plugs of the battery.
Caution: Battery acid has a strong corrosive action. Treat any acid that gets
splashed on the skin or clothing immediately with soap suds and then rinse with
plenty of water. If any acid has splashed into the eyes, immediately rinse with
plenty of water and then consult a doctor as quickly as possible. Specifi cations
and warnings of the battery and vehicle manufacturer for battery charging must
be complied with without fail and have priority!
3. If possible, check the fl uid level of the battery.
4. If necessary refi ll distilled water.
• Das Ladegerät kann im Betrieb handwarm werden!
CHARGING TIME
The charging time depends on the charge status and the capacity of the battery.
- 40 Ah battery, empty – charging time approx. 12 h
- 18 Ah, partially discharged – charging time approx. 3–5 h

Battery Charger INTELLI 3
7
SETTINGS
1. Menu language:
• Connect the INTELLI 3 to a mains socket. The
version number is fi rst shown in the display, then
„M+S Solution INTELLI 3“.
• With the battery not connected, press the
button.
• Press
or till „Sprache/Language“ is displayed.
The second selectable language will be displayed.
• Press
to change the menu language between
„German“ and „English“.
• Wait for 10 seconds => automatically back to the
function display or select or to get to the next
menu option.
2. Type of battery:
Before connecting a battery, the battery type must be set.
• Connect the INTELLI 3 to a mains socket.
• With the battery not connected, press the
button.
• Press
or till „Change battery type“ and the
currently selected battery type are displayed
alternately.
• Press
to change the selection.
• With
or ,select the desired type of battery:
lead/acid – lead/gel – AGM – pure lead –
LiFePo.
• Confi rm the selected battery type with
=> Back to the main menu
3. Power supply:
Select this menu if the vehicle should be supplied with
power at short notice during removal of the battery.
The set values of the vehicle are retained
(e.g. radio PIN code).
• With the battery not connected, press the
button.
• Press
or till „power supply“ appears.
The pre-set status will be displayed.
• Press
in order to switch „power supply” mode
on or off.
no battery
connected !
Choose menu item
exit
battery type:
Change
Sprache/Language
english
Lead/acid
Change
choose menu item
exit
Constantcurrent:
off

WE ARE THE GOOD GUYS
8
Note: In „power supply” mode, short-circuit detection is turned off. In the case of a
short circuit, sparking is possible. Output current is limited to 2.5 A!
After disconnecting the INTELLI 3, power supply mode is exited and the pre-set
charging program is activated.
4. Carrying out a battery test:
Select this function, if you would like to test the charging status of your battery.
• With the battery not connected, press the
button.
• Press
or till „Battery Test” is displayed.
• Press
to start the test.
• Connect the battery.
• The battery check begins and lasts approx.
30 seconds. The status of the battery will then be
displayed.
• If the battery is discharged, a battery test is not
possible. The INTELLI 3 detects this and displays it.
Then, fi rst charge the battery completely and then
repeat the process:
• Press
to end the battery test.
• If the battery remains connected, the INTELLI 3
automatically starts to charge the battery.
5. Force charging:
You can select this function, if the display “no battery connected” appears despite
correctly connected battery. The battery is probably exhausted and is therefore not
recognised.
• With the battery not connected, press the
button.
• Press
or till „force charging“ appears.
• Connect the battery that is no longer recognised.
• Press
to force the charging.
6. Force desulphation:
Use this function if a lead battery has been left uncharged for several months.
• With the battery not connected, press the
button.
• Press
or till „desulphation“ appears.
• Connect the battery.
• Press
to start desulphation.
Battery-check
select
Force charging
execute
Battery-check
connect battery
Battery-check
please wait
Status
good
choose menu item
exit
choose menu item
exit
Desulphation
execute
choose menu item
exit

Battery Charger INTELLI 3
9
7. CAN-Bus:
Select this function if you want to charge the battery in installed condition via the
on-board power outlet in a motorcycle with CAN-Bus control.
• With the battery not connected, press the
button.
• Press
or till „CAN-Bus“ appears.
• Press
to turn charging via the on-board power
outlet on or off.
8. Quitting the Menu:
• Press
or till „End menu“ appears.
• Press
to quit the setting menu.
• After 10 seconds without any input
=> automatically back to the function display!
Note: The values that have been set are retained even after separating from the
mains supply. If you connect the same battery once again, no change in the settings
is necessary. Notice the details under CAN-Bus page 14.
CONNECTING / DISCONNECTING
1. Connect the INTELLI 3 to a mains socket.
2. Set the desired function.
3. Make sure that the battery to be loaded involves a 12 V accumulator.
4. First connect the red battery clip to the plus pole of the battery.
5. Thereafter, connect the black battery clip to the minus pole of the battery.
This sequence must be followed without fail!
After charging:
1. Pull the mains plug from the socket.
2. Disconnect the black battery clip from the minus pole of the battery.
3. Disconnect the red battery clip from the plus pole of the battery.
This sequence must be followed without fail!
SPECIAL INSTRUCTION
This charger is fi tted with an M+S system plug.
There are various charging cables for nearly all common power outlets.
You can fi nd further information at http://www.m-u-s.com
CAN-Bus
off
choose menu item
exit
choose menu
exit

WE ARE THE GOOD GUYS
10
NOTIFICATIONS
LED display Explanation
Blue LED glowing
winking
Connected to the mains supply and ready for operation
Waiting for action; Test ongoing; Change
Green LED glowing
winking
Battery charged and ready for deployment
Sleep mode
Red LED winking Alarm or fault indication
Text on the display Explanation
No battery
connected
Blue LED winks
No battery connected.
Batterycheck
U=13.5V I=0.0A
Blue LED glows/winks
The INTELLI 3 fi rst briefl y charges the battery and
then tests it under load. This test checks whether the
battery is deep-discharged or sulphated1).
Desulphation
xth attempt
Blue LED
+red LED
glows
winks
With a special charging mode, the harmful sulphate
layer 1) on the lead plates is broken up.
Caution!!! Before switching to this charging
mode, INTELLI 3 will prompt you to disconnect
the battery.
battery defect
sulfated
Blue +red LEDs wink
The sulphate layer 1) could not be broken up. Normal
charging is thus not possible.
=> The battery is faulty.
Battery is
deep discharged!
Blue LED
+red LED
+ „beep“
glows
winks
The battery is completely discharged (U < 10V). By
pressing the button, a gentle rejuvenation charging
is started till the battery has enough voltage to be able
to be charged normally.
WARNING !!!
short circuit
Blue +red LEDs wink
Battery clips have been interchanged or the clips are
touching one another.
This message may also appear with batteries that have
a circuited cell.
battery defect
chorted cell
Blue +red LEDs wink
The battery voltage of 11.7 V was not exceeded after
a charging duration of 48 hours.
It is assumed that there is a circuited cell2).
=> The battery is faulty!

Battery Charger INTELLI 3
11
Text on the display Explanation
I-charge
U=14.2V I=3.0A
Blue LED glows
The battery is charged with constant current up to a
battery voltage of 14.4V or 14.7V.
The current battery voltage and the present charging
current are shown in the display.
U1-charge
U=14.4V I=0.2A
Blue LED glows
The battery is charged with constant current up to a
battery voltage of 14.4V or 14.7V.
The current battery voltage and the present charging
current are shown in the display.
Maintaining
U=13.5V I=0.1A
Blue +green LEDs glow
The battery voltage is kept constant at 13.5V.
This mode is retained for approx. 2 hours.
Thereafter, the appliance switches into sleep mode.
Prepairing for
sleep mode
Blue LED winks
Power saver mode is being prepared.
Display
Green LED
dark
winks
The INTELLI 3 is in power-saver mode. If the battery
voltage of 12.7V is undershot,
the INTELLI 3 switches itself on again and starts the
charging program from the beginning.
Note:
By pressing the button, you can awaken the INTELLI
3 at any time. The current battery voltage is displayed
for 10 seconds. Then, it switches back into power-saver
mode.
Power supply
U=13.7V I=1.0A
No LED is lit
The INTELLI 3 is in power supply mode.
The voltage is approx.13.7V. The current is limited to
approx. 2.5A.
Caution: Risk of short circuit to the battery clips!
1) Sulphate layer: A (lead-) sulphate layer is formed – in the case of lead acid batteries – on the surface of their electrode plates when the
battery is stored uncharged for a prolonged period.
(All lead batteries get discharged with time.) The reaction surface of the lead electrodes gets reduced hence => the battery capacity is
inadequate for starting. A sulphate layer can only be dissolved with a special charging mode. The thicker the sulphate layer becomes,
the more diffi cult and tedious it becomes, till it is fi nally not possible any more at all.
Crystals from the sulphate layer can fall on the battery electrodes from vibrations. A sludge layer is formed on the fl oor of the cell. If
the sludge layer becomes too high, it can cause a short circuit between the electrodes => the battery cell gets destroyed.
2) Cell short-circuit: There is a cell of the battery that cannot output any voltage because of a short circuit and cannot take up a charge
any more either. This fault is caused by impurities and lead sludge precipitation in the cell.

WE ARE THE GOOD GUYS
12
TECHNICAL DESCRIPTION
From the AC supply voltage (100–240V / 50–60Hz), the INTELLI 3 generates a low DC
voltage and DC current in order to charge 12V accumulators, keep them fresh and
regenerate them, if necessary.
To start with, the INTELLI 3 delivers a constant charging current (I-charging), till the battery
is nearly fully charged. Then, it reduces the charging current and regulates the voltage
(U1-regulation) till the battery is fully charged. Next, the INTELLI 3 switches into
maintenance mode for 2 hours (U2-regulation). At the end, it goes into sleep mode and thus
saves energy and costs.
During the sleep mode, the INTELLI 3 continuously monitors the battery voltage. If there is
a shortfall below the desired value, or not later than after 6 days, it automatically switches
itself on, checks the battery and recharges it. It then goes back into sleep mode. The process
repeats itself.
The charging process can vary depending on the type of battery selected. A more exact
description of the charging program can be found in the next section.
By means of the electronic charge regulation, the battery is always kept in a charged state of
at least 90%. Sulphating of the battery is prevented and the life time of the battery is
increased. The battery is always ready to start.
INFORMATION ABOUT THE CHARGING PROGRAMS
1. Lead/acid, lead/gel, AGM
After connecting the battery, a battery test is performed. During the test phase, the
INTELLI 3 detects whether the battery is exhausted or sulphated and switches to the
appropriate charging program.
If the battery begins to charge, I-charging will proceed fi rst. The charging current is
gradually increased in order to recognise the capacity of the battery that is
connected. The maximum charging current will be automatically adjusted to the
capacity of the battery.
If the fi nal charging voltage of 14.4V has not been reached within 24 hours, the
INTELLI 3 will assume that there is a short circuit in the cells. The charging is
cancelled and the notifi cation „battery defect - shorted cells“ appears in the display.
If the fi nal charging voltage of 14.4V has been achieved, the charging process will
continue with the U1-charging. During the U1-charging, the voltage will be
maintained at 14.4V. The charging current thereby also decreases over the charging
time. If the charging current falls below 0.2A or if the charge is longer than 5 hours,
the U1-charging will be terminated. The INTELLI 3 skips to trickle charge
(maintenance mode).
In maintenance mode (U2-charging), the charging voltage will be down-regulated to
13.5V (lead/gel and AGM) or 13.7V (lead/acid). The maintenance is carried out for
2 hours.

Battery Charger INTELLI 3
13
After this time, the INTELLI 3 automatically switches to sleep mode.
If the battery voltage falls below 12.7V, the INTELLI 3 automatically awakens and
restarts the charging process with the battery test.
2. Pure lead (AGM round cells)
After connecting the battery, a battery test is performed. During the test phase, the
INTELLI 3 detects whether the battery is exhausted or sulphated and switches to the
appropriate charging program.
If the battery begins to charge, I-charging will proceed fi rst. The charging current is
gradually increased in order to recognise the capacity of the battery that is connec-
ted. The maximum charging current will be automatically adjusted to the capacity of
the battery.
If the fi nal charging voltage of 14.7V has not been reached within 24 hours, the
INTELLI 3 will assume that there is a short circuit in the cells. The charging is can-
celled and the notifi cation „battery defect - shorted cells“ appears in the display.
If the fi nal charging voltage of 14.7V has been achieved, the charging process will
continue with the U1-charging. During the U1-charging, the voltage will be main-
tained at 14.7V. The charging current thereby also decreases over the charging time.
If the charging current falls below 0.2A, or if the charge is longer than 5 hours, the
U1-charging will be terminated. The INTELLI 3 skips to trickle charge
(maintenance mode).
In maintenance mode (U2-charging) the charging voltage will be down-regulated
to 13.7V.
This charging program does not involve switching into sleep mode! Every hour,
equalisation charging will be done for 10 minutes.
During equalisation charging, the charging voltage will be increased to 16.0V. A
current limitation to 0.2A prevent overcharging of the battery. This equalisation
counteracts a differing charging status of the individual cells (cell drift). This ensures
that each individual cell is completely charged. The INTELLI 3 then switches back to
maintenance mode with 13.7V.
3. LiFePo
After connecting the battery, a battery test is performed. During the test phase, the
INTELLI 3 detects whether the battery is exhausted and switches to the appropriate
charging program.
If the battery begins to charge, I-charging will proceed fi rst. The charging current is
gradually increased in order to recognise the capacity of the battery that is
connected. The maximum charging current will be automatically adjusted to the
capacity of the battery.
If the fi nal charging voltage of 14.7V has not been reached within 24 hours, the
INTELLI 3 will assume that there is a short circuit in the cells. The charging is
cancelled and the notifi cation „battery defect - shorted cells“ appears in the display.

WE ARE THE GOOD GUYS
14
If the charging voltage reaches 14.7V, the program will immediately switch to
sleep mode.
The INTELLI 3 will only wake up, if the battery voltage falls below 12.7V. The charging
process then begins anew with the battery test.
4. CAN-Bus Mode
In this charging mode, it is possible to charge the battery in mounted state via the
CAN-Bus controlled charging outlet of motorcycles.
After connecting the INTELLI 3 to the on-board power outlet, you will be prompted
to briefl y turn on the ignition of the motorcycle and then turn it off again.
After turning on the ignition, the INTELLI 3 begins with the battery test.
During the test phase, the INTELLI 3 detects whether the battery is exhausted. A test
for sulphation is not carried out.
If the battery begins to charge, I-charging will proceed fi rst. The charging current is
gradually increased to 1A in order to recognise the capacity of the connected battery.
The maximum charging current will be automatically adjusted to the capacity of the
battery.
If the fi nal charging voltage of 13.7V has not been reached within 24 hours, the
INTELLI 3 will assume that there is a short circuit in the cells. The charging is
cancelled and the notifi cation „battery defect - shorted cells“ appears in the display.
If the fi nal charging voltage of 13.7V has been achieved, the charging process will
continue with the U1-charging. During the U1-charging, the voltage will be main-
tained at 13.7V. The charging current thereby also decreases over the charging time.
If the charging current falls below 0.2A, or if the charge is longer than 5 hours, the
U1-charging will be terminated. The INTELLI 3 skips to trickle charge (maintenance
mode).
In maintenance mode (U2-charging), the charge voltage will be down-regulated to
13.5V (lead/gel and AGM) or 13.7V (lead/acid).
In CAN-Bus mode, the INTELLI 3 will not be switched into sleep mode. This ensures
that the power outlet is not switched off. Recharging is thus possible at any time.
If the battery voltage falls below 12.7V through switching of loads, the device will be
switched to I-charging and the battery will be recharged.
5. Desulphation
Before proceeding with desulphation, the question „battery removed?” will appear in
the display.
Before proceeding with desulphation, please remove the battery from the vehicle.
During desulphation, voltages of up to 17.0V may occur, which can be critical for
sensitive electrical components! Furthermore, the battery could start to gas.
This can cause damage to the vehicle!
When the battery is removed, reconnect the INTELLI 3 and confi rm the question
„battery removed?” with „yes”. The desulphation will then begin.

Battery Charger INTELLI 3
15
The battery will be charged with a higher charging voltage. The charging current is
limited to approx. 0.2A. The high charging voltage penetrates the closed sulphate
layer on the lead plate and regenerates it to lead and sulphuric acid. The process can
take up to 30 minutes. It will then be tested whether the battery accepts charge.
If this is not the case, the desulphation process will be repeated up to ten times.
If the battery does not accept charge even after the fi nal attempt, the INTELLI 3
assumes that the cells can no longer be regenerated (battery has been partially or
completely discharged for too long) and the notifi cation „battery defect - sulfated“
appears in the display.
If the test shows that the battery accepts charge after desulphation, the battery will
be charged with the selected charging program.
Please note that a sulphated but regenerated battery will never achieve its original
performance.
6. Exhausted batteries
An exhausted battery will gently be charged with a maximum charging current of
2.0A and a voltage of 12.0V.
If the voltage of 12.0V is not reached after 2 hours, the INTELLI 3 assumes that the
battery is defective. The notifi cation „battery is deep charged“ appears in the display.
If 12.0V is achieved, the INTELLI 3 will charge with the selected charging program,
starting with the battery test.
7. Power supply
This mode is not suitable for charging a battery!
Select this mode, if you require a power supply with constant voltage at short notice.
Note: In „power supply” mode, short-circuit detection is turned off. In the case of a
short circuit, sparking is possible.
In this mode, the INTELLI 3 provides a constant voltage of approx. 13.7V.
The maximum output current is limited to 2.5A.
In this mode, you can operate 12V devices with up to 30W or supply a vehicle with
power if the battery needs to be removed. The information stored in the vehicle will
not be lost.
Proceed as follows:
• Press the button on the disconnected battery.
• Press
or till „power supply“ appears. The previous-
ly selected status will be displayed.
• Press
in order to switch the power supply on or off.
• Turn off all loads on the vehicle.
• Turn on the ignition of the vehicle.
• Loosen the screws on both battery terminals –
do not remove the battery terminals!
• Connect the red cable clip of the INTELLI 3 to the red terminal of the vehicle
battery.
Constantcurrent:
off

WE ARE THE GOOD GUYS
16
• Connect the black cable clip of the INTELLI 3 to the ground terminal of the
vehicle battery.
• Remove the battery terminals from the poles of the battery. Ensure a secure
position of the cable clips of the INTELLI 3 on the battery terminals!
• The INTELLI 3 will then continue to supply the vehicle and device memory with
power to ensure that the saved settings are not lost.
When reconnecting, pay attention to the sequence. It must be strictly observed
1. Attach the red battery terminal to the positive pole of the battery
2. Attach the ground terminal to the negative pole of the battery
3. Unplug the INTELLI 3
4. Disconnect the red cable clip of the INTELLI 3
5. Disconnect the black cable clip of the INTELLI 3
6. Tighten screws on both battery terminals
After disconnecting the INTELLI 3, the device will exit power supply mode, and the
pre-set charging program will be reactivated.
TECHNICAL DATA
Charging current: max 4.0A
Mains voltage: 100-240V / 50-60 Hz
Power drawn: approx. 60VA
Suitable for: 12V start accumulators
lead/acid, lead/gel, AGM, pure lead and LiFePo
Degree of protection: IP 44
Protection class: II
Appliance cut-outs: against overload, polarity interchanging, short-circuit
and over-temperature
Charging characteristic: I/U1/U2, Special program
Charging voltage: 14,4/13,5V or 14,7/13,7V depending on the
battery type
Housing: Impact-resistant ABS plastic housing
Dimensions: 238 x 135 x 52 mm
Weight: 670 g

Battery Charger INTELLI 3
17
DECLARATION OF CONFORMITY
M+S Solution GmbH hereby declares that the battery charger INTELLI 3 (Type: V1.0) fulfi ls
the following standards:
• EN60335-1:2002 + A1:2004 + A11:2004 + A2:2006 + A12:2006 + A13:2008 +
A14:2010 + A15:2011;
• EN60335-2-29:2004 + A2:2010 in accordance with the conditions in the Directive
2006/95/EG (Low-voltage Directive)
• EN61000-3-3, EN61000-3-2, EN55014-1, EN55014-2 in accordance with the condi-
tions in the Directive 2004/108/EG (Electromagnetic compatibility)
SERVICE ADDRESS / IMPRINT
Service-Adress:
M+S Solution GmbH
You can fi nd the latest address and telephone number at http://www.m-u-s.com
The website also contains this operating manual as a download in colour or in other
languages, as well as accessories and other interesting products on the theme of battery
charging and protecting vehicles.
Impressum
© 2014 M+S Solution GmbH
We reserve the right to make technical and visual changes and correct printing errors
(14. August 2014).

WE ARE THE GOOD GUYS
18
LIMITED MANUFACTURER GUARANTEE IN EUROPE
Please note that this limited manufacturer‘s warranty does not affect your legal rights with regard to the sales of
consumable goods according to the respective laws and acts.
The M+S Solution GmbH („M+S”) grants you, the purchaser of the M+S product, which can be found in the sale
packaging („product”), the following limited warranty.
Limited warranty:
According to this limited manufacturer‘s warranty, within the warranty period, material-, design- or processing short-
comings or defects will be rectifi ed by M+S or a customer service centre authorised by M+S within an economically
reasonable period free of cost, either by repair or, if M+S should consider it necessary, at its discretion, by replacement
of the product. The execution of the warranty will be in keeping with the conditions of this limited manufacturer‘s
warranty, unless compelling legal regulations lay down something to the contrary. This limited manufacturer‘s warranty
is only valid and implementable in the country in which the product was purchased, and requires also that the product
was intended to be sold by M+S in that country. If you have purchased the product in a member country of the EU or
in Switzerland and if it was originally intended by M+S to be sold in one of these countries, this limited manufacturer‘s
warranty is valid and implementable in the aforementioned countries. There may be some limitations to the warranty
service owing to country-specifi c product components.
Warranty period
The warranty period starts on the date on which the product was fi rst purchased by an end customer. The product can
consist of several individual parts, for which different warranty periods hold good (hereinafter „warranty period”). The
different warranty periods are:
a. Twenty-four (24) months for all products and for accessories (depending on whether the accessories were present
in the original packaging or were bought separately) with the exception of the wear parts and accessories that fall
under the category given in (c);
b. Sixty (60) months for chargers of the M+S brand with the exception of the wear parts and accessories that come
under (c);
c. Thirty (30) days on the following wear parts and accessories: Battery cells, storage batteries, manuals and covers
The warranty will be neither extended, nor will it start again from the beginning, nor be infl uenced in any other way
because of a later second sale, or repairs authorised by M+S or replacement of the product. Notwithstanding the above,
for parts repaired or replaced during the warranty period, a fresh warranty period of sixty (60) days from the time of
repairs or replacement or for the remaining warranty period existing for the original period will be granted, whichever
of the two is longer.
How to make use of the warranty service?
If you wish to fi le a claim according to this limited manufacturer‘s warranty, please get the product or the faulty part of
the product (if the entire product is not involved) to a sales agency authorised by M+S. You can also call M+S (there may
be national telephone charges or value-added service charges applicable), to get further information on fi ling the claim.
For every assertion of claims according to this limited manufacturer‘s warranty, you must inform M+S or a customer
service centre or sales centre authorised by M+S within a reasonable period after the discovery of the purported
defect, but in any case, before the warranty period has lapsed.
If you wish to make a claim on the basis of the limited warranty, you must submit the following:
a. the product (or the affected part) and
b. the original proof of purchase, which must clearly show the name and address of the seller, the date, the place of
purchase and the product type.
What does the limited manufacturer‘s warranty not include?
1. This limited manufacturer‘s warranty does not include either the user manuals or any software supplied by third
parties, settings, contents, fi les or links, regardless of whether they are included in the product or were downloa-
ded to the product and regardless of whether they were inserted in the shipment chain during the installation, the
assembly, the transport or at any other time or were obtained by you in any other manner or by any other means.
M+S does not guarantee that every M+S software fulfi ls your requirements, or is compatible with any hardware
or software supplied by a third party, or that the work sequence of every software will function free or errors or
interruptions or that every software error can be corrected or will be corrected.
2. This limited manufacturer‘s warranty does not include a) normal wear-and-tear (including any wear of batteries
and displays), b) defects caused by rough handling (including defects that result from sharp objects, bending,
pressure or dropping etc.) or c) defects or damage that result from improper use of the product, including usage
that is not in keeping with instructions from M+S (for example, according to the instructions in the user manual)

Battery Charger INTELLI 3
19
d) defects or damage resulting from improper assembly of the product, including the and/or e) other events, which
are not reasonably within the sphere of infl uence of M+S
3. This limited manufacturer’s warranty does not include defects or purported defects that occur because the product
was used or connected to any other product, accessories, software and/or services not manufactured or provided by
M+S, or used in any other way that is considered to be not in keeping with the intended purpose.
4. This limited manufacturer’s warranty does not hold good if the product is opened, modifi ed or repaired by anyone
other than the authorised customer service centre, or is repaired with non-approved spare parts or if the product
serial number was removed, deleted, defaced or changed or has been made unreadable in any other way, with the
decision regarding this being solely according to the discretion of M+S.
5. This limited manufacturer’s warranty does not apply if the product has been subjected to moisture, wetness or
extreme temperatures and ambient conditions or a rapid change in these, corrosion or oxidation, or foodstuff or
fl uids were spilled on it, or chemical substances have acted on it.
Important remarks
M+S acquires ownership of all parts of the product or other fi ttings that M+S has replaced. M+S and the sales and
customer service centres of M+S reserve the right to charge processing fees if the product does not fall under the
conditions of the limited manufacturer warranty. M+S may use new or repaired products or parts for the repair or
replacement of the product.
Your product can contain country-specifi c elements, including software. In case of re-export of the product from the
original country of destination to another country, the product can contain country-specifi c elements that are not
considered to be shortcomings in the meaning of this limited manufacturer warranty.
The SIM card as well as the cellular phone network and/or another network or system on which some products are
operated, are provided by a third party, for example, an independent provider. For this reason, M+S does not accept,
with this warranty, any liability for the operation, availability, network coverage, services or range of the cellular phone
network or system.
Limitation of liability
This limited manufacturer’s warranty contains your sole and only judicial redress against M+S and is M+S‘s sole and
only liability for defects in your product. This limited manufacturer’s warranty replaces every other warranty and
liability of M+S, regardless of whether such an earlier warranty was given verbally, or in writing, or on the basis of legal
(not mandatory) conditions or contractually, or results owing to an unlawful act or in any other manner, including and
without restriction and to the extent permissible by the applicable law, any implicit conditions, guarantees or other
conditions with regard to suffi cient quality or the suitability for use. This limited manufacturer warranty does not
exclude either i) your legal rights according to the respective applicable laws or II) your entitlements with respect to the
seller of the product, or limit these in any way.
Insofar as the applicable laws allow it, M+S is not liable for the loss, damage or falsifi cation of data, the loss of profi ts,
or the usability or operability of the product, for loss of business, loss of contract, loss of the source of income, or loss
of expected savings, increased costs or costs for indirect loss or damage, consequential losses or damage or for extra-
ordinary losses or damage.
The M+S liability is limited to the magnitude of the procurement value of the product.
The aforementioned liability limitations do not apply to cases where M+S has acted in a premeditated or grossly
negligent manner or in case of the death of or injuries to persons, if these are caused by negligence on the part of M+S.
Note:
Your product is a technically sophisticated electronic appliance. M+S emphatically requires you to familiarise yourself
with the user manual and the instructions that accompany the product.
Table of contents
Other MS Batteries Charger manuals