G1 SCBA Radio Pairing Guide | Motorola APX
Rev. 2-11-2019 Page 5of 11
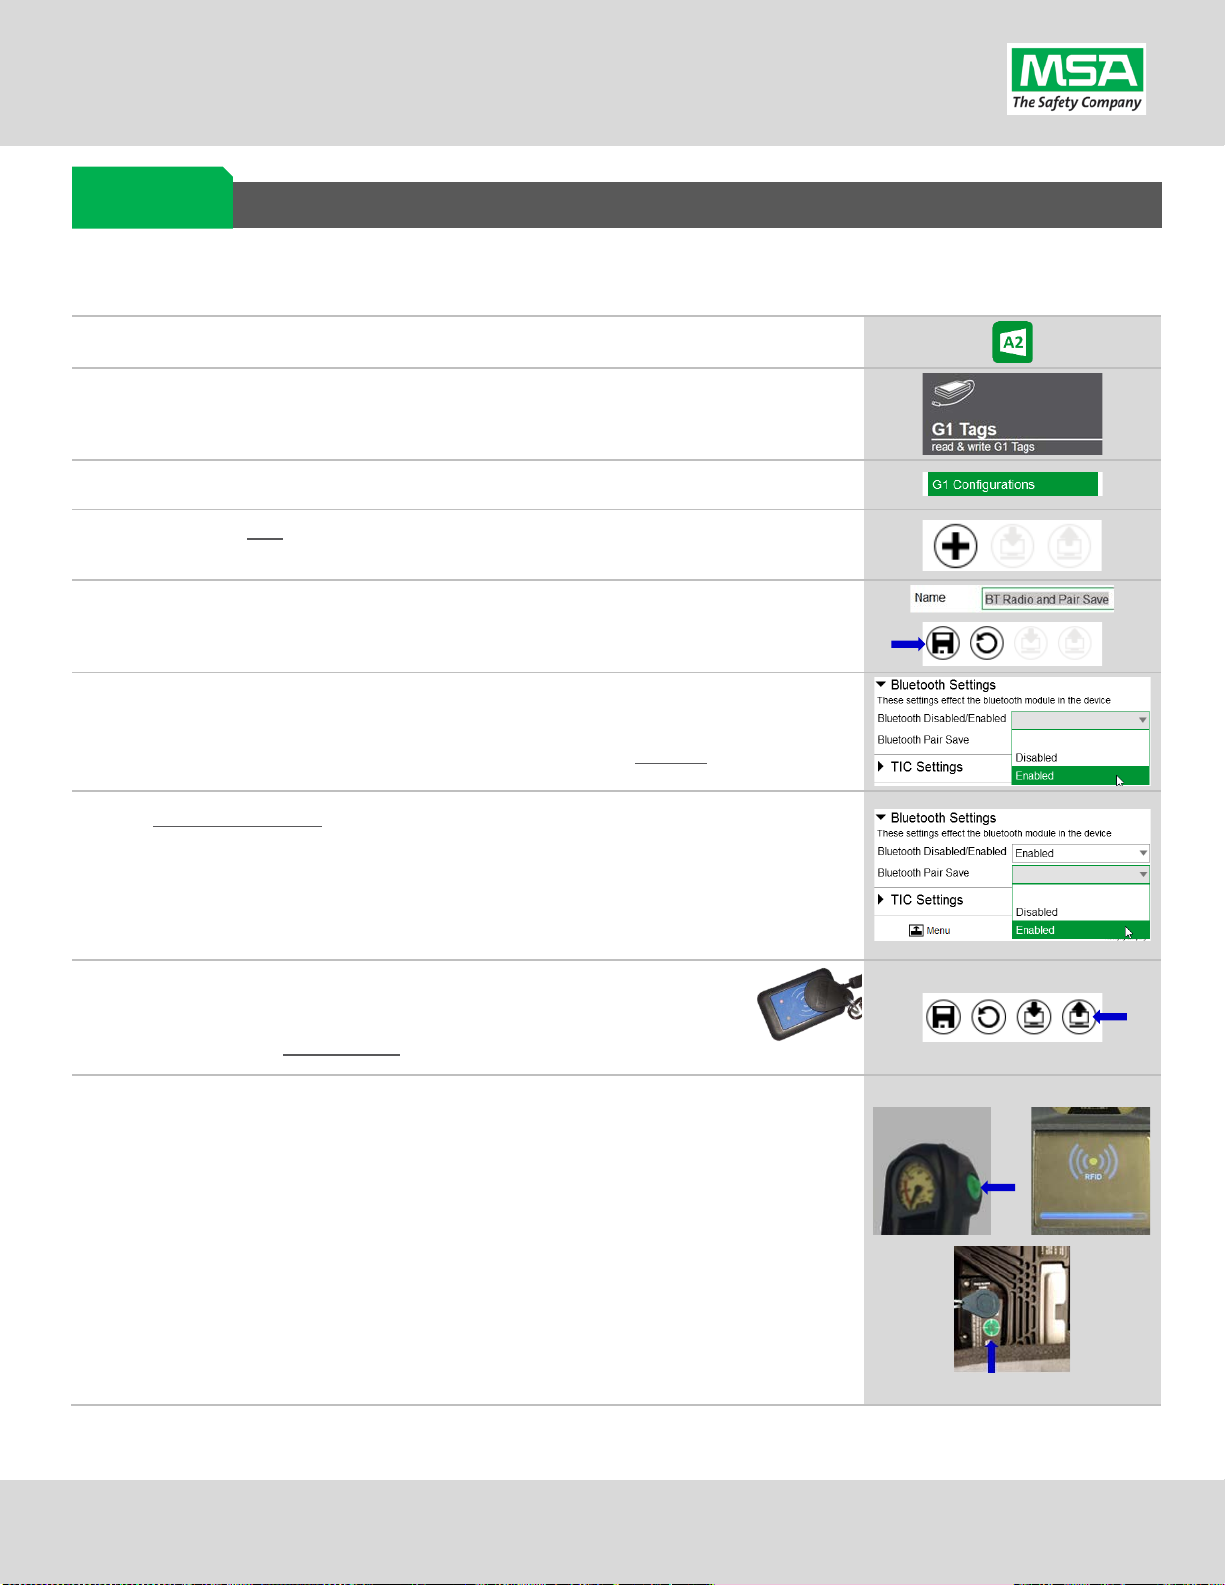
Creating a G1 SCBA Configuration Tag (G1 Bluetooth Settings)
The purpose of this section is to: (1) enable the Bluetooth radio on the G1 SCBA and
(2) to set Bluetooth Pair Save behavior based on the department’s preference.
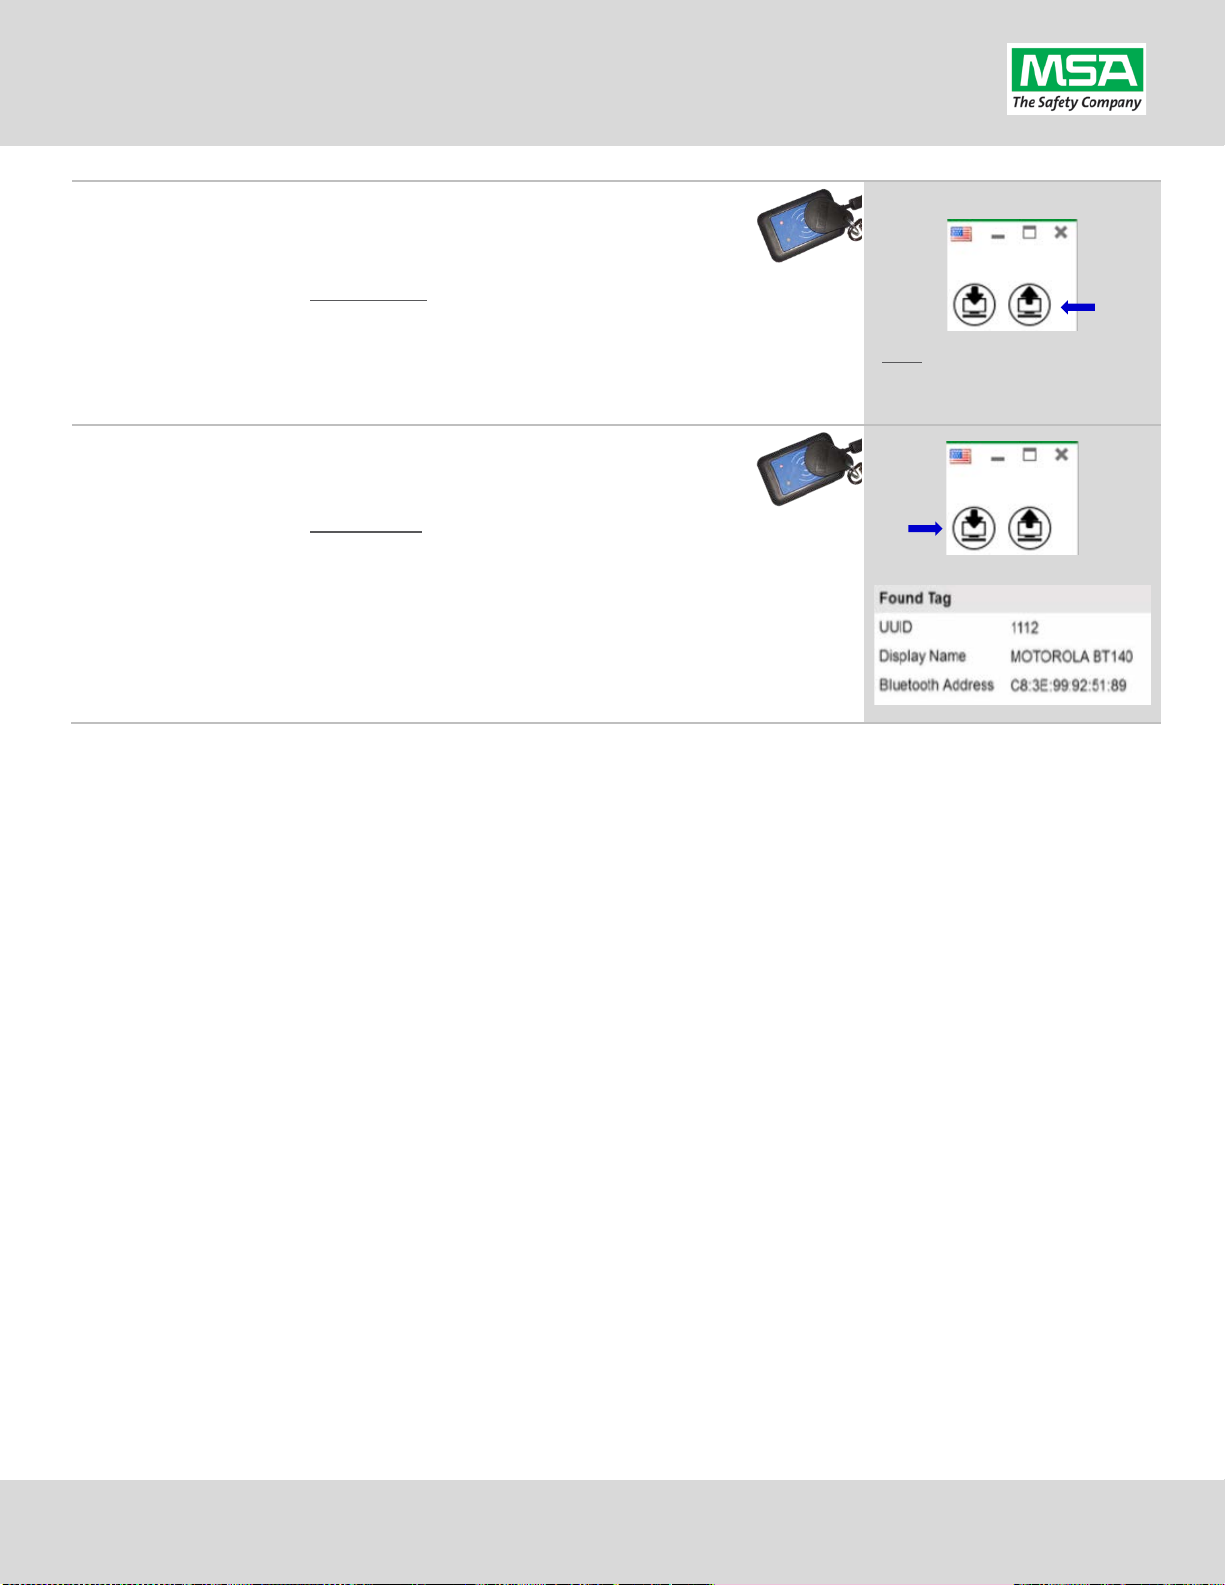
Launch the MSA A2 Software
Select the “G1 Tags” Tile on the A2 Dashboard (Under the “G1 Devices”
column)
Select tag type: “G1 Configurations”
Select the Add (+) icon (top-right) to create the configuration template, which
will be used to change these 2 settings.
Note: This tag can be written without saving a template, but a template can be
saved using the Save Icon (top-right) if a template Name is filled in.
Enabling the G1 SCBA’s Bluetooth Radio:
(A)
Expand the “Bluetooth Settings” section.
Change “Bluetooth Disabled/Enabled” setting to “Enabled”.
“Bluetooth Pair Save” setting options:)
Require Radio Pairing Tag in every SCBA is turned on, choose “Disabled”
To retain the Radio Pairing on the SCBA until “clearing the pair” *, choose
“Enabled”
- defined on the “Removing Radio Pairing Info from the G1 SCBA” page.
Writing the G1 Configuration Tag:
(A)
Place RFID Tag on the RFID Reader / Writer
Select the Write G1 Tag icon (top-right side of A2 application)
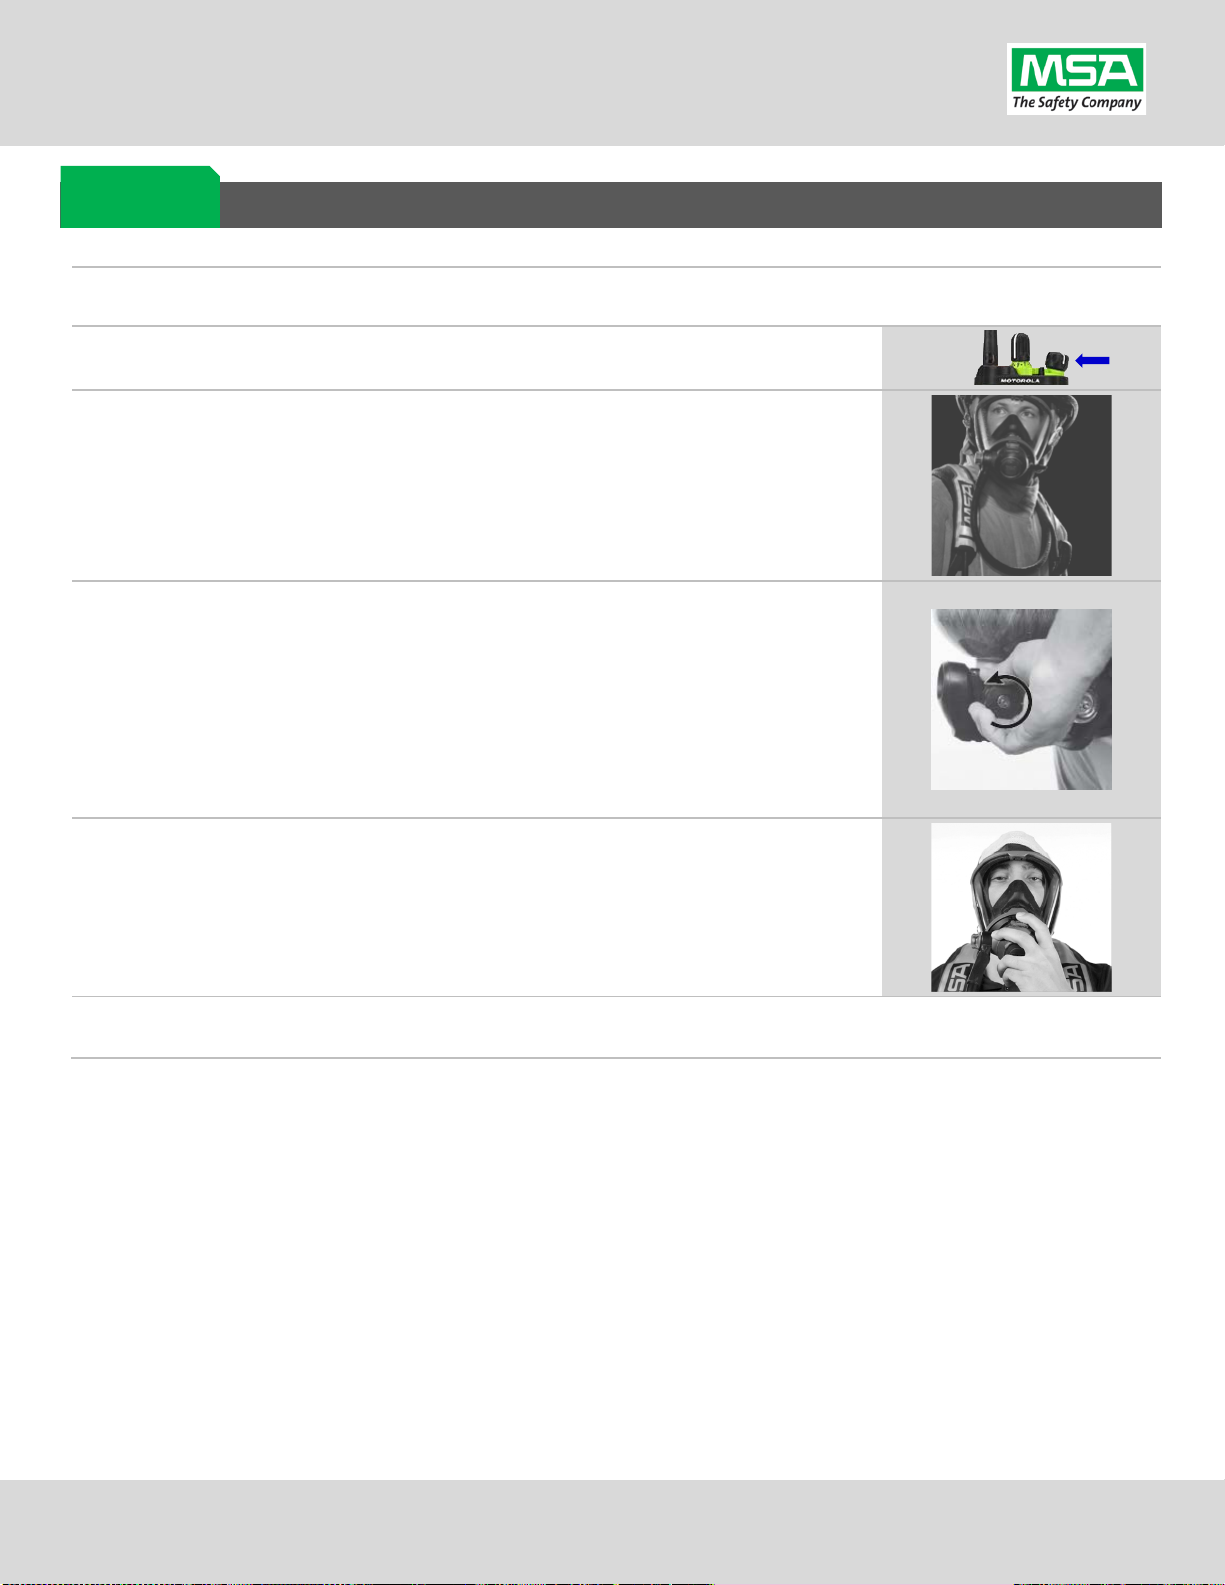
Applying the G1 Configuration Tag to the G1 SCBA(s):
(A)
Power on the G1 SCBA
Press & hold either of the green Control Module buttons to activate the
RFID mode. For iTic Control modules: Press & Hold Both Green Buttons.
Place Bluetooth Pairing Save Tag over G1 Power Module RFID Target.
The G1 SCBA is now configured with the settings:
- G1 Bluetooth is now enabled - G1 Bluetooth Pair Save (as chosen).
The G1 SCBA is now ready to accept a Radio Pairing tag.
Repeat this “Step 8” for each SCBA to apply these 2 settings.
G1 Bluetooth
Settings Tag