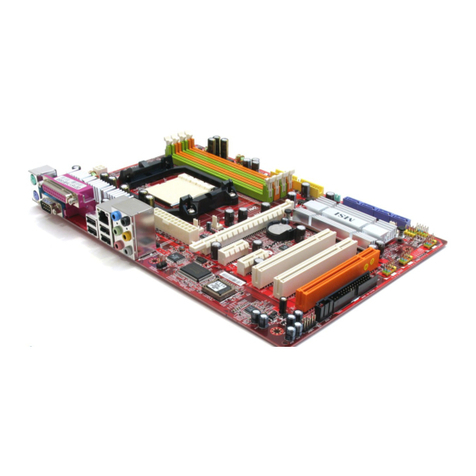
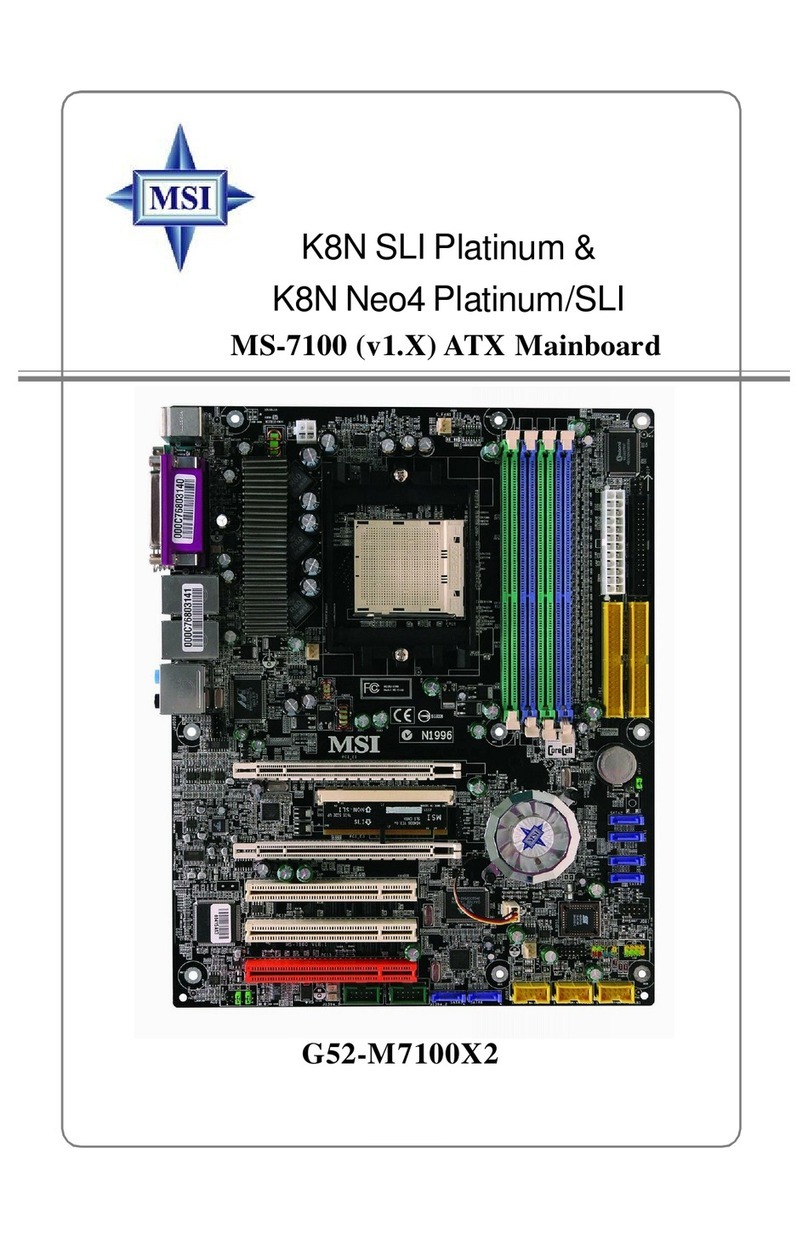
MSI K8N Neo-V2 User manual

i
FCC-BRadio FrequencyInterferenceStatement
Thisequipmenthasbeen tested and foundtocomplywiththe limitsforaclass Bdigitaldevice,pursuant
topart15 ofthe FCCrules.Theselimitsaredesigned toprovidereasonableprotection againstharmful
interferenceinaresidentialinstallation. This equipmentgenerates,usesand can radiateradiofrequency
energyand,ifnotinstalled and used inaccordancewiththe instruction manual,maycauseharmful
interferencetoradiocommunications.However,thereis no guarantee thatinterferencewill occurina
particularinstallation.Ifthis equipmentdoescauseharmfulinterferencetoradioortelevision reception,
whichcan be determined byturning the equipment offand on, the useris encouraged totrytocorrect the
interferencebyoneormoreof the measureslisted below.
4Reorient orrelocatethe receiving antenna.
4Increasetheseparation between the equipment andreceiver.
4Connecttheequipmentintoan outletonacircuitdifferentfromthattowhichthe receiveris
connected.
4Consult the dealeroran experienced radio/ television technician forhelp.
Notice1
The changesormodificationsnot expresslyapprovedbythe partyresponsibleforcompliancecouldvoid
the user sauthoritytooperatethe equipment.
Notice2
Shielded interfacecablesand A.C. powercord, if any, must be used inordertocomplywiththe emission
limits.
VOIRLANOTICEDNSTALLATIONAVANTDERACCORDERAU RESEAU.
Micro-StarInternational
MS-7030
This devicecomplieswithPart 15 of the FCC Rules. Operation is subject tothe following twoconditions:
(1)this devicemaynot causeharmfulinterference, and
(2)this devicemustacceptanyinterferencereceived,including interferencethatmaycauseundesired
operation G52-M7030XE

ii
CopyrightNotice
The materialinthisdocument is the intellectualpropertyofMICRO-STARINTERNATIONAL. Wetake
everycareinthepreparation of this document, but no guaranteeis givenastothe correctness of its
contents. Ourproductsareundercontinualimprovement and wereservethe right tomakechanges
without notice.
Trademarks
All trademarksarethe propertiesof theirrespectiveowners.
AMD, Athlon™Athlon™XP,Thoroughbred™and Duron™areregistered trademarksofAMD Corporation.
Intel®and Pentium®areregistered trademarksofIntelCorporation.
PS/2and OS®2areregistered trademarksofInternationalBusiness MachinesCorporation.
Microsoft®is aregistered trademarkofMicrosoft Corporation.Windows®98/2000/NT/XPareregistered
trademarksofMicrosoft Corporation.
NVIDIA,the NVIDIAlogo, DualNet, and nForceareregistered trademarksortrademarksof NVIDIA
Corporation inthe United Statesand/orothercountries.
Netware®is aregistered trademarkof Novell,Inc.
Award®is aregistered trademarkof PhoenixTechnologiesLtd.
AMI®is aregistered trademarkofAmerican MegatrendsInc.
Kensington andMicroSaverareregistered trademarksof the KensingtonTechnologyGroup.
PCMCIAandCardBusareregistered trademarksof the PersonalComputerMemoryCardInternational
Association.
Revision History
Revision Revision HistoryDate
V2.0First released ofv-class version forPCB2.xJuly2005
withchipset nVIDIAnForce3 250

iii
SafetyInstructions
1.Alwaysread thesafetyinstructionscarefully.
2.Keep this UserManualforfuturereference.
3.Keep this equipment awayfromhumidity.
4.Laythis equipment on areliableflat surfacebeforesetting it up.
5.The openingson the enclosureareforairconvection henceprotectsthe equipment fromoverheating.
Donot coverthe openings.
6.Makesurethe voltage of thepowersourceandadjust properly110/220Vbeforeconnecting the
equipment tothe powerinlet.
7.Placethe powercordsuchawaythat peoplecan not step on it. Donot placeanything overthe power
cord.
8.AlwaysUnplug thePowerCordbeforeinserting anyadd-on cardormodule.
9.All cautionsand warningson the equipment shouldbe noted.
10.Neverpouranyliquidintothe opening that coulddamage orcauseelectricalshock.
11.Ifanyof the following situationsarises, get the equipment checkedbyaservicepersonnel:
-The powercordorplug is damaged.
-Liquidhaspenetrated intothe equipment.
-The equipment hasbeen exposed tomoisture.
-The equipment doesnot workwell oryou can not get it workaccording toUserManual.
-The equipment hasdropped and damaged.
-The equipment hasobvioussign of breakage.
12.Donot leavethis equipment inan environment unconditioned, storagetemperatureabove60°C
(140°F), it maydamage theequipment.
CAUTION:Dangerofexplosionifbatteryisincorrectlyreplaced. Replace
onlywiththesameorequivalenttyperecommendedbythe
manufacturer.

iv
WEEE Statement
English
Toprotect the globalenvironment and asan environmentalist, MSImust remindyou that...
Underthe EuropeanUnion ("EU")Directiveon WasteElectricaland Electronic Equipment, Directive
2002/96/EC,whichtakeseffectonAugust13,2005,productsof"electricaland electronic equipment"
cannot be discarded asmunicipalwasteanymoreand manufacturersof coveredelectronic equipment will
be obligatedtotakebacksuchproductsattheendoftheirusefullife.MSIwill complywiththeproduct
takebackrequirementsatthe end oflifeofMSI-branded productsthataresoldintothe EU. You can
returntheseproductstolocalcollection points.
Deutsch
Hinweis von MSIzurErhaltungundSchutzunsererUmwelt
Gemäß derRichtlinie2002/96/EG überElektro-und Elektronik-Altgerätedürfen Elektro-und
Elektronik-Altgerätenichtmehrals kommunaleAbfälleentsorgtwerden.MSIhateuropaweit
verschiedene Sammel-und Recyclingunternehmen beauftragt, dieindieEuropäische Union inVerkehr
gebrachten Produkte,amEnde seinesLebenszykluszurückzunehmen.BitteentsorgenSiedieses
Produkt zumgegebenen Zeitpunkt ausschliesslichan einerlokalen AltgerätesammelstelleinIhrerNähe.
Fran ais
Entantqu écologisteet afinde protégerl environnement, MSI tient àrappelerceci...
Ausujetde ladirectiveeuropéenne (EU)relativeauxdéchetsdes équipement électriqueset
électroniques,directive2002/96/EC, prenanteffetle13 août2005,que lesproduits électriqueset
électroniquesne peuvent êtredéposésdanslesdéchargesoutoutsimplementmis àlapoubelle.Les
fabricantsde ces équipementsseront obligésde récupérercertainsproduitsenfinde vie.MSIprendraen
comptecetteexigencerelativeau retourdesproduitsen finde vieau seinde lacommunautéeuropéenne.
Parconséquentvouspouvezretournerlocalement cesmatériels danslespointsde collecte.
Русский
Компания MSI предпринимает активные действия по защите окружающей среды, поэтому
напоминаем вам, что....
Всоответствии сдирективой Европейского Союза (ЕС) по предотвращению загрязнения
окружающей среды использованным электрическим иэлектронным оборудованием (директива
WEEE 2002/96/EC), вступающей всилу 13 августа 2005 года, изделия, относящиеся к
электрическому иэлектронному оборудованию, не могут рассматриваться как бытовой мусор,
поэтому производители вышеперечисленного электронного оборудования обязаны принимать его
для переработки по окончании срока службы.MSI обязуется соблюдать требования по приему
продукции, проданной под маркой MSI на территории EC, впереработку по окончании срока
службы. Вы можете вернуть эти изделия вспециализированные пункты приема.
Español
MSIcomoempresacomprometida con laproteccióndelmedioambiente, recomienda:
Bajoladirectiva2002/96/ECdelaUniónEuropea enmateriade desechosy/o equiposelectrónicos,con
fecha de rigordesde el13de agostode 2005,losproductosclasificadoscomo"eléctricosyequipos
electrónicos"no puedenserdepositadosenloscontenedoreshabitualesdesumunicipio, losfabricantes
de equiposelectrónicos,estánobligadosa hacersecargo de dichosproductosaltermino de superíodo
de vida.MSIestarácomprometido con lostérminosde recogida de susproductosvendidosenlaUnión
Europea alfinalde superiodo de vida.Usted debe depositarestosproductosen elpuntolimpio
establecido porelayuntamientode sulocalidad oentregarauna empresaautorizada paralarecogida de
estosresiduos.
Nederlands
Omhet milieu tebeschermen, wil MSIueraan herinneren dat….
Derichtlijnvan deEuropeseUnie(EU)metbetrekking totVervuiling van Electrische en Electronische
producten (2002/96/EC),dieop 13Augustus2005 inzalgaan kunnen nietmeerbeschouwdworden als
vervuiling.
Fabrikanten van dit soort producten wordenverplicht omproducten retourtenemen aan het eind van hun
levenscyclus.MSIzalovereenkomstigde richtlijnhandelen voorde producten diede merknaamMSI
dragen enverkochtzijninde EU. Dezegoederen kunnen geretourneerdwordenop lokale
inzamelingspunten.

v
Srpski
Dabizaštitili prirodnu sredinu, ikao preduzećekojevodiračuna ookoliniiprirodnojsredini, MSImorada
vaspodestida…
PoDirektiviEvropskeunije("EU")oodbačenojekektronskojielektričnojopremi,Direktiva2002/96/EC,
kojastupa na snagu od 13. Avgusta2005, proizvodikoji spadajupod "elektronskuielektričnu opremu"ne
mogu višebitiodbačenikaoobičan otpad iproizvođačioveopremebićeprinuđenida uzmunatragove
proizvodena krajunjihovog uobičajenog vekatrajanja.MSI ćepoštovatizahtevopreuzimanjuovakvih
proizvodakojimajeistekao vektrajanja,koji imajuMSIoznakuikoji suprodatiuEU.Oveproizvode
možetevratitina lokalnimmestimazaprikupljanje.
Polski
Abychronićnasze środowiskonaturalne orazjakofirmadbającaoekologię,MSIprzypomina, że...
ZgodniezDyrektywąUnii Europejskiej("UE")dotyczącąodpadówproduktówelektrycznychi
elektronicznych(Dyrektywa2002/96/EC),którawchodziw życie13 sierpnia2005,tzw. “produktyoraz
wyposażenieelektryczne ielektroniczne "niemogąbyćtraktowane jako śmiecikomunalne,takwięc
producenci tychproduktówbędązobowiązanido odbieraniaichwmomenciegdyproduktjest
wycofywanyzużycia.MSIwypełniwymaganiaUE,przyjmującprodukty(sprzedawane na terenieUnii
Europejskiej)wycofywane zużycia.ProduktyMSIbędziemożnazwracaćwwyznaczonychpunktach
zbiorczych.
TÜRKÇE
Çevreci özelliğiylebilinen MSIdünyada çevreyikorumakiçinhatırlatır:
AvrupaBirliği(AB)Kararnamesi ElektrikveElektronikMalzemeAtığı,2002/96/ECKararnamesi altında 13
Ağustos2005 tarihinden itibaren geçerli olmak üzere,elektrikli veelektronikmalzemelerdiğeratıklargibi
çöpe atılamayacakvebu elektonikcihazların üreticileri, cihazlarınkullanımsüreleribittikten sonra ürünleri
geritoplamaklayükümlüolacaktır.Avrupa Birliğine satılan MSImarkalıürünlerinkullanımsüreleri
bittiğinde MSI ürünleringerialınmasıisteğiileişbirliğiiçerisinde olacaktır. Ürünlerinizi yereltoplama
noktalarına bırakabilirsiniz.
ČESKY
Záleží námna ochraněživotního prostředí-společnost MSI upozorňuje...
PodlesměrniceEvropskéunie("EU")olikvidaci elektrickýchaelektronickýchvýrobk 2002/96/EC platné
od 13.srpna 2005jezakázánolikvidovat"elektrickéaelektronickévýrobky"vběžnémkomunálním
odpadu avýrobci elektronickýchvýrobk ,na kterésetatosměrnicevztahuje,budou povinniodebírat
takovévýrobkyzpětpo skončeníjejich životnosti.SpolečnostMSIsplnípožadavkyna odebírání
výrobk značkyMSI,prodávanýchvzemíchEU, po skončeníjejich životnosti.Tytovýrobkym žete
odevzdatvmístníchsběrnách.
MAGYAR
Annak érdekében,hogykörnyezetünketmegvédjük,illetvekörnyezetvédőkéntfellépveazMSI
emlékezteti Önt, hogy...
AzEurópaiUnió(„EU")2005.augusztus13-ánhatályba lépő,azelektromos éselektronikus
berendezésekhulladékairólszóló2002/96/EK irányelveszerintazelektromos éselektronikus
berendezésektöbbénemkezelhetőeklakosságihulladékként, ésazilyenelektronikusberendezések
gyártóikötelesséválnakazilyentermékekvisszavételéreazokhasznos élettartamavégén.AzMSI
betartjaatermékvisszavétellelkapcsolatoskövetelményeketazMSImárkanévalatt azEU-nbelül
értékesített termékekesetében,azok élettartamánakvégén.Azilyentermékeketalegközelebbi
gyűjtőhelyreviheti.
Italiano
Perproteggerel ambiente,MSI, da sempreamicadellanatura, tiricorda che….
InbaseallaDirettivadellUnione Europea (EU)sulloSmaltimentodeiMateriali Elettricied Elettronici,
Direttiva2002/96/ECinvigoredal13Agosto2005,prodottiappartenentiallacategoriadeiMateriali
Elettrici ed Elettronicinon possono piùessereeliminaticomerifiutimunicipali: iproduttorididettimateriali
saranno obbligatiaritirareogniprodottoallafine delsuo ciclodivita.MSIsi adegueràataleDirettiva
ritirando tuttiiprodottimarchiatiMSIche sono stativendutiallinterno dellUnione Europea allafine del
lorociclodivita. Èpossibileportareiprodottinelpiùvicino puntodiraccolta.
vi
TableofContent
English.....................................................................1
Deutsch....................................................................15
Fran ais...................................................................31
体中文 ...................................................................45
體中文 ...................................................................59
日本語.......................................................................73

1
Introduction
ThankyouforchoosingtheK8NNeo V2.0Series(MS-7030 v2.X)ATXmainboard.TheK8NNeo
V2.0Seriesisbased onnVIDIA nForce3 250singlechipforoptimal systemefficiency. Designed
tofittheadvancedAMD K8Athlon64processorsin754pinpackage,theK8NNeoV2.0Series
deliversahighperformanceand professional desktop platformsolution.
Layout
PCI3
PCI2
PCI1
PCI 4
PCI 5
AGP1
SATA1
SATA2
BATT
+
JP
W
1
C_FAN1
I
D
E
1
I
D
E
2
J
W
R
1
S_FAN2
S_FAN1
FDD 1
BIOS
JUSB2JUSB1
JFP1
JFP2
NB_FAN1
JAUD1JCOM1JIR1
JCD1
JBAT1
DDR1
DDR2
JCASE1
Winbond
W83627THF
LAN
Chip
T:
M:
B:
Line-In
Line-Out
Mic
T:LANjack
B: USBports
Top : mouse
Bottom: keyboard
USBports
Top:
ParallelPort
Bottom:
COMport
JCD1
nVIDIA
nFORCE3250

2
Specifications
CPU
lSupports64-bitAMD K8Athlon64processor(Socket754)
lSupportsupto3400+ CPU
(Forthelatest information aboutCPU,pleasevisit
http://www.msi.com.tw/program/products/mainboard/mbd/pro_mbd_cpu_support.php )
Chipset
lnVIDIAnForce3250
-SupportsK8Athlon64processorSocket754.
-HyperTransport supportsspeedupto800MHz.
-Supportssinglememorychannel, DDR 400/333/266withoutECC support.
-SupportsexternalAGP4X/8X.
-IntegratedSerial ATAinterface:SATARAIDcontrollerand2channelsATA133/100/66
mastermodeIDEcontroller.
Main Memory
lSupports2slotsfor184-pinDDR DIMMmodules.
lSupportsmemorysizeupto2GBwithoutECC.
lSupportsDDR400/333/266.
(Fortheupdatedsupportingmemorymodules,pleasevisit
http://www.msi.com.tw/program/products/mainboard/mbd/pro_mbd_trp_list.php )
Slots
lOneAGP(AcceleratedGraphics Port)1.5v4X/8Xslot
lFive32-bit PCIbusslots(support3.3v/5vPCIbusinterface).
On-Board IDE
lAnIDEcontrolleronthenVIDIAnForce3250 chipset providesIDEHDD/CD-ROMwithPIO,
BusMasterandUltraDMA133/100/66 operationmodes
lCanconnectupto4IDEdevices
lIntegrated SATA
-Upto150MB/stransferrate
-supportingupto2ports
On-BoardPeripherals
lOn-BoardPeripheralsinclude:
-1floppyportsupports1FDD with360K,720K,1.2M,1.44Mand 2.88Mbytes
-2serialports(Rear*1/Front *1)

3
-1parallel portsupportsSPP/EPP/ECPmode
-3audiojcaks
-8USBports(Rear*4/Front *4)
-1RJ-45LANJack
-1IrDApinheader
Audio
l6channelssoftwareaudiocodecRealtekALC655.
-CompliancewithAC97v2.3Spec.
-MeetPC2001audioperformancerequirement.
LAN
lRealtek 8100C(default)or8110SB(Optional)
-Supports10Mb/sand100Mb/s,and8110SB alsosupports1000Mb/s.
-CompliantwithPCI v2.2.
-SupportsACPIPowerManagement.
BIOS
lThe mainboardBIOSprovides “Plug&Play”BIOSwhichdetectstheperipheral devicesand
expansioncardsoftheboardautomatically.
lThe mainboardprovidesaDesktop Management Interface(DMI)functionthatrecordsyour
mainboardspecifications.
NVRAID(Software)
lSupports2SATA150 plus4ATA133
-RAID0,or1,o+1, JBODissupported
-Booting fromRAID
-Cross controllerRAIDsupport
-Rebuildingon theFly
-SpareDiskAllocation
lSupportsWindows2000andlaterversions
Dimension
lATXFormFactor:220mmx305mm.
Mounting
l6mountingholes.

4
Rear Panel
The backpanelprovidesthefollowing connectors:
HardwareSetup
Thischaptertellsyou howtoinstalltheCPU,memorymodules,andexpansioncards,aswellas
howtosetupthejumperson themainboard.It alsoprovidestheinstructionson connecting the
peripheraldevices,suchasthemouse, keyboard,etc.Whiledoingtheinstallation,becarefulin
holdingthecomponentsandfollowtheinstallation procedures.
Central ProcessingUnit: CPU
ThemainboardsupportsAMD Athlon64processor.ThemainboardusesaCPUsocketcalled
Socket-754foreasyCPUinstallation.When youareinstallingtheCPU,makesuretheCPUhas
aheat sinkandacoolingfanattached on thetoptopreventoverheating.Ifyou donothavethe
heat sinkandcooling fan,contactyourdealertopurchaseandinstall thembeforeturningon the
computer.
(Forthelatest information aboutCPU,pleasevisit
http://www.msi.com.tw/program/products/mainboard/mbd/pro_mbd_cpu_support.php )
ExampleofCPUCore Speed Derivation Procedure
IfCPUClock=200MHz
Core/Busratio =12
thenCPUcorespeed=Host ClockxCore/Busratio
=200MHzx12
=2.4GHz
Keyboard
Mouse Parallel Port
USB Ports
USB Ports
LAN
Lineln
LineOut
Micln
COMPort

5
Memory Speed/CPUFSBSupportMatrix
Memory
FSB DDR 266 DDR 333 DDR 400
800MHz OK OK OK
CPUInstallation Procedures forSocket754
1.Pleaseturnoffthepowerandunplug thepowercordbeforeinstallingtheCPU.
2.Pulltheleversidewaysawayfromthesocket.Makesuretoraisetheleveruptoa
90-degree angle.
3.Lookforthegold arrowon theCPU.TheCPUcan onlyfit inthecorrect orientation.Lower
theCPUdownontothesocket.
4.If theCPUiscorrectlyinstalled,thepinsshouldbecompletelyembeddedintothesocket
andcan not beseen.Pleasenotethatanyviolation ofthecorrectinstallation procedures
maycausepermanentdamagestoyourmainboard.
5.Press theCPUdownfirmlyintothesocketand closethelever.AstheCPUislikelyto
movewhiletheleverisbeingclosed,alwaysclosetheleverwithyourfingerspressing
tightlyon top oftheCPUtomakesuretheCPUisproperlyand completelyembedded into
thesocket.
Installing AMDAthlon64CPUCoolerSet
WhenyouareinstallingtheCPU, makesuretheCPUhasaheat sinkandacooling fan attached
on thetoptopreventoverheating.If you donothavetheheatsinkandcoolingfan,contactyour
dealertopurchaseandinstall thembeforeturning onthecomputer.
1.Detachtheshield of thebackplate’spaster.
2.Turnoverthemainboard,andinstallthebackplatetotheproperposition.
3.Turnoverthemainboardagainandplacethemainboardon theflatsurface.Locatethe
twoscrewholesof themainboard.
4.Align theretention mechanism and thebackplate.Fixtheretention mechanismandthe
backplatewithtwoscrews.
5.Positionthecoolingsetontotheretentionmechanism.Hookoneendofthecliptohook
first.

6
6.Press downtheotherendofthecliptofasten thecoolingsetonthetop of theretention
mechanism.
7.LocatetheFixLever,SafetyHookandtheFixedBolt.Lift up theintensivefixedlever.
8.Fasten downthelever.
9.Makesurethesafetyhookcompletelyclaspsthefixed boltof theretentionmechanism.
MSIRemindsYou...
WhiledisconnectingtheSafetyHookfromthefixedbolt,itisnecessarytokeepaneyeonyour
fingers,becauseoncetheSafetyHookisdisconnectedfromthefixedbolt,thefixedleverwill
springback instantly.
Memory
Themainboardprovidestwo184-pinunbuffered DDR266/DDR333/DDR400 DDR SDRAM
sockets,andsupportsthememorysizeupto2GB.Tooperateproperly,atleastoneDIMM
modulemustbeinstalled.(Fortheupdated supportingmemorymodules,pleasevisit
http://www.msi.com.tw/program/products/mainboard/mbd/pro_mbd_trp_list.php )
Installat leastoneDIMM moduleontheslots.Memorymodulescanbeinstalledontheslotsin
anyorder.You can install eithersingle-ordouble-sided modulestomeet yourownneeds.
Installing DDRModules
1.The DDRDIMMhasonlyonenotchon thecenterofmodule.Themodulewillonlyfit inthe
rightorientation.
2.InserttheDIMMmemorymoduleverticallyintotheDIMMslot.Then pushitinuntilthe
golden fingeron thememorymoduleisdeeplyinsertedinthesocket.
3.The plasticclipat eachsideoftheDIMMslot willautomaticallyclose.
Notch
Volt

7
Power Supply
The mainboardsupportsATXpowersupplyforthepowersystem.Beforeinsertingthepower
supplyconnector, alwaysmakesurethatallcomponentsareinstalledproperlytoensurethatno
damagewill becaused.A300Worabovepowersupplyissuggested.
ATX20-PinPower Connector:JWR1
Thisconnectorallowsyoutoconnecttoan ATXpowersupply.To
connect totheATXpowersupply,makesuretheplugofthepower
supplyisinsertedintheproperorientationand thepinsarealigned.
Then pushdownthepowersupplyfirmlyintotheconnector.
ATX12VPower Connector:JPW1
This12Vpowerconnectorisused toprovidepowertotheCPU.
FloppyDisk DriveConnector:FDD1
Themainboardprovidesastandardfloppydiskdriveconnector
that supports360K, 720K,1.2M, 1.44Mand2.88Mfloppydisk
types.
CD-In Connector:JCD1
The connectorisforCD-ROMaudioconnector.
FanPower Connectors:C_FAN1/S_FAN1/S_FAN2/NB_FAN1
The C_FAN1(processorfan),S_FAN1/S_FAN2(systemfan)andNB_FAN1
(northbridgefan)supportsystemcooling fan with+12V.Theysupport
three-pinhead connector. Whenconnecting thewiretotheconnectors, alwaystakenotethatthe
redwireisthepositiveand shouldbeconnectedtothe+12V,the black wireisGroundand
shouldbeconnected toGND.IfthemainboardhasaSystemHardwareMonitorchipset on-board,
youmustuseaspeciallydesigned fanwithspeed sensortotakeadvantageoftheCPUfan
control.
1
3
4
2
GND
12V
GND
12V
1
10
11
20
+3.3V
+3.3V
-12V+3.3V
GNDGND
PS-ON#
+5V
GNDGND
GND+5V
GNDGND
-5V
PWR OK
+5V5VSB
+5V+12V
GND
+12V
NC
L
R
GND

8
MSIRemindsYou...
1.Always consultthevendorsforproperCPUcoolingfan.
2. C_FAN1supportsthefan control. Youcaninstall thePCAlert utilitythat will automatically
controltheCPUfanspeedaccordingtotheactualCPUtemperature.
IDEConnectors:IDE1/IDE2
The mainboardhasa32-bitEnhancedPCIIDEandUltraDMA66/100/133controller
thatprovidesPIOmode0~4,BusMaster, andUltraDMA66/100/133function.Youcan
connectup tofourharddisk drives, CD-ROM,120MBFloppyandotherdevices.
The firstharddriveshouldalwaysbeconnectedtoIDE1.IDE1can connectaMaster
andaSlavedrive.Youmustconfiguresecond harddrivetoSlavemodebysettingthe
jumperaccordingly.IDE2can alsoconnectaMasterandaSlavedrive.
MSIRemindsYou...
If you install twoharddisks oncable,you mustconfigurethesecond drivetoSlavemodeby
setting itsjumper. Refertotheharddisk documentation suppliedbyharddisk vendorsforjumper
setting instructions.
FrontPanel Connectors:JFP1/JFP2
Themainboardprovidestwofrontpanel connectorsfor
electrical connectiontothefrontpanelswitchesand LEDs.
JFP1iscompliant withIntelFront Panel I/OConnectivityDesign
Guide.
FrontPanelAudio Connector:JAUD1
The frontpanel audioconnectorallowsyouto
connect tothefrontpanel audioandis
compliantwithIntel Front PanelI/O
ConnectivityDesignGuide.
MSIRemindsYou...
If you donot wanttoconnect tothefront audioheader, pins5&6, 9&10 havetobejumperedin
ordertohavesignaloutputdirectedtotherearaudio ports.Otherwise,theLine-Outconnectoron
theback panelwill notfunction.
JFP1
Power
LED
HDD
LED Reset
Switch
Power
Switch
1 9
2
10
JFP2
Power
LED
Speaker
1
7
2
8
(2)AUD_GND
AUD_VCC
AUD_RET_R
Key
AUD_RET_L(10)
(1)AUD_MIC
AUD_MIC_BIAS
AUD_FPOUT_R
HP_ON
AUD_FPOUT_L(9)
1
9
2
10

9
FrontUSBConnector:JUSB1/JUSB2
The mainboardprovidestwostandardUSB 2.0pin headers
JUSB1&JUSB2.USB2.0technologyincreasesdatatransfer
rateup toamaximumthroughputof480Mbps,whichis40
timesfasterthan USB 1.1, andisidealforconnectinghigh-speedUSBinterfaceperipheralssuch
asUSB HDD,digital cameras,MP3players, printers,modemsand thelike.
MSIRemindsYou...
Notethat the pinsof VCC and GND must be connected correctly, oritmaycausesomedamage.
SerialATAHDD Connectors:SATA1/SATA2
The mainboardprovidesdual high-speedSerial ATAinterfaceports.The ports
support1st generation Serial ATAdataratesof150MB/sandarefullycompliant
withSerialATA1.0specifications.EachSerialATAconnectorcanconnectto1
harddiskdrive.
Serial PortConnector:JCOM1(optional)
Themainboardprovidesoneserial portheaderforyou toconnect
secondaryserial devices.
IrDAInfrared ModuleHeader:JIR1
The connectorallowsyoutoconnecttoIrDAInfraredmodule.You must
configurethesettingthroughtheBIOSsetuptousetheIRfunction.
JIR1iscompliantwithIntel?Front Panel I/OConnectivityDesignGuide.
ChassisIntrusionSwitch Connector:JCASE1
Thisconnectorisconnected to2-pin connectorchassisswitch.IftheChassisis
open,theswitchwill beshort.Thesystemwill recordthisstatus.Toclearthe
warning,youmustentertheBIOSsettingandclearthestatus.
(2)VCC
USB1- GND
GND
USB0-
USB0+
USB1+
USB0C(10)
(1)VCC Key(9)
GND
CINTRU
1
2
SATA1
1
7
SATA
2
1
7
GND
DSR
RTS
CTS
[9]RI
SOUT
SIN[2]
DTR
[5]IRTX

10
Clear CMOSJumper:JBAT1
ThereisaCMOSRAMon boardthathasapowersupply
fromexternalbatterytokeepthedataofsystemconfiguration.
WiththeCMOSRAM,thesystemcan automaticallyboot OS
everytimeitisturned on.Ifyou wanttoclearthesystemconfiguration,usetheJBAT1(Clear
CMOSJumper)tocleardata.Followtheinstructionsbelowtoclearthedata:
MSIRemindsYou...
YoucanclearCMOSbyshorting2-3pin while thesystemisoff. Thenreturnto1-2pin position.
Avoid clearingtheCMOSwhilethesystemison;it willdamagethemainboard.
AGP(Accelerated Graphics Port) Slot
The AGPslotallowsyoutoinserttheAGP
graphics card.AGPisan interface
specificationdesigned forthethroughputdemandsof 3Dgraphics. It introducesa66MHz,32-bit
channel forthegraphics controllertodirectlyaccess mainmemory.
PCI (PeripheralComponentInterconnect) Slots
ThePCIslotsallowyoutoinserttheexpansion cards
tomeetyourneeds.Whenaddingorremoving
expansioncards,makesurethatyouunplugthepowersupplyfirst. Meanwhile,readthe
documentationfortheexpansion cardtomakeanynecessaryhardwareorsoftwaresettingsfor
theexpansion card,suchasjumpers, switchesorBIOSconfiguration.
PCI InterruptRequestRouting
The IRQ,abbreviation of interrupt requestlineandpronouncedI-R-Q,arehardwarelinesover
whichdevicescansendinterrupt signalstothemicroprocessor.ThePCI IRQpinsaretypically
connected tothePCIbusINTA#~INT D#pinsasfollows:
Order1 Order2 Order3 Order4
PCISlot 1 INTA# INTB# INTC# INTD#
PCISlot 2 INTB# INTC# INTD# INTA#
PCISlot 3 INTC# INTD# INTA# INTB#
PCISlot 4 INTD# INTA# INTB# INTC#
PCISlot 5 INTB# INTC# INTD# INTA#
1
1
1
3
3
3
2
2
2
KeepData
ClearData

11
BIOSSetup
Poweronthecomputerandthesystemwillstart POST(PowerOnSelfTest)process. Whenthe
messagebelowappearson thescreen,press <DEL>keytoenterSetup.
Press DELtoenterSETUP
Ifthemessagedisappearsbeforeyourespondandyoustill wishtoenterSetup,restartthe
systembyturning it OFF andOnorpressingtheRESETbutton.You mayalsorestart thesystem
bysimultaneouslypressing<Ctrl>,<Alt>, and <Delete> keys.
MainPage
Standard CMOSFeatures
Usethismenuforbasicsystemconfigurations, suchastime, dateetc.
Advanced BIOSFeatures
UsethismenutosetuptheitemsofAwardspecial enhancedfeatures.
AdvancedChipsetFeatures
Usethismenutochangethevaluesinthechipsetregistersandoptimizeyoursystem
performance.
IntegratedPeripherals
Usethismenutospecifyyoursettingsforintegrated peripherals.
PowerManagementSetup
Usethismenutospecifyyoursettingsforpowermanagement.
PNP/PCIConfigurations
Thisentryappearsif yoursystemsupportsPnP/PCI.
H/W Monitor
Thisentryshowsthestatusof yourCPU,fan,warning foroverallsystemstatus.

12
Cell Menu
Usethismenutospecifyyoursettingsforfrequency/voltagecontrol.
LoadOptimizedDefaults
UsethismenutoloadfactorydefaultsettingsintotheBIOSforstablesystemperformance
operations.
BIOSSettingPassword
Usethismenutoset BIOSsetting Password.
Save&ExitSetup
SavechangestoCMOSandexit setup.
ExitWithoutSaving
Abandonall changesand exitsetup.

13
Cell Menu
CurrentCPU/DDRClock
It showsthecurrent clockofCPU/ DDR. Read-only.
High Performance Mode
Thisfield allowsyoutoselect theDDR timingsetting.Settingto[Optimized]enablesAdjust DDR
MemoryFrequencyautomaticallytobedetermined bySPD. Selecting[Manual]allowsusersto
configurethesefieldsmanually.Settingoptions:[Optimized],[Manual].
Aggressivetiming
Thisitemallowsyoutoenableordisablethememoryclock.When[Enabled]isselected,the
timing delayofmemorywillbeshortentoincreasetheperformance. Settingoptions: [Enabled],
[Disabled].
DynamicOverClocking
DynamicOverclockingTechnologyistheautomaticoverclockingfunction,includedintheMSITM
newlydeveloped CoreCellTMTechnology.It isdesigned todetect the load balanceofCPUwhile
running programs,and toadjustthebestCPUfrequencyautomatically.Whenthemotherboard
detectsCPUisrunningprograms,itwill speedupCPUautomaticallytomaketheprogramrun
smoothlyandfaster.WhentheCPUistemporarilysuspendingorstayingin thelowloadbalance,
itwill restorethedefaultsettingsinstead.UsuallytheDynamicOverclockingTechnologywill be
powered onlywhen users'PCneed torun hugeamountofdatalike3Dgamesorthevideo
process,andtheCPUfrequencyneedtobeboosted uptoenhancetheoverall performance.
Settingoptions:
[Disabled]DisableDynamicOverclocking.
[Private]1st levelof overclocking,increasingtheCPUfrequencyby1%.
[Sergeant]2ndlevelof overclocking,increasingtheCPUfrequencyby3%.
[Captain]3rdlevelof overclocking,alsothedefaultvalueof"LoadHigh Performance
Defaults",increasing theCPUfrequencyby5%.

14
[Colonel]4thlevel of overclocking,increasing theCPUfrequencyby7%.
[General]5thlevel of overclocking,increasing theCPUfrequencyby10%.
[Commander]6thlevel of overclocking,increasing theCPUfrequencyby15%.
MSI RemindsYou...
Even thoughtheDynamicOverclocking Technologyismorestable thanmanualoverclocking,
basically,itisstill risky.WesuggestusertomakesurethatyourCPUcan affordtooverclocking
regularlyfirst.IfyoufindthePCappearstobeunstable orreboot incidentally, it'sbettertodisable
theDynamicOverclockingortolowerthelevelof overclockingoptions.Bytheway, ifyouneedto
conductoverclocking manually, youalsoneedtodisabletheDynamicOverClockingfirst.
SpreadSpectrum
Whenthemotherboard’sclockgeneratorpulses,theextremevalues(spikes)ofthepulses
createsEMI(ElectromagneticInterference).TheSpreadSpectrumfunctionreducestheEMI
generatedbymodulatingthepulsessothatthespikesofthepulsesarereduced toflattercurves.
Ifyoudonot haveanyEMI problem,leavethesettingatDisabledforoptimalsystemstabilityand
performance.Butifyouareplagued byEMI, settoEnabled forEMIreduction.Rememberto
disableSpread Spectrumifyou areoverclocking becauseeven aslightjittercanintroducea
temporaryboost inclockspeedwhichmayjust causeyouroverclocked processortolock up.
HTFrequency
Thissetting specifiesthemaximumoperating frequencyofthelinktransmitterclock.Setting
options: [1x], [2x], [3x],[4x], [5x].
Cool nQuiet
It providesaCPUtemperaturedetectingfunctiontopreventyourCPU’sfromoverheading dueto
theheavyworkingloading.
AdjustCPURatio
ThisitemletsyouadjusttheCPUratio.Settingto[Startup]enablestheCPUrunningatthe
fastest speedwhichisdetected bysystem. Settingoptionsare:[Startup], [x4]~[x25].
AdjustCPUFSBFrequency
Thisitemallowsyou toselecttheCPUFrontSideBusclockfrequency(inMHz).Selectthe
numberbetween[200]~[300]forneededfrequency.
AdjustAGPFrequency
ThisitemallowsyoutoselecttheAGPfrequency(in MHz).Selectthenumberbetween
[66]~[100] forneededfrequency.
CPUVoltage
ThisfeatureallowsyoutotrimthevoltageofCPU.
MemoryVoltage
Adjusting theDDR voltagecan increasetheDDR speed.Anychangesmadetothissetting may
causeastabilityissue,sochangingtheDDR voltageforlong-termpurposeisNOT
recommended.
AGPVoltage
AGPvoltageisadjustablein thefield,allowing youtoincreasethe performanceofyourAGP
displaycardwhen overclocking, butthestabilitymaybeaffected.
This manual suits for next models
2
Table of contents
Languages:
Other MSI Motherboard manuals

MSI
MSI MS-6120 User manual

MSI
MSI 925X Neo Platinum User manual

MSI
MSI KA780GM Series User manual

MSI
MSI MS-6315 User manual

MSI
MSI Baby AT SI19 User manual

MSI
MSI B75MA-P33 series User manual

MSI
MSI MS-5192 User manual

MSI
MSI MAG B760M MORTAR MAX WIFI User manual

MSI
MSI MS-7521 (v2.X) User manual

MSI
MSI RX480 Neo2 User manual

MSI
MSI MS-7199 User manual

MSI
MSI P45 Neo3 V2 Series User manual

MSI
MSI MICRO ATX AL12 User manual

MSI
MSI MEG B550 UNIFY User manual

MSI
MSI MS-7226 (V1.X) User manual

MSI
MSI MS-98E1 User manual

MSI
MSI RS482M4-CSIP User manual

MSI
MSI 650GLMS User manual

MSI
MSI 915G Neo2-FR User manual

MSI
MSI MPG X570-A PRO User manual