MSI DigiVOX A/D II User manual

1
V2.602
User’sManual
Digi VOX

2
Table of Contents
Chapter 1 DVB TV Introduction...................................................................................... 3
1.1 Introduction .......................................................................................................... 4
1.2 System Requirements........................................................................................... 4
1.3 Features................................................................................................................. 4
Chapter 2 Installation Introduction.................................................................................. 7
2.1 Hardware Installation.......................................................................................... 7
2.2 Software Installation............................................................................................ 8
Chapter 3 Channel Scanning........................................................................................... 12
USB-Ter..................................................................................................................... 12
Chapter 4 DVB TVApplication Programs .................................................................... 17
4.1 Control Panel...................................................................................................... 17
4.2 Functions............................................................................................................. 19
4.3 Right Click Menu ............................................................................................... 25
4.4 Keyboard Shortcuts ........................................................................................... 26
Appendix 1 ......................................................................................................................... 27

3
DVB TV Introduction
This chapter provides a brief introduction about
DVB TV hardware/software and includes
information to help you set up the system.
Sections include:
Introduction
System Requirements
Features
CHAPTER

4
Chapter 1 DVB TV Introduction
1.1 Introduction
DVB TV series products allow you to watch digital TV & Radio programs via PCI or USB
interface. With DVB TV, users are able to watch record & play back high quality digital
TV program on their PC. Please read the instructions carefully before you begin the
installation.
1.2 System Requirements
System Requirements
SDTV
Intel Pentium III 800MHz or above
128 MB RAM or above
One free USB 2.0 Port and
VGA card supports DirectX 8.1 or above
Windows R 2000/XP / MCE(when using MCE OS an extra 3rd party DVD decoder must be installed)
HDTV
Intel Pentium 4 2.0GHz or above
256 MB RAM or above
One free USB 2.0 Port
VGA card supports DirectX 8.1 or above
sound card
Windows R 2000/XP / MCE(when using MCE OS an extra 3rd party DVD decoder must be installed)
1.3 Features
Digital TV and Radio Program Receiving
Real time Digital Video Recording
Schedule Recording and Time-shifting
Wake up Recording
EPG and Teletext
Multi-Channel Preview (FTA Channels Only)
Transponder, region, and Frequency range Auto Scan
MPEG-II Software Decoding
Aspect Ratio Adjustment
Direct Burn (DVD+/-RW; Supports SDTV only)
Single/Multiple Frames Capture
Favorite List
Subtitle over Display
Wake Up Recording

5
Signal Utility Tool
Parent control
Software Upgradeable
Remote control supported

6
Installation Introduction
This chapter explains how to easily install the
hardware and software of DVB TV products.
Sections include:
Hardware installation
Software installation
CHAPTER
7
Chapter 2 Installation Introduction
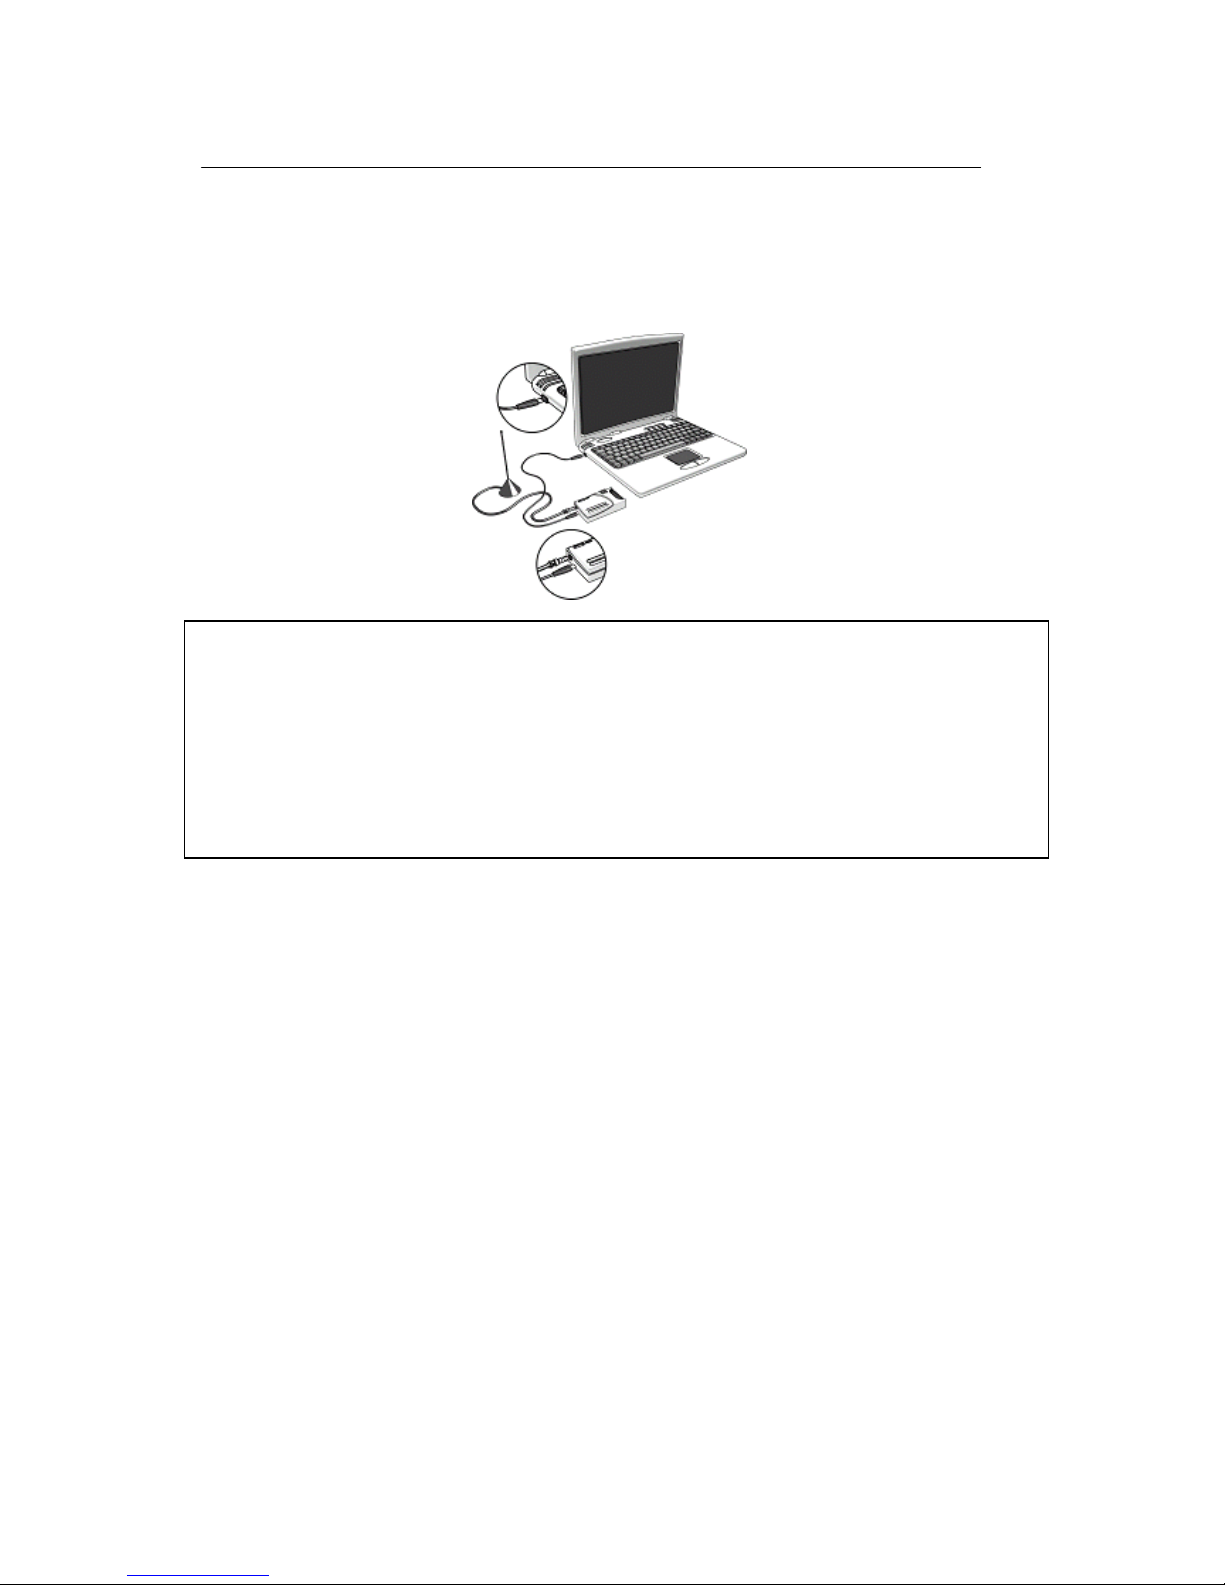
2.1 Hardware Installation
Step1: Connect USB port
Step2: Connect the antenna cable.
Note 1: If you try to install DVB DTV in your Notebook computer, be sure to switch off
the “POWER SAVING” function which might lower the CPU performance and influence
a normal operation of DVB DTV.
Note 2: Reception may vary in different location. Please check local broadcaster for more
detail information. Roof antenna is strongly recommended.
8
2.2 Software Installation
Before You Begin
Make sure that the DVB TV product is actually installed (for more information,
please refer to Hardware Installation in the previous section).
Turn on your computer
Driver Installation
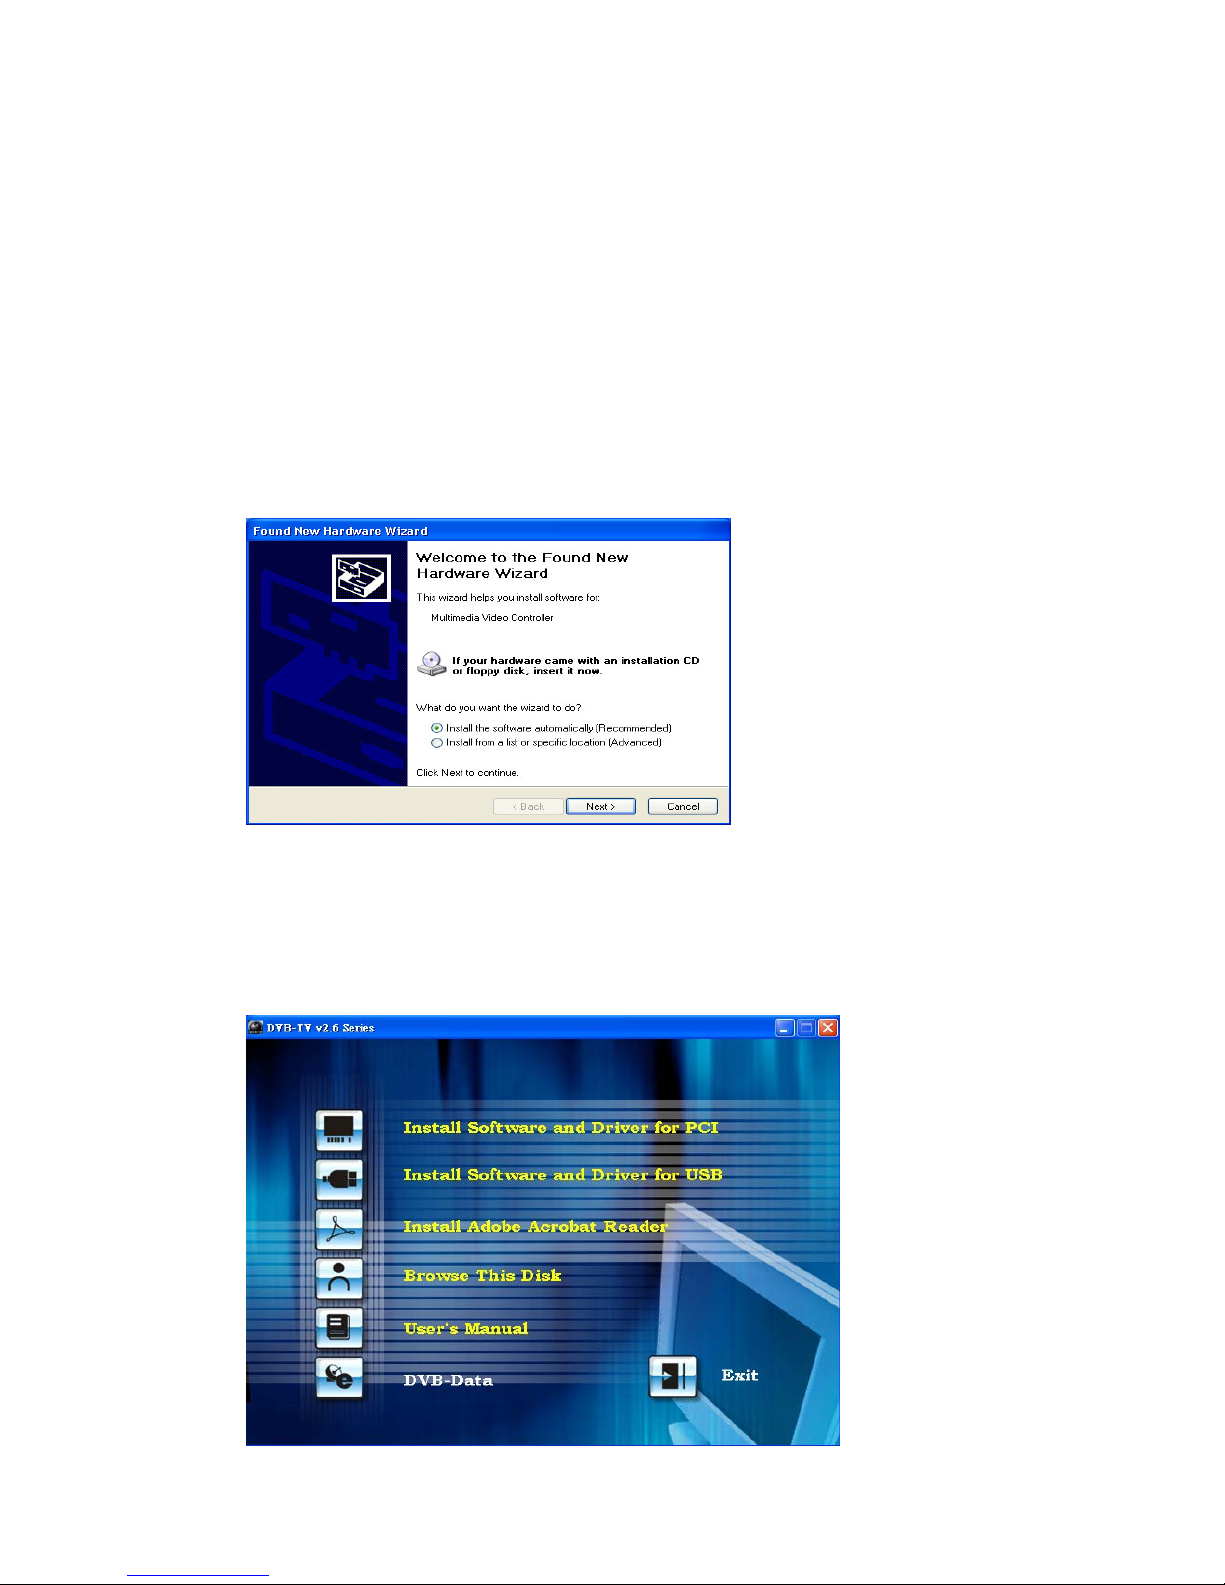
Step1: Cancel “New Hardware Wizard”
After the computer is turned on, Windows will find New Hardware. Please choose
“Cancel” from the pop up windows. We will install the driver later by the DVB TV
installation program automatically.
Step2: Activate DVB TV CD-ROM
Insert the DVB TV driver CD into your CD-ROM drive, the “Autorun” window
should appear. Click on “Install Software and Driver”. If the “Autorun” window
does not appear, please open the “DVB TV” folder in CD-ROM and launch the
“Setup” program manually.

9
Step3: Install Driver
Please click “next” to install driver.
STEP4: Install DVB DTV SDK
Please click “next” to install SDK

10
STEP5: Install finished
You will see DVB TV icon on your desktop.

11
Software Setup
This chapter describes that how to configure all the
parameters of the system in detail and lists the
guidelines you need for setting up the Digital TV
system.
CHAPTER

12
Chapter 3 Channel Scanning
USB-Ter
Step3.2.1
After you launch DVB DTV application, you will see two parts in this application. One is
control panel, the other is a screen for displaying TV program.
When you see this control panel, please click the green button at the very left side of
control panel, and the extended panel will appear. When the extended panel shows up,
click the second button located from the right side of top row. You will get into
“Channel Scan” function.
Step3.2.2
There are two ways for channel scanning: “Easy Setup” and “Terrestrial setup”
If you have detail information handy, you may choose “Terrestrial setup”. Otherwise,
choose “Easy Setup” for basic setting default.

13
Note: three are two option in the button: “enable all the main frequency (+/-167khz)
scan”—let user to scan related frequency, “enable LCN (logic channel number)”—enable
user to rank channel as local channel listing method.
“Easy Setup”
After you click “Scan” button, and you can see this configuration shown below. This
function will help you complete channel scanning. Note that this will take a little longer
than “Terrestrial setup” setting.
“Terrestrial setup”
There are three ways to the advanced setup:
Scan by Frequency, Scan by Country /Area and Scan all Channels
14
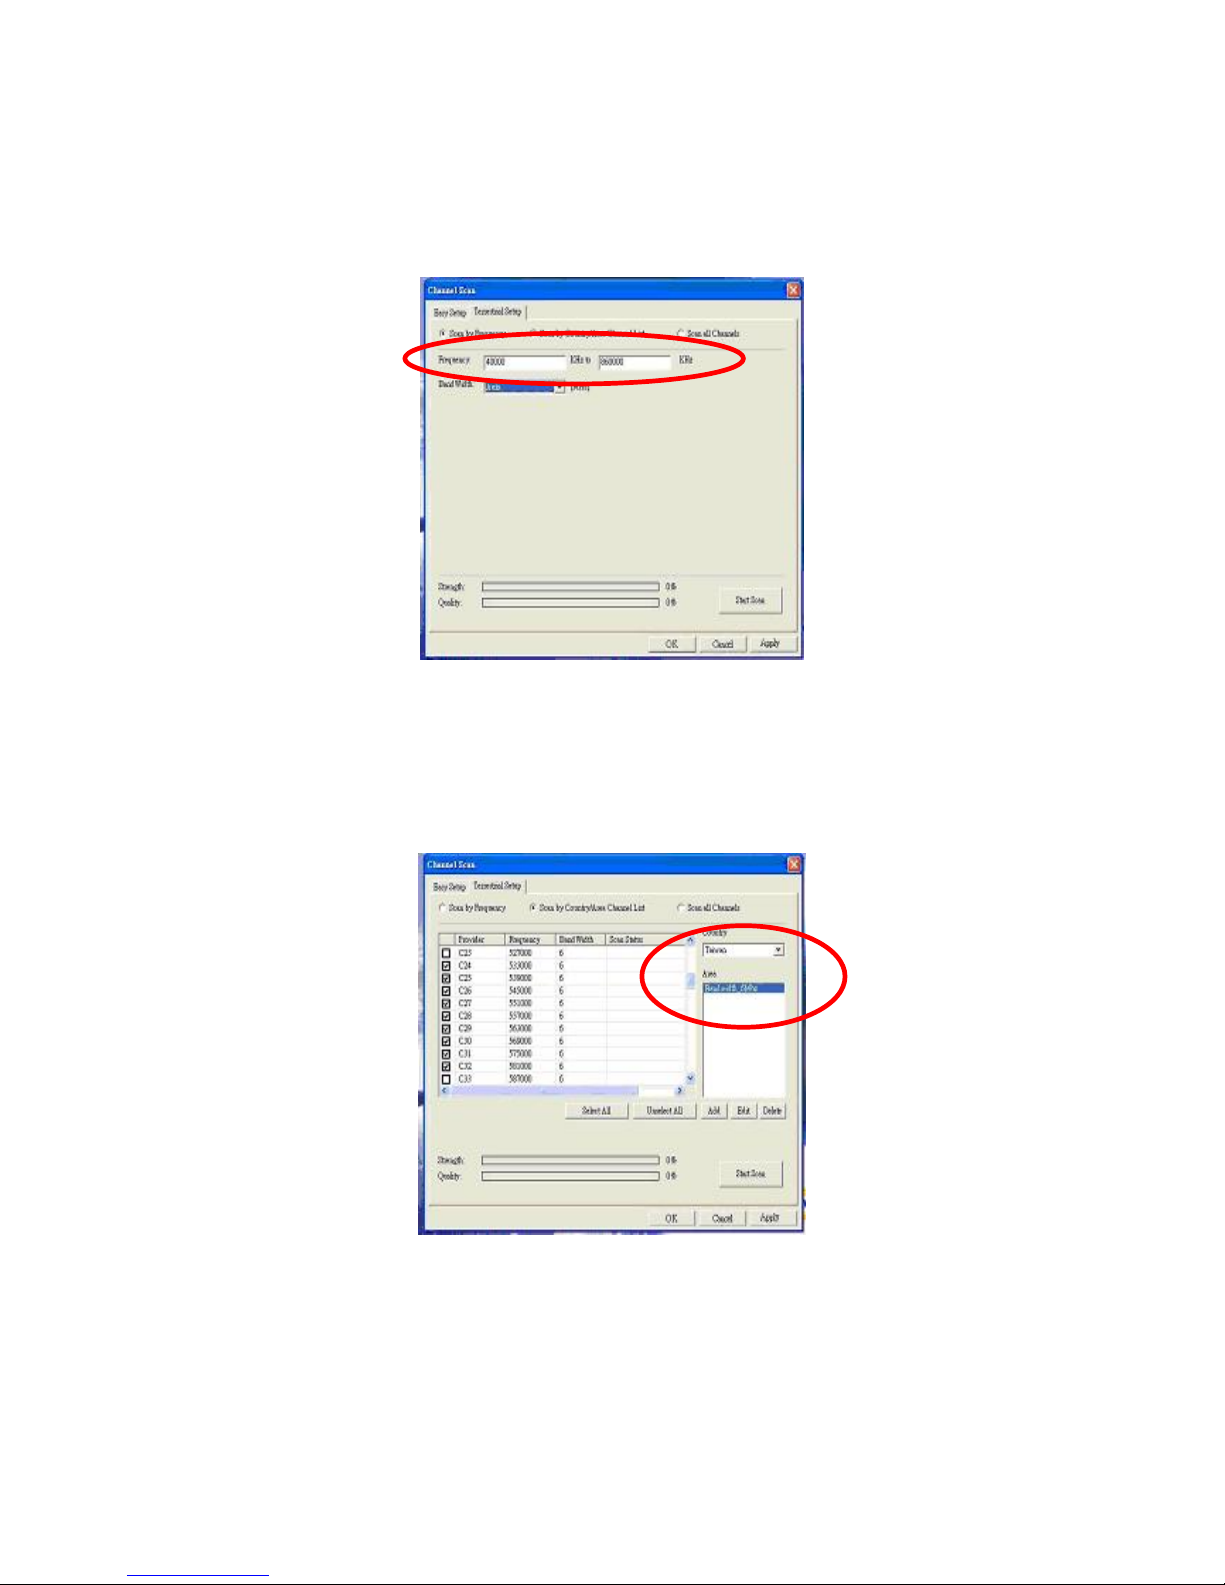
Scan by Frequency
If you already know the DTV frequency range of your location, please select “Scan by
Frequency”. After you choose “Scan by Frequency”, this configuration window will
show up. Please fill in the correct frequency and bandwidth and click “Start Scan”
button for scanning.
.
Scan by Country /Area
You can choose the area you are located and the bandwidth that your country adopts to
scan channel.
15
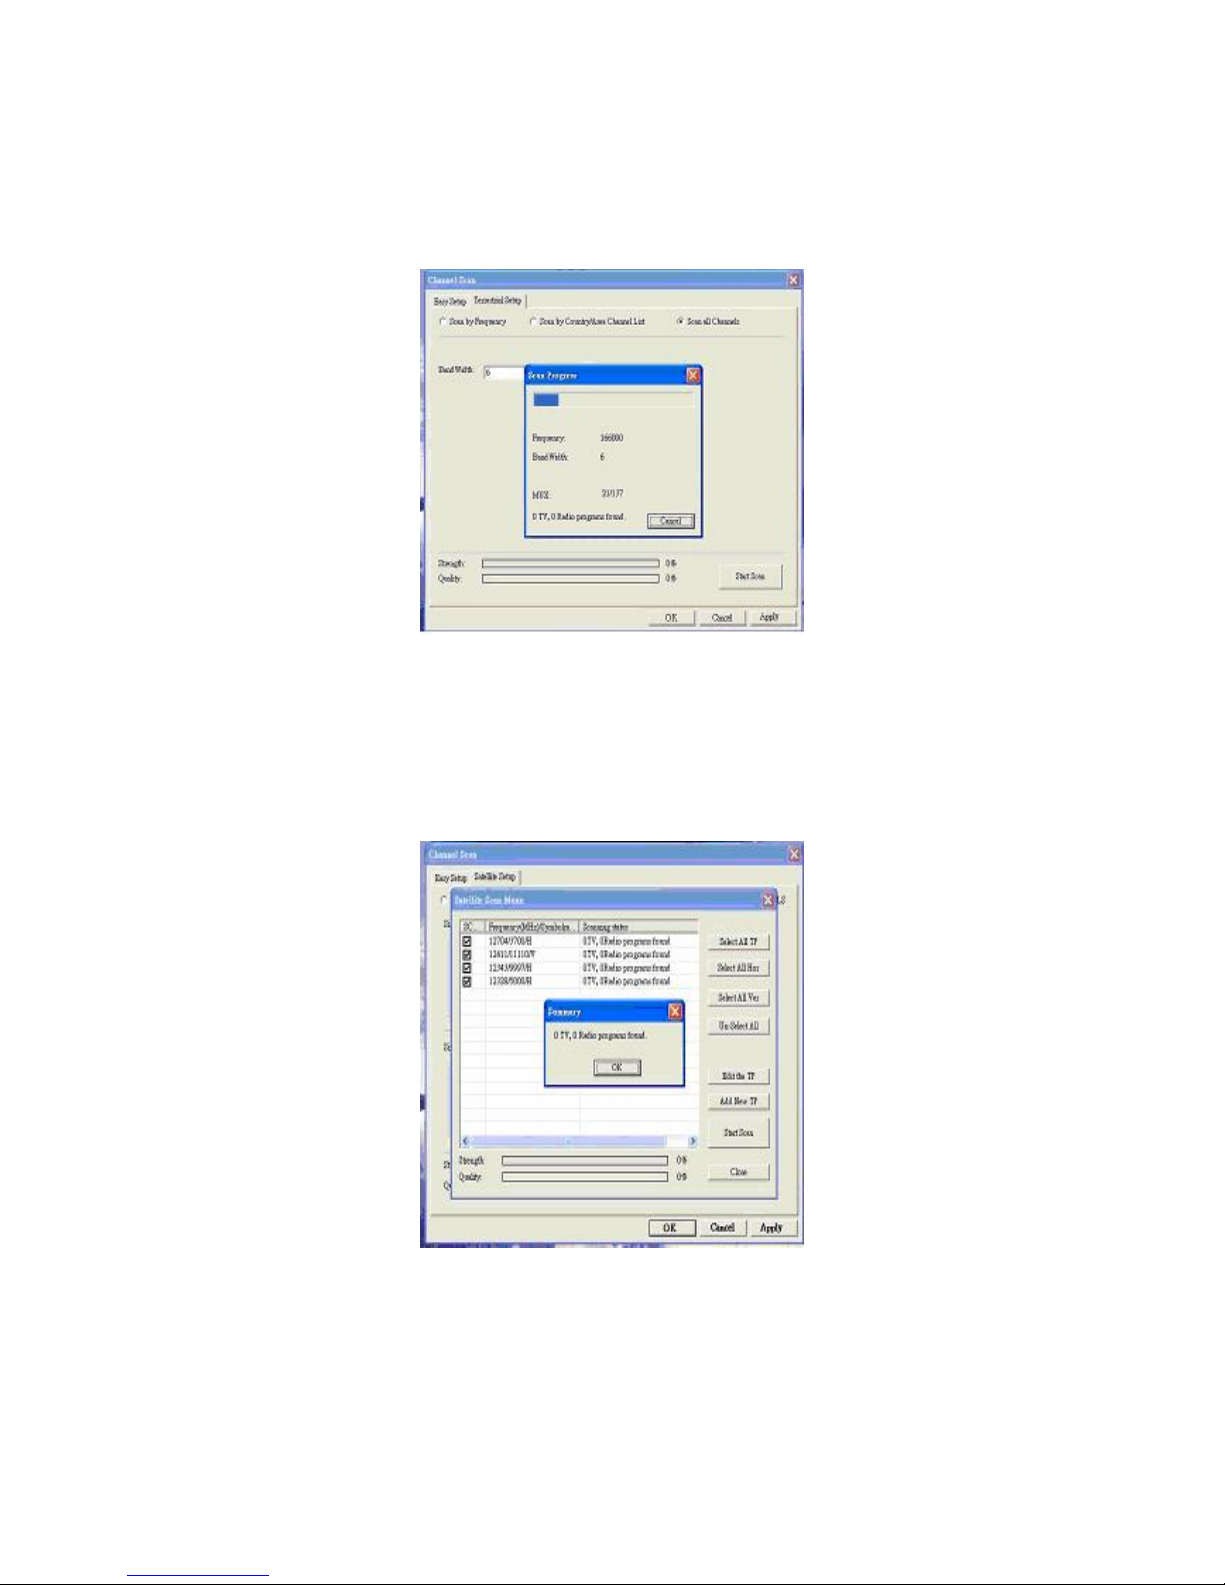
Scan all Channels
If you know about specific frequency in your country, please mark those channels that
you like to scan. After you mark all channels that you like to scan, click the “Start Scan”
button for scanning.
Step3.2.3
When finished channel scanning, this summary window will show up telling you how
many TV and Radio programs had been scanned. Please click “OK” button of summary
dialog box and click ”OK” button of Channel Scan to close this dialog.

16
DVB TV Application Programs
DVB TVApplication Program is a powerful
software to let you watch DTV on your PC. Please
carefully review this chapter for better knowing the
DVB TV application programs.
Sections include:
Control Panel
Features
Mouse Right Click Menu
Keyboard Shortcuts
CHAPTER

17
Chapter 4 DVB TVApplication Programs
4.1 Control Panel
Main control bar and control panel icons:
Icon Function Icon Function
Exit DVB TV application.
Full Screen/Restore
Minimize
Open Extended
Panel
Open “Favorite List” Language switch
Capture still image. Subtitle
Channel up
Channel down
Stop / Play
Rewind / Pause /
Fast Forward
Time Shifting /
Record
On Line Help Control Speaker on,
off, LL, RR
Volume Mute
Signal strength Signal quality
Other Information:
Clock (Set by host computer’s time clock)
Channel and program time
Stop/Play/Time Shifting

18
Extended control panel
Icon Function Icon Function
Configuration Video Adjustment
Channel Scan EPG Function
Capture Pool Record List
Teletext Hibernate
Note: You will not be able to use “Capture” if you have previously enabled “Mpeg2
Hardware Accelerator”.

19
4.2 Functions
Video Recording
You can record video by clicking on . You can also schedule recordings in the
“Recording Setup” screen in the Properties menu . You may also setup
Once/Daily/Weekly schedule recording under Record Mode. Specify day when
scheduling weekly recording.
Electronic Program Guide (EPG)
Click on the extended control panel to see the electronic program guide provided by
the content provider. From here you are able to obtain detail information about the
broadcasting programs. EPG will basically show current and next program info while
playing, and all program EPG info will be saved in database.
Multi-Language
Please click here to change language.
Note: Check your content provider to see if the programs support multi-language
20
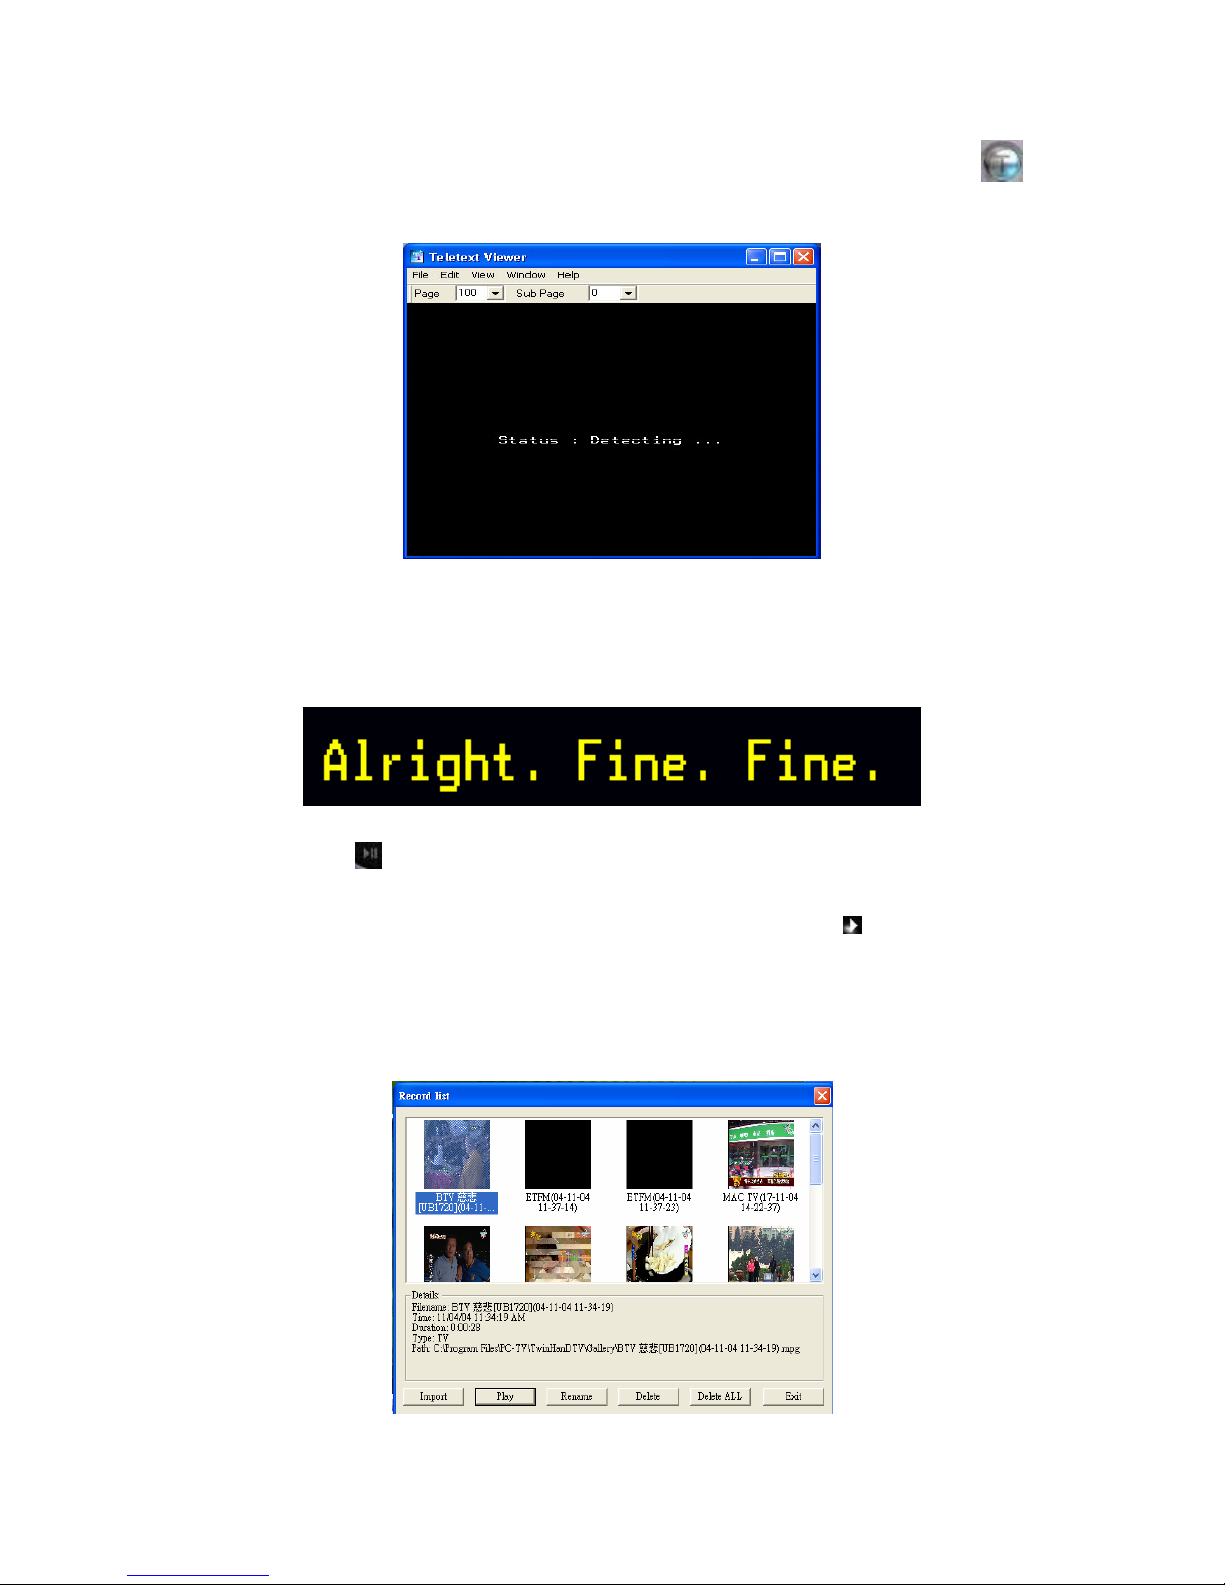
Teletext
The application “Teletext” is a simple teletext browser. To start this function, click
on the control panel when your DVB TV is running.
Note: Teletext is not supported under UK standard
Subtitle over Display
Time-shifting
When you click , the live program you are watching can be paused. Click it again,
the program will play from the moment that you had paused it so that you won’t miss any
part of the program. If you like to go back to the live program, click and it will stop
time-shifting function.
Playback recording file
This manual suits for next models
1
Table of contents
Other MSI TV Receiver manuals


