MTD 19A30022100 User manual

MTD LLC, P.O. BOX 361131 CLEVELAND, OHIO 44136-0019
Printed In USA
Safe Operation Practices • Set-Up • Operation • Maintenance • Service • Troubleshooting • Warranty
WARNING
READ AND FOLLOW ALL SAFETY RULES AND INSTRUCTIONS IN THIS MANUAL
BEFORE ATTEMPTING TO OPERATE THIS MACHINE.
FAILURE TO COMPLY WITH THESE INSTRUCTIONS MAY RESULT IN PERSONAL INJURY.
OperatOr’sManual
Form No. 769-10774
(October 25, 2015)
Snow Cab/Sun Shade
NOTE: This Operator’s Manual covers several models. Features may vary by model. Not all features in this manual are applicable to all
models and the model depicted may differ from yours.

Customer Support
Please do NOT return the machine to the retailer or dealer without first contacting the Customer Support Department.
If you have difficulty assembling this product or have any questions regarding the controls, operation, or maintenance of
this machine, want to orde replacement parts/attachments/accessories, or want to view an online How-To video; you can
seek help from the experts. Have your full model number and serial number ready. Choose from the options below:
◊ Web: www.mtdproducts.com/equipment/mtdproducts
◊ Phone: (800) 800-7310
◊ Mail: MTD LLC • P.O. Box 361131 • Cleveland, OH • 44136-0019
Thank you for purchasing this product. It was carefully
engineered to provide excellent performance when properly
operated and maintained.
Please read this entire manual prior to operating the equipment.
It instructs you how to safely and easily set up, operate and
maintain your machine. Please be sure that you, and any other
persons who will operate the machine, carefully follow the
recommended safety practices at all times. Failure to do so could
result in personal injury or property damage.
All information in this manual is relative to the most recent
product information available at the time of printing. Review
this manual frequently to familiarize yourself with the machine,
its features and operation. Please be aware that this Operator’s
Manual may cover a range of product specifications for various
models. Characteristics and features discussed and/or illustrated
in this manual may not be applicable to all models. We reserve
the right to change product specifications, designs and
equipment without notice and without incurring obligation.
If applicable, the power testing information used to establish
the power rating of the engine equipped on this machine can be
found at www.opei.org or the engine manufacturer’s web site.
If you have any problems or questions concerning the machine,
phone your local authorized MTD service dealer or contact us
directly. MTD’s Customer Support telephone numbers, website
address and mailing address can be found on this page. We want
to ensure your complete satisfaction at all times.
Throughout this manual, all references to right and left side of the
machine are observed from the operating position.
Thank You
To The Owner 1
2
Safe Operations....................................................... 3
Assembly & Set-Up .................................................. 5
Warranty..................................................Back Cover
Table of Contents

Important Safe Operation Practices 2
3
General Operation
1. Read, understand, and follow all instructions on the
machine and in the manual(s) before attempting to
assemble and operate. Keep this manual in a safe place for
future and regular reference and for ordering replacement
parts.
2. Be familiar with all controls and their proper operation.
Know how to stop the machine and disengage them
quickly.
3. Never allow children under 14 years of age to operate this
machine. Children 14 and over should read and understand
the instructions and safe operation practices in this manual
and on the machine and should be trained and supervised
by an adult.
4. Never allow adults to operate this machine without proper
instruction.
5. The snow cab/sun shade frame add height to the machine.
Low tree limbs, clothes lines, door entry ways and other
overhead structures that did not interfere with the machine
operation before, may now present a hazard. Be sure you have
adequate clearance before driving under them.
6. Check overhead clearances carefully before driving under
low hanging tree branches, wires, door openings etc.,
where the operator may be struck or pulled from the
machine, which could result in serious injury.
7. If situations occur which are not covered in this manual, use
care and good judgment. Contact your customer service
representative for assistance.
8. Breathing Carbon Monoxide can cause headaches, nausea,
fainting or death.
9. Do not block air vents as Carbon Monoxide may accumulate
inside the cabin.
10. Never run your riding mower in an enclosed space or
garage.
11. This snow cab/sun shade is designed to provide an element
of protection from seasonal weather only. it is not designed
to provide protection from noise, exhaust fumes, chemicals
or injury from collision or other accidents. This structure
does not provide roll-over protection.
12. Neither the snow cab or sun shade is intended to provide
complete protection from the sun. Use sunscreen or wear
protective clothing for additional protection.
WARNING! This symbol points out important safety instructions which, if not followed,
could endanger the personal safety and/or property of yourself and others. Read and follow
all instructions in this manual before attempting to operate this machine. Failure to comply
with these instructions may result in personal injury.
When you see this symbol. HEED ITS WARNING!
DANGER! This machine was built to be operated according to the safe operation practices in
this manual. As with any type of power equipment, carelessness or error on the part of the
operator can result in serious injury. This machine is capable of amputating hands and feet
and throwing objects. Failure to observe the following safety instructions could result in
serious injury or death.
CALIFORNIA PROPOSITION 65
WARNING! Engine Exhaust, some of its constituents, and certain vehicle components
contain or emit chemicals known to State of California to cause cancer and birth defects
or other reproductive harm.
WARNING! Battery posts, terminals, and related accessories contain lead and lead
compounds, chemicals known to the State of California to cause cancer and reproductive
harm. Wash hands after handling

4Section 2 — important Safe operation practiceS
Children
1. Tragic accidents can occur if the operator is not alert to the
presence of children. Children are often attracted to the
machine and the mowing activity. They do not understand
the dangers. Never assume that children will remain where
you last saw them.
a. Keep children out of the mowing area and in
watchful care of a responsible adult other than the
operator.
b. Be alert and turn machine off if a child enters the
area.
c. Before and while backing, look behind and down for
small children.
d. Never carry children, even with the blade(s) shut off.
They may fall off and be seriously injured or interfere
with safe machine operation.
e. Use extreme care when approaching blind corners,
doorways, shrubs, trees or other objects that may
block your vision of a child who may run into the
path of the machine.
f. To avoid back-over accidents, always disengage
the cutting blade(s) before shifting into Reverse. If
equipped, the “Reverse Caution Mode” should not
be used when children or others are around.
g. Keep children away from hot or running engines.
They can suffer burns from a hot muffler.
h. Remove key when machine is unattended to
prevent unauthorized operation.
Safety Symbols
This page depicts and describes safety symbols that may appear on this product. Read, understand, and follow all instructions on the
machine before attempting to assemble and operate.
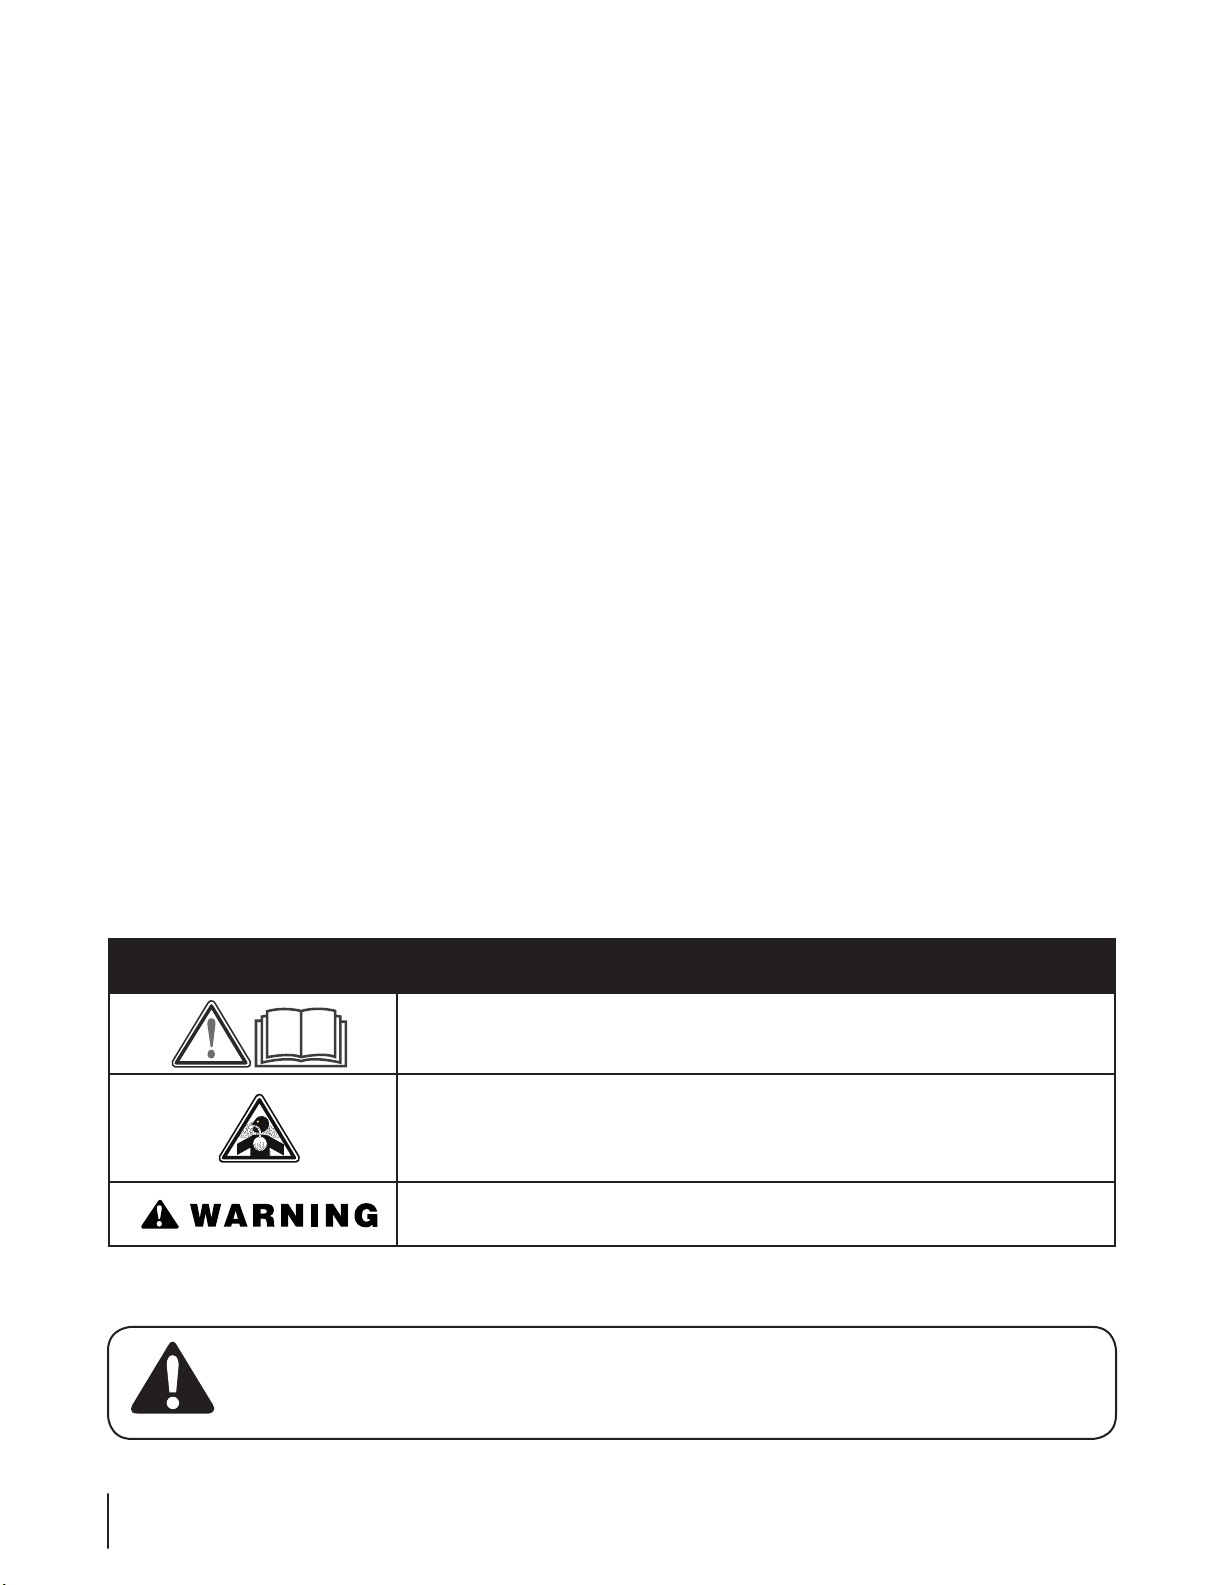
Symbol Description
READ THE OPERATOR’S MANUAL(S)
Read, understand, and follow all instructions in the manual(s) before attempting to
assemble and operate
WARNING — CARBON MONOXIDE
Breathing Carbon Monoxide can cause headaches, nausea, fainting or death. Do not block
air vents as Carbon Monoxide may accumulate inside the cabin. Never run your riding mower
in an enclosed space or garage.
WARNING — ROLLOVER
This frame will not protect against rollover.
2. Never allow children under 14 years of age to operate this
machine. Children 14 and over should read and understand
the instructions and safe operation practices in this manual
and on the machine and should be trained and supervised
by an adult.
General Service
1. Keep all nuts, bolts, and screws tight to be sure the
equipment is in safe working condition.
2. After striking a foreign object, stop the engine, disconnect
the spark plug wire(s) and ground against the engine.
Thoroughly inspect the machine for any damage. Repair
the damage before starting and operating.
3. Never attempt to make adjustments or repairs to the
machine while the engine is running.
4. Grass catcher components and the discharge cover are
subject to wear and damage which could expose moving
parts or allow objects to be thrown. For safety protection,
frequently check components and replace immediately
with original equipment manufacturer’s (O.E.M.) parts only,
listed in this manual. “Use of parts which do not meet the
original equipment specifications may lead to improper
performance and compromise safety!”
5. Maintain or replace safety and instruction labels, as
necessary.
WARNING! Your Responsibility—Restrict the use of this power machine to persons who read, understand and
follow the warnings and instructions in this manual and on the machine.
SAVE THESE INSTRUCTIONS!

Assembly & Set-Up 3
5
Contents of Carton
3
1
2A
7
3
4
2B
7
6B
5
5
6A
11
10
8
9
12
14
13
Hardware &
Loose Pack Items
Ref. Part Number Description Qty.
1749-05389A Rear Support 1
2A 749- 05387 Rear Right Support 1
2B 749- 05388 Rear Left Support 1
3749- 05386 Cross Support 2
4749- 05408 Center Support 1
5749- 05384 Front Support 2
6A 649-05054 Front Right Support 1
6B 649-05055 Front Left Support 1
7649-05053 Side Support 2
Figure 3-1
Ref. Part Number Description Qty.
8683-05220 Front Canopy Mount Plate 2
9736-0451 Sdle. Wash., .320 x .930 x .060 1
10 712- 04063 Flange Lock Nut, ⁄-18 2
11 712- 04064 Flange Lock Nut, ⁄4-20 4
12 777X45500 Reector Labels 2 *
13 710-3180 Hex Screw, ⁄-18 x 1.75 2
14 736-3078 Fl. Wash., 344 x 1.000 x .063 2
NS 790 - 00712 Snow Cab 1 *
NS 790-00710 Sun Shade 1 *
* -- If equipped

6Section 3— ASSembly & Set-Up
NOTE: All references to LEFT, RIGHT, FRONT, and REAR indicate
the Snow Cab/Sun Shade position when sitting in the tractor seat
in the operator’s position.
CAUTION: Do not transport the tractor on a trailer
or in the bed of a truck with the snow cab or sun
shade installed.
Assembly
Before beginning installation, remove all parts from the carton to
make sure everything is present. Carton contents listed on page 5.
NOTE: Some tractors will require the use of the Snow Cab/
Sun Shade Mounting Kit (#759-05086) in order to install. The
templates to drill the required holes and instrctions are on page 10. To
order the snow cab/sun shade mounting kit see your authorized
service dealer or contact Customer Support.
1. Using two of the flange lock nuts (Ref. part #11) and one of the
front canopy mount plates (#8), mount the front left support
(#6B) to the frame of the tractor as shown in Figure 3-2.
Figure 3-2
2. Before installing the front right support (#6A), the oil drain tube
and clip must be removed from the frame. See Figure 3-3. The
oil drain tube and clip will be fitted onto the front right support
bracket when it is installed.
Figure 3-3
3. Repeat the mounting steps (Starting with Step 1) on the
right side of the tractor to mount the front right support
(#6A).
4. Install the oil drain tube clip onto the front right support
bracket (#6A) in the mounting hole. See Figure 3-4.
Figure 3-4

7Section 3 — ASSembly & Set-Up
5. Use two flange lock nuts (#10), two saddle washers (#9),
two flat washers (#13) and two hex screws (#14) to mount
the rear support (#1) to the frame of the tractor as shown in
Figure 3-5.
Figure 3-5
6. Assemble the frame of the Snow Cab/Sun Shade by
connecting the numbered parts as shown in Figure 3-1.
7. The frame pieces connect with a spring clip inserted into the
hole of the connecting part to secure each piece in place.
Press down on the spring clip button and slide it inside the
connecting piece until it snaps into the hole. See Figure 3-6.
Figure 3-6
NOTE: Refer to Figure 3-1 for proper location and assembly
of the frame pieces.
Installing the Sun Shade
NOTE: If you purchased the Snow Cab Kit (19A30022100) alone, the
Sun Shade attachment (790-00710) can be ordered separately.
1. Slide the sun shade over the top of the frame with the long
mesh flap towards the back.
2. There are eight velcro straps on the inside of the sun shade;
four in the front and four in the back. Secure the front and
back of the sun shade with these straps as shown in Figure 3-7.
Figure 3-7
NOTE: The lower velcro straps should be secured below
the clip button to help secure the sun shade in place.
The upper straps should be positioned below the front
crossbar, but above the clip button.
3. There are two longer straps on the rear mesh flap of the
sun shade. Wrap these around the rear supports and secure
as shown in Figure 3-8.
Figure 3-8

8Section 3— ASSembly & Set-Up
Installing the Snow Cab
NOTE: If you purchased the Sun Shade kit (Part #19A30021100)
alone, you can order the Snow Cab attachment (790-00712)
seperately.
NOTE: To help remove any wrinkles in the snow cab, leave the
snow cab unfolded out in the sun.
1. Unfold the snow cab and lay it over the top of the frame.
Make sure that the silver/gray reflector along the upper rear
of the back window is facing towards the rear of the tractor.
See Figure 3-9.
Figure 3-9
2. Remove the backing tape on the reflector labels and install
the labels on the outside of the cab as shown in Figure 3-10.
Figure 3-10
3. There are five clips around the base of the snow cab, three
on the back and one each on the left and right side.
4. The rear center clip clips onto the center of the fender. See
Figure 3-11.
Figure 3-11
5. The outer rear clips clip onto the fenders near the wheels.
See Figure 3-12.
Figure 3-12

9Section 3 — ASSembly & Set-Up
6. The outer front clips attach to the front fenders near the
wheels. See Figure 3-13.
Figure 3-13
7. A bungee strap runs over the front of the hood. This strap is
used to tighten the snow cab around the hood and prevent
snow from entering the cab. The hooks of the strap are
hooked onto the hood near the front wheels. See Figure 3-14.
Figure 3-14
8. Unzip the cab door and locate the five straps inside the
cab. There is one in the front (near the hood) and a four
along the top. Snap the ends of each strap together and
then tighten them securely. See Figure 3-15.
Figure 3-15
9. A pair of magnets are on the bottom section of each side of
the floor boards. These magnets help hold the lower portion
of the snow cab against the floorboards. See Figure 3-16.
Figure 3-16

10 Section 3— ASSembly & Set-Up
10. Secure the two velcro tabs on the back corners of the snow
cab to ensure a tight fit. See Figure 3-17.
Figure 3-17
11. If your tractor has a snow thrower installed, the chute
directional control can be positioned or routed inside the
cab through the zippered opening on the left side of the
cab. See Figure 3-18.
Figure 3-18
12. The lift handle and trigger control can be accessed by
unzipping the right side of the snow cab. See Figure
3-19.
Figure 3-19
NOTE: These zippers can also be opened for air circulation.
Drill Templates
NOTE: Some tractors will require the use of the Snow Cab/Sun
Shade Mounting Kit (#759-05086) in order to install. To order the
snow cab/sun shade mounting kit see your authorized service
dealer or contact Customer Support or use the paper templates
shown in Figure 3-20.
AB
Figure 3-20

11Section 3 — ASSembly & Set-Up
13. Align template A on the right side of the tractor as shown
in secure in place with the hex screw, nut and screw from
the Snow Cab/Sun Shade Mounting Kit. See Figure 3-21.
Figure 3-21
14. Drill the appropriate holes with the ⁄” drill bit provided in
the Snow Cab/Sun Shade Mounting Kit. See Figure 3-21.
15. Remove template A.
16. Align template B on the left side of the tractor and secure
in place with the hex screws and nuts from the Snow Cab/
Sun Shade Mounting Kit. See Figure 3-22.
Figure 3-22
17. Drill the appropriate holes with the ⁄” drill bit provided in
the Snow Cab/Sun Shade Mounting Kit. See Figure 3-22.
18. Remove template B and begin the Assembly steps on page 6.

MANUFACTURER’S LIMITED WARRANTY FOR
GDOC-100167 REV. A
The limited warranty set forth below is given by MTD LLC with
respect to new merchandise purchased and used in the United
States and/or its territories and possessions, and by MTD Products
Limited with respect to new merchandise purchased and used
in Canada and/or its territories and possessions (either entity
respectively, “MTD”).
“MTD” warrants this product (excluding its Normal Wear Parts and
Attachments as described below) against defects in material and
workmanship for a period of one (1) year commencing on the date
of original purchase and will, at its option, repair or replace, free of
charge, any part found to be defective in materials or workmanship.
This limited warranty shall only apply if this product has been
operated and maintained in accordance with the Operator’s Manual
furnished with the product, and has not been subject to misuse,
abuse, commercial use, neglect, accident, improper maintenance,
alteration, vandalism, theft, fire, water, or damage because of other
peril or natural disaster. Damage resulting from the installation or
use of any part, accessory or attachment not approved by MTD
for use with the product(s) covered by this manual will void your
warranty as to any resulting damage.
Normal Wear Parts are warranted to be free from defects in material
and workmanship for a period of thirty (30) days from the date of
purchase. Normal wear parts include, but are not limited to items
such as: batteries, belts, blades, blade adapters, tines, grass bags,
wheels, rider deck wheels, seats, snow thrower skid shoes, friction
wheels, shave plates, auger spiral rubber and tires.
Attachments — MTD warrants attachments for this product against
defects in material and workmanship for a period of one (1) year,
commencing on the date of the attachment’s original purchase or
lease. Attachments include, but are not limited to items such as:
grass collectors and mulch kits.
HOW TO OBTAIN SERVICE: Warranty service is available, WITH
PROOF OF PURCHASE, through your local authorized service dealer.
To locate the dealer in your area:
In the U.S.A.
Check your Yellow Pages, or contact MTD LLC at P.O. Box 361131,
Cleveland, Ohio 44136-0019, or call 1-800-800-7310, 1-330-220-
4683 or log on to our Web site at www.mtdproducts.com.
In Canada
Contact MTD Products Limited, Kitchener, ON N2G 4J1, or call
1-800-668-1238 or log on to our Web site at www.mtdcanada.com.
This limited warranty does not provide coverage in the following
cases:
a. Log splitter pumps, valves, and cylinders have a separate
one- year warranty.
b. Routine maintenance items such as lubricants, filters, blade
sharpening, tune-ups, brake adjustments, clutch adjustments,
deck adjustments, and normal deterioration of the exterior
finish due to use or exposure.
c. Service completed by someone other than an authorized
service dealer.
d. MTD does not extend any warranty for products sold or
exported outside of the United States and/or Canada, and
their respective possessions and territories, except those sold
through MTD’s authorized channels of export distribution.
e. Replacement parts that are not genuine MTD parts.
f. Transportation charges and service calls.
g. MTD does not warrant this product for commercial use.
No implied warranty, including any implied warranty of
merchantability or fitness for a particular purpose, applies
after the applicable period of express written warranty above
as to the parts as identified. No other express warranty,
whether written or oral, except as mentioned above, given
by any person or entity, including a dealer or retailer, with
respect to any product, shall bind MTD. During the period of
the warranty, the exclusive remedy is repair or replacement of
the product as set forth above.
The provisions as set forth in this warranty provide the sole
and exclusive remedy arising from the sale. MTD shall not
be liable for incidental or consequential loss or damage
including, without limitation, expenses incurred for substitute
or replacement lawn care services or for rental expenses to
temporarily replace a warranted product.
Some states do not allow the exclusion or limitation of incidental
or consequential damages, or limitations on how long an implied
warranty lasts, so the above exclusions or limitations may not apply
to you.
In no event shall recovery of any kind be greater than the amount
of the purchase price of the product sold. Alteration of safety
features of the product shall void this warranty. You assume the
risk and liability for loss, damage, or injury to you and your property
and/or to others and their property arising out of the misuse or
inability to use the product.
This limited warranty shall not extend to anyone other than the
original purchaser or to the person for whom it was purchased as a
gift.
HOW STATE LAW RELATES TO THIS WARRANTY: This limited
warranty gives you specific legal rights, and you may also have
other rights which vary from state to state.
IMPORTANT: Owner may be required to present proof of purchase
to obtain warranty coverage.
MTD LLC, P.O. BOX 361131 CLEVELAND, OHIO 44136-0019; Phone: 1-800-800-7310, 1-330-220-4683
MTD Canada Limited - KITCHENER, ON N2G 4J1; Phone 1-800-668-1238
This manual suits for next models
1
Table of contents
Other MTD Snow Blower Accessories manuals
Popular Snow Blower Accessories manuals by other brands

Virnig
Virnig VAB60 Owner's/operator's manual

Classic Accessories
Classic Accessories Deluxe Snow Thrower Cab Assembly and care instructions

Meyer
Meyer Lot Pro Light Duty Assembly instructions

WIFO
WIFO RA-60 Parts and Operator's Manual

Toro
Toro Power Max 107-3827 installation instructions

Fisher
Fisher XLS 74800 installation instructions