BEFORE STARTING
MTX recommends that you have your new speakers installed by an authorized MTX
retailer, preferably MECP certified. If you do decide to do it yourself, make sure you
have read the instructions carefully, and that you have the following tools:
• Electric drill
• Phillips bit or screwdriver
• 1/8” bit
• Door panel puller
• Wire cutters/crimpers
• Metal cutting tool
• Safety glasses
• X-acto knife
Please be aware that today’s cars have door panels that are not designed to come
apart easily; they are designed by the factory to sit tight against the door and not
rattle. It is important to note that if the proper procedures are not followed, the door
panels can easily become
damaged which can make them fit improperly when you’re trying to reinstall them.
There are often hidden screws that, if overlooked, can cause the panel to crack or
break when force is applied to remove door panel. Even new car owners need to be
aware of this potential issue. Buying a new door panel is an expensive process so
please take note of the potential for damage.
With the door panel off, it is a perfect time to add sound dampener. The main goal
of sound dampeners is to add mass to the metal in the door, causing less rattle and
“ring” which will help to improve the overall sound of your new speakers. It also
helps prevent against outside noise by adding insulation. Sound dampening material
can be bought from numerous manufactures in many different forms, and kits, for
many different applications. Please make sure you purchase the correct type for your
specific project.
Note: Before cutting anything, please use common sense and make sure that no
wires or glass will interfere with cutting tools. ALWAYS WEAR PROPER SAFETY
GLASSES. Be sure all wires are clear of moving parts such as window crank
mechanisms and trunk hinges. Use rubber grommets when running wires through
sharp edged metal holes, which may wear through the wire’s insulation.
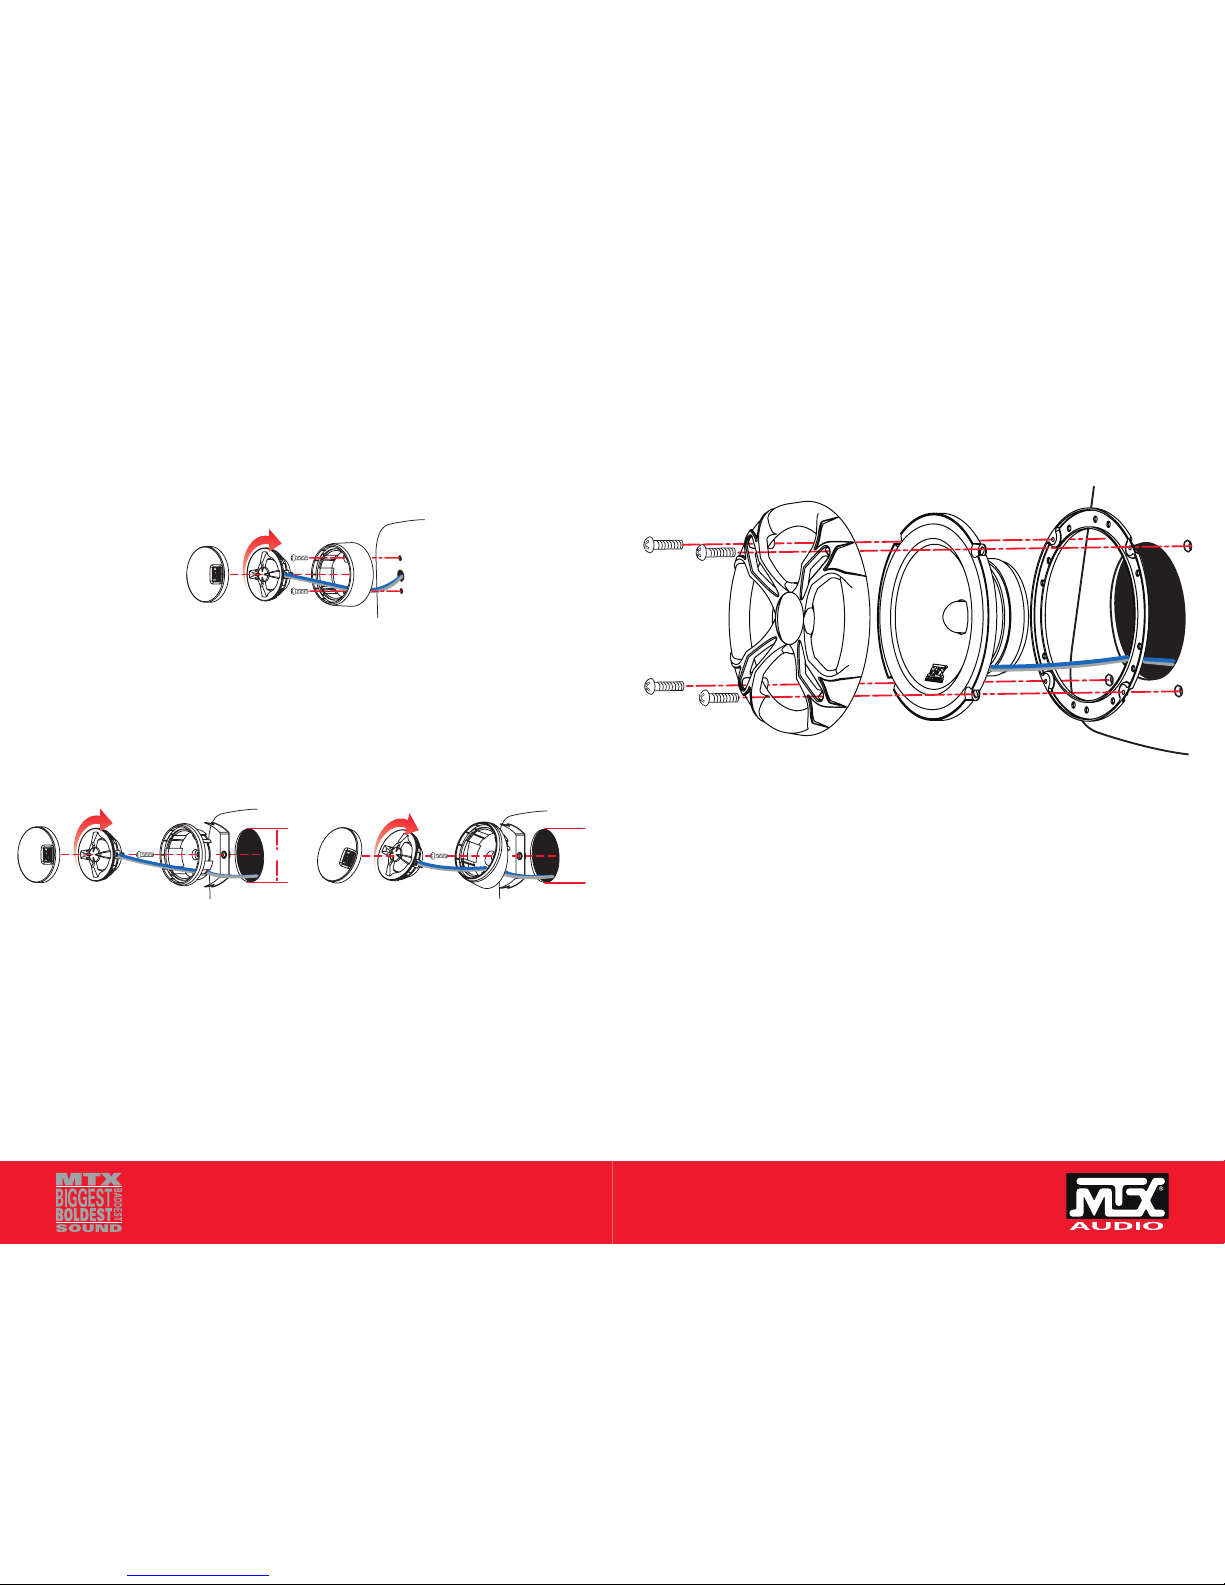
Do not mount speakers in the following locations:
• Where the doors window glass comes in contact with the speaker/s
• Where the window crank handles or gear assemblies come in contact with the
speaker when rotated
• Where the speakers come in contact with the trunk springs, shock towers, or
trunk lid
• Where the speakers come in contact with the gas tanks, or fuel lines
• Where the speakers come in contact with the rear window glass, car wall, etc...
INTRODUCTION
Thank you for choosing MTX to help reach your ultimate goal with your vehicle.
Adding MTX separates and a matching MTX amplifier with StreetWires connections
will put you in a better position to hear, feel and experience all of the music the artist
intended you to hear.
Model TX4001 TX5001 TX6001 TX1000
Description 4”
Separate
5-1/4”
Separate
6-1/2”
Separate
25mm
Tweeter
Cone Polypropylene
with Aluminum
Deposition
Polypropylene
with Aluminum
Deposition
Polypropylene
with Aluminum
Deposition
N/A
Tweeter 25mm
Soft Dome
25mm
Soft Dome
25mm
Soft Dome
25mm
Soft Dome
Impedance 4 Ohm 4 Ohm 4 Ohm 4 Ohm
Frequency
Response
74Hz-20kHz 51Hz-20kHz 44Hz-20kHz 2.5kHz-20kHz
Power (RMS) 75 90 90 50
Peak Music
Power
150 180 180 100
Sensitivity @
2.83V
90dB 90dB 90dB 90dB
Voice Coil 1” 1” 1” 25mm
X-Max 1.5 mm 2.75 mm 2.75 mm N/A
Woofer
Mounting
Depth
1-7/8” 2-3/16” 2-3/16” N/A
Woofer
Cut-out Dia.
3-3/4” 4-11/16” 5” N/A
Tweeter
Mounting
Depth
1” 1” 1” 1”
Tweeter
Cut-out Dia.
1-7/8” 1-7/8” 1-7/8” 1-7/8”
Tweeter
Mounting
Options
Flush, Surface,
Angle
Flush, Surface,
Angle
Flush, Surface,
Angle
Flush,
Surface,
Angle
Crossover 2-Way.
18dB/6dB
2-Way.
18dB/6dB
2-Way.
18dB/6dB
1-Way.
18dB
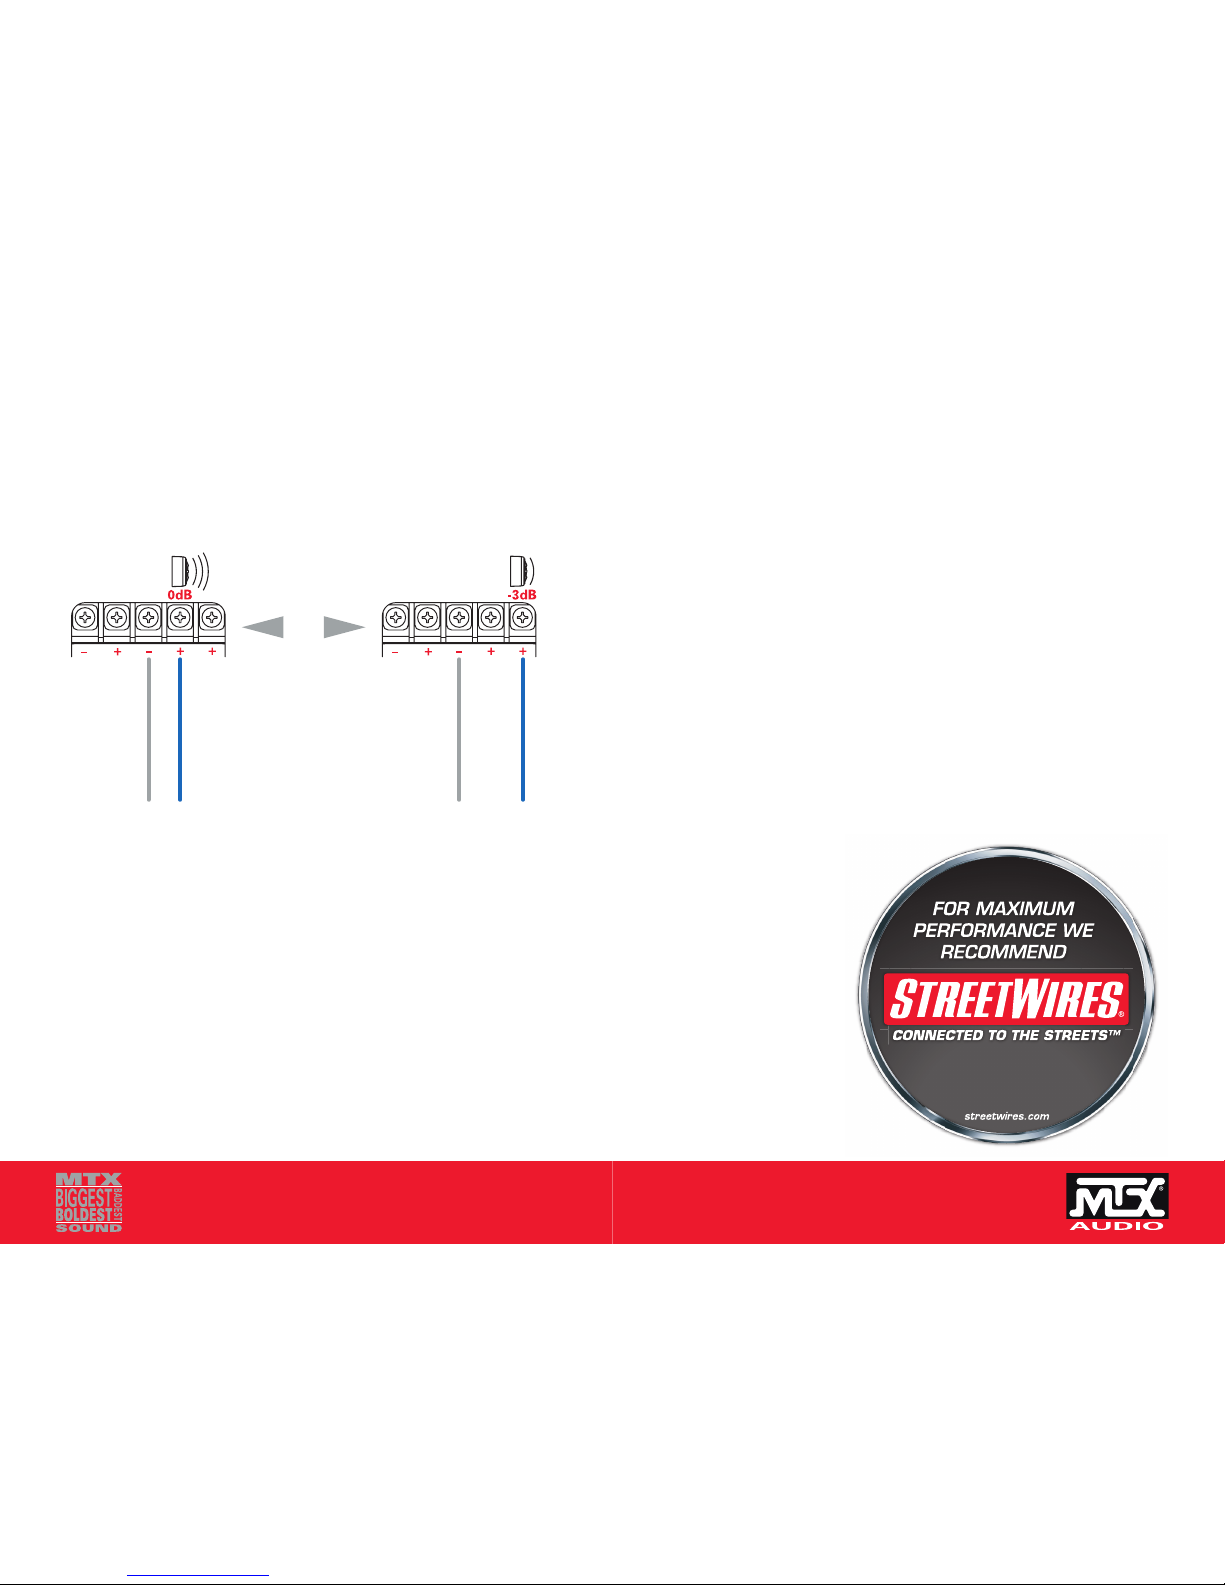
Adjustable
Tweeter Level
0, -3, 0, -3, 0, -3, N/A
SPECIFICATIONS