MTX Thunder Form JWTJ97C20A-TN User manual

MTX.COM
JWTJ97C20A-TN / JWTJ97T20A-TN
JEEP WRANGLER
VEHICLE SPECIFIC SUBWOOFER ENCLOSURE
OWNER’S MANUAL

MTX.COM
2
THANK YOU
Thank you for making the AWESOME decision to purchase our MTX Audio vehicle specic
subwoofer enclosure designed for the Jeep Wrangler TJ. Our sub enclosure, with its two 10"
Terminator subwoofers, will belt out the bass and deliver ground pounding audio making you the
party vehicle! With a few basic hand tools in your trusty toolbox, you can have this installed in no
time. So, what are you waiting for? It’s time to get the rumble in your ride! Oh, and congratulations
on your purchase, thanks for your support and most importantly, enjoy the ultimate audio experience
with MTX!
WE’RE HERE TO HELP
We’re here to help with any installation or technical support. Visit mtx.com to chat, call
1-800-225-5689 to speak with an MTX Technical Support representative, or visit
youtube.com/user/MTXAudioUSA to view product videos.
DON’T FORGET TO REGISTER YOUR PRODUCT
Don’t forget to register your new MTX Audio product. Visit mtx.com/productregistration or scan the
QR code to the right.
Model #
Serial #
Dealer’s Name
Date of Purchase
IMPORTANT NOTICE
Whenever working on the vehicle, it is recommended to disconnect the battery prior to starting work.
Failure to do so may lead to a risk of electric shock or equipment damage.
When connecting power and ground wires ensure that the red power wire is fused at the point
where it is connected to the vehicle’s battery. Failure to do so can result in damage to the vehicle if a
short circuit develops between the vehicle connection point and the product.

MTX.COM 3
FEATURES
• Includes two MTX 10" Terminator Subwoofers
• Integrated Amplier Easily Connects to Existing Systems
• Rotationally Molded Design, Finished in Charcoal and Tan
• Mounts Behind Rear Seat
• EBC and Wiring Harness Included
SPECIFICATIONS
• Dual 10" Amplied Subwoofer Enclosure
• RMS Power Handling: 200-Watts
• Peak Power Handling: 400-Watts
• Signal-to-Noise Ratio (1 Watt): > 75dB
• Frequency Response: 10Hz - 78Hz
• Impedance: 4Ω
FIT GUIDE
Wrangler TJ ............................................................................................................................................1997 - 2006
REQUIRED TOOLS
• Powered Screwdriver
• Right Angle Skewdriver
• 6" Bit Holder Extension
• Wire Ties
• 10mm Wrench
• Utility Knife
• Phillips Screw Driver
IN THE BOX
• JWTJ97C20A-TN or JWTJ97T20A-TN Amplied Subwoofer Enclosure
• EBC
• Wiring Harness
MTX.COM
4
INSTALLATION
Step 1 - Flip rear seat to full forward position. This will give you more room to work with.
Step 2 - You may also want to remove the top to make moving around the vehicle, during installation,
easier.
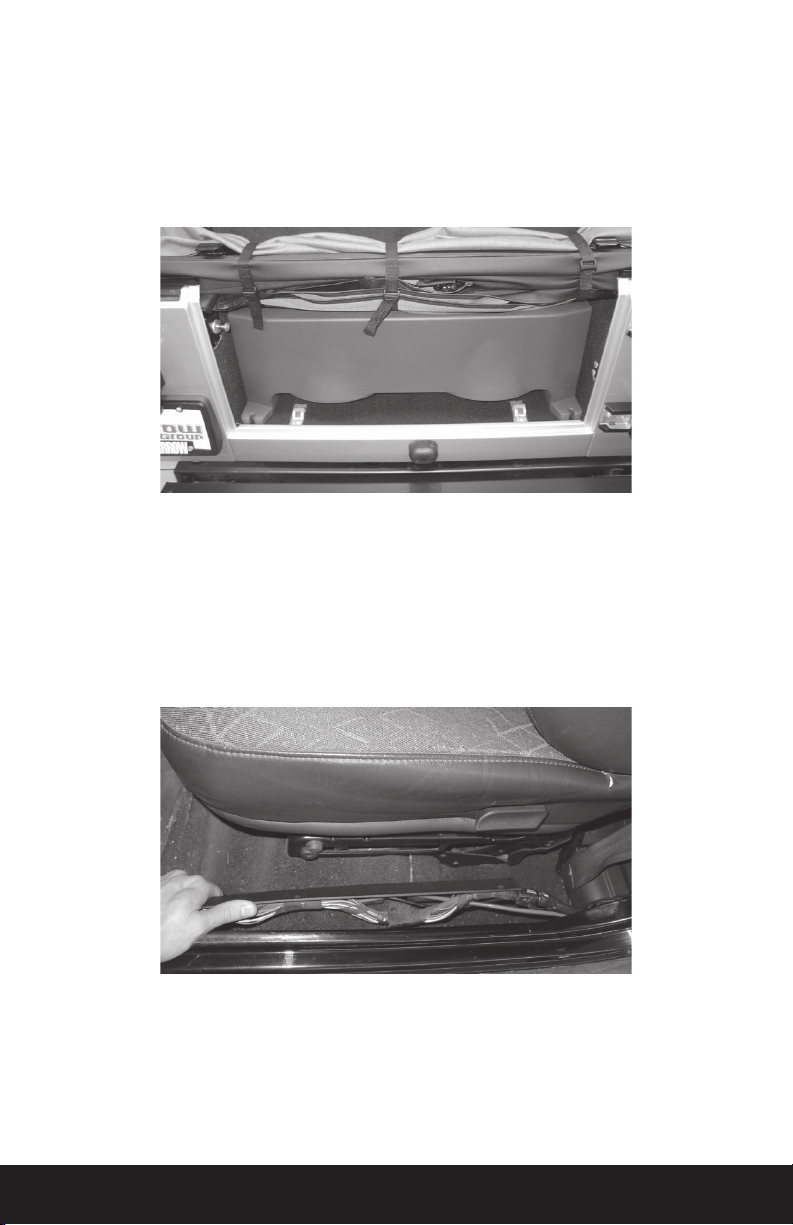
Step 3 - Place enclosure on the oor behind the rear seats with woofers ring down as shown below.
Step 4 - If externally amplied, make speaker connections to the enclosure from the amplier.
Connect speaker wires from amplier to enclosure, positive to red terminal and negative to black
terminal.
Amplied ThunderForm
Note: When routing power wire we recommend a connection directly to the battery.
Step 5 - Locate the factory wire harness running under the driver side threshold.
Step 6 - Use a Phillips screw driver to remove the three clips holding the factory wire harness under
the door threshold on the driver side.
Step 7 - Make a small cut in the carpet located just under the pre-amp location of the enclosure. This
will allow you to hide the wires under the oor mat.

MTX.COM 5
Step 8 - Using the furnished wiring harness, route the 10ga red power wire starting at pre-amp
location. Route wire to driver side, under the carpet following the factory wire harness to the front of
the vehicle. Wire tie as you go to secure the wiring.
Step 9 - Open hood.
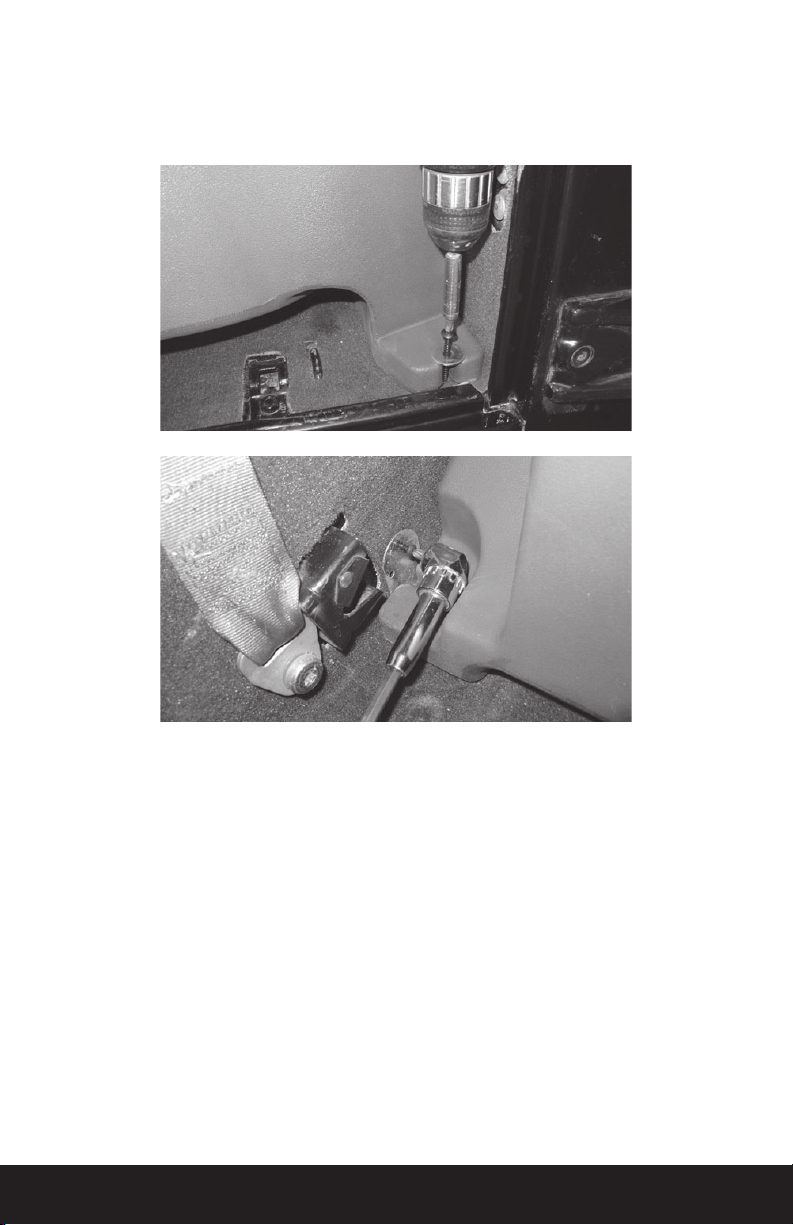
Step 10 - Drill a hole through the rewall. Locate a spot high on the rewall on the driver side. You
should always look to nd a clear path. Drill a hole from inside of the vehicle into engine compartment
and insert grommet. You may also nd a pre-existing, unused rubber grommet in this location that
you can pass the wire through. Note: To avoid any damage to parts inside engine compartment, drill
from inside of vehicle using a short bit.
Step 11 - Route 10ga red power wire through grommet into the engine compartment.
Step 12 - Route 10ga red power wire through engine compartment safely away from any moving or
hot parts that could damage the wire.
Step 13 - Cut 10ga red power wire to length, connect the supplied fuse holder from the wire kit to the
end of the wire.
Step 14 - Remove 20 amp fuse from MTX fuse holder. Connect furnished ring terminal to positive side
of battery. Remove 10mm nut from factory battery terminal. Place ring terminal on battery post and
retighten nut. Note: Always turn the ignition OFF when connecting or disconnecting battery cables.
Failing to do so may damage electronic components.
Firewall
Drill Hole for
Grommet
Battery

MTX.COM
6
Step 15 - Ground amplier to chassis of vehicle; connect the terminal provided to the 10ga black wire
from furnished wiring harness. A good ground is as important as the power connection. The ground
should be as short as possible and the contact point should be free of paint and debris.
Step 16 - Connect remote (Blue) wire to 12-volt switched accessory. To turn on the amplier unit, a
switched 12-volt signal is required. Locate a 12-volt wire that is active when the vehicle key is on and
connect the blue remote wire to it. This may be found in the fuse panel, key-switch or radio harness.
Speaker Wires
Step 17 - In the channel on driver side threshold, locate the left and right rear speaker wires.
Wire colors for the left rear speakers are; dark green / dark blue (positive) and dark green / purple
(negative). The right rear speaker wire colors are; gray / dark blue (positive) and gray / tan (negative).
Tap into wires and route under the carpet to pre-amp of enclosure. Connect to the supplied High
Level input harness wires and plug into the matching port on the pre-amp.
Although, MTX has made every effort to assure proper wiring colors, MTX is not responsible for any
changes made by the vehicle manufacturer which sometime occur. If wiring colors do not match then
physical verication is required.
Connection to Enclosure
Conventional Wiring of Factory Radio
Conventional Wiring of Aftermarket Radio
Green (-)
Green / White (+)
Gray (-)
Gray / White (+)
Dark Green / Purple (-)
Dark Green / Dark Blue (+)
Gray / Tan (-)
Gray / Dark Blue (+)
Blue Turn On Lead 12V Switched Source
Source Unit
Red Power Wire
Black Ground Wire
Attach Ground Wire Directly to
Vehicle Frame After Clearing
Area of Debris and Paint
_+
20 Amp Fuse
Optional EBC
(Electronic Bass Control)
RCA Interconnects
Blue Turn On Lead
Source Unit with
RCA Outputs
Red Power Wire
Black Ground Wire
Attach Ground Wire Directly to
Vehicle Frame After Clearing
Area of Debris and Paint
_+
20 Amp Fuse
Optional EBC
(Electronic Bass Control)

MTX.COM 7
Step 18 - Plug power wire harness into amplier pre-amp.
Step 19 - Replace 20 amp fuse under hood.
Step 20 - When amp turns on, LED will display red during diagnostic mode, and then green, signaling
amp is on and functioning. Amp will only turn on when radio is on.
Step 21 - Adjust gain.
Setting Gain
Turn gain knob on ThunderForm pre-amp to minimum, counter clockwise. Play a favorite song that
contains consistent music and bass. Turn the source unit to maximum listening level. You should
know that some source units will produce distortion or “clip” before the unit reaches maximum
volume. Reduce volume to the loudest listening level before distortion. Turn the gain knob on the
ThunderForm pre-amp clockwise until the speaker starts to distort and reduce gain to loudest
listening level before distortion.
Optional - The EBC, or Electronic Bass Control, allows a remote bass control to be adjusted from the
driver’s seat.
Troubleshooting Tips if Amp Does Not Turn On
• Check all connections at battery and that fuse is installed
• Check speaker wire connections
• Check ground
• Check fuse on pre-amp
Step 22 - Check wire harness under driver side threshold to be sure it’s secure in its factory location
and replace the three screw clips.
Step 23 - Using the supplied hardware, secure the enclosure to oor of vehicle.
MTX.COM
8
Step 24 - Making sure the enclosure is at the far rear of the vehicle with the rear mounting feet
pressed against the tail gate threshold, secure enclosure into place. Attach brackets to mounting
feet on front of enclosure an secure to the sides of the cargo area using a right angle skewdriver as
shown below.
Step 25 - Flip the rear seat back and lock into place against your new enclosure.
These instructions are guidelines only and in no way are intended to replace a professional
installation. As always before screwing or drilling check to make sure you will not damage any wires
or hoses or cause damage to the vehicle.
Warning: Batteries normally produce explosive gases which can cause personal injury. Therefore, do
not allow ames, sparks or lighted substances to come near the battery. When charging or working
near a battery, always shield your face and protect your eyes. Always provide ventilation.

MTX.COM 9
NOTES

MTX.COM
10
NOTES
This manual suits for next models
1
Table of contents
Other MTX Car Stereo System manuals


