7.Lap timer
E5
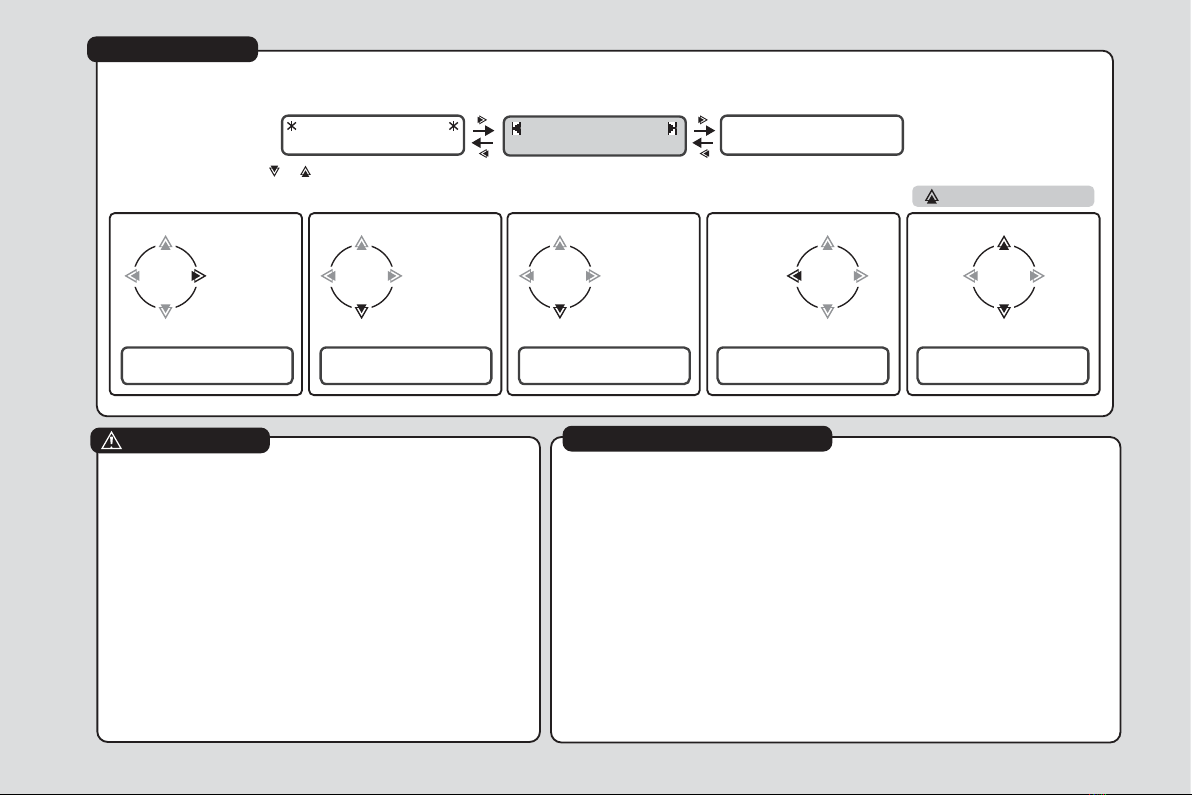
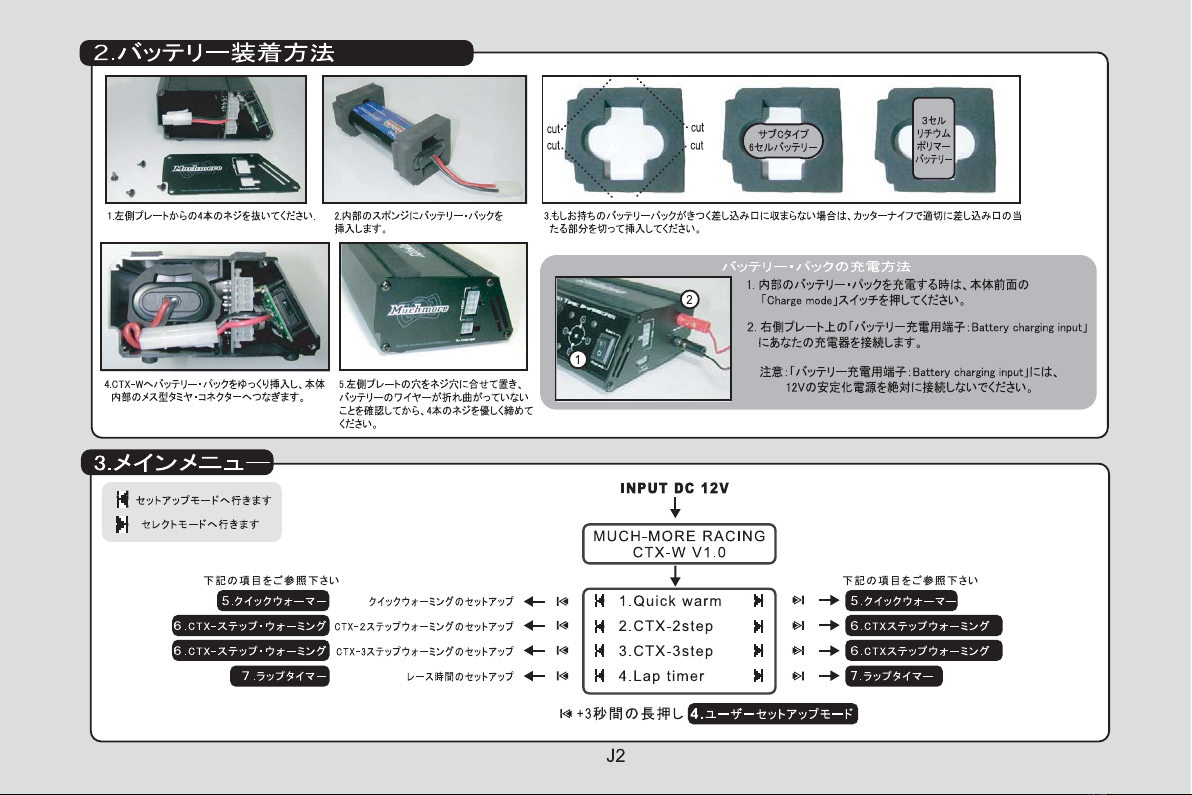
4.Lap timer
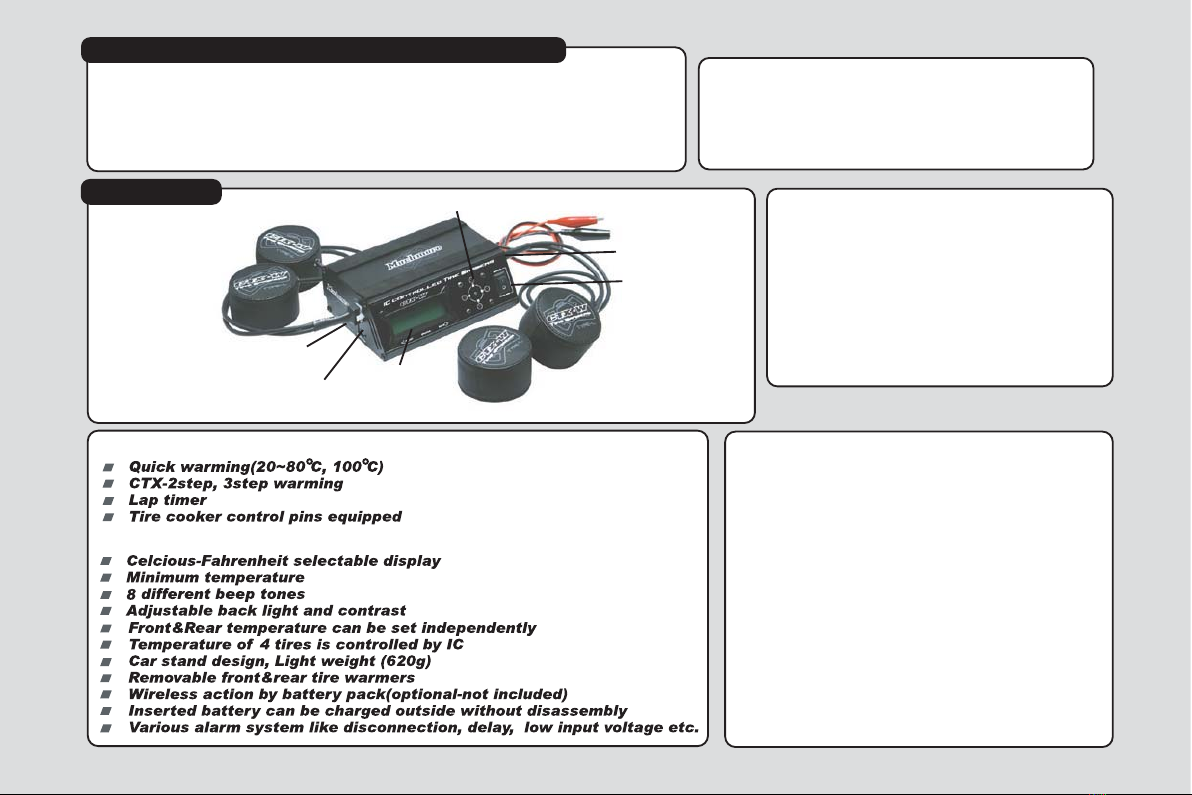
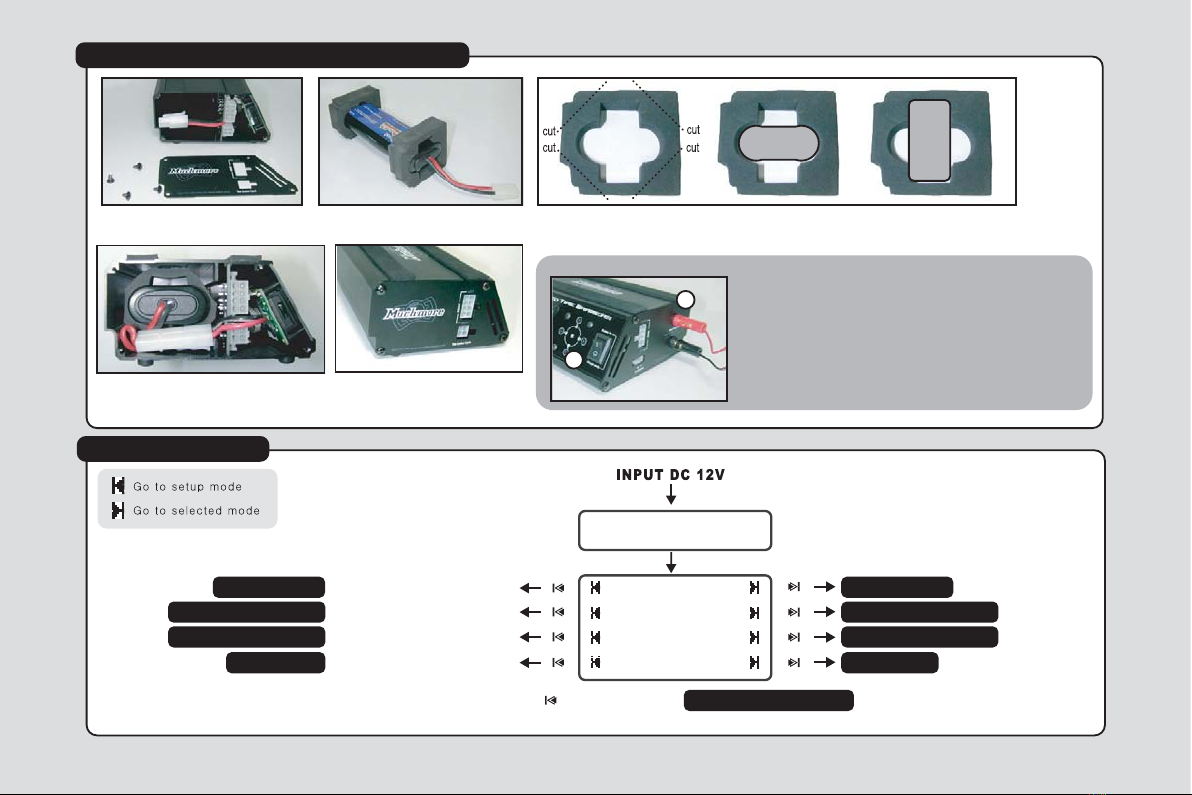
1.Quick warm
Check your competitor's lap time at the table! (up to 99Laps), Quick warming or CTX warming can not be operated simultaneously in this mode.
Only Minimum temp function will act.
Determine race minutesor :
How to check lap times
READY 00:00.00
LAP --
START(or STOP)
00:00.00
Race time set
08minutes
RUN 00:01.35
LAP -- 00:00.00 RUN 00:13.35
LAP 01 00:13.35
FINISH LAP
LAP COUNT
Time goes up 1lap counted 2lap counted Final lap counted. Recall data
RECORD CALL
+2seconds : Data clear
RECORD CALL
1. 2.
RUN 00:26.55
LAP 02 00:13.20
LAP COUNT
3.
READY 00:40.05
LAP 03 00:13.10
4.
READY 00:40.05
LAP 03 00:13.10
5.
WARNING
Do not leave the CTX-W unattended. Do not connect 12V power supply
directly to the battery charge input.When you insert your battery pack into the
CTX-W, make sure the batteries polarity and direction are correct. Wrong
connection may cause unit to fail. The remote possibility of a failure could
cause a short circuit by improper connection. This could cause the battery to
rupture. If cells are too hot to touch there is something wrong and the pack
must be disconnected from the CTX-W. Muchmore Racing(or their
associated distributors) shall not be liable for any property damage or
personal injury which may result from the failure to follow these instructions
or other improper use of this product. Avoid any contact of your CTX-W with
water or other liquids. Never operate on carpets, cloths, pit towel or other
materials. Disconnect the CTX-W from power supply when not in use. Only
insert serially switched battery packs. Never connect the CTX-W directly to a
110/230 VAC power source. For best performance, we recommend the
Power Master(24A power supply #MM-CTXP3). New warmers may produce
a slight odour in the first few hours of service due to materials curing inside
the device.
Product Warranty
MUCHMORE RACING warrants their CTX-W to be free from defects in material and workmanship
for a period of 120 days from the date of purchase. This warranty applies only to the original
purchaser. MUCHMORE RACING (or their associated distributors) will repair or replace without
charge, or refund the purchase price of any product which fails during the warranty period by reason
of defect in material or workmanship found upon examination by MUCHMORE RACING to have
been the cause of failure. This warranty does not cover any failures attributable to abuse,
mishandling, failure to follow operating instruction, alteration or accident. To make a claim under this
warranty, the purchaser must return the product to MUCHMORE RACING (or the relevant Countries
associated distributors) at the address shown E6(last page), properly packed and with shipping
charges prepaid. All claims must be made within thirty (30) days from the product failure and, in any
event, within thirty (30) days of the expiration of the 120 day warranty. All claims must be
accompanied by a sales slip or other written proof of date of purchase. The maximum repair costs
for any failure caused by the purchaser are 50% of retail price (original purchase price). Since we
cannot supervise the proper use of our products, we can not accept any liability for direct or indirect
damage of any type arising from their use or occurring to the property of the user and/or third parties.
Therefore, any use of this product shall take place at the user's own risk. The warranty claim may not
exceed the value of this product in any case. By putting this product into operation you accept the
above conditions and assume full responsibility for use of this product.