Mueller ULTRA BREW DC-760 User manual

USER
MANUAL
Model:
ULTRA BREW
DC-760
Thermal Coffee Maker

IMPORTANT SAFEGUARDS
When using electrical appliances, basic safety precautions should
always be followed to reduce the risk of fire, electric shock, and/or
injury to persons, including the following:
• Read all instructions.
• Make sure that your outlet voltage corresponds to the voltage
stated on the rating label of the coffee maker.
• Always unplug the unit from the outlet when not in use and before
cleaning. Allow the unit to cool before putting on or taking off parts
and before cleaning it.
• To protect against fire, electric shock and injury, do not submerge
the cord or the plug in water or other liquids.
• This appliance is not intended for use by persons (including
children) with reduced physical, sensory or mental capabilities, or
lack of experience and knowledge unless they have been given
supervision or instruction concerning use of the appliances by a
person responsible for their safety.
• Do not operate the appliance with a damaged cord or plug or after
the appliance malfunctions, or has been damaged in any man-
ner—return the appliance to an authorized service facility for exam-
ination, repair, or adjustment.
• Do not touch hot surfaces. Use handles and knobs.
• The use of accessory not recommended by the appliance manu-
facturer may result in fire, electric shock, or injury.
• Do not use the unit outdoors.
• Do not let the cord hang over the edge of a table or counter or
touch hot surfaces.
• Do not place the unit on or near a hot gas or electric burner or in
a heated oven.
• Do not use the unit for other than its intended use.
• Always fill the water reservoir first, then plug the cord into the wall
outlet.

• Do not clean the carafe with cleansers, steel wool pads, or other
abrasive material.
• Scalding may occur if the Top Lid is removed during the brewing
cycle.
• The Stainless Steel Carafe is designed for use with this coffee
maker only. It must never be used on a range top.
• Never leave the empty carafe on the warming plate when the plate
is warm; otherwise, the carafe might crack.
• Do not place a hot carafe on a wet, hot, or cold surface.
• Do not use a cracked carafe or a carafe having a loose or weak-
ened handle.
• WARNING: TO REDUCE THE RISK OF FIRE OR ELECTRIC SHOCK,
DO NOT REMOVE THE BASE PANEL. NO USER-SERVICEABLE
PARTS ARE INSIDE. REPAIRS SHOULD BE DONE ONLY BY AUTHO-
RIZED PERSONNEL.
• Do not operate the coffee maker without water.
• Do not place cloth beneath the coffee maker.
• This appliance is intended for household use only.
ELECTRICAL REQUIREMENTS
Voltage: 120V 〜60 Hz
Power: 900W
NOTE: Your Coffee Maker has a two-prong plug. To reduce the risk
of electrical shock, this plug will fit in an outlet only one way. If the
plug does not fit in the outlet, contact a qualified electrician. Do not
modify the plug in any way.
SAVE THESE INSTRUCTIONS
FOR HOUSEHOLD USE ONLY

KNOW YOUR COFFEE MAKER
PARTS
Control
panel
Control panel
Carafe
lid
Carafe
handle
Coffee
spoon
Stainless Steel
Thermal Carafe
Permanent
filter Top lid
Water tank
Water level
gauge
Warming
plate
AUTO
PROG ON/OFF
HOUR MIN
RUN
Funnel

USING YOUR COFFEE MAKER
FOR THE FIRST TIME
Check that all accessories are there, and the unit is not damaged.
IMPORTANT: make sure to perform these steps before brewing your
coffee for the first time!
Fill water into the water tank to the MAX level and brew water several
times without coffee powder, then discard the water. Clean and dry all
detachable parts thoroughly according to the section “CLEANING AND
MAINTENANCE”.
HOW TO MAKE COFFEE
NOTE: For best results, always
use cold, fresh tap water.
1. Open the Top Lid and fill the water tank with
drinking water. The water level should not exceed
the MAX level, as indicated on the water level
gauge. The water tank capacity is 1L (34oz).
2. Install the funnel properly and then place the
permanent filter into the funnel. Make sure both
parts are assembled correctly; otherwise, the Top
Lid cannot be closed.
3. Add coffee powder into the permanent filter.
Close the Top Lid completely.
NOTE: Usually, a cup of coffee needs a level spoon
of coffee powder, but you may adjust according to
personal taste.
!

AUTO
PROG ON/OFF
HOUR MIN
RUN
4. Insert the carafe with closed lid onto the
warming plate.
5. Plug the power cord into the outlet. The
LCD will display “AM 12:00”.
6. Press the ON/OFF button. The RUN
indicator will turn red, and the appliance will
begin to work.
- The coffee maker will take around 10
minutes to brew your coffee, depending on
the amount of coffee and water you are
using.
- The brewing process can be interrupted at
any time by pressing the ON/OFF button
TWICE. The appliance will continue brewing
once the ON/OFF button is pressed again.
- You can take out the carafe, pour, and serve
your coffee at any time. The appliance will
automatically stop dripping for 30 seconds.
7. Once the brewing is completed, if you do
not want to serve immediately, coffee can
be kept warm in the carafe on the warming
plate. The appliance will shut off automati-
cally after the brewing process.
10
min
ON/OFF
press
2x

- The coffee you get will be less than the
water you have added, as the coffee
grounds absorb some water.
- For an optimum coffee taste, serve it
just after brewing.
- Be careful while pouring the hot coffee
to avoid any mishap.
8. Always disconnect the coffee maker
from the power supply when not in use.
DELAY FUNCTION
The Delay Brew function lets users program the appliance to automati-
cally brew coffee at a later time within a 24-hour period. This is a helpful
feature for people who, for example, don't have time to prepare coffee
and wait for it to brew in the morning.
Let’s say you would like the coffee maker to start brewing your coffee at
8:15 AM.
1. Add water and coffee grounds to
the coffee maker as you normally
would.
2. Press the PROG button, and the
word “CLOCK” will appear in the
upper-right corner of the display, show-
ing the current time.
AUTO
PROG ON/OFF
HOUR MIN
RUN
CLOCK
CLOCK
To set up the delay-brew, follow these
steps:

AUTO
PROG ON/OFF
HOUR MIN
RUN
3. To set the current time, press the
"HOUR" and "MINUTE" buttons separate-
ly until the numbers change to the
correct hour and minute.
Note: The time cycle is 12 hours, so for
example, if the time is PM, the clock will
show a "PM" symbol.
4. Press the PROG button again, and
the word “TIMER” will appear in the
upper-left corner of the display, showing
the delayed brew time.
5. To set the time when you want the
brewing process to start, press the
"HOUR" and "MINUTE" buttons separate-
ly.
6. Press the ON/OFF button twice: the
AUTO indicator will illuminate, and the
LCD will display the current time. You
can always check the preset delayed
start time by pressing the PROG button.
Note: If you want to cancel the delay
brew setting, press the ON/OFF button
once. If, however you want to cancel the
delay brew setting AND start the brew-
ing process immediately, press the
ON/OFF button twice - the RUN indicator
will illuminate, and the unit will start the
brewing process.
7. When the time is due, the AUTO
indicator light will go out, the RUN
indicator will illuminate, and the unit will
start the brewing process.
ON/OFF
AUTO
PROG ON/OFF
HOUR MIN
RUN
AUTO
PROG ON/OFF
HOUR MIN
RUN
AUTO
PROG ON/OFF
HOUR MIN
RUN press
2x
TIMER

CLEANING AND MAINTENANCE
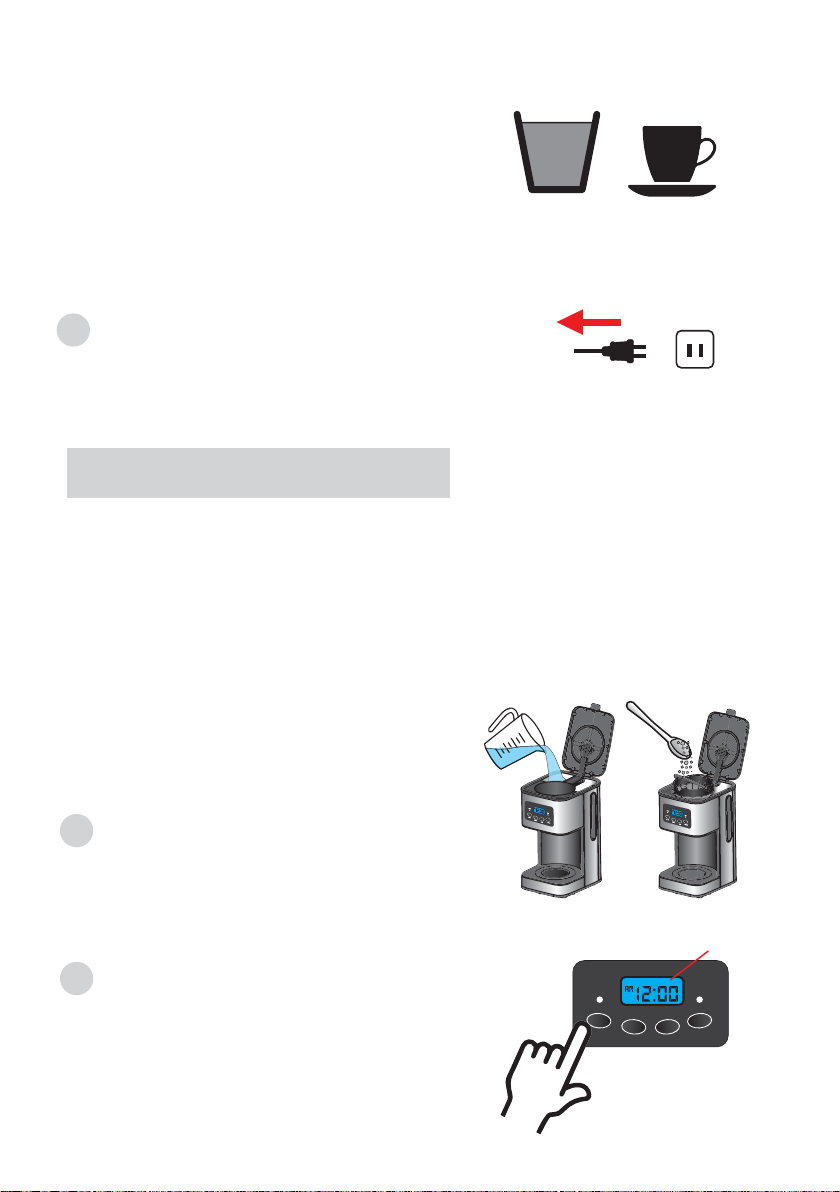
CAUTION! Always turn the coffee maker off and remove the plug from
the electrical outlet before cleaning. To protect against electrical shock,
do not submerge the cord, plug, or the unit in the water or liquid.
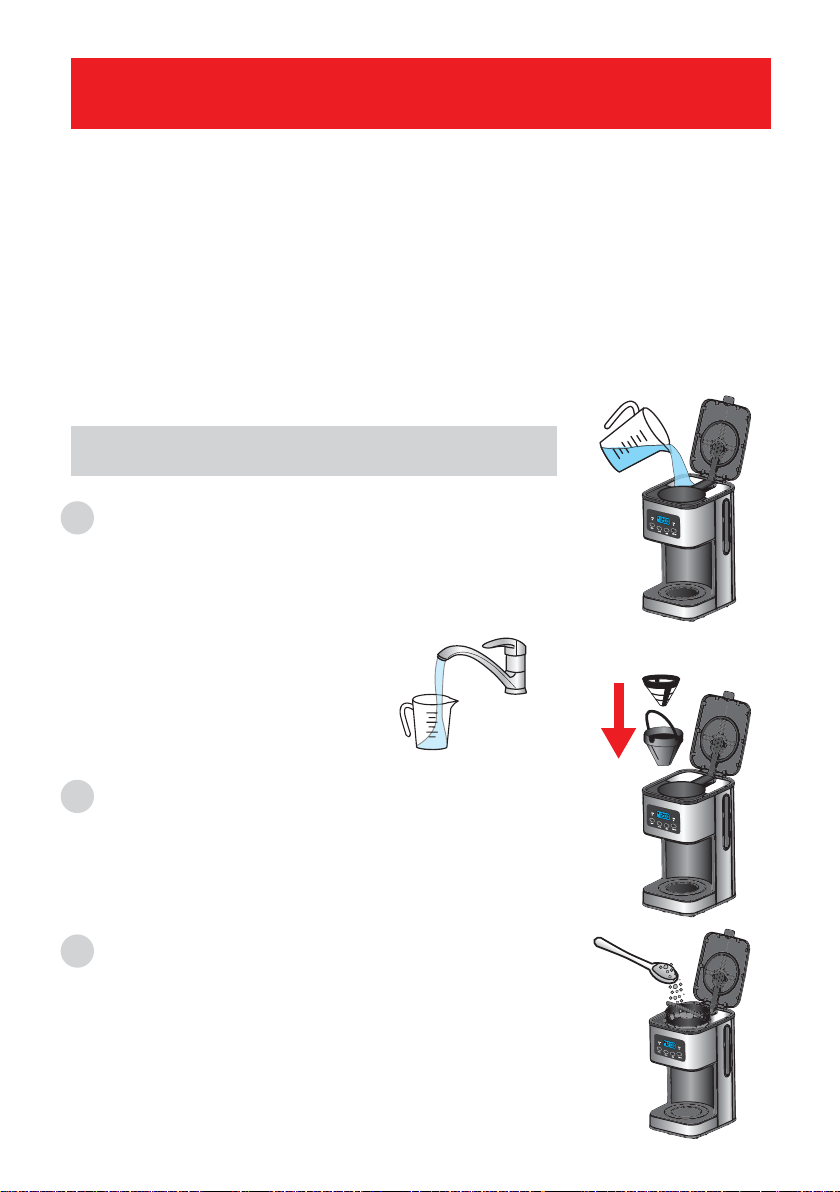
• Lift the Top Lid, remove all removable parts such as Permanent Filter,
Funnel, and Carafe, and wash them with warm soapy water.
NOTE: Do not put any water in the unit once the filter and funnel have
been removed. Wipe that area with a damp cloth.
• Never immerse the unit in water or other liquid. To clean the exterior
surface, simply wipe with a clean, damp cloth, and dry before storing it.
• Water droplets may build up in the area above the funnel and drip onto
the product base during brewing. To prevent the build-up, wipe off the
area with a clean, dry cloth after each use.
• Use a clean, damp cloth to clean the warming plate. Never use rough,
abrasive materials or cleansers to clean the warming plate.
• Do not dry the inside of the water tank with a cloth, as lint may remain.
• Keep your coffee maker in a dry and cool place.
Depending on the mineral content of your water, calcium deposits or
scale may build up in your coffee machine. Regularly descaling your
brewer every 3-6 months helps maintain the heating element and other
internal parts that come in contact with water. Calcium deposits may
build up faster, making it necessary to descale more often.
We recommend removing mineral deposits as follows:
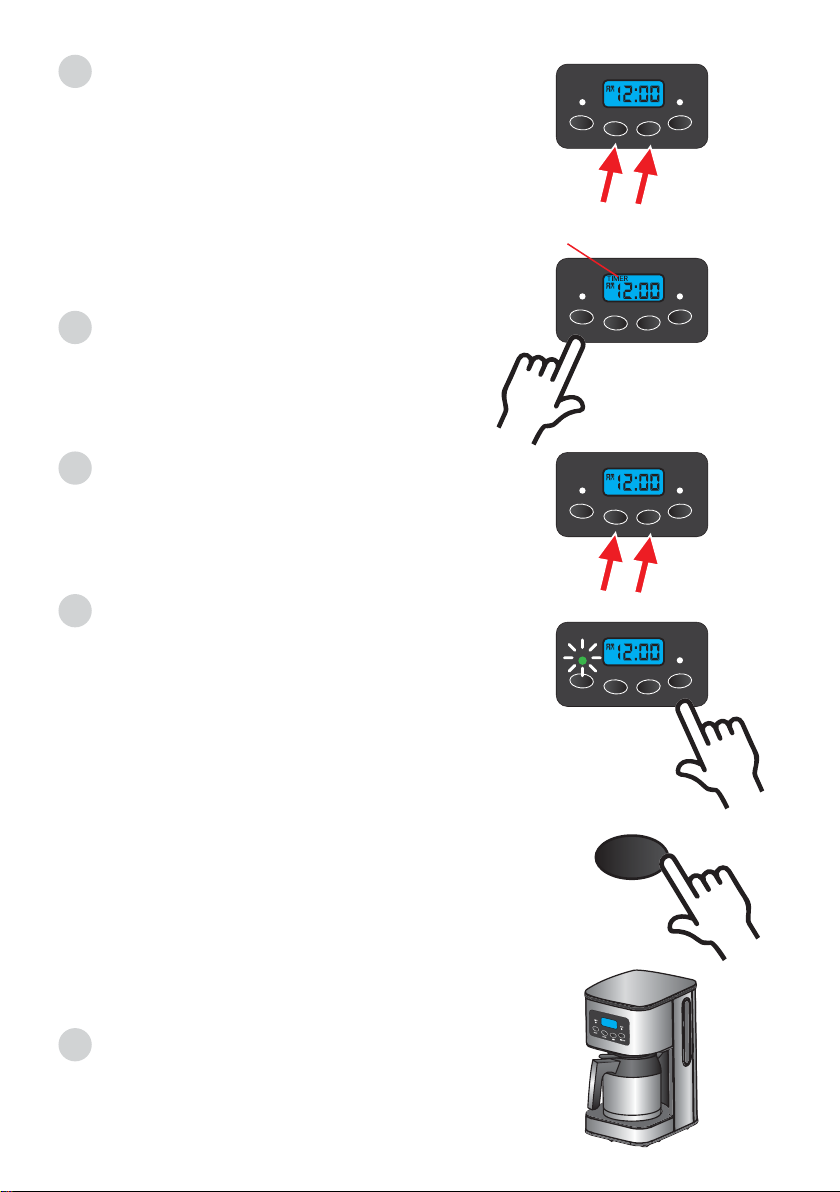
1. Fill the water tank with the water-vinegar solution to the MAXIMUM
level as indicated on the Water level gauge (the water-vinegar ratio should
be 1:1). You may also use citric acid to create the descaler solution by
mixing 100 ml (3.4oz) of water with 3 ml (0.1oz) of citric acid.
2. Make sure the funnel and the filter are in place.
REMOVING MINERAL DEPOSITS

TIPS FOR GREAT-TASTING COFFEE
• A clean coffee maker is essential for making great-tasting coffee.
• Regularly clean the coffee maker as specified in the “CLEANING AND
MAINTENANCE” section.
• Always use fresh, cold water in the coffee maker.
• Store the coffee powder in a cool, dry place. After opening a package of
coffee powder, reseal it tightly and store it in a refrigerator to maintain its
freshness.
• For an optimum coffee taste, buy whole coffee beans and finely grind
them just before brewing.
• Do not reuse coffee powder since this will significantly reduce the
flavor. Reheating coffee is not recommended because coffee is at its
ultimate flavor right after brewing.
3. Place a coffee cup onto the warming plate.
4. Start a brew cycle by pressing the ON/OFF button and midway through
the brew cycle, press the ON/OFF button TWICE to interrupt the brewing
process. Let the solution sit for 30-60 minutes, depending on how much
build-up you need to clear away.
5. After 30-60 minutes, press again the ON/OFF button and let the brew
cycle finish.
6. Perform the brew cycles until there is no more water-vinegar solution
inside the water tank, allowing your coffee maker to cool between brews.
7. Rinse the funnel, filter, and water tank with water a couple of times.
8. Fill the water tank with fresh water to the MAX fill line and perform the
brew cycles until the water tank is empty, allowing your coffee maker to
cool between brews.

Your satisfaction is guaranteed. If you are not completely
satised with our ULTRA BREW Thermal Coee Maker, and
the results it brings, we insist that you let us know. We’ll help
you make the ULTRA BREW Thermal Coee Maker work for
you, or we’ll refund your money.

2720 Pellissier Place, Ste 73D
City of Industry, CA 90601
Telephone: (888) 632-9981
E-mail: [email protected]
Web: www.muellerdirect.com
Müeller USA
If you are not happy with the product for any reason, please
with your feedback or questions, and we will do our best to
make things right for you!
Your purchase comes with a 100%
satisfaction guarantee from Müeller
Table of contents
Other Mueller Coffee Maker manuals

Mueller
Mueller FRENCH PRESS MU-SSHYDPRESS User manual

Mueller
Mueller DC-550 User manual

Mueller
Mueller KC-21 User manual

Mueller
Mueller U-700 User manual

Mueller
Mueller Ultra Brew DC 750 User manual

Mueller
Mueller Ultra Brew DC 750 User manual

Mueller
Mueller SmoothBrew CB-375 User manual

Mueller
Mueller MLR010557N User manual

Mueller
Mueller FRENCH PRESS User manual
Popular Coffee Maker manuals by other brands

Oster
Oster BVSTDC10SS instruction manual

Wilfa
Wilfa Classic CM2B-A125 manual

Bunn
Bunn SmartWave APS Installation and operating manual

HAMILTON BEACH/PROCTOR SILEX
HAMILTON BEACH/PROCTOR SILEX 47294 use & care

Krups
Krups EA80 series manual

Continental Refrigerator
Continental Refrigerator CE-CM241 user manual