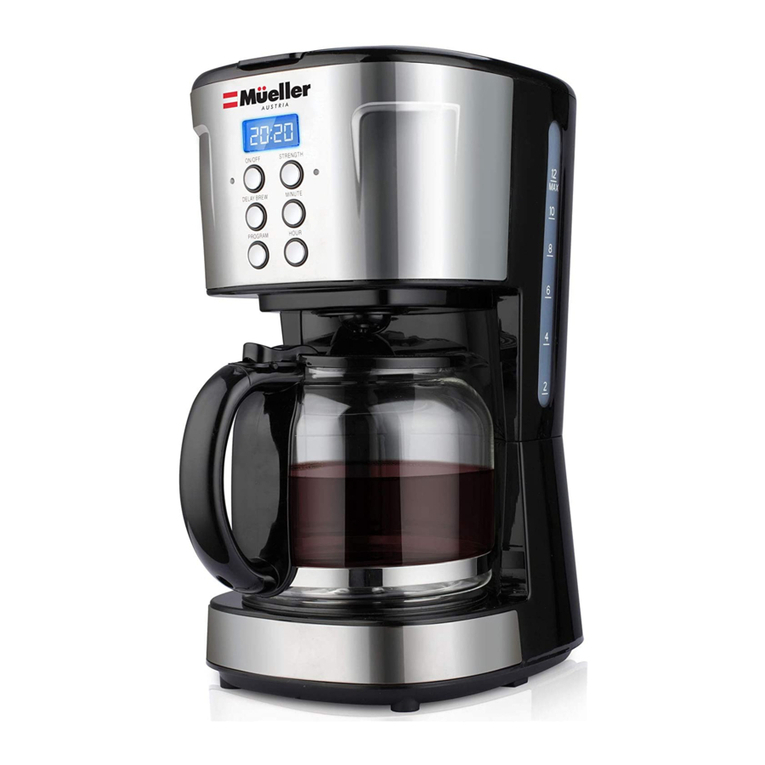
Mueller DC-550 User manual

INSTRUCTION MANUAL
Your satisfaction is guaranteed. If you are not completely satisfied with our
12-Cup Coffee Maker and the results it brings, we insist that you let us know.
We'll help make the coffee maker work for you, or we'll refund your money.
Model: DC-550
12-CUP
COFFEE MAKER

When using electrical appliances, basic precautions should always be
followed, including the following:
• Read all instructions.
• Make sure that your outlet voltage corresponds to the voltage stated on
the rating label of the coffee maker.
• Do not operate the appliance if the cord or plug is damaged, or after the
appliance malfunctions.
• Do not let the cord hang over the edge of a table or counter, or touch any
hot surface.
• To protect against fire, electric shock and injury to persons, do not
immerse cord, plug, or coffee maker body in water or other liquid.
• Unplug from outlet when not in use and before cleaning. Allow the unit to
cool before inserting parts or coffee and before cleaning.
• Be sure not to overfill as this may cause scalding.
• Do not place on or near a hot gas or electric burner, or in a heated oven.
• Do not touch hot surfaces of the unit when in use. Remove carafe using
the handle.
• Do not use a cracked carafe or a carafe with a loose or weakened handle.
• Do not set a hot carafe on a wet or cold surface.
• Do not clean the carafe with cleansers, steel wool pads, or other abrasive
material.
• Never leave the empty carafe on the keeping warm plate; otherwise the
carafe is liable to crack.
• Never attempt to brew the coffee in your coffee maker without adding the
water in a water tank.
• Never use warm or hot water to fill the water tank. Use cold water only.
• The carafe is designed for use with this coffee maker only. It must never
be used on a range top.
• The use of accessory attachments not recommended by the appliance
manufacturer may damage the unit, result in fire, electric shock, or injury to
persons.
• Do not use the appliance for any other purpose than its intended use.
• Do not use outdoors.
• Children should be supervised to ensure that they do not play with the
appliance.
• This appliance is not intended for used by persons (including children)
with reduced physical, sensory or mental capabilities, or lack of experi-
ence and knowledge, unless they have been given supervision or instruc-
tion concerning use of the appliance by a person responsible for their
safety.
• WARNING: TO REDUCE THE RISK OF FIRE OR ELECTRIC SHOCK, DO NOT
REMOVE THE WARMING PLATE. NO USER-SERVICEABLE PARTS ARE
INSIDE. REPAIRS SHOULD BE DONE ONLY BY AUTHORIZED PERSONNEL.
IMPORTANT SAFEGUARDS:

When using electrical appliances, basic precautions should always be
followed, including the following:
• Read all instructions.
• Make sure that your outlet voltage corresponds to the voltage stated on
the rating label of the coffee maker.
• Do not operate the appliance if the cord or plug is damaged, or after the
appliance malfunctions.
• Do not let the cord hang over the edge of a table or counter, or touch any
hot surface.
• To protect against fire, electric shock and injury to persons, do not
immerse cord, plug, or coffee maker body in water or other liquid.
• Unplug from outlet when not in use and before cleaning. Allow the unit to
cool before inserting parts or coffee and before cleaning.
• Be sure not to overfill as this may cause scalding.
• Do not place on or near a hot gas or electric burner, or in a heated oven.
• Do not touch hot surfaces of the unit when in use. Remove carafe using
the handle.
• Do not use a cracked carafe or a carafe with a loose or weakened handle.
• Do not set a hot carafe on a wet or cold surface.
• Do not clean the carafe with cleansers, steel wool pads, or other abrasive
material.
• Never leave the empty carafe on the keeping warm plate; otherwise the
carafe is liable to crack.
• Never attempt to brew the coffee in your coffee maker without adding the
water in a water tank.
• Never use warm or hot water to fill the water tank. Use cold water only.
• The carafe is designed for use with this coffee maker only. It must never
be used on a range top.
• The use of accessory attachments not recommended by the appliance
manufacturer may damage the unit, result in fire, electric shock, or injury to
persons.
• Do not use the appliance for any other purpose than its intended use.
• Do not use outdoors.
• Children should be supervised to ensure that they do not play with the
appliance.
• This appliance is not intended for used by persons (including children)
with reduced physical, sensory or mental capabilities, or lack of experi-
ence and knowledge, unless they have been given supervision or instruc-
tion concerning use of the appliance by a person responsible for their
safety.
• WARNING: TO REDUCE THE RISK OF FIRE OR ELECTRIC SHOCK, DO NOT
REMOVE THE WARMING PLATE. NO USER-SERVICEABLE PARTS ARE
INSIDE. REPAIRS SHOULD BE DONE ONLY BY AUTHORIZED PERSONNEL.
MEET YOUR 12-CUP COFFEE MAKER
SAVE THESE INSTRUCTIONS
FOR HOUSEHOLD USE ONLY
ELECTRICAL REQUIREMENTS:
Voltage: 120V / 60 Hz
Power: 950W
NOTE: Your Coffee Maker has a two-prong plug. To reduce the risk of electrical
shock, this plug will fit in an outlet only one way. If the plug does not fit in the
outlet, contact a qualified electrician. Do not modify the plug in any way.
Top lid
Water gauge
Funnel
Permanent
filter
Warming plate
Water tank
Carafe
lid
Carafe
handle
Glass
Carafe
On/Off switch
OPERATING NOTICE:
TIPS FOR THE PERFECT CUP OF COFFEE:
Clogging and backing up of water and/or coffee in the filter basket can
occur under any or a combination of any of the following conditions:
- The use of too finely ground coffee, using the Permanent filter in
conjunction with a paper filter, not properly cleaning the filter from coffee
grounds, or allowing coffee grounds to spill over the filter.
CAUTION: Never remove the Permanent filter during the brewing cycle,
even if no water is draining from the filter, since extremely hot water/coffee
can spill out and cause injury. If water/coffee is not draining from the filter
during the brewing cycle, unplug the unit and wait 10 minutes before open-
ing and checking the filter basket.
Element 1: WATER
A cup of coffee is 98% water. The quality of that water is as important as the
quality of your coffee. If water doesn’t taste good from the tap, it won’t taste
good in your coffee.
Element 2: COFFEE
While a cup of coffee is 98% water, all of the flavors come from the beans.
To achieve the same great taste you enjoy at a coffee bar, you need to use
the same coffee quality. If you choose to grind your beans, buy them fresh
and whole. Buy only about a two-week supply at a time, because once the
bean has been ground, its flavor degrades quickly. If you buy a larger quanti-
ty, reseal the package tightly, and store it in a refrigerator to maintain its
freshness.
Element 3: GRIND
The grind is essential for proper flavor extraction. If the grind is too fine,
over-extraction and bitterness will result. Too fine a grind may also clog the
filter. If the grind is too coarse, the water will pass through too quickly, and
the maximum flavor will not be extracted. When grinding your beans, we
recommend a medium-fine grind.
Element 4: PROPORTION
Coffee that is too strong or too weak is always a disappointment. Adjust the
water – coffee ratio as per your preference, but make sure that the coffee
powder and the water level do not exceed their MAXs, as shown on the
Permanent filter and the Water tank gauges.

BEFORE THE FIRST USE:
Check that all accessories are there, and the unit is not damaged. IMPORT-
ANT: make sure to perform these steps before brewing your coffee for the
first time!
Insert the Funnel, and Permanent filter, then place Carafe onto the Warming
plate. Fill water into the water tank to the MAX level and brew water several
times without coffee powder, then discard the water. Clean and dry all
detachable parts thoroughly according to the section “CLEANING AND
MAINTENANCE”.
HOW TO MAKE COFFEE:
1. Lift and open the Top lid. Fill the Water tank
with water.
2. Insert the Funnel into the front section of the
unit, ensuring the open tab is aligned at the
front edge of a coffee maker, and that the left
and right tabs sit firmly at the sides.
3. Insert Permanent filter into the funnel. Add
coffee powder into the Permanent filter, gently
shake the filter to distribute the coffee evenly,
then close the Top lid.
NOTE: The water level should not exceed the
MAX level, as indicated on the water gauge.
The water tank capacity is 12 cups (1,800 ml).
NOTE: For best results, always use cold, fresh
water.
NOTE: Please refer to the illustration on how to
place the funnel properly.
USING YOUR 12-CUP COFFEE MAKER

4. Place the Carafe with lid attached onto
the Warming plate.
5. Plug the power cord into the wall outlet.
6. Switch On/Off switch to ON to start
brewing coffee. The indicator light will
turn on.
NOTE: Do not exceed the MAX level
marked on the filter when adding coffee
powder (about 12 tablespoons). Refer to
the illustration.
7. Once the brewing process is completed you may serve the coffee.
NOTE: If you do not wish to serve immediately, leave the Carafe on the
Warming plate to keep warm.
NOTE: The amount of brewed coffee may be less than the water you have
added into the Water tank, as some water gets absorbed by the coffee
grounds. For an optimum coffee taste, serve it just after brewing. Be careful
while pouring the hot coffee to avoid scalding.
8. Always turn the coffee maker off and disconnect the power supply when
not in use.
NOTE: It will take about 10-12 minutes to brew 12 cups of coffee (maxi-
mum amount).
- The brewing process can be halted by switching the Power switch button
to OFF at any time. The appliance will continue brewing once the Power
switch button is switched to ON.
- You can take out the carafe, pour, and serve your coffee at any time. The
appliance will automatically stop dripping.
MAX

DAILY CLEANING:
• Always unplug the coffee maker and allow it to cool before cleaning.
• Remove the Permanent filter, Funnel, Glass carafe, and Carafe lid and wash them
in hot water and mild liquid detergent.
ATTENTION: Never use abrasive cleaners, steel wool pads, or other abrasive mate-
rials.
• Wipe the exterior surface (including the Warming plate) of the Coffee maker with
a soft, damp cloth. Do not use metal scouring pads or abrasive cleaners.
• Do not dry the inside of the water tank with a cloth, as lint may remain.
• Keep your coffee maker in a dry and cool place.
NOTE: The Glass carafe and Carafe lid are TOP-RACK dishwasher safe. However, it
is not recommended, as all parts washed in a dishwasher may fade in color over
time.
The Permanent filter and Funnel are not dishwasher safe.
CAUTION! Never immerse the coffee maker itself in water, in any other liquid, or
place in the dishwasher.
REMOVING MINERAL DEPOSITS:
Minerals (calcium) found in water will leave deposits in your coffee maker and will
affect its performance. It is recommended that you, at least once a month, remove
these deposits. If the water in your area is especially high in minerals, please do the
following every two weeks:
1. Fill the Water tank with 3 parts of cold water and 1 part of vinegar to the MAXI-
MUM level as indicated on the Water level gauge.
2. Make sure the funnel and the filter are in place.
3. Place the Glass carafe onto the warming plate.
4. Plug in the Coffee maker into the wall outlet, and press the Power switch button
to ON to start brewing.
NOTE: During the cleaning process, more steam occurs than during the coffee
brewing process.
5. Once the Glass carafe fills up with a cleaning solution, turn the Power switch to
OFF and allow the coffee maker to cool off for at least 3 minutes.
6. Open the Top lid, remove and rinse both Permanent filter, and Funnel, then put
them back in place, and close the Lid.
7. Pour the cleaning solution from Glass carafe back to the Water tank, and repeat
steps 3 – 5 again.
8. Once the coffee maker cools off, remove the Glass carafe, and discard the clean-
ing solution.
CLEANING & MAINTENANCE

9. Open the Top lid, remove and rinse both the Permanent filter and funnel, then put
them back in place.
10. Fill up the Glass carafe with clean, fresh water, and pour the water into the
Water tank.
11. Place the Glass carafe onto the Warming plate, and turn the Power switch to ON
start brewing. NOTE: This step will rinse the Coffee maker from the cleaning
solution.
12. Once done rinsing, wash the Permanent filter, Funnel, Glass carafe, and Carafe
lid with a warm soapy solution.
PREPARING FOR USE
Selecting and Measuring Coffee Ground:
Suggested Coffee Measurement Chart
To Brew Ground Coffee
For best results, use a level tablespoon for ground coffee measurement.
Make sure you use medium grind coffee for a perfect brew.
12 Cups
10 Cups
8 Cups
6 Cups
4 Cups
9 tbsp.
7.5 tbsp.
6.5 tbsp.
4.5 tbsp.
3 tbsp.
1 level tablespoon (tbsp) = 5g/0.17oz
1 cup = 5 fl.oz of brewed coffee
Use more or less coffee to suit your taste.
Müeller USA
168 Mason Way Unit #4A,
City of Industry, CA 91746
Telephone: (888) 632-9981
E-mail: [email protected]
Web: www.muellerdirect.com
Table of contents
Other Mueller Coffee Maker manuals

Mueller
Mueller Ultra Brew DC 750 User manual

Mueller
Mueller FRENCH PRESS User manual

Mueller
Mueller Ultra Brew DC 750 User manual

Mueller
Mueller ULTRA BREW DC-760 User manual

Mueller
Mueller U-700 User manual

Mueller
Mueller KC-21 User manual

Mueller
Mueller FRENCH PRESS MU-SSHYDPRESS User manual

Mueller
Mueller MLR010557N User manual

Mueller
Mueller SmoothBrew CB-375 User manual
Popular Coffee Maker manuals by other brands

Aicok
Aicok GC-CP001K instruction manual

Maidaid Halcyon
Maidaid Halcyon Barista Compact Installation and user manual

Jura
Jura IMPRESSA S9 One Touch Quick reference guide

Aroma Vero
Aroma Vero Alex PLUS User instructions

Melitta
Melitta Passione OT operating instructions

Cuisinart
Cuisinart 12-Cup Programmable Quick reference guide