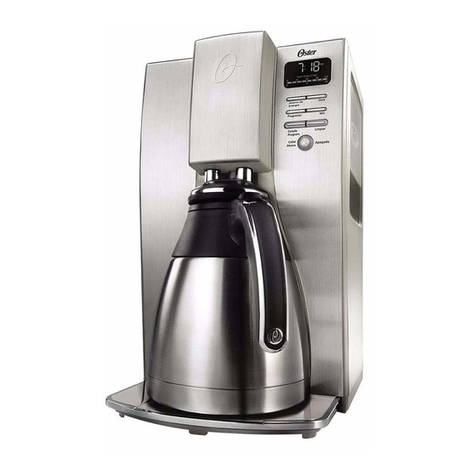
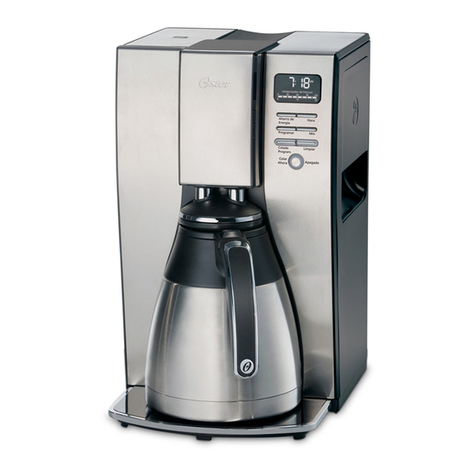
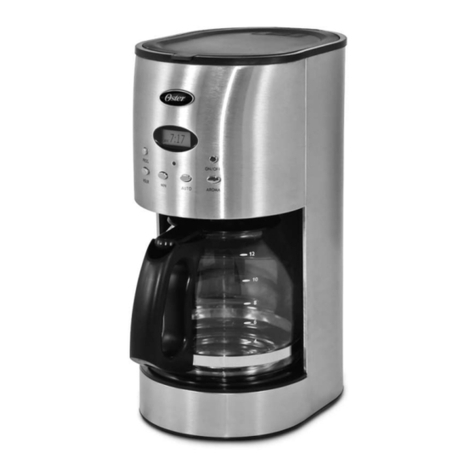
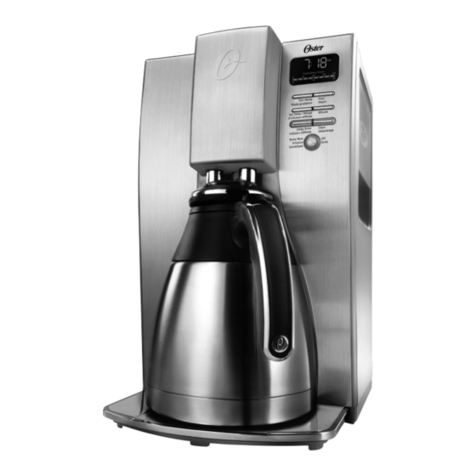
Oster BVSTDC10SS User manual

Instruction Manual
Manual de Instrucciones
BVSTDC10SS
PLEASE READ ALL INSTRUCTIONS BEFORE USING THIS APPLIANCE
LEA TODAS LAS INSTRUCCIONES ANTES DE USAR ESTE ARTEFACTO
MODELO
MODEL
COFFEE MAKER
CAFETERA

Español 1
PRECAUCIONES IMPORTANTES
Cuando se utiliza cualquier artefacto eléctrico siempre se deben seguir precauciones básicas
de seguridad para evitar el riesgo de incendio, descarga eléctrica y/o lesiones, incluyendo
las siguientes:
1. LEA TODAS LAS INSTRUCCIONES ANTES DE UTILIZAR SU CAFETERA.
2. NO toque las supercies calientes de la cafetera. Utilice las asas o perillas.
3. Para protegerse contra una descarga eléctrica, no sumerja el cable, el enchufe o la
cafetera en agua u otros líquidos.
4. Apague la cafetera, desenchúfela del tomacorriente cuando no esté en uso y espere que
se enfríe antes de colocarle o retirarle piezas y antes de su limpieza.
5. NO opere ningún artefacto con un cable o enchufe dañados, después de que el artefacto
haya fallado o si se cae al suelo o se daña de cualquier otra manera. Lleve el artefacto
al Centro de Servicio Oster® Autorizado más cercano para examinarlo, repararlo o para
ajustarlo mecánica o eléctricamente.
6. El uso de accesorios no recomendados o no vendidos por el fabricante del artefacto puede
causar incendios, descargas eléctricas o lesiones corporales.
7. NO la utilice al aire libre.
8. NO permita que el cable cuelgue del borde de la mesa o mostrador o que entre en contacto
con supercies calientes.
9. NO coloque este artefacto sobre o cerca de quemadores de estufas de gas o eléctricas, ni
dentro de un horno caliente.
10. Para desconectar, coloque el control en la posición de APAGADO, después remueva el
enchufe del tomacorriente.
11. Coloque la cafetera sobre una supercie dura y nivelada para evitar la interrupción del
ujo de aire debajo del artefacto.
12. NO utilice este artefacto para otro propósito que no sea para el que ha sido diseñado.
13. Este artefacto eléctrico no está destinado para ser usado por personas (incluyendo
niños) cuyas capacidades físicas, sensoriales o mentales estén disminuidas, o carezcan
de experiencia y conocimiento, a menos que una persona responsable por su seguridad les
haya supervisado o instruido en el uso de este electrodoméstico. Los niños deberán estar
bajo supervisión para cerciorarse de que no jueguen con el artefacto eléctrico.
14. Se requiere estricta supervisión cuando las personas discapacitadas o los niños utilicen
cualquier electrodoméstico o estén cerca de él. Este artefacto no ha sido diseñado para
funcionar mediante un temporizador externo ni un sistema de control remoto.
15. Este artefacto eléctrico ha sido diseñado para uso doméstico y aplicaciones similares
tales como: uso de los empleados en las áreas de la cocina en comercios, ocinas u otros
ambientes laborales; casas de campo; por huéspedes en hoteles, moteles, hosterías y otro
tipo de ambiente tipo hotelero.
ESTA UNIDAD ESTA DISEÑADA SOLO PARA USO DOMÉSTICO.

Español 2
CONSERVE ESTAS INSTRUCCIONES
Cuidado y Uso de la Jarra
Siga las siguientes instrucciones para reducir o eliminar el riesgo de romper la jarra:
a. Esta jarra está diseñada para ser utilizada con su cafetera Oster®, por lo tanto, nunca
debe ser usada sobre las hornillas de una estufa, horno ni TAMPOCO EN UN HORNO
MICROONDAS.
b. NO coloque la jarra de vidrio caliente sobre una supercie fría o mojada.
c. NO utilice una jarra quebrada o con un asa debilitada.
d. NO limpie la jarra con polvos limpiadores, bras metálicas o de lana o cualquier otro
material abrasivo.
e. Deseche la jarra inmediatamente si sus contenidos se evaporan al hervir.
f. Proteja la jarra de los, raspaduras o un manejo brusco.
ADVERTENCIA:
Para reducir el riesgo de incendio o descarga eléctrica, no quite ninguna cubierta para
dar servicio al artefacto. En el interior de la cafetera no se encuentra ninguna parte que
pueda ser reemplazada. Solamente el personal autorizado debe reparar la cafetera.
Instrucciones Especiales del Cable Eléctrico
1. El artefacto cuenta con un cable eléctrico corto como medida de seguridad para prevenir
el riesgo de tropezar, tirar o enredarse con un cable más largo.
2. Puede utilizar cables de extensión si se observan las precauciones adecuadas.
3. Si se usan los cables de extensión la capacidad nominal eléctrica del cable de extensión
debe ser el mismo del producto. Coloque el cable de extensión de manera que no cuelgue
del borde del mostrador o mesa donde pueda tirarlo un niño o pueda tropezar con él
accidentalmente.

Español 3
DESCRIPCIÓN DEL ARTEFACTO
1
3 4
8
5 6
2
7
910
1. Tapa del tanque de agua
2. Filtro permanente lavable
3. Cesta de Preparación
4. Indicador de nivel de agua
5. Placa de calentamiento
6. Jarra
7. Botón de programación
8. Botón de ‘’Auto’’ (encendido/apagado)
9. Botón de ajuste de la hr (hora)
10. Botón de ajuste de los min (minutos)

Español 4
UTILIZANDO SU ARTEFACTO
Ajuste del Reloj
Enchufe la cafetera en el tomacorriente. La pantalla mostrará 12:00. Para ajustar el reloj,
presione el botón “Prog” (Programar) hasta que aparezca la palabra “Horas” en la pantalla.
Luego debe presionar el botón de “HH” hasta que se alcance la hr (hora) deseada. Después
de congurar la hr (hora), presione el botón de “MM” para congurar los min (minutos). Una
vez ajustada la hr (hora) correcta, espere 10 segundos sin tocar los botones de hr (hora) y/o
min (minutos), el reloj desaparecerá de la pantalla.
Antes de Utilizar su Cafetera por Primera Vez
Antes de preparar el primer café, lave bien la jarra, la tapa de la jarra y el ltro permanente
extraíble en agua tibia con detergente suave. Enjuague y seque bien.
Limpie el interior de la cafetera con agua, repita el proceso dos veces (vea cómo preparar
café en los próximos capítulos). No coloque café molido en el ltro permanente para realizar
esta primera limpieza, solo agua.
Nota: Al nalizar el primer ciclo, apague la cafetera y espere diez min (minutos). Encienda el artefacto nuevamente y
vuelva a realizar otro ciclo de limpieza con una segunda jarra de agua.
Instrucciones de Uso
[01] Conecte la cafetera en el tomacorriente de acuerdo con el voltaje indicado en el artefacto.
[02] Llene la jarra con agua fría y luego viértela en el tanque. Usted encontrará las medidas
de la cantidad de agua deseada en el tanque de agua. No le agregue azúcar al agua.
[03] Agregue la cantidad de café en polvo en el ltro permanente de acuerdo con su
preferencia.
[04] Coloque el ltro permanente en su lugar y asegúrese de que la posición de bloqueo esté
correctamente colocada. Cierre la tapa.
[05] Coloque la jarra en la placa de calentamiento.
[06] Para encender la unidad, presione el botón de ‘’Auto’’ (encendido/apagado). La luz azul
se encenderá indicando que la cafetera está funcionando.
[07] Si desea servir el café antes de completar el ciclo, retire la jarra de la placa de
calentamiento. La cafetera detiene automáticamente el proceso y cuando regresa a la
posición original, comienza a funcionar de nuevo.
Nota: Si se interrumpe el proceso de preparación del café, la cafetera no se apagará después de retirar la jarra. Por lo
tanto, vuelva a colocar la jarra en la placa de calentamiento inmediatamente después de servir el café, para evitar
la acumulación y el desbordamiento de líquido dentro del ltro de café permanente.
[08] Mantenga la tapa de la jarra en su lugar para servir y para mantener el café a la
temperatura ideal.
[09] Para mantener el café caliente, vuelva a colocar la jarra en la placa de calentamiento
después de servir. La placa realiza un ciclo automático que mantiene la temperatura ideal

Español 5
mientras la cafetera está encendida.
Nota: La cafetera permanece encendida durante un máximo de 2 hr (horas), después de este tiempo se apagará
automáticamente.
[10] Apague la unidad cuando la jarra esté vacía o cuando la cafetera no esté en uso
presionando el botón de ‘’Auto’’ (encendido/apagado). Las luces apagadas indican que el
artefacto está apagado.
[11] Para preparar una segunda jarra de café, apague el artefacto y espere 10 min (minutos),
permitiendo que se enfríe.
Advertencia: si el artefacto no tiene tiempo suciente para enfriarse antes de volver a
usarlo, el agua en el tanque puede calentarse demasiado y hacer que el vapor escape
por la abertura, lo que puede causar quemaduras.
Advertencia: sirva el café lentamente para evitar fugas por el pico de la jarra.
Advertencia: Nunca recaliente el café colocando la jarra sobre una supercie caliente,
como un microondas o una estufa.
Advertencia: solo use agua ltrada en el tanque de agua. Nunca ponga café, azúcar ni
ninguna otra sustancia en el tanque de agua.
Programando su Cafetera
[01] Para programar su cafetera, presione el botón de “Prog” (Programar) hasta que aparezca
la palabra “Timer” en la pantalla. Luego presione el botón “HH” y ajuste la hr (hora) para
preparar el café, luego presione el botón “MM” para ajustar los min (minutos).
[2] Para activar la función automática, presione nuevamente el botón de ‘’Prog’’ (Programar)
hasta que se encienda la luz azul.
[03] Cuando llegue al tiempo establecido, la luz azul se apagará y la luz roja se encenderá,
lo que indica que el proceso de programar la preparación del café ha comenzado. Una
vez nalizado el proceso, la luz roja permanecerá encendida durante dos hr (horas) para
mantener el café a la temperatura ideal. Después de dos hr (horas), la cafetera se apagará.
Para apagar la cafetera, presione el botón de ‘’Auto’’ (encendido/apagado) dos veces hasta
que se apaguen todas las luces. Presione nuevamente el botón de “Prog” (Programar)
para regresar la cafetera al modo de programación. La luz azul se encenderá indicando
que el modo de programación está activado. Si desea programar otro momento, repita el
procedimiento anterior.
Limpiando Su Cafetera
Usted debe limpiar su cafetera cuando note cualquiera de las siguientes condiciones: Salida
excesiva de vapor o los tiempos de preparación aumentan considerablemente. Esto es
causado por la acumulación de residuos minerales que se encuentran en el agua. Si la
acción del colado se detiene antes de que toda el agua haya fuido del artefacto, la cafetera
requiere limpieza.
La frecuencia de limpieza de la cafetera depende de la dureza del agua que se utiliza para

Español 6
preparar el café. La siguiente tabla le indica un programa sugerido de limpieza.
NO TOQUE la placa calefactora durante el uso de la cafetera o cuando termine de
usarla, ni después de haberla apagado o desconectado del tomacorriente, la placa
calentadora puede estar caliente después de su uso, espere a que se enfríe antes de
tocarla.
Intervalos de Limpieza Sugeridos
Tipos de Agua Frecuencia de Limpieza
Agua suave Cada 80 ciclos de preparación
Agua dura Cada 40 ciclos de preparación
Para limpiar su cafetera utilizando vinagre:
[01] Vierta cuatro tazas de vinagre blanco sin diluir en el tanque de agua.
[02] Coloque el ltro permanente en la canasta removible (asegúrese que no haya café en el
ltro) y cierre la tapa de la cafetera.
[03] Coloque la jarra vacía sobre la placa de calentamiento. Asegúrese de que coloque la
jarra correctamente sobre la placa de calentamiento, para evitar la posibilidad de derrames.
[04] Presione el botón de ‘’Auto’’ (encendido/apagado) de manera que la luz se encienda.
[05] Cuando todo el vinagre haya uido dentro de la jarra, apague la cafetera.
Presione el botón de ‘’Auto’’ (encendido/apagado) de manera que la luz se apague.
[06] Repita los pasos 01 – 05.
[07] Deseche el vinagre. Llene la jarra con agua limpia y fresca y viértala en el tanque de
agua.
[08] Coloque la jarra sobre el plato calefactor y encienda la cafetera y permita que el ciclo
se complete.
[09] Deseche el agua de la jarra y apague la cafetera.
Repita los pasos del 07 – 09 para enjuagar todos los residuos de vinagre de la cafetera.
Limpieza de la Jarra:
El agua dura puede dejar manchas blancas en la jarra. El café puede cambiar estas manchas
a color café.
Para remover las manchas de la jarra:
[01] Llene la jarra con una solución de partes iguales de agua y vinagre blanco y deje que la
solución repose en la jarra durante aproximadamente 20 min (minutos).
[02] Deseche la solución, lave y enjuague la jarra.
No use limpiadores abrasivos que puedan rallar la jarra; las rayaduras pueden propiciar que
la jarra se rompa.
GUARDANDO SU ARTEFACTO
Permita que el artefacto se enfríe completamente antes de guardarlo. Si va a guardar la
cafetera por periodos prolongados, asegúrese de que la cafetera no contenga partículas o
residuos de alimentos. Almacene la cafetera en un lugar seco como encima de una mesa o
mostrador, o sobre una repisa.

English 1
IMPORTANT SAFEGUARDS
When using electrical appliances, basic safety precautions should always be followed to
reduce the risk of re, electric shock and/or injury to persons, including the following:
1. READ ALL INSTRUCTIONS BEFORE USING THE COFFEE MAKER.
2. DO NOT touch hot surfaces. Use handles or knobs.
3. To protect against re or electrical shock, do not put cord, plug or appliance in water or any
other liquid.
4. Turn the coffee maker off and unplug the power cord from the power source when the
coffee maker is not in use and before cleaning. Allow the coffee maker parts to cool before
putting on or taking off parts and before cleaning the appliance.
5. DO NOT operate any appliance with a damaged cord or plug or operate it after the appliance
malfunctions or has been damaged in any manner. Take this appliance to the nearest Oster®
Authorized Service Center for examination, repair or adjustment.
6. The use of accessory attachments not recommended or sold by the manufacturer may
cause re, electrical shock or injury.
7. DO NOT use outdoors.
8. DO NOT let the power cord hang over the edge of a table or counter or allow it to come in
contact with hot surfaces.
9. DO NOT place this appliance on or near a hot gas or electric burner, or in a heated oven.
10. To disconnect, turn the coffee maker OFF, then remove the power plug from wall outlet.
11. Place the coffee maker on a hard, at level surface to avoid interruption of air ow
underneath the appliance.
12. DO NOT use appliance for other than intended use.
13. This appliance is not intended for use by persons (including children) with reduced physical,
sensory or mental capabilities, or lack of experience and knowledge, unless they have been
given supervision or instruction concerning use of the appliance by a person responsible for
their safety. Children should be supervised to ensure that they do not play with the appliance.
14. Close supervision is necessary when any appliance is used by or near children, or
incapacitated individuals.
15. This appliance is not intended to be operated by means of an external timer or separate
remote-control system.
16. This appliance is intended to be used in household and similar applications such as: staff
kitchen areas in shops, ofces and other working environments farmhouses by clients in
hotels, motels and other residential type environments bed and breakfast type environments.
THIS UNIT IS FOR HOUSEHOLD USE ONLY.

English 2
SAVE THESE INSTRUCTIONS
Carafe Use and Care
Follow the instructions below to reduce or eliminate the chance of breaking the carafe:
a. This carafe is designed for use with your Oster® coffee maker and therefore must never be
used on a range top or in any oven, INCLUDING A MICROWAVE OVEN.
b. DO NOT set a hot carafe on a wet or cold surface.
c. DO NOT use a cracked carafe or a carafe having a loose or weakened handle.
d. DO NOT clean the carafe with abrasive cleansers, steel wool pads or other abrasive
materials.
e. Discard the carafe immediately if it is ever boiled dry.
f. Protect the carafe from sharp blows, scratches or rough handling.
WARNING:
To reduce the risk of re or electric shock, do not remove any service covers. There are
no user serviceable parts inside the coffee maker. Only authorized personnel should
repair the coffee maker.
Special Cord Set Instructions
1. Ashort power-supply cord is provided to reduce the risk resulting from becoming entangled
in or tripping over a longer cord.
2. Extension cords are available and may be used if care is exercised in their use.
3. If an extension cord is used, the marked electrical rating of the extension cord must be
the same as the product. The resulting extended cord must be arranged so that it will not
drape over the countertop or tabletop where it can be pulled on by children or tripped over
accidentally.

English 3
DESCRIPTION OF THE APPLIANCE
1
3 4
8
5 6
2
7
910
1. Water Reservoir Lid
2. Permanent/Washable Filter
3. Brew Basket
4. Water Reservoir
5. Warming Plate
6. Carafe
7. Programming Button
8. Auto Button (On/Off)
9. Hr (hour) Setting Button
10. Min (minute) Setting Button

English 4
OPERATING INSTRUCTIONS
Setting the Clock
Plug the coffee maker into the outlet. The display will show “12:00.” To adjust the clock, press
the “Prog” (Program) button until the word “Horas” appears in the display. Then the “HH”
button must be pressed until the desired time is reached. After setting the time, press the
“MM” button to adjust the min (minutes). Set the correct time, wait for 10 seconds without
touching the hr (hours) and/or min (minutes) buttons. The word “Clock” will disappear from
the display.
Before Using For The First Time
Before brewing the rst coffee, thoroughly wash the carafe, the lid of the carafe and the
permanent lter in warm water with mild detergent. Rinse and dry well.
Clean the inside of the coffee maker using water. Repeat the process twice (see “How to
Brew Coffee” in the next chapters). Do not put the coffee grounds in the lter during the rst
cleaning, just water.
Note: At the end of the rst cycle, turn off the coffee maker and wait for ten min (minutes). Turn the appliance on again
and run a second cycle of water through the carafe.
Instructions for Use
[01] Plug the coffee maker into the outlet according to the voltage indicated on the appliance.
[02] Fill the carafe with cold water and then pour it into the reservoir. In the water reservoir,
you will nd measurements of the desired amount of water. Do not add sugar to water.
[03] Add the amount of coffee powder according to your preference.
[04] Place the permanent lter in place and carefully observe that the lock position is correct.
Close the lid.
[05] Place the carafe on the warming plate.
[06] To switch the appliance on, press the ‘’Auto’’ button (On/Off). The blue light will turn on
indicating that the appliance is operating.
[07] If you wish to serve the coffee before completing the cycle, remove the carafe from the
warming plate. The coffee maker automatically stops the process. When it returns to the
original position, it is ready to operate.
Note: If the coffee brewing process is interrupted, the coffee maker will not turn off after removing the carafe. Therefore,
place the carafe back onto the warming plate immediately after serving the coffee. This will avoid accumulation
and overow of liquid inside the permanent coffee lter.
[08] Keep the carafe lid in place to serve and keep the coffee at the ideal temperature.
[09] To keep the coffee warm, place the carafe back on the warming plate after serving. The
warming plate automatically cycles, maintaining the ideal temperature while the coffee maker

English 5
is on.
Note: The Coffee Maker will remain on for a maximum of 2 hr (hours), after which time it will turn off automatically.
[10] Turn off the appliance when the coffee maker is empty or when the coffee maker is not
in use by pressing the “Auto’’ button (On/Off). The light turned off indicates that the appliance
is switched off.
[11] To cycle a second coffee pot, turn off the appliance and wait for 10 min (minutes), allowing
the appliance to cool.
Attention: If the appliance does not have enough time to cool down before being used
again, the water in the reservoir may become too hot, causing vapor to escape through
the opening, which may cause burns.
Attention: Serve the coffee slowly to avoid leaking from the carafe spout.
Warning: Never reheat the coffee by placing the carafe on a hot surface such as a
microwave or stove.
Attention: Only use ltered water in the water reservoir. Never put coffee, sugar or any
other substance in the water reservoir.
Programming Your Coffee Maker
[01] To program your coffee maker, press the “Prog” (Program) button until the word “Timer”
appears in the display. Then press the “HH” button and set the time for your coffee. Next,
press the “MM” button to adjust the min (minutes).
[02] To enable the automatic function, press the “Prog” (Program) button until the blue light
comes on.
[03] When the set time is reached, the blue light will turn off and the red light will turn on,
indicating that the programmed coffee brewing has started. Once it nishes brewing, the red
light will stay on for up to two hr (hours), keeping the coffee at the ideal temperature. After two
hr (hours) the coffee maker will automatically switch off. To turn off the coffee maker, press the
‘’Auto’’ button (On/Off) twice until all the lights go out. Press the “Prog” (Program) button again
to return the coffee maker to the programmed mode. The blue light will remain on to indicate
that programmable mode has been activated. If you want to schedule to brew another period
of time, please follow the steps above.
CLEANING INSTRUCTIONS
Your coffee maker must be cleaned when you begin to notice excessive steaming, or the
brewing time increases considerably. This condition is caused by a build-up of lime and
mineral deposits from your water. If the brewing action stops before all the water has been
cycled out of the machine, the appliance requires cleaning.
The frequency of cleaning depends on the hardness of water used. The following table gives

English 6
a suggested cleaning schedule.
DO NOT TOUCH the heating plate during use of the coffee maker or when you nish
using it, or after turning it off or disconnected from the outlet, the heating plate may be
hot after use, wait for it to cool before touching it.
Suggested Cleaning Interval
Type of Water Cleaning Frequency
Soft Water Every 80 Brew Cycles
Hard Water Every 40 Brew Cycles
To Clean Your Coffee Maker Using Vinegar:
[01] Pour four cups of undiluted white household vinegar into the water reservoir.
[02] Place the permanent lter into the removable basket and close the lid.
[03] Place the empty carafe on the warming plate. Make sure to accurately place the carafe
on the warming plate to avoid the possibility of overow.
[04] Start the brew cycle.
[05] Push the ‘’Auto’’ button (On/Off) to turn on the coffee maker.
[06] When all the vinegar has owed into the carafe, turn the coffee maker off by pushing the
‘’Auto’’ button (On/Off) and let the vinegar stand for 30 min (minutes).
[07] Repeat Steps 1 – 6.
[08] Discard the vinegar. Fill the carafe with clean water and pour it into the water reservoir.
[09] Place the carafe on the warming plate and begin the brew cycle.
[10] Discard the water in the carafe and turn the coffee maker off by pushing the ‘’Auto’’ button
(On/Off).
If necessary, repeat steps 8 – 10 to ush all traces of vinegar from the coffee maker.
Cleaning the Carafe:
Hard water can leave a whitish stain on the carafe. Coffee may then turn this stain brown.
To Remove Carafe Stains:
[01] Fill the carafe with a solution of equal parts water and vinegar and let the solution stand
in the carafe for approximately 20 min (minutes).
[02] Discard the solution and wash and rinse the carafe.
Do not use harsh abrasive cleansers that may scratch the carafe; scratches may cause the
carafe to break.
STORING YOUR APPLIANCE
Allow the appliance to cool completely before storing. If storing the coffee maker for long
periods of time, make certain that it is clean and free of food particles. Store the coffee maker
in a dry location such as on a table or countertop or cupboard shelf.

Notas/Notes

Notas/Notes

© 2019 Sunbeam Products, Inc. Todos los derechos reservados.
Garantía limitada de un año – por favor consulte los detalles en el inserto.
© 2019 Sunbeam Products, Inc. All rights reserved.
One Year Limited Warranty - please see insert for details.
www.oster.com
P.N. 200760
Impreso en China
Printed in China
[REV. 00]
La siguiente información es para México solamente.
The following information is intended for Mexico only.
Cafetera Oster®
MODELO: BVSTDC10SS-013
IMPORTADOR: NEWELL BRANDS DE MÉXICO S.A. DE C.V.
AVE. JUÁREZ Nº 40-201, COLONIA EX HACIENDA SANTA MÓNICA,
TLALNEPANTLA 54050, ESTADO DE MÉXICO
RFC SME570928G90
TEL. 5366-0800
PAÍS DE ORIGEN: CHINA
PAÍS DE PROCEDENCIA: CHINA, E.U.A.
CONTENIDO: 1 PIEZA
CARACTERÍSTICAS ELÉCTRICAS
60 Hz 127V~ 800 W
Características eléctricas de los modelos de la serie: BVSTDC10SS-XXX
Electric characteristics of series models: BVSTDC10SS-XXX
Voltaje/Voltage Frecuencia/Frequency Potencia/Power
127 V 60 Hz 800 W
220 V 50/60 Hz 800 W
220 V 50 Hz 800 W
XXX en donde X es cualquier numero entre 0 y 9 o cualquier letra entre A y Z.
XXX where X is any number between 0 and 9 or any letter between A and Z.
Table of contents
Languages:
Other Oster Coffee Maker manuals

Oster
Oster BVST-RDXSS43 User manual

Oster
Oster Designer 3272 User manual

Oster
Oster BVSTDCS12B User manual

Oster
Oster Counterforms 4281 User manual

Oster
Oster 3196 User manual

Oster
Oster BVSTPSTX95-033 User manual

Oster
Oster RF Series User manual

Oster
Oster 3291 User manual

Oster
Oster BVSTEM6601R User manual

Oster
Oster BVSTEM6702B User manual

Oster
Oster Designer 3274 User manual

Oster
Oster BVSTEJX Series User manual

Oster
Oster BVSTEM6601 User manual

Oster
Oster BVSTDC4401 User manual

Oster
Oster BVSTDCMV13 User manual

Oster
Oster BVSTEM8000RD User manual

Oster
Oster BVSTDC3401 User manual

Oster
Oster 3296 Technical specifications

Oster
Oster 3305-33 User manual

Oster
Oster BVSTEM6601R User manual