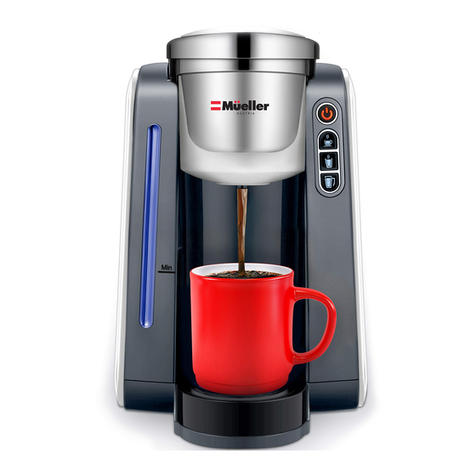
Mueller KC-21 User manual

MANUAL MLR010004N
COMPACT AND FAST

IMPORTANT SAFETY INSTRUCTIONS | 32 |IMPORTANT SAFETY INSTRUCTIONS
CAUTION!
There is extremely hot water/
steam in the Capsule Holder
during the brewing process.
To avoid the risk of injury, do not
lift the Handle to open the Brew
Head during the brewing process.
When using electrical appliances, basic safety precautions
should always be followed to reduce the risk of fire, electric
shock, and/or injury to persons, including the following:
–Do not touch hot surfaces. Use handles and knobs when
available. Scalding may occur if the Coffee Maker is moved or
opened or Capsule Holder is disturbed during brewing cycles.
–Do not place on or near a hot gas or electric burner or in
a heated oven.
–For indoor use only.
–To protect against fire, electric shock, and injury, do not
immerse cords, plugs or the appliance in water or any
other liquid.
–Use only water in this appliance! Do not put any other liquids
or foods in the Water Reservoir.
–Unplug power cord when not in use and before cleaning.
Allow to cool down before putting on or taking off parts,
and before cleaning the appliance.
–Do not operate any appliance with a damaged cord or plug or
after the appliance malfunctions or is damaged in any manner.
Contact Mueller Customer Service to arrange for replacement
or repair.
–Do not let the cord hang over the edge of a table or counter,
or touch any hot surfaces.
–Always grasp the power plug to remove it from the wall outlet.
Do not pull on the power cord itself.
–This appliance is not intended for use by persons (including
children) with reduced physical, sensory or mental capabilities,
or lack of experience and knowledge unless they have
been given supervision or instruction concerning use of the
appliance by a person responsible for their safety.
–Do not open the Coffee Maker while brewing is in progress.
–To disconnect, turn the machine off and then remove the plug
from a wall outlet.
–Do not open the Brew Head or remove the mug until the
“On/Off” button stops flashing.
–Do not use appliance for anything other than its intended use.
IMPORTANT!
You may find some water remaining in the appliance.
To ensure that this appliance works perfectly, it was
tested using water before leaving the factory.
Please read this instruction manual and the Safety Instructions
before operating this appliance!
This operaating manual cannot cover all possible circumstances.
For further information or in case of problems not adequately
covered in this operating manual, please contact
Mueller Customer Service.
CAUTION!
There are two sharp needles that
puncture the capsule, one above
the Capsule Holder (located in the
Brew Head) and the other at the
bottom of the Capsule Holder. To
avoid the risk of injury, do not put
your fingers in the Capsule Holder.
IMPORTANT SAFETY
INSTRUCTIONS
Risk of Fire or Electric Shock.
Do not open. No user serviceable
parts inside. Repair should be done
by authorized service personnel only.
ELECTRICAL
SHOCK HAZARD
FOR HOUSEHOLD USE ONLY
SAVE THESE INSTRUCTIONS
HOW TO MAKE COFFEE | 54 | OvERvIEW OF PARTS
OVERVIEW OF PARTS
Handle
Outlet/Gasket
Water Boiler
“On/Off”
Button
Brew Head
Filter
Capsule Holder
Dispenser
Drip Tray
BEFORE FIRST USE
Before you use your Single Serve
Coffee Maker for the first time,
perform an initial cleansing brew
by running clean water through the
brewing cycle without using
a capsule.
Add a mug on the Drip Tray to catch
the cleaning water. Afterwards, dump
the water and clean your mug.
NOTE: Mug and single use coffee capsules not included.
1Place the Coffee Maker on
a flat surface and plug it into
a power outlet.
2Lift the Brew Head by pulling
on the Handle.
3Fill the Water Boiler with
the desired amount of
water (10 oz maximum) and
insert a capsule into the
Capsule Holder.
4Place a mug under the
Dispenser on the Drip Tray.
Brewing into a tall
mug (up to 4.1 in)
To brew into a tall mug,
simply remove the
Drip Tray and place
the tall mug underneath
the Dispenser.
HOW TO MAKE COFFEE
NOTE: Do not remove the foil
cover or puncture the capsule.
CAUTION!
Avoid the sharp piercing pins located inside the Brew
Head and at the bottom of the Capsule Holder.
CAPSULE
CAPSULE
CAPSULE
CAPSULE
CAPSULE

COFFEE BEST PRACTICES | 76 | HOW TO MAKE COFFEE
5Close by pressing down on top
of the Handle, making sure it is
completely closed. The capsule
will be punctured on top and
the bottom when closing the
Brew Head.
CAPSULE
6Press the “On/Off” button to start
brewing coffee. During brewing,
the “On/Off” button light will
flash. The brewing process will
take about 3 minutes.
When the brewing is complete,
the Coffee Maker will stop
automatically and the “On/Off”
button light will turn off.
CAPSULE
7Prior to opening the Brew Head,
always let residual drips/steam
evaporate completely from
the Dispenser.
8Wait for the Coffee Maker to
cool before removing the used
capsule as they remain hot
after the brewing cycle.
CAPSULE
CAUTION!
To avoid potential
scalding, do not lift
the Handle while the
machine is brewing.
COFFEE BEST PRACTICES
–The right water makes a difference. For best tasting coffee/tea/cocoa,
we recommend using bottled or filtered water.
–Do not use distilled or reverse osmosis water.
–Water quality varies. If you notice an undesirable taste in your coffee
(such as chlorine or other mineral taste), we recommend you consider
using bottled water or water from a filtration system.
–A clean coffee maker is essential. Regularly clean this appliance using
the “Cleaning and Maintenance” section.
–Do not reuse a capsule since this will significantly reduce the flavor.
CLEANING AND MAINTENANCE
De-Scaling
To keep your Coffee Maker looking and performing well, regularly clean the
external and internal components. This includes periodic descaling.
Mineral content in water varies from place to place. Depending on the
mineral content of the water in your area, calcium deposits or scale may
build up in the appliance. Scale is non-toxic, but left unattended, it can
hinder Coffee Maker performance. De-scaling the appliance helps maintain
the heating element and other internal parts of the Coffee Maker that come
in contact with water.
How to De-Scale the Coffee Maker:
Make sure you have at least 8 oz of undiluted white
vinegar on hand. You will also need access to a sink
and a 10 oz ceramic mug (do not use a paper mug).
STEP 1
VINEGAR
8 OZ
Fill the Water
Boiler with 8
oz of undiluted
white vinegar
and place
a ceramic mug
on the Drip Tray.
STEP 2
VINEGAR
8 OZ
Close the Brew
Head and brew into
the mug without
adding a capsule.
STEP 3
VINEGAR
8 OZ

CLEANINg THE CAPSULE HOLDER | 98 | CLEANINg ExTERNAL PARTS
Press the “On/Off”
button to start
cleaning. When
liquid starts to
dispense, press the
“On/Off” button again to turn the
appliance off. Allow the appliance
to sit for at least 30 minutes.
STEP 4
VINEGAR
8 OZ
After 30 minutes, press
the “On/Off” button
to complete the brew
without a capsule. Empty
the contents of the mug
into the sink. Be careful as
contents may be hot!
STEP 5
Finally, the appliance needs to be cleaned with water to remove the
descaling solution. Fill the Water Boiler with 8 oz of bottled water, close
the Brew Head without adding a capsule, place a mug on the Drip
Tray Plate and perform a brew. You may need to perform additional
water rinse cycles if you notice any residual taste.
STEP 6
CLEANING EXTERNAL PARTS
IMPORTANT!
Make sure the Coffee Maker is unplugged before
cleaning. Regular cleaning of the Coffee Maker external
components is recommended.
Clean Your Coffee Maker Regularly
To keep your Coffee Maker looking and performing its best, be sure to clean
the external and internal components on a regular basis.
–Never immerse the appliance in water or other liquids.
–Clean the housing and all external parts with mild soap and a damp,
non-abrasive cloth.
–For the warming plate, use a clean, damp cloth. Never use rough, abrasive
materials or cleaners to clean the warming plate.
Drip Tray
The Drip Tray catches any liquid overflow. Slide
the Drip Tray toward you to remove it. To avoid
spilling, keep the Drip Tray level. Hand wash
the removable Drip Tray with warm, mild soap
and water. Allow to dry before reinserting it.
NOTE: Empty the Drip Tray before any long-term storage or inactivity.
CLEANING THE CAPSULE HOLDER
1Lift the Handle to open the
Coffee Maker.
2Grasp the top of the
Capsule Holder. Gently twist
counterclockwise to unlock it,
then pull straight up for removal.
3Wash the Capsule Holder.
It is top rack dishwasher safe
or wash by hand with mild
soap and water.
4Allow the Capsule Holder
to dry before reinserting it.
5Reinserting is the reverse of
removal. Ensure you align the
Capsule Holder rib with the
recessed area in the Coffee
Maker when you insert it.
6Give a gentle clockwise twist
until you hear the Capsule
Holder click into its locked
position.
CLEANING THE FILTER
1Remove the Filter basket
by grasping its handle and
lifting straight up.
2Wash the Filter in warm, soapy
water and rinse thoroughly.
3After cleaning, replace the Filter
in the Filter holder and press
firmly to make sure it closes
securely.

1-YEAR LIMITED WARRANTY | 1110 | STORAgE
Problem Possible Cause Solution
Coffee Maker
does not have
power.
The Coffee Maker
is not plugged in
securely.
Plug into a different
outlet.
Coffee Maker
will not brew.
The Brew Head is not
closed properly or not
closed at all.
Close the Brew Head by
pressing firmly down
on the Handle.
Brewing
a partial mug.
Capsule Holder or the
Filter may be clogged.
Remove and clean the
Capsule Holder and the
Filter if necessary and
rinse it under faucet.
Calcium or scale is
built up in the Coffee
Maker.
De-scale the Coffee
Maker.
This product is warranted to be free from defects in material and workmanship
under normal use and service for one year from the date of the original
purchase with the receipt. The manufacturer’s obligation shall be limited to
repairing or replacing any part of the product that is defective. Such warranty
shall not apply to damages resulting from accidents, abuse, or misuse.
TROUBLESHOOTING
1YEAR LIMITED WARRANTY
SPECIFICATIONS
STORAGE
After use, allow some time for the unit to cool before putting it away. Empty
the Water Reservoir and the Drip Tray before storing your Coffee Maker.
This appliance accepts single use capsules only.
Model
Number Voltage Power Pump
Pressure Water Tank Capacity
KC-21 120 V~
60 Hz 800 W Max 3 Bars 10 oz
If there is any problem with Mueller
Single Serve Coffee Maker, please
contact Customer Service.
MUELLERDIRECT.COM
SUPPORTMUELLERDIRECT.COM
8886329981

37 E 18TH STREET
NEW YORK, NY 10003
UNITED STATES
MUELLERDIRECT.COM
SUPPORT@MUELLERDIRECT.COM
888-632-9981
SKU: MLR010004N MADE IN CHINA
COMPACT AND FAST
This manual suits for next models
1
Table of contents
Other Mueller Coffee Maker manuals

Mueller
Mueller FRENCH PRESS MU-SSHYDPRESS User manual

Mueller
Mueller U-700 User manual

Mueller
Mueller SmoothBrew CB-375 User manual

Mueller
Mueller FRENCH PRESS User manual

Mueller
Mueller Ultra Brew DC 750 User manual

Mueller
Mueller MLR010557N User manual

Mueller
Mueller Ultra Brew DC 750 User manual

Mueller
Mueller DC-550 User manual

Mueller
Mueller ULTRA BREW DC-760 User manual