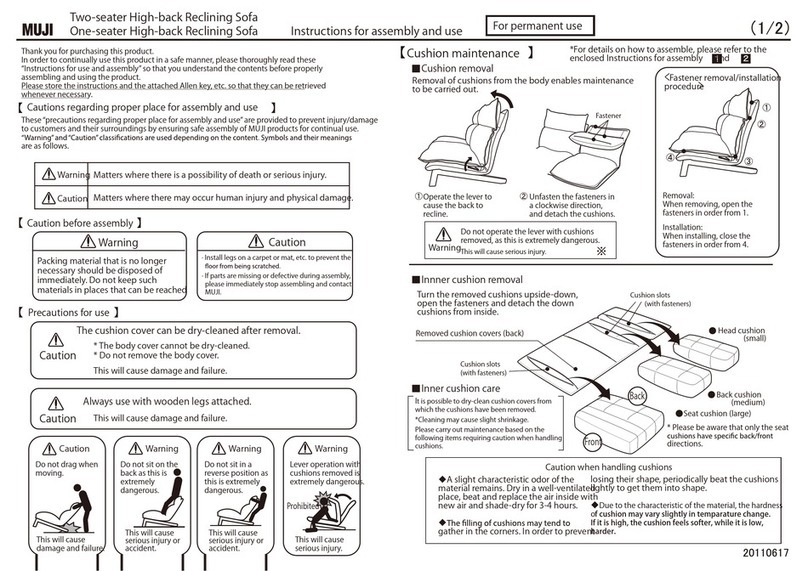
Two-seater High-back Reclining Sofa
One-seater High-back Reclining Sofa Instructions for assembly and use For permanent use
Thank you for purchasing this product.
Please read this sheet before assembly and
use.
Please keep this sheet in a safe place for
Please make sure you read this before assembly
* When assembling, please reserve sucient space and exercise
caution by laying covers, etc. to prevent ooring and existing
furniture from becoming scratched.
* Assembly should be carried out by at least two persons.
* Do not use power tools when installing tting parts.
* A screwdriver is not included, so please use your own Phillips head
screwdriver.
* The assembly illustration shows the two-seater model, but
the same assembly also applies for the one-seater.
Cautions
Cautions
List of parts
Assembly of body and wooden legs
How to recline back/headrest
Lever installation
Completed assembly Precautions for use
Back angle adjustment Headrest angle adjustment
*Pleaseuseproperlyaftercheckingtheenclosed“Precautionsforuse”.
Useontatamimatsandwooden
flooring
Ifthesofaissetandusedinthesame
placeforalongtime,theflooring
surfacebeneaththesofa'slegsmay
becomedentedordamaged.
Alwaysplacethesofaontopofa
carpetormat,etc.
Whenloweringtheback:
Lowerthebackwiththeleverliftedandset
theanglebyreleasingtheleveratyour
preferredangle.
Whenraisingtheback:
Thebackwillberaised
whentheleverislifted.
Theheadrestcanbeadjustedmanuallyto6
differentlevels(includingwhenflat).
Matchwiththebackrecliningangleto
reachyourpreferredangle.
Lock
20110706
Inthisposition,
thegearlock
willbereleased.
Maintenanceinspections
Periodicallyinspectandtightenscrews.
Body
Wooden
Hexagonal
Spring washers
Two-seater
One-seater
Spanner
Remove
Remove
Step1
Step3 Step4
Step2
Felt
Lever
Lever
concealmen
Lever concealment
Lever
concealmen Surface fastener
Remove the surface fastener
for lever concealment on the
left/right of the body.
Install and x the lever to the
lever attachment tting using the
Phillips screws.
The lever attachment tting on the
body is visible, so please remove the
Phillips screws using your own
Once again close the lever concealment,
attach the surface fastener to the cover,
and rmly close.
Felt sticker
2S: Two-seater/1S:
Lever
Phillips screws
2S
2S 1S 2S 1S
2S
1S
1S
* Note 1
* Note 1 * Note 1
* Note 1
Parts , and are assembled in the
body in advance. Before assembling, please
remove using the spanner and your own
Phillips head screwdriver.
When installing the hexagonal bolts in the four points, rst
temporarily tighten all of the points and then tightly screw and x
Ax the felt stickers to the base of the wooden legs.
Turn the body upside-down, loosen
the hexagonal bolts and spring
washers with the spanner, and remove
these from the
body.
Align the front and back of the wooden
legs as per the illustration on the right.
Lightly screw the hexagonal bolts and
springs washers into all four of the screw
holes in the body through the screw
Please carry out assembly
work on top of covers such as
carpets, etc. in order to * Please use your own Phillips
head screwdriver.
* The lever can be installed on
the left or the right.
6
l
e
v
e
l
s
R
e
l
e
a
s
e


