Multipick ATT User manual

1
Instructions
MULTIPICK ATT
EN
Valid as from: 1/2018
Originalbetriebsanleitung in
deutscher Sprache. Für künftige
Verwendung aufbewahren!
Distributed by:
Multipick
Godesberger Str. 51
D-53175 Bonn
Tel: +49 (0) 228-39187-15
Fax: +49 (0) 228-39187-41
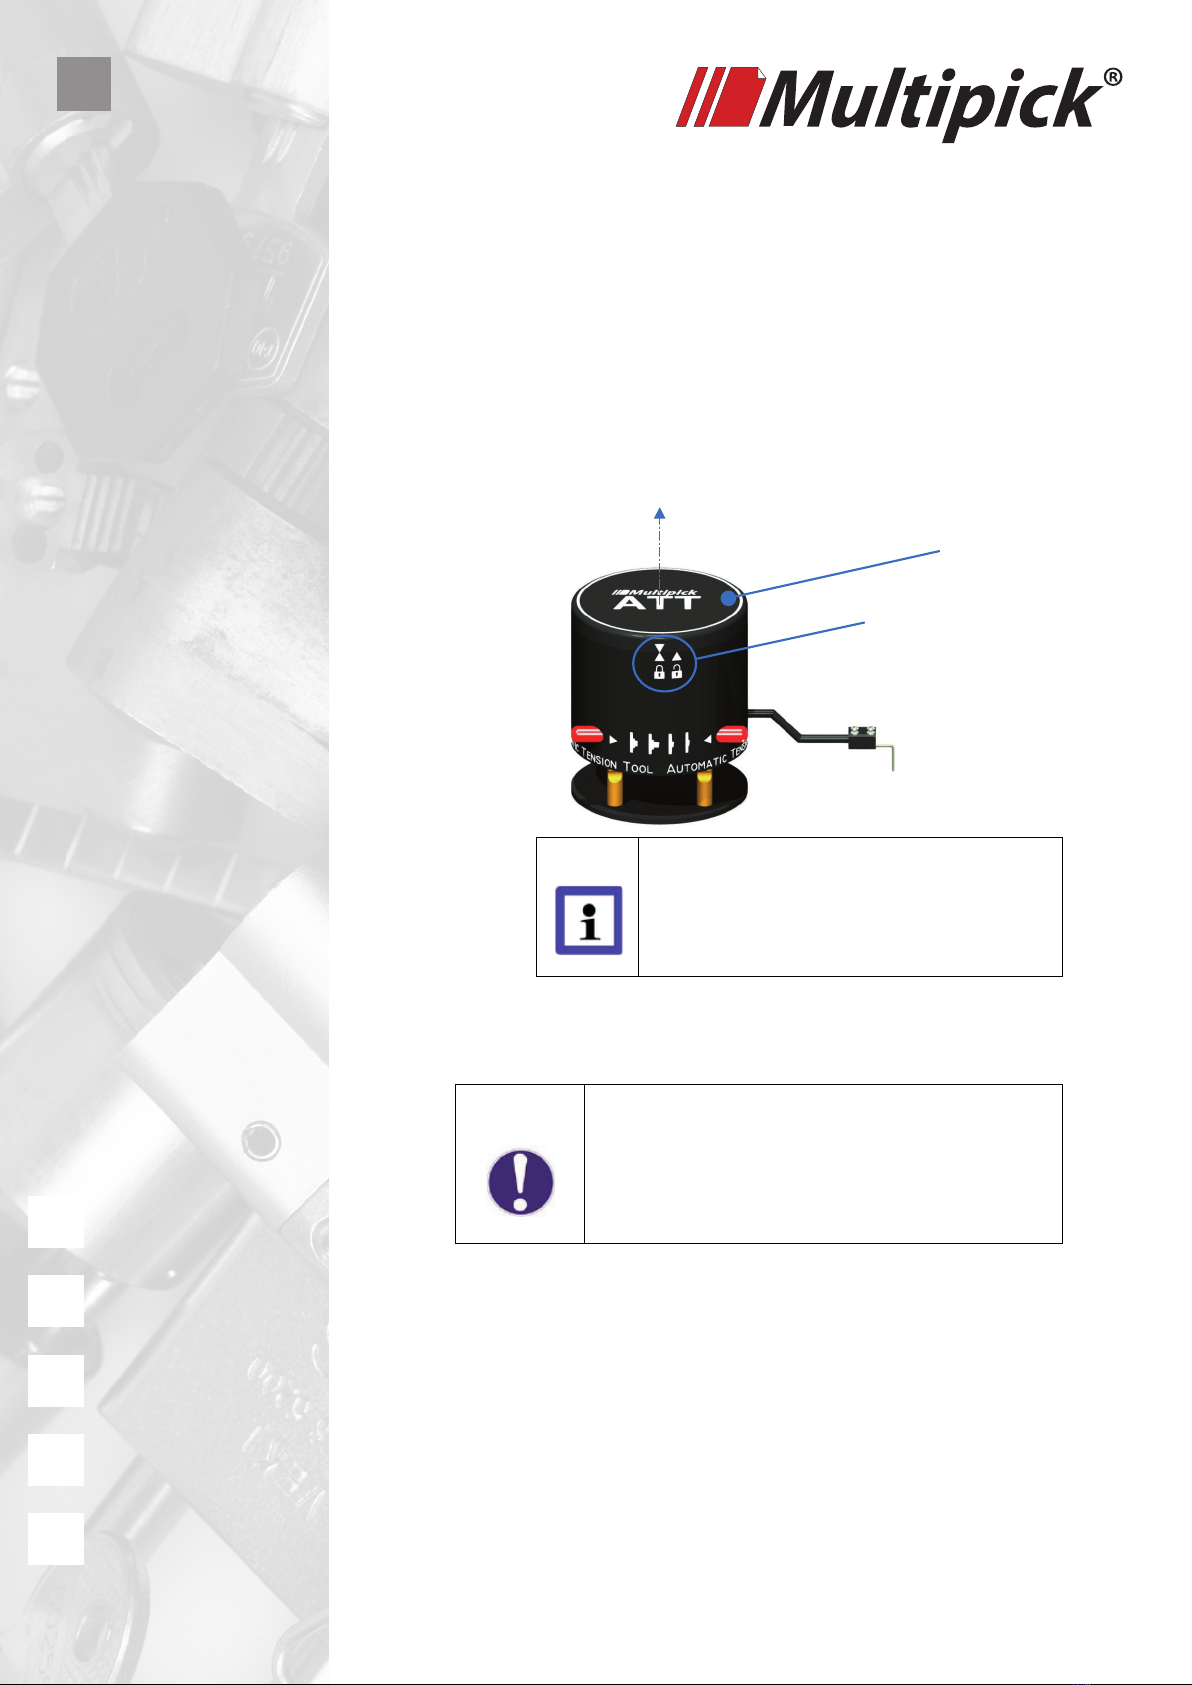
1. General
Congratulationsonyourpurchaseoftheworld'sfirstanduniqueelectrictensioner,the
MULTIPICKATT-Thekeytechnologyforasuccessfulcylinderlockopening!
WiththenewMULTIPICKelectrictensioner,almosteverylockcanbeopenedincombination
withalockpickingtool,suchastheMULTIPICKMHPPRO.Inadditiontogeneral(safety)
instructions,thefollowingguidancelistsanddescribesthefunctionsandoperatinginstructions
oftheelectrictensionerMULTIPICKATT.
2. Preface
!These operating instructions must be available to the operator at all times.
!These operating instructions are intended to make it easier for you to:
oFamiliarize yourself with the MULTIPICK ATT,
oOperate the MULTIPICK ATT accordingly to its intended purpose,
oMake optimum use of the MULTIPICK ATT.
!Please read and follow these operating instructions carefully.
!It contains important information for:
osafe and
oproper operation of the Multipick ATT.
!Your observance is the assuarance:
ofor the safety of the operator
ofor the prevention of dangerous situations
ofor a flawless operation of the MULTIPICK ATT.
!The manufacturer assumes no liability for damage and malfunctions resulting from the non-
observance of these operating instructions
3. Warranty
The warranty regulations, according to the general terms and conditions of MULTIPICK service, apply
in the version valid at the time of delivery.

2
Safety - Accident Prevention
1. Warnings and Special Indications
In this manual, the following terms &signs are used for safety warnings and indications:
DANGER!
Indicates an imminent danger. Non-compliance with the notice
may lead to serious injury or death.
WARNING!
Indicates a potentially dangerous or hazardous situation.
Failure to comply with this notice can cause serious injury.
CAUTION!
Indicates a potentially dangerous situation. Failure to comply
with this notice can cause minor injury.
ATTENTION!
Special instructions and prohibitions for damage prevention.
NOTE!
Specific
information regarding the effective and smooth
operation as well as important additional information.
2. Intended Use
!The MULTIPICK ATT may only be used for tensioning/opening of cylinder locks. Any
other use is considered improper and therefore should be avoided! The
manufacturer/supplier shall not be liable for any resulting damage. The risk is borne
by the user alone.
!Before using the MULTIPICK ATT other than the above-mentioned application area,
the customer service of MULTIPICK service is to be consulted, otherwise the warranty
shall become null and void.
!Usage for the intended purpose also includes complying with the operating manual.

3
!The MULTIPICK ATT may only be operated, maintained and serviced by qualified
personnel.
!The MULTIPICK ATT may only be used with original accessories from MULTIPICK
Service (www.MULTIPICK.com).
3. Improper Use
!Utilisingthe product without reading and following the instruction manual.
!Utilising the product beyond the operating limits (lawful use,etc.).
!Opening/ Dismantling the MULTIPICK ATT.
!Deliberate or careless handling of the product
!Causing bodily injury or damage to a third party.
4. Safety Hazards - Accident Prevention
The MULTIPICK ATT has been constructed in accordance with state-of-the-art technology
and the recognised safety rules and regulations. Compliance with the relevant
occupational safety and accident prevention regulations are provided for:
ATTENTION!
!NEVER
leave the device unattended and accessible to
children.
!NEVER remove any safety devices
or render them
nonfunctional through alteration of the unit.
!Operating the MULTIPICK ATT
with technical defects is
prohibited.
!Strictly use genuine spare
parts from MULTIPICK Service.
Only these conform to the specified technical requirements.
1. Lithium-ion batteries
Please note that lithium-ion cells may only be utilised by qualified personnel. Incorrect
handling or short circuit may lead to fire or explosion.

4
2. Behaviour in Emergency Situations
By releasing the control switch, each movement will be immediately stopped.
3. Noise Emission
The A-rate equivalent continuous sound pressure level is below 70 db (a)
5 . Disclaimer
NOTE!
!The use of the MULTIPICK ATT without any
experience or
training is not advisable. This is not recommended.
!MULTIPICK Service does not accept any liability for damages
and costs caused by improper use.
!
The use of the MULTIPICK ATT is only permitted for
commercial and legal use.
6.CE-Marking
The MULTIPICK ATT is built in accordance with the currently valid EC directives. The Declaration
of conformity loses its validity if the MULTIPICK ATT is rebuilt or modified without the approval of
MULTIPICK service.
7Loss of Warranty
The MULTIPICK ATT may only be opened, repaired and serviced by Multipick Service and / or
authorised service partners. The only exception a user is allowed to do is to open the cover from
the housing via quick release to insert the lithium-ion cells (insert / change battery). Should the
MULTIPICK ATT be opened willfully, the device will lose its warranty.
8Electric Tensioner MULTIPICK ATT

5
1. Scope of Delivery
!1 Electric Tensioner MULTIPICK ATT
!4 Lithium-Ionen Batteries
!2 Storage Boxes for Batteries
!2 Tension Needles
!1 Charger
!1 Country-specific Power Adapter
!1 Car Charger Adapter

6
2. Operation
a. General
(01) Control Switch
(02) Manipulator
(03) Clamping Rail
(04) Tension Needle
(05) Spacer
(06) Cover
(07) Housing
(08) Height Adjustment Knob
(08)
(05)
(01)
(02)
(03)
(04)
(07)
(06)

7
b. Commissioning/ Preparing for Operation
1. Inserting & Changing the Tension Needle
!To insert or to change the tension needle (01), unscrew the two lower screws
(02) on the clamping rail (03) with an Allen wrench (SW 1.5) by turning
towards the left. Make sure that you do not unscrew the screws completely
out oft he housing.
!To change, remove the tension needle (01).
!Now, insert a new tension needle into the clamping rail. Make sure that the:
otension needle sits in alignment with the clamping rail at the rear end
(top view:left)..
ogrounded surface of the tension needle is not inserted into the
clamping rail.
!To fix the needle, use an Allen wrench and turn the loosened screws (02)
towards the right until you notice an average resistance.
2. Inserting/ Replacing Batteries
(02)
(01)

8
!To insert or replace the lithium-ion batteries, first, open the cover (01) with a
slight twist towards the left until the sign shifts from lock to unlock(02).
!Then lift the cover out axially (03) and lay it aside.
NOTE!
The arrows on the HOUSING (▲
) as well as on the
COVER (▼) must always be positioned exactly on top of
each other (lock/unlock) when removing as well as they
are inserted.
!To replace the batteries remove the two lithium-ion batteries (04).
!Now, insert two charged batteries into the device as indicated.
!
ATTENTION!
!
Make sure that the locking lugs (05) are not damaged during
exchange or insertion process.
!Make sure that the poles are inserted correctly according to the
instructions and the marking on the device.
(03)
(01)
(02)

9
!Now, take the cover and insert it axially into the housing. Press the cover gently
towards the housing and turn it slightly towards the right until the symbol moves
from unlock to lock and snaps back into the housing.
3. Positioning on/to the Lock
Distance between the Electric Tensioner and the Door
ATTENTION!
!Exclusively use battery packs from MULTIPICK.
!Do not use damaged or deformed battery packs.
(05)
(04)

10
!To insert or replace the lithium-ion batteries, first, open the cover (01) with a
slight twist towards the left until the sign shifts from lock to unlock(02).
!Then lift the cover out axially (03) and lay it aside.
NOTE!
The arrows on the HOUSING (▲
) as well as on the
COVER (▼) must always be positioned exactly on top of
each other (lock/unlock) when removing as well as they
are inserted.
!To replace the batteries remove the two lithium-ion batteries (04).
!Now, insert two charged batteries into the device as indicated.
!
ATTENTION!
!
Make sure that the locking lugs (05) are not damaged during
exchange or insertion process.
!Make sure that the poles are inserted correctly according to the
instructions and the marking on the device.
(03)
(01)
(02)
Table of contents


