Musicmakers STRUMBLY KIT User manual

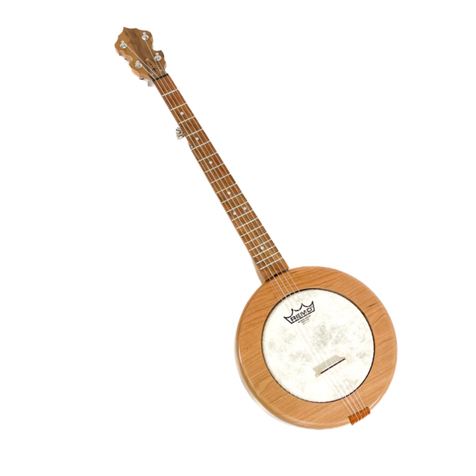
STRUMBLY KIT
Assembly Instructions
Neck (A)
Soundboard (with hole) (B)
Back (no hole) (C)
Tailpiece (D)
Internal Brace (E)
Bridge
2 Sides (F)
4 Lining Strips (G)
Medium Donut for rosette
Medium Fretwire (20”)
Thick First Fret (1-1/2”)
3 geared tuners with tiny screws
Set of 3 Strings
Plastic Nut (1/8” X 3/8” X 1-1/2”)
Choice of Medium Rosette
Flat Pick
Assembly Instructions
Songbook
WOOD PARTS HARDWARE
A
B
C
D
E
F
G

651-439-91202
BEFORE YOU BEGIN
Inventory and inspect all your parts carefull. If anything is miss-
ing or defective, please call us right away.
_____A.
_____B. It is a good idea to read through the entire assembly instructions before you start, just to get
an overview of the project.
651-439-9120
•
A NOTE ABOUT GLUE
We strongly recommend that you use a common woodworking glue like Elmer’s Carpenter’s
Wood Glue or Titebond because they hold the parts more securely than most other
adhesives, and they are inexpensive and easy to use. DO NOT assemble the wood parts
of this project with 5-minute epoxy or super-glue or hot melt glue. The yellow colored
Elmer’s or Titebond is best.
When gluing parts together, be sure to put enough glue on the joint to wet the entire
surfaces to be joined. A good sign of proper gluing is that a little excess will squeeze out
around the joint when clamping pressure is applied. Too little glue may cause the parts
to separate later, whereas too much glue makes things messy. Always keep a damp rag
handy for quick cleanup, as necessary. It is especially helpful to keep your fingers clean
while gluing, because gluey fingerprints have the embarrassing tendency to appear on the
finished product in prominent places.
____1.
____2.
____3.
ASSEMBLY INSTRUCTIONS
Begin by gluing the 2 SIDES to the TAILPIECE.
Small C-Clamps or some spring clamps
should do the trick, as shown. Be sure to seat
the parts fully into place and check that the
SIDES are parallel with each other. While
the glue is drying you can begin working on
the NECK. (fig. 1)
Notice that we have punch marked numbers
on the side of the NECK. If you want these
numbers to be easier to read on the finished
instrument, use a ball-point pen to darken
them. If you slip with the pen, just sand off
the offending ink. You can even color in the
numbers with a pen after you have applied a
finish to the instrument.
The NECK has been roughly rounded at the factory. Use
some 180 grit sandpaper to sand off any machine marks
on the neck. Don’t sand the top of the neck where the frets
go - Keep that part of the neck flat.
FIG. 1
FIG. 2

ww.harpkit.com 3
____4.
____5.
INSTALLING THE FRETS
Once you have sanded the neck to your satisfaction you can begin to install the frets. Place the
NECK on a good firm surface for this operation. A flimsy table top will not do. Better to work
on a concrete floor or a cement block. Otherwise, your wood will just bounce around as you
try to pound the frets into place.
Find the short piece of THICK FRETWIRE and tap
it into the first narrow slot near the end where the
geared tuners will be installed. This thicker fret will
hold the strings at the right height on this end of the
neck. (fig. 3)
FIG. 3
thick fret
Then you can install the rest of the frets using the
long length of MEDIUM FRETWIRE. Hold the end of
wire over the next slot in the NECK, so the end hangs
over the edge of the wood just 1/16” or so. Position the
FRETWIRE so that the ‘tang” will be driven down in
the fret slots (fig. 4).
Use a hammer to lightly tap the FRETWIRE into the
slot, until the crown of the fret contacts the wood sur-
face. Yes, the FRETWIRE is slightly curved, but it will
straighten as you tap it in.
Tap one end of the wire in first, then the other end, and finally the middle. DO NOT
OVERWORK THE WIRE! You should be able to install each fret with four or five taps,
total. If you have difficulty with a fret, you can use a chisel to pry it back out of the wood,
straighten the wire with plyers, and install it again.
•
____6.
____7.
____8.
When the FRETWIRE is securely held by the wood,
use a wire cutter to clip off the excess, as close to the
wood as possible. (fig. 5)
Proceed to the next fret slot in the same way, and so
on until all frets are installed.
After the frets are all installed, look them over carefully to make sure each one fits all the
way down against the wood. If one fret stands higher than another, it may cause buzzing
problems later when you try playing Strumbly. Now is the time to take care of the prob-
lem. A few good taps from the hammer are usually sufficient to seat any frets that are too
high. But make sure you are working on a very firm surface. A bouncy table will only
make this job impossible.
FIG. 4
FIG. 5

651-439-91204
____10.
File (or sand) the ragged ends of the frets down
until they are smooth and flush with the sides of
the NECK. If you happen to have access to a belt
sander, you’ll find it very helpful for this part of
the project. The FRETWIRE is soft enough metal
to work very easily with a sanding belt. Be careful,
however, not to gouge the edge of the NECK!
____9.
File (or sand) a 45 degree bevel at the ends of the frets,
as shown, working the file in a downward motion
only, to avoid lifting the frets up. (fig. 6)
FIG. 6
We like to use the same File to smooth off the sharp
ends of the heel, where the sides will be glued into
those slots. The sharp edges are fragile, so if you leave
them sharp, you are likely to chip off a few splinters
when installing the sides into the slots. (fig. 7)
Just remove about 1/16” from the points, as shown at
right.
____11.
FIG. 7
GLUING THE FRAME TOGETHER
____12. Test fit the parts together first, without glue, as
shown. You should be able to bend the SIDES enough
to fit them into the slots in the heel of the NECK. If
they do not go in easily, sand the ends of the SIDES a
little to thin them out until they are easy to slide into
the slots. (fig. 8)
CAUTION: It is possible to glue the BODY to the
NECK upside-down! Make sure to orient the
TAILPIECE so the string holes are facing up when
the NECK is facing up.
•
Make sure the SIDES go all the way into the slots of
the HEEL. Look closely from the front and the back
views to see that there are not big gaps. (figs. 9 & 10)
If you have trouble inserting the SIDES without glue,
it will be even harder when you apply glue. Sand
the SIDES a little thinner, if necessary, to make them
slide easily into place.
Note: TAIL and NECK facing up.
NECK
SIDES
HEEL
String holes
FIG. 8
FIG. 9
FIG. 10
Test fit SIDES without glue.
Front View
Back View

ww.harpkit.com 5
____13.
____14.
____15.
Whensatisfied with the fit of these parts, and making sure
they are all facing up, use a nail to smear some glue into
the slots of the NECK. (fig. 11) Make sure to get some glue
on both sides of the slots. Then push the SIDES into the
slots, making sure to push them all the way in.
Check to see that the SIDES are level with the heel of the
NECK. We do this by pushing the heel and tail down
against a flat surface to make sure the parts are all parallel
with the neck, not tilted upward or downward. (fig. 12)
Use a nail to smear
glue in the slots in
the NECK
Press assembly
down firmly
against a
flat surface.
Set assembly aside to dry, supporting the peghead with
something so the instrument will remain properly
aligned. Allow at least an hour for the glue to set up nicely
FIG. 11
FIG. 12
INSTALLING LINING STRIPS
When the frame is dry, glue the 4 LINING STRIPS to the
insides of the SIDES, as shown. Try to get the STRIPS to be
flush with the edges of the SIDES. This gives you a wider
glue surface for adhering the SOUNDBOARD and BACK
panels later. Use clothespins (or other small clamps) to
clamp the strips until the glue dries. (fig. 13)
The LINING STRIPS are for increasing the thickness of the
SIDES where the SOUNDBOARD and BACK will be glued.
This makes the instrument stronger.
Once these LINING STRIPS are dry, use a
long sanding block to level off the edges of the
SIDES in preparation for gluing the front and
back panels in place. We like to glue a piece
of 60- or 80-grit sandpaper to a flat block of
wood, such as a 2 X 4 for this purpose. (fig. 14)
Draw a center line on the HEEL of the neck, as shown at
left. This will be an important guide line when you install
the SOUNDBOARD. (fig. 15)
____16.
FIG. 13
FIG. 14
FIG. 15

651-439-91206
PREPARING THE FRONT
____17. Draw a centerline lengthwise on the inside of
the SOUNDBOARD (choose the lesser quality
face to show inside). This centerline will help
you to keep Strumbly square and straight.
Also draw a line on the inside of the
SOUNDBOARD that is 7 1/2 inches below the
top edge and is perpendicular to your center-
line, as shown. This line will mark the location
of the BR ACE.
____18.
____19.
Glue the BRACE to the inside of the
SOUNDBOARD, as shown. Center the BRACE
on the intersection of the two lines on your
SOUNDBOARD and use two clamps to glue the
BRACE in that position. (fig. 16)
7-1/2”
FIG. 16
INSTALL THE ROSETTE
Dry fit the rosette in the soundhole. You
may need to lightly sand the edges. DO NOT
GLUE THE ROSETTE YET. With the rosette in
place, flip the soundboard over and position
the DONUT so that it is completely hidden by
the outer ring of the rosette. (fig. 17) Glue the
DONUT in place using clamps, tape, or a heavy
weight.
Lightly sand the front of the rosette to remove
any residual smoky color from the laser cutting
process. If plan to use the plain rosette with-
out coloring it, you can glue it to the ledge of
the donut now, making sure to orient the pat-
tern the way you want it to look on the finished
instrument. Try to keep glue off the surface of
the FRONT. (fig. 18)
Otherwise, you can wait until you have deco-
rated the rosette, and glue it in after the instru-
ment is finished.
FIG. 17
FIG. 18

ww.harpkit.com 7
____20.
INSTALL THE FRONT
After the BRACE and DONUT have dried, you can test fit
the SOUNDBOARD to the frame without glue. Centering
the SOUNDBOARD is not difficult if you proceed carefully.
Begin by clamping the narrow end to the front of the frame
and then turning the frame so you can see the center lines
inside. Shift the soundboard as necessary to align the cen-
terline with the heel first. (fig. 19)
Once the SOUNDBOARD is clamped and centered at the
heel, you can slide the TAIL BLOCK one way or the other
until the center lines match up at the tail end. Put a clamp
at each corner to hold the parts straight. (fig. 20)
Double-check to make sure you have clamped the
SOUNDBOARD to the front of the frame! You should be
able to see the three string holes at the tail end when you
turn the frame around to the front side.
Align center lines to heel then tail
No glue yet. This is a rehearsal.
•
Double-check the alignment of the neck on the front side,
as follows: Put masking tape in two places along the neck
(near each end) and mark the center of the neck
Then place a long straight-edge down the center of the neck
to see how it lines up with the sound hole and the middle
string hole at the tail end. It should be very close. In fact,
the only way it could be off-center is if the soundboard is
not fully seated against the neck at the narrow end. Make
adjustments if necessary to ensure that you have a straight
instrument.
OK. This was a trial run without glue. Now that you under-
stand the procedure for aligning the FRONT to the BODY,
you can glue the FRONT panel in place. Put glue on all the
surfaces that contact the FRONT, including the top sur-
face of the HEEL, the SIDES, LINING STRIPS, and the TAIL
block.
Start clamping in the same sequence as your trial run, cen-
tering the FRONT on the HEEL first, and then clamping
the two corners when the centerlines match at the TAIL
BLOCK. Double-check the alignment, front and back, and
then add more clamps around the perimeter. Once the
FRONT is glued, the frame will stay put. No more align-
ment will be necessary.
FIG. 19
FIG. 20
FIG. 21
FIG. 22

651-439-91208
____21. It is easier to trim off the excess overhang of the
FRONT before installing the BACK. You can do this
by hand with a fine-tooth coping saw, though you
must be careful to install the blade with the teeth cut-
ting toward the handle. (fig. 23) Don’t trim too close!
Leave some for sanding with a coarse sanding block.
If you have a router and router table, you can do this
job much more quickly and easily. Use a flush trim
bit, and stand it high enough to roll along the sides.
(fig. 24)
Regardless of how you accomplished the initial trim-
ming, you will still need to follow afterwards with a
coarse (60-80 grit) sanding block in order to finish the
job. A sharp chisel or razor knife might help in the
corners where the neck meets the body.
Direction of teeth>>>>>>>>
FIG. 23
FIG. 24
Caution: Make sure the roller does not “fall”
into the groove of the Tail Piece!
•
INSTALLING THE BACK
You may want to sign and date your instrument before closing it up. This is a good time
for that. Find a spot inside the BACK where you’ll be able to see your signature through
the soundhole.
•
Now you can glue and clamp the BACK
panel in place, showing the better face out-
ward. It is not so important to center this
piece perfectly, but you’ll want to have some
excess material overhanging the body all
the way around. (fig. 25)
Wa-La! Your instrument is all assembled. Pat yourself on the back and have some milk and
cookies! There’s still work to do, but the heavy lifting is out of the way.
____22. FIG. 25
____23. When the BACK is dry, trim off the excess
overhang all the way around, just as you did
for the FRONT.

ww.harpkit.com 9
SANDING AND FINISHING
____24. Give Strumbly a final sanding before applying a finish. Take your time to do a nice job -- it
will pay huge dividends toward the cosmetic appearance of the instrument when it is finished.
Start with 180 grit sandpaper and sand off all the machine marks left by our equipment, as
well as any glue spots you might have added during construction. Dried glue may not show
much now, but it will stick out like a sore thumb under the finish. Work your way through
finer sandpaper if you wish, but many people are satisfied with how smooth the wood is with
180 grit paper.
Now you’re ready to apply the finish of your choice. We’ve listed several options below. Don’t
forget to put some finish on the BRIDGE.
STAINS or DYES -- These are coloring agents and should only be used if you want to change
the natural color of the wood. We usually do not apply stains to our projects, especially when
they are made with naturally beautiful hardwoods such as cherry or walnut. These woods
look best with a clear finish. But, if you want to color the wood, your staining should be accom-
plished before applying a surface finish such as oil, varnish, or lacquer.
OIL or WAX -- Be very cautious about using an oil or wax finish. If the this type of finish
gets into the tuning pin holes, it will act as a lubricant, and you may have trouble keeping the
instrument in tune. Oil finishes will give your wood a low luster appearance, bringing out the
natural color of the grain, but it tends to soak into the wood and appear dry and “thirsty” after
awhile. Some people are fond of a beeswax finish for a natural look, but it can show water spots
if it gets wet, so you may end up needing to re-wax or touch up the surface in the future.
POLYURETHANE VARNISH -- Any regular varnish will work fine on this project, but we
think a wipe-on (gel) polyurethane is the easiest to apply because it does not drip or sag -- just
wipe on a thin coat and wipe off the excess. Our complete finishing kit includes a half-pint
can of satin gel polyurethane (instructions printed right on the can), plus sandpaper sheets,
and foam applicator for the first coat. The advantages of this finish are its simple application,
minimal odor, good durability, and deep, soft luster.
LACQUER -- Many professional instrument makers use lacquer for their finish. The most
readily available lacquer is called Deft Clear Wood Finish. It is best to purchase a can of liquid
to brush on as a sealer coat first, and then use an aerosol can of the same product to spray on
the final coats. The advantage of this finish is its quick drying time, but the disadvantage is the
strong odor of the toxic lacquer fumes.
GENERAL FINISHING GUIDELINES

651-439-912010
INSTALLING HARDWARE
Once your finish has dried you can install the hardware. Begin by installing the
GEARED TUNERS. Please note that we drill some pegheads for right-mounted gears and some
for left-mounted gears, in order to make balanced use of our inventory. You should orient
these on the PEGHEAD with the handles pointing down. (fig. 26)
____25.
Use a 1/16” drill bit to make pilot
holes for the tiny mounting screws.
Then a #1 size Phillips screwdriver
will work for installing two screws
in each tuner to hold the metal
plates firmly to the peghead. Make sure the buttons
are pointing down.
Trim the length of the black plastic NUT to fit the width of the NECK, and smooth any rough or
sharp corners with sandpaper. Then press it into the pre-cut slot near the geared tuners, with
the three cuts facing up. These cuts are for spacing the strings properly. Use some epoxy or
Superglue to glue the NUT in place if is loose, but no glue is needed if it fits snugly.
FIG. 26
____26.
____27. Before you install the strings you need to file 3 shallow grooves in
the BRIDGE. A small triangle file works well for this. You will make
final adjustments to the height of the BRIDGE after the strings are
installed. File the middle groove in the center of the BRIDGE first,
and space the other two grooves 1/2” on either side. (fig. 27) Shallow
cuts are all that is necessary for now.
Bridge
FIG. 27
INSTALLING STRINGS
____28. Thread the end of the thickest (brass colored) string
through the left-hand hole in the TAIL and pull it all the
way until the ball end stops against the wood. Pull that
string up to the other end of the instrument and thread
the end through the corresponding GEARED TUNER.
(fig. 28)
Cut the wire about 2 - 3 inches beyond the tuning gear.
Then pull the end back until it barely shows through the
post, and wind the excess string around the metal post
by turning the button. It is best to have the string wrap
over the top of the post.
After you have the first string installed you can slide
the BRIDGE into place. It should sit about 23-5/8”
(600mm) from the NUT. Do not glue the BRIDGE in place.
You can make fine adjustments to the location of the
BRIDGE after you have all the strings installed.
____29.
FIG. 28

ww.harpkit.com 11
____30.
____31.
____32.
Proceed to install the remaining two strings
according to the diagram. (fig. 29) Notice that you
can direct the wraps of wire toward one side of the
NECK or the other, depending on how you’d like
the string to align with its position in the NUT.
BE CAREFUL not to over-tighten the strings! They
may break if you tune them higher than the pitches
shown.
Although you can play lots of songs on this instru-
ment without even tuning it (by just playing one
string), you’ll learn more musical things (like
chords) if you tune all the strings properly, as
shown in the chart at right. You can tune to a pia-
no or an electronic tuner, or you can visit our web-
site and use the free online tuner on our website at
www.harpkit.com/freetuner.
String # 3
Note: D3
.025”
String # 2
Note: G3
.016”
String # 1
Note: D4
.012”
The THICK FRET (near the NUT) should hold the strings at the proper height at that end of
the NECK, but you need to check the gap over the 8th space. You will adjust the height of the
BRIDGE to achieve the 1/8” (3 mm) gap shown in the illustration. (fig. 30) An easy way to check
the string height is to see how a 1/8” drill bit fits between the string and the wood at the eighth
fret (near the body). Setting the string height like this will make a big difference in the play-
ability of your instrument.
If your strings are just a little higher than the proper height at first, you may only need to file
the notches in the BRIDGE a little deeper. If you have 1/4” gap at the 8th fret, however, we rec-
ommend removing the BRIDGE and sanding the underside to lower the string height. That
will be much easier than trying to cut deep notches in the wood. It’s OK to reduce the height
of the BRIDGE considerably, if needed, to achieve the proper string height. Conversely, it is
also fine to glue a shim under the BRIDGE, if necessary, to raise the strings to the proper level.
Play a string open (without pressing it to any fret) and then play the string fretted at the eighth
fret. Check these two notes on your electronic tuner. These two notes should be exactly one
octave apart. If the fretted note is sharp - slide the BRIDGE toward the bottom of the instru-
ment a little bit. If the fretted note is flat - slide the BRIDGE toward the neck a little bit. Keep
making adjustments until the 2 notes are exactly an octave apart.
FINE TUNING THE BRIDGE PLACEMENT.
FIG. 30
FIG. 29

INSTALLING A STRAP
____33. If you choose to install the strap
with 2 buttons you will need to
drill 2 pilot holes (3/32”), one in the
middle of the TAILPIECE and one
in the heel of the NECK. (fig. 31)
FIG. 31
CARE AND FEEDING
You don’t ever need to replace the strings unless they break
or get rusty or full of peanut butter and jelly. Strumbly will
sound its best, however, if you change the strings about
once a year. The strings are just common ball-end acoustic
guitar strings. You should be able to find these at any local
music shop. The sizes are shown in the tuning chart on the
previous page, or you can just take a scrap of the old string
with you for comparison.
You can keep Strumbly clean using regular furniture pol-
ish. We like a product called Old English because it does
not contain silicone or wax. It may be a sad thing when you
put that first big nick or scratch in the finish. Go ahead an
get it out of the way now so you can stop worrying about
it. Remember - the purpose of a musical instrument is to
make music. Looking perfect is just a luxury.
Yes, you may take Strumbly hiking, camping, climbing,
boating, fishing, and many other places. It may come in
handy as a spare tent pole, critter swatter, food tray, or
walking cane, but we caution you to use Strumbly as a
canoe paddle only as a last resort.
Musicmakers
14525 61st ST CT N
Stillwater, MN 55082
in
gs unless they bre
ak
nd jelly. Strumbly will
nge the strings about
mon ball-end acoustic
fi
nd these at any local
he tuning chart on the
sc
rap of the old string
re
gular furniture pol-
nglish because it does
e
a sad thing when you
he finish. Go ahead an
n
stop worrying about
usical instrument is to
a luxur
y.
g, camping, climbing,
laces. It may come
in
swatter, food tray, or
to use Strumbly as a
Table of contents
Other Musicmakers Musical Instrument manuals

Musicmakers
Musicmakers Reverie 2 User manual

Musicmakers
Musicmakers 17/16 Hammered Dulcimer Kit User manual

Musicmakers
Musicmakers DELUXE THUMB PIANO KIT User manual

Musicmakers
Musicmakers Hurdy Gurdy User manual

Musicmakers
Musicmakers Reverie Harp Kit User manual

Musicmakers
Musicmakers Dakota Mandola KIT User manual

Musicmakers
Musicmakers Voyageur User manual

Musicmakers
Musicmakers BALLAD HARP KIT User manual

Musicmakers
Musicmakers Mountain Dulcimer KIT User manual

Musicmakers
Musicmakers MOUNTAIN BANJO KIT User manual