Musicmakers HARP WHEELS KIT User manual

Musicmakers
14525 61st ST CT N
Stillwater, MN 55082
HARP WHEELS KIT
Assembly Instructions
Wood Parts:
a) Wheel Paddle
b) Axle for Wheels
c) 2 Fenders for Axle
d) 2 Brake Main Parts
e) 2 Cams for Brakes
Hardware Parts:
f) 2 Bolts for Wheels 1/2” - 13x5”
g) 2 Washers for Bolts, 1/2”
h) 2 Square Neck Carriage Bolts, 1/4”-20x2-1/2”
i) 6 Washers, #12
j) 2 Spring Washers
k) 2 Lock Nuts, 1/2”
l) 2 Lock Nuts, 1/4”
m) 9 Wood Screws, 1” (not pictured)
n) 4 Wood Screws, 1-1/4” (not pictured)
o) 7/64” Drill Bit (not pictured)
p) 2 Nylon Straps w/ Buckles
q) 2 Wheels, 7”
r) felt pads (not pictured)
A
B
C
D
E
F
G
H
I
J
K
L
P&Q
Updated August 2020

651-439-91202
BEFORE YOU BEGIN
Inventory and inspect all your parts carefully. If anything is
missing or defective, please call us right away.
_____A.
_____B. It is a good idea to read through the entire assembly instructions before you start, just to get an
overview of the project. (fig. A)
651-439-9120
____1. Sand all the pieces of your kit with 120-grit sandpa-
per. Switch to 150- and finish with 180-grit after the
previous scratches are gone. Sand with the grain.
If you have an orbital hand sander, this will make the
job easy and quick. Sand away the machine marks,
but be careful to not reshape the parts.
Do not sand over ends of axle where the fenders will
go. (fig. 1A)
Soften edges with the palm of your hand and 150- or
180-grit paper. (fig. 1B)
____2. Locate the fenders. Be sure to orient the counter-
sink of the holes toward the outside. (fig. 2A)
FIG. 1A
pBe sure to sand all the pieces of your wheels before
assembly.
FIG. 1B
FIG. 2A
FIG. 2B
ASSEMBLE THE WOOD PARTS
SAND
Use the 1/2” bolt to line up the fender and the
axle. Align the fender flush with the edge of the
axle. Hold in place and drill pilot holes for wood
screws with 7/64” drill bit. (fig. 2B) Drill deep
enough for the 1” wood screws.

ww.harpkit.com 3
____3. Apply wood glue to the end of the axle. (fig. 3A)
Once again, use the 1/2” bolt to line up the fender
and the axle.
Partially thread the 1” wood screws into the pilot
holes. Use a drill to drive the screws in until they
are snug the glue squeezes out.
Clean up the glue with a wet rag and a putty
knife. (fig. 3B)
Repeat the process for the opposite fender.
____4. Be sure to orient the paddle correctly. The fend-
ers should face the same direction as the paddle.
(fig. 4A) Be sure the bottom of the paddle is flush
with the axle.
Center the paddle with the countersunk holes
facing upward. (fig. 4A) There should be about
1” space between the paddle and the fender on
either side.
Mark your edges with a pencil to be sure nothing
gets bumped out of place. (fig. 4B)
Drill 7/64” pilot holes, starting with either end.
Thread 1” wood screws into place. This will hold
the paddle in place while you drill the other pilot
holes. (fig. 4C)
ATTACHING THE PADDLE
pUsing a vice can be helpful to hold the
axle while attaching the paddle.
FIG. 3A
FIG. 3B
FIG. 4A
Countersunk holes facing upward
FIG. 4C
FIG. 4B

651-439-91204
____8. The finish for the wheels needs to be durable. These
are going to move your harp across mountains and val-
leys (maybe!). We recommend multiple layers of poly-
urethane. This type of finish lends itself well to taking
a beating and staying intact. Polyurethame also holds
up well against moisture. Most hardware stores carry a
variety of finishes that are suitable for this task.
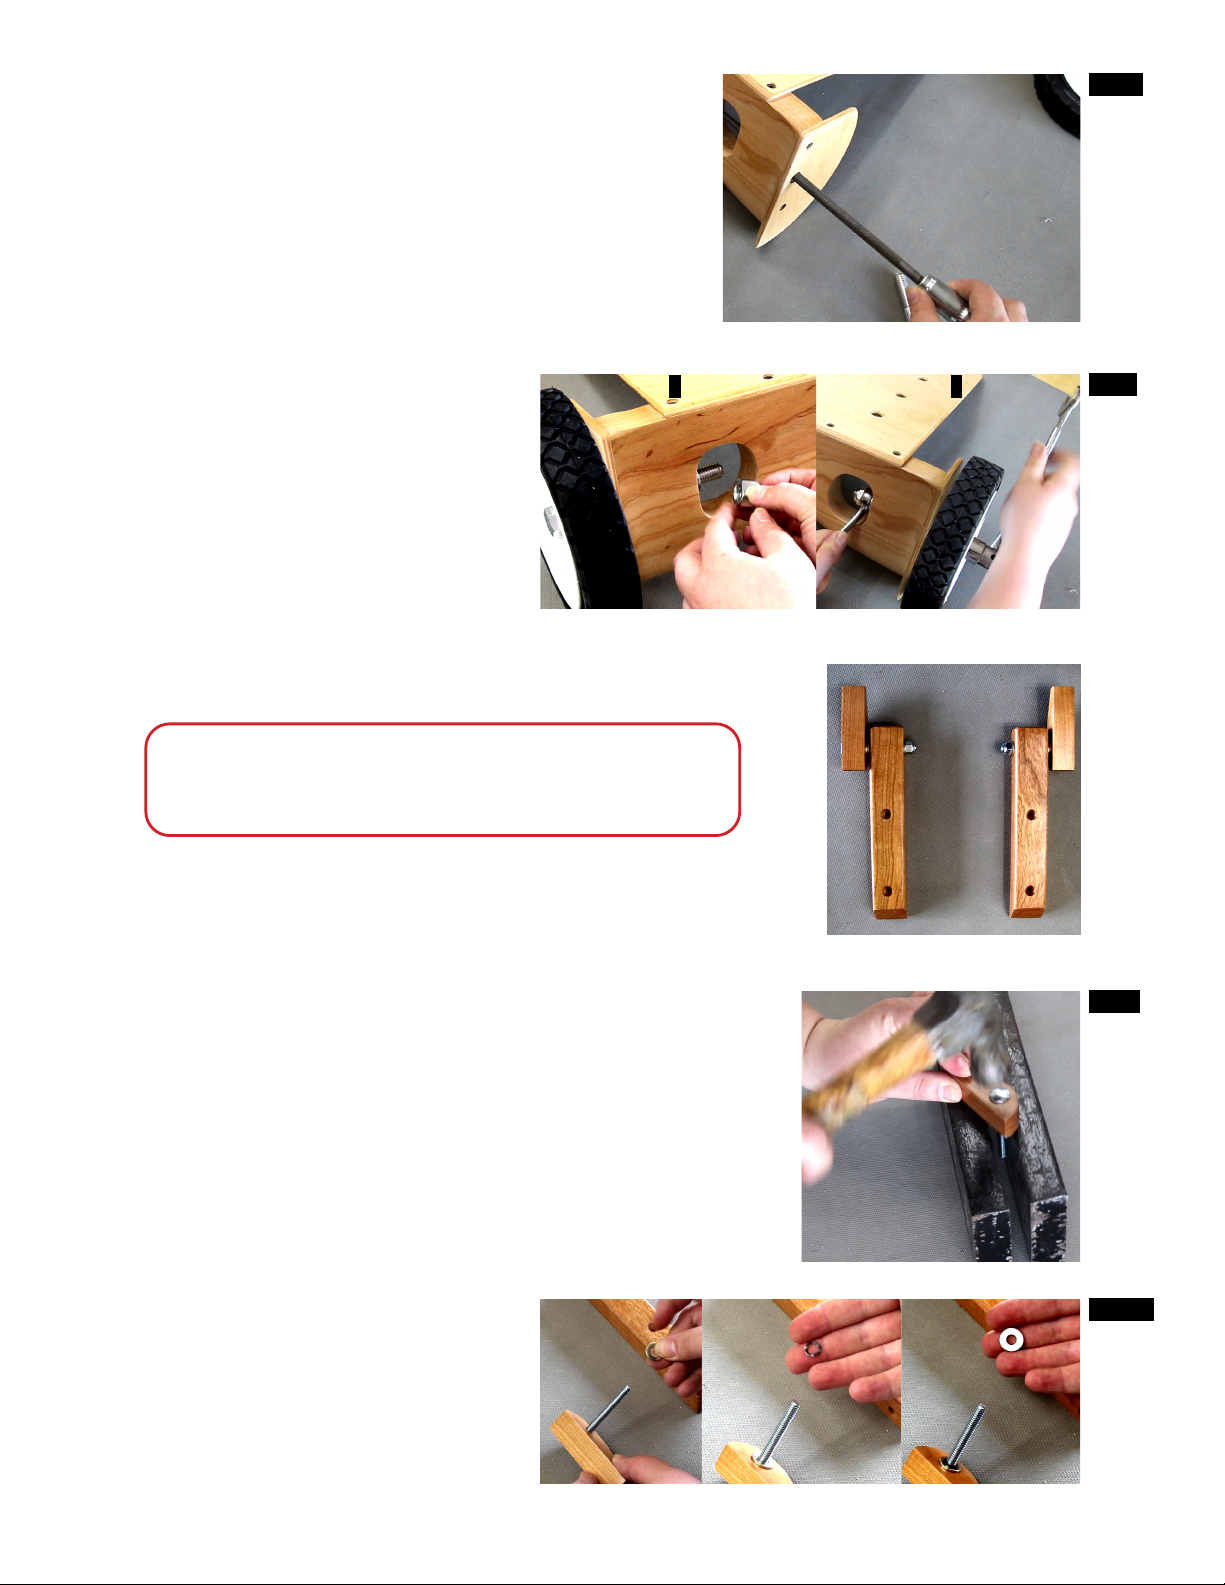
____9. Apply finish to one side of the set of wheels, using a spray
(fig. 9A), brush (fig. 9B ), or wipe on finish. Allow time
for the finish to dry, then flip over and finish the other
sides. Once the coat dries, you may want to sand with
400-600 grit sandpaper.
It’s also possible to hang the wheels for the finishing
process.
We typically apply 2-4 coats of finish. The thicker the
finish, the better.
FIG. 9A
FIG. 9B
____7. The wood in this kit is all raw and unfinished. You can
take this opportunity to add stain to the wood, if you’d
like. Choose the color you like and begin customizing
your wheels.
Be aware that if the wood is stained, it will show wear
and tear a little more than if just finished in a clear coat.
pHere are some finishing options, along with a few
hints from our experiences with finishing materials.
FINISHING
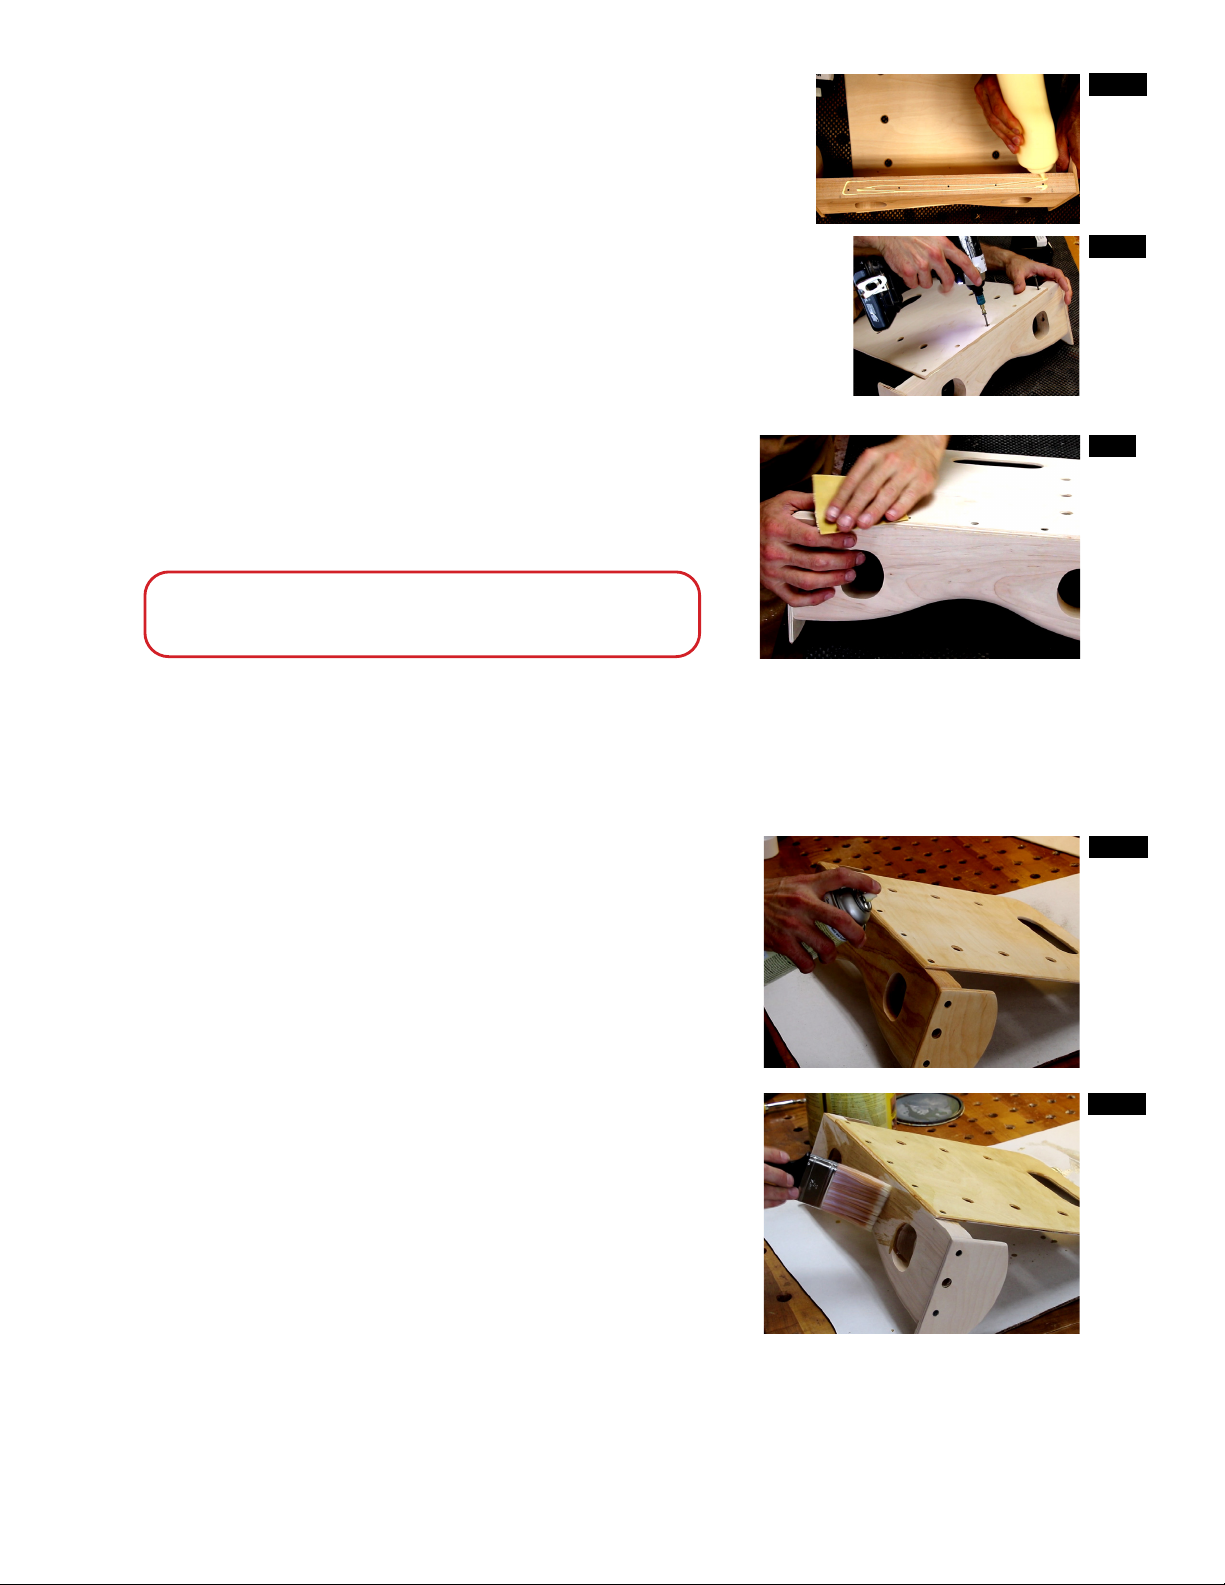
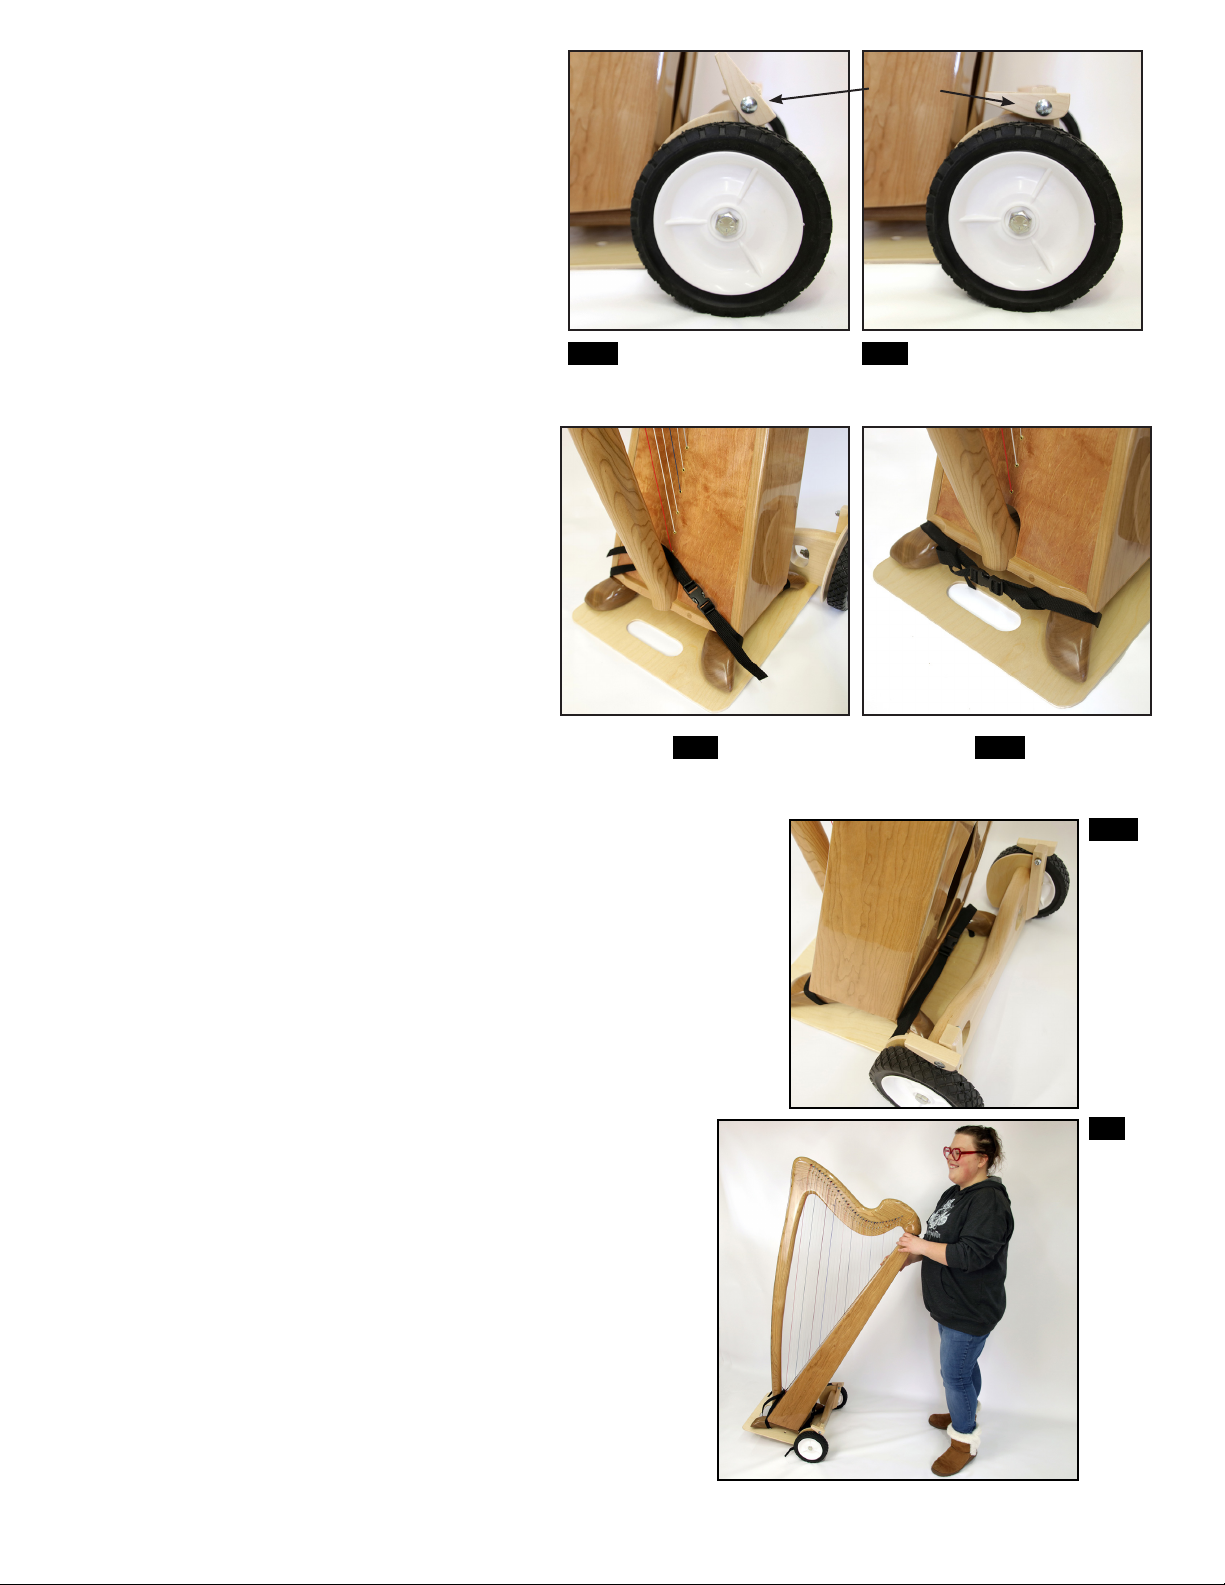
____6. Sand over all the sharp edges and uneven seams from
the assembly process.
Round over the paddle/axle edge. (fig. 6) An orbital
sander can make this a quick task. Be sure to remove all
scratch marks and glue spots from the assembly process.
FIG. 6
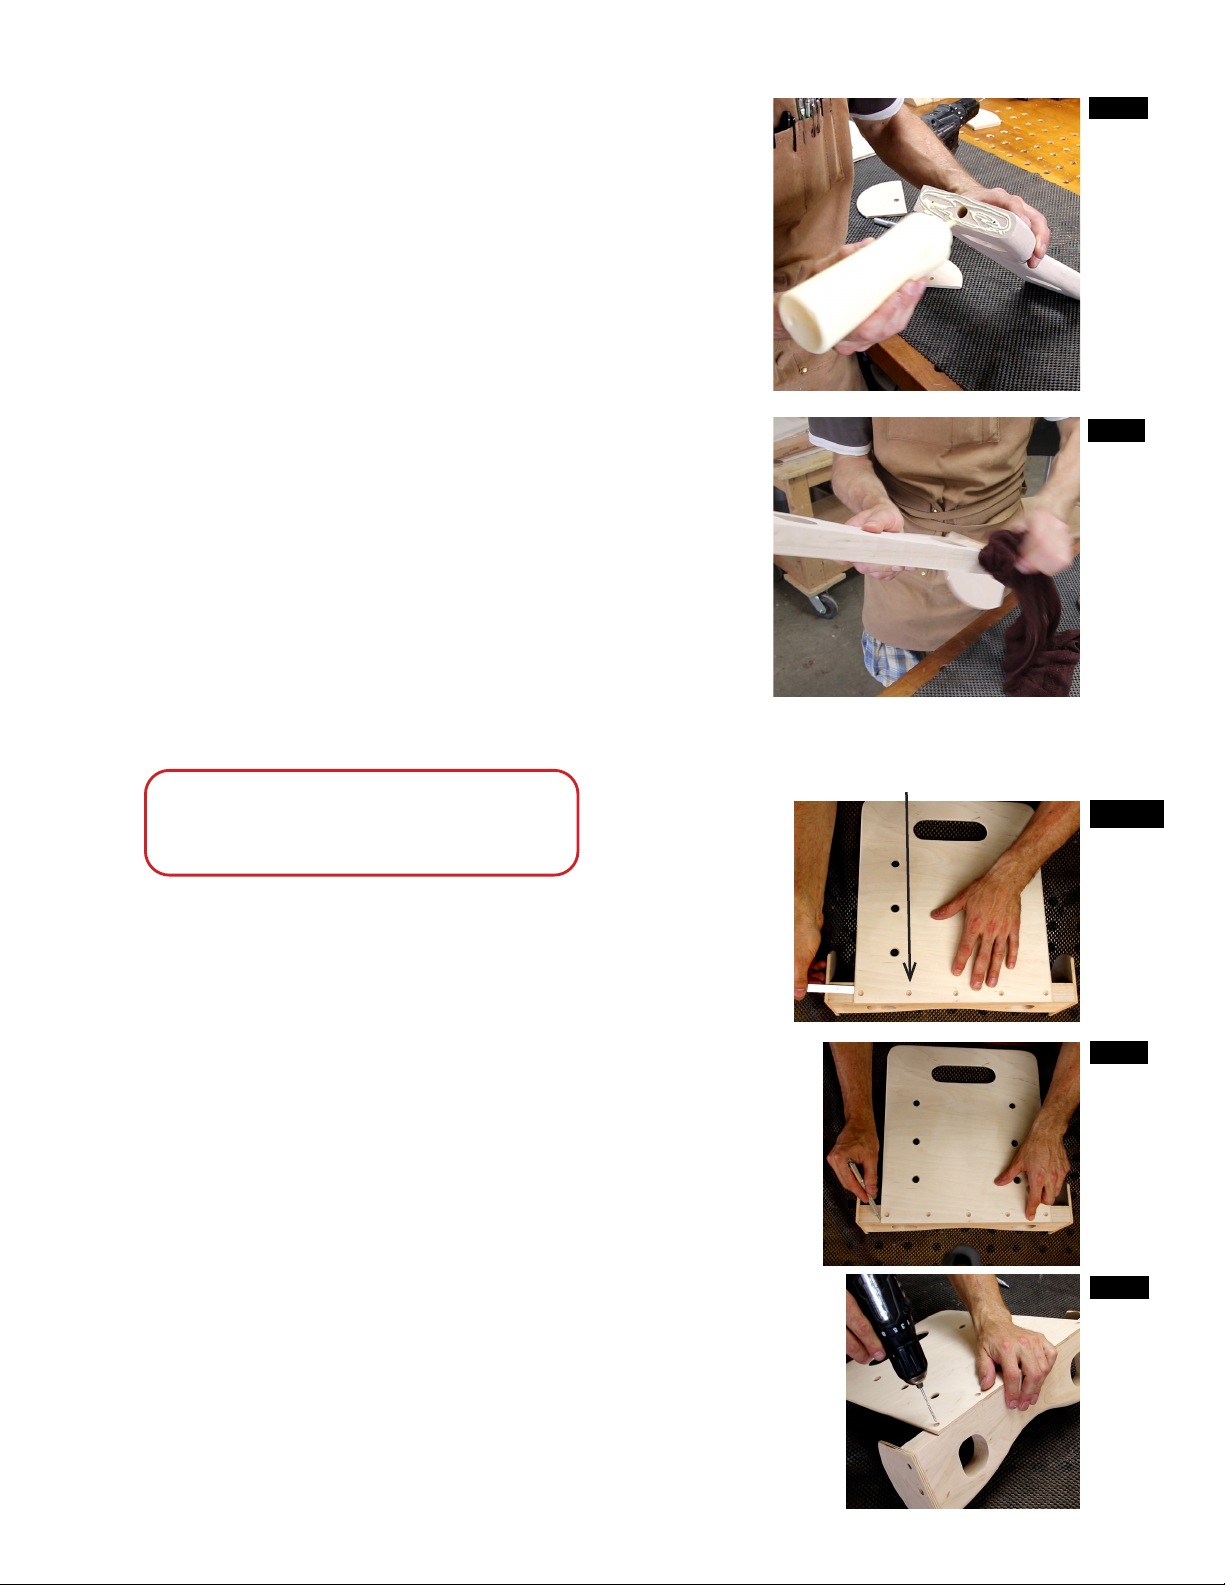
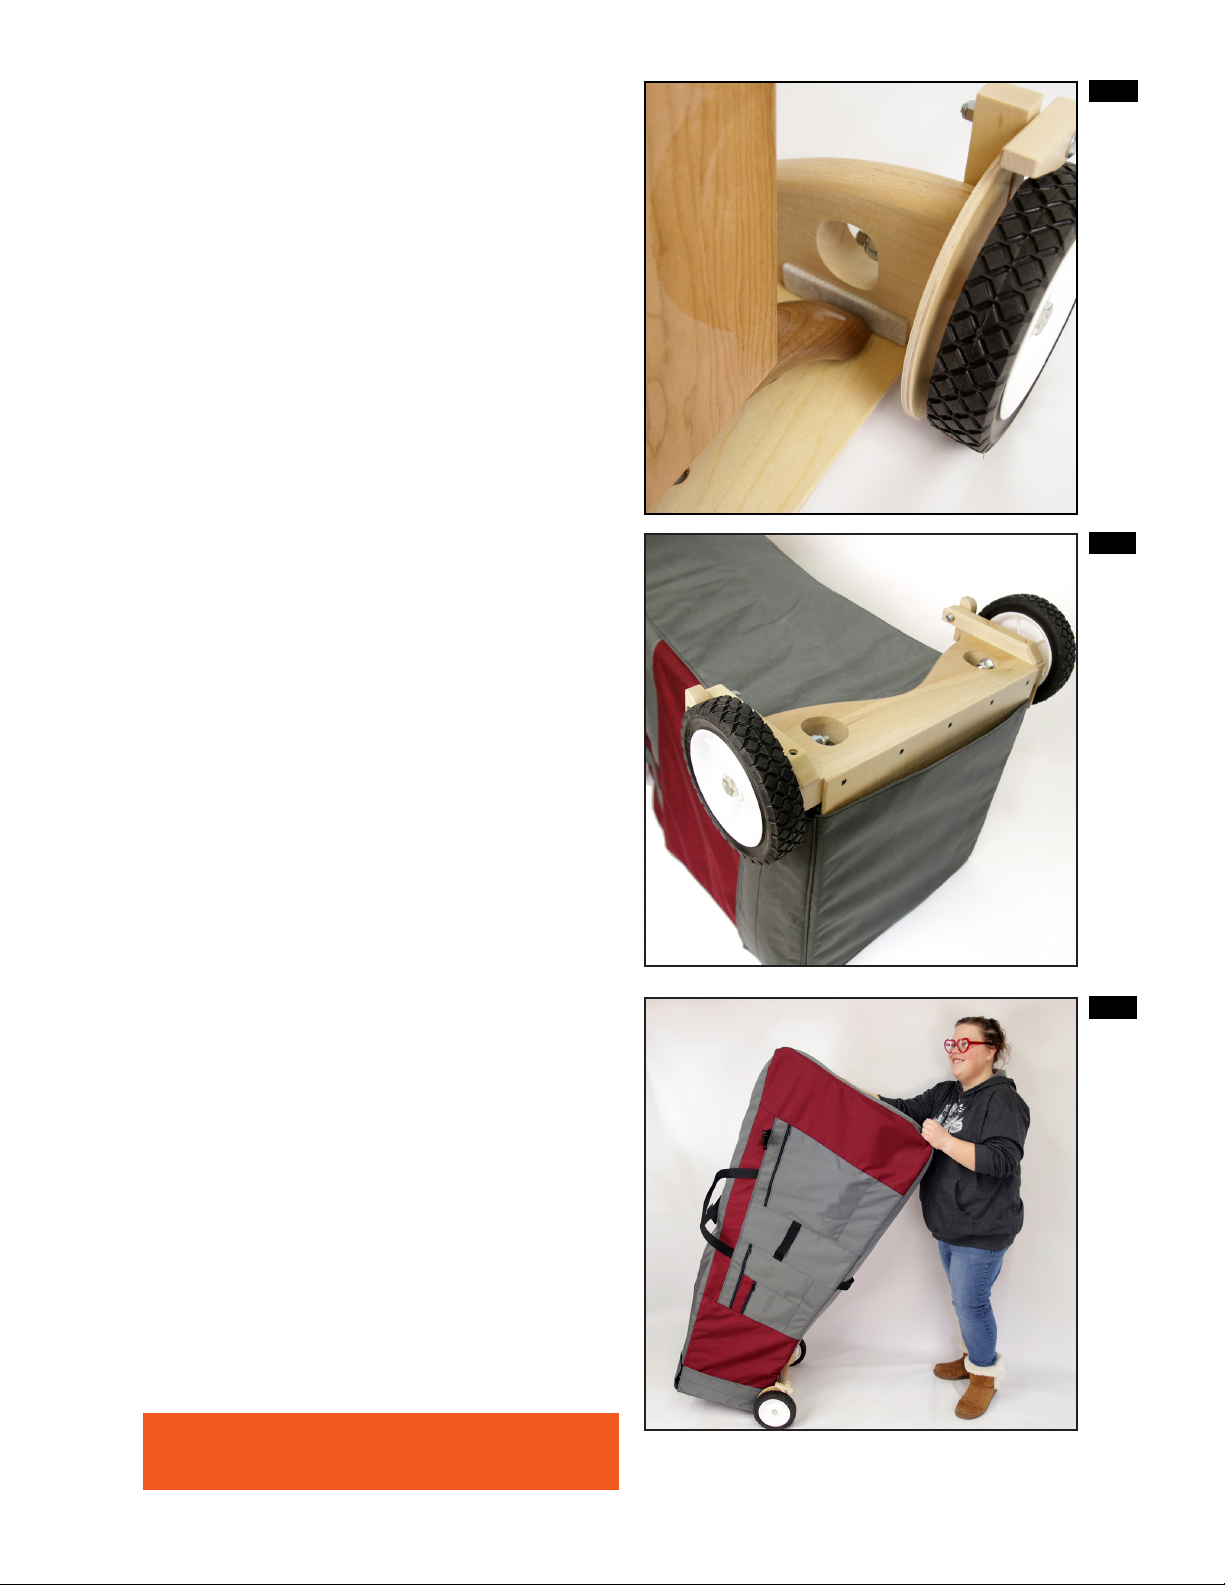
____5. Apply glue to axle and screw the paddle to the axle using
1” wood screws. (figs 5A and 5B) Tighten the screws
until the glue squeezes out. Be sure to clean up any glue
squeeze out with a wet rag.
FIG. 5A
FIG. 5B

ww.harpkit.com 5
FINAL ASSEMBLY
____10. Make sure the bolt will spin freely in the
hole. If it’s a little tight, ream it out a little
with a rat tail file or drill bit. (fig. 10)
FIG. 10
Place the bolt through the wheel
with the flat side of the wheel
on the outside. Place the washer
on the bolt and then install the
locking nut. (fig. 11A)
Use two 3/4” wrenches or sockets
to tighten the bolt. Be sure that
the wheel is able to spin free-
ly but is tight enough so that it
doesn’t wobble when it moves.
(fig. 11B)
____11.
FIG. 11
BA
____12. Use a solid surface as a foundation to pound the carriage
bolt to seat it into the brake. (fig. 12)
Be sure the next bolt is installed on the opposite side.
Double check yourself.
pYou must assemble the brakes in a mirror image. Be sure
that there is one right and one left.
FIG. 12
Mirror Images
Sandwich the spring wash-
er with two 1/4” steel washers
(fig. 13A)
____13. FIG. 13A

651-439-91206
Congratulations! you have completed the kit for the Harp Wheels. Now you’re ready to move
your instrument across mountains and valleys.
Engage the cam on the wheel, and make sure that
it prevents the wheel from moving while it is in the
locked position. Also, disengage the cam to ensure
that the wheel spins freely while the cam is not in
the lock position.
___ 15.
____14. Tip the cam forward about 5 degrees. This will help
hold the brake in place while you drill the top pilot
hole. Align the brake next to the wheel. Let the brake
rest on top of the wheel. (fig. 14A)
Keep the brake aligned and use a 7/64” drill bit to
bore a pilot hole, in the top hole. Then insert the
1-1/4” wood screw into the pilot hole you just drilled.
Do not tighten the screw all the way down.
Repeat process for the the lower hole. Be sure the
brake stays aligned for this step.
Once both screws have been inserted, you can tight-
en them down all the way. (fig. 14B)
Repeat this process for the other brake.
FIG. 13B
FIG. 13C
FIG. 14A
FIG. 14B
Insert the carriage bolt into the main brake part. Put the remain-
ing 1/4” washer between the main brake part and the 1/4” lock nut.
(fig. 13B)
Use a 1/2” socket or wrench to tighten the
lock nut. (fig. 13C)
This nut needs to be tight enough to keep
the cam from moving when it’s engaged
on the wheel, but loose enough to be able
to move it without too much effort.

ww.harpkit.com 7
Slide the wheels in the pocket on the bottom
piece of the harp case. (fig. B)
Make sure the brakes are off.
Tilt the harp case back and away you go. (fig. C)
FIG. B
FIG. A
FIG. C
USING WHEELS WITH A MUSICMAKERS CASE
USING YOUR WHEELS
USING WHEELS WITH OTHER CASES
If you don’t have a Gig Bag from Musicmakers
with the pocket on the bottom, you can still use
the wheels with your gig bag. This might require
some extra materials, like bungee cords, etc.
You need to find a way to hold wheel platform to
the bottom of the case so that when you tilt the
harp back, the paddle rises with the case allow-
ing you to move around freely.
We have a video on our website with some help-
ful tips.
Set your harp on the wheels and install the
adhesive backed felt on the axle where the feet
will make contact. This will help prevent dings
on the feet. (fig. A)
www.harpkit.com/wheels

There is a brake on each wheel.
Lift the cam up to engage the brake.
(fig D)
Push the cam level to release the brake.
(fig. E)
Your harp wheels include two straps.
The strap in front can go between the
pillar and the soundboard (fig. F)
OR it can just go over the feet. (fig. G)
The strap in back goes over the feet in back. (fig. H)
This may not be possible for your harp and that
is OK. The strap in front should be enough to lift
the platform up when you tilt the harp back.
Pull the straps tight for the best results. A little
wobble won’t hurt but the more secure your harp
is attached to the wheels, the better control you
will have as you move your harp around.
Once the harp is secured to the wheels, make sure
the brakes are off, tilt your harp back, and you are
off to the races. (fig. I)
USING THE BRAKES
USING THE WHEELS WITHOUT A CASE
FIG. D
FIG. F
FIG. E
FIG. G
FIG. H
FIG I
Brake is ON
OR
Brake is OFF
Musicmakers
14525 61st ST CT N
Stillwater, MN 55082
cam
Table of contents
Other Musicmakers Musical Instrument manuals

Musicmakers
Musicmakers MOUNTAIN BANJO KIT User manual

Musicmakers
Musicmakers Voyageur User manual

Musicmakers
Musicmakers Hurdy Gurdy User manual

Musicmakers
Musicmakers 17/16 Hammered Dulcimer Kit User manual

Musicmakers
Musicmakers Reverie Harp Kit User manual

Musicmakers
Musicmakers BALLAD HARP KIT User manual

Musicmakers
Musicmakers Dakota Mandola KIT User manual

Musicmakers
Musicmakers STRUMBLY KIT User manual

Musicmakers
Musicmakers DELUXE THUMB PIANO KIT User manual

Musicmakers
Musicmakers Reverie 2 User manual