ww.harpkit.com 5
____16.
____19.
____20.
____18.
____17.
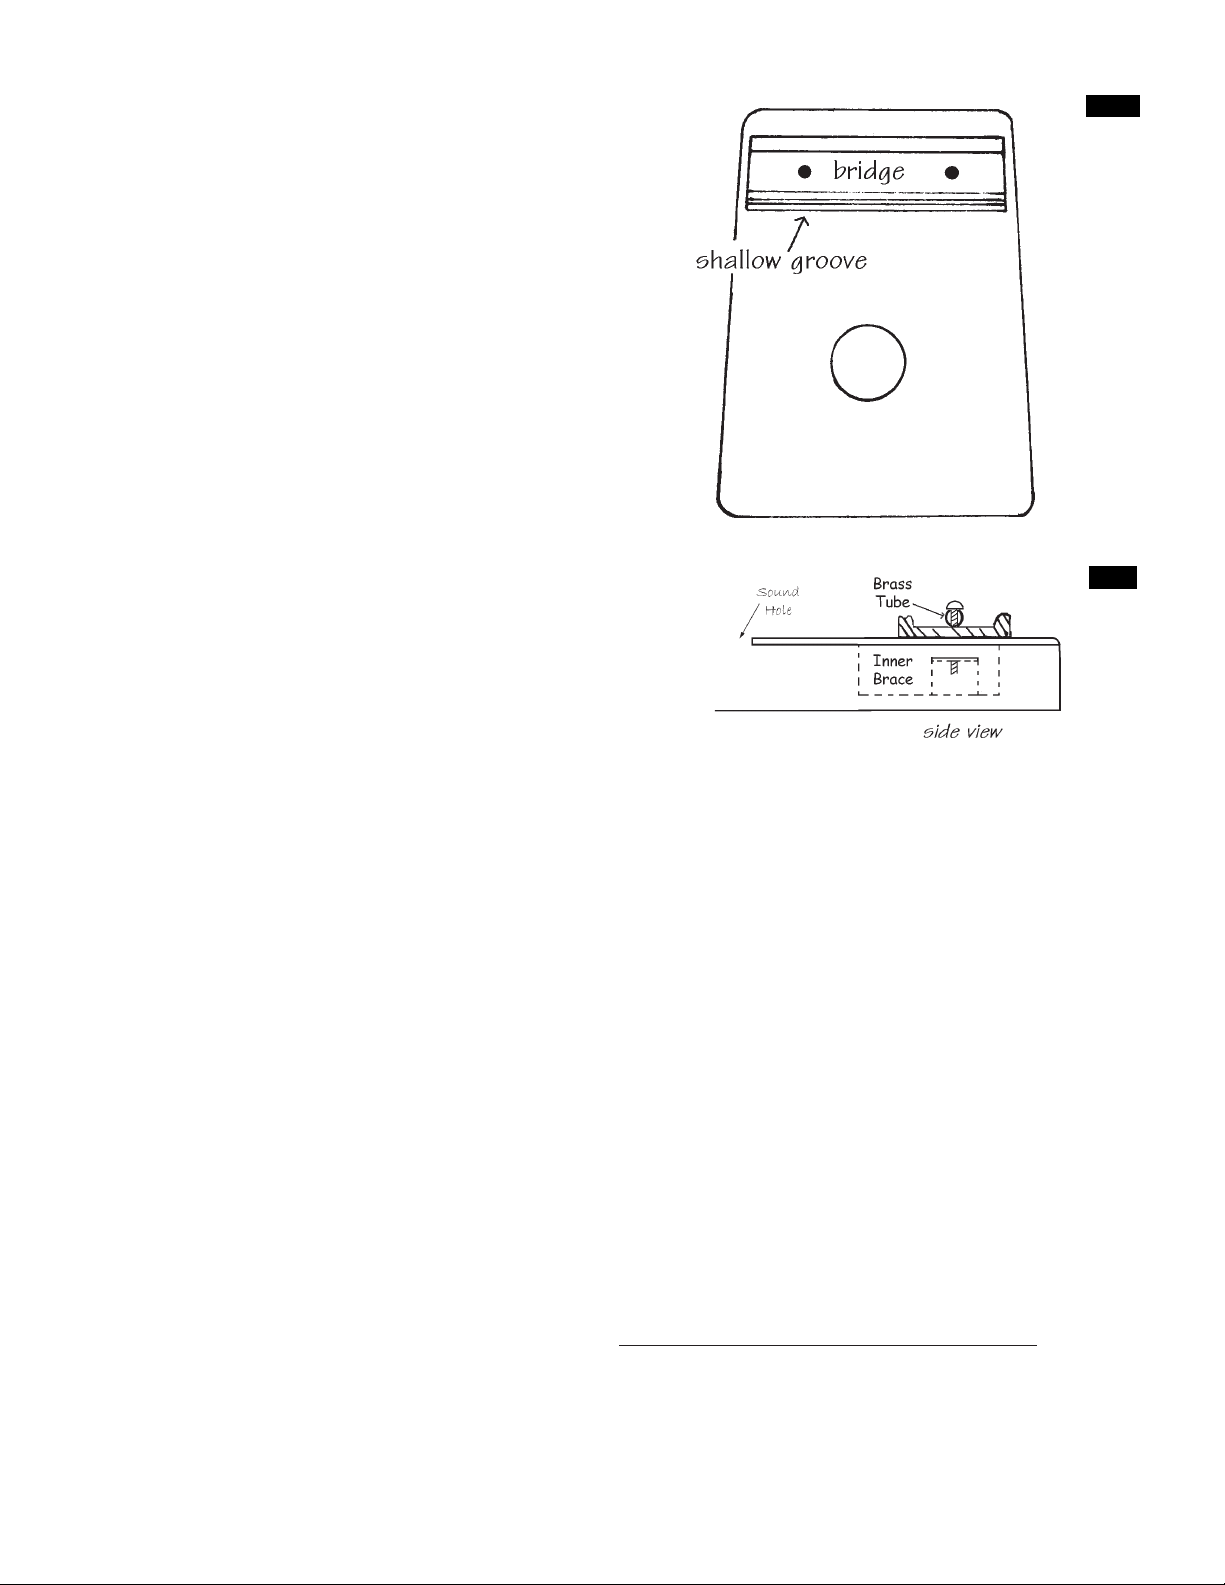
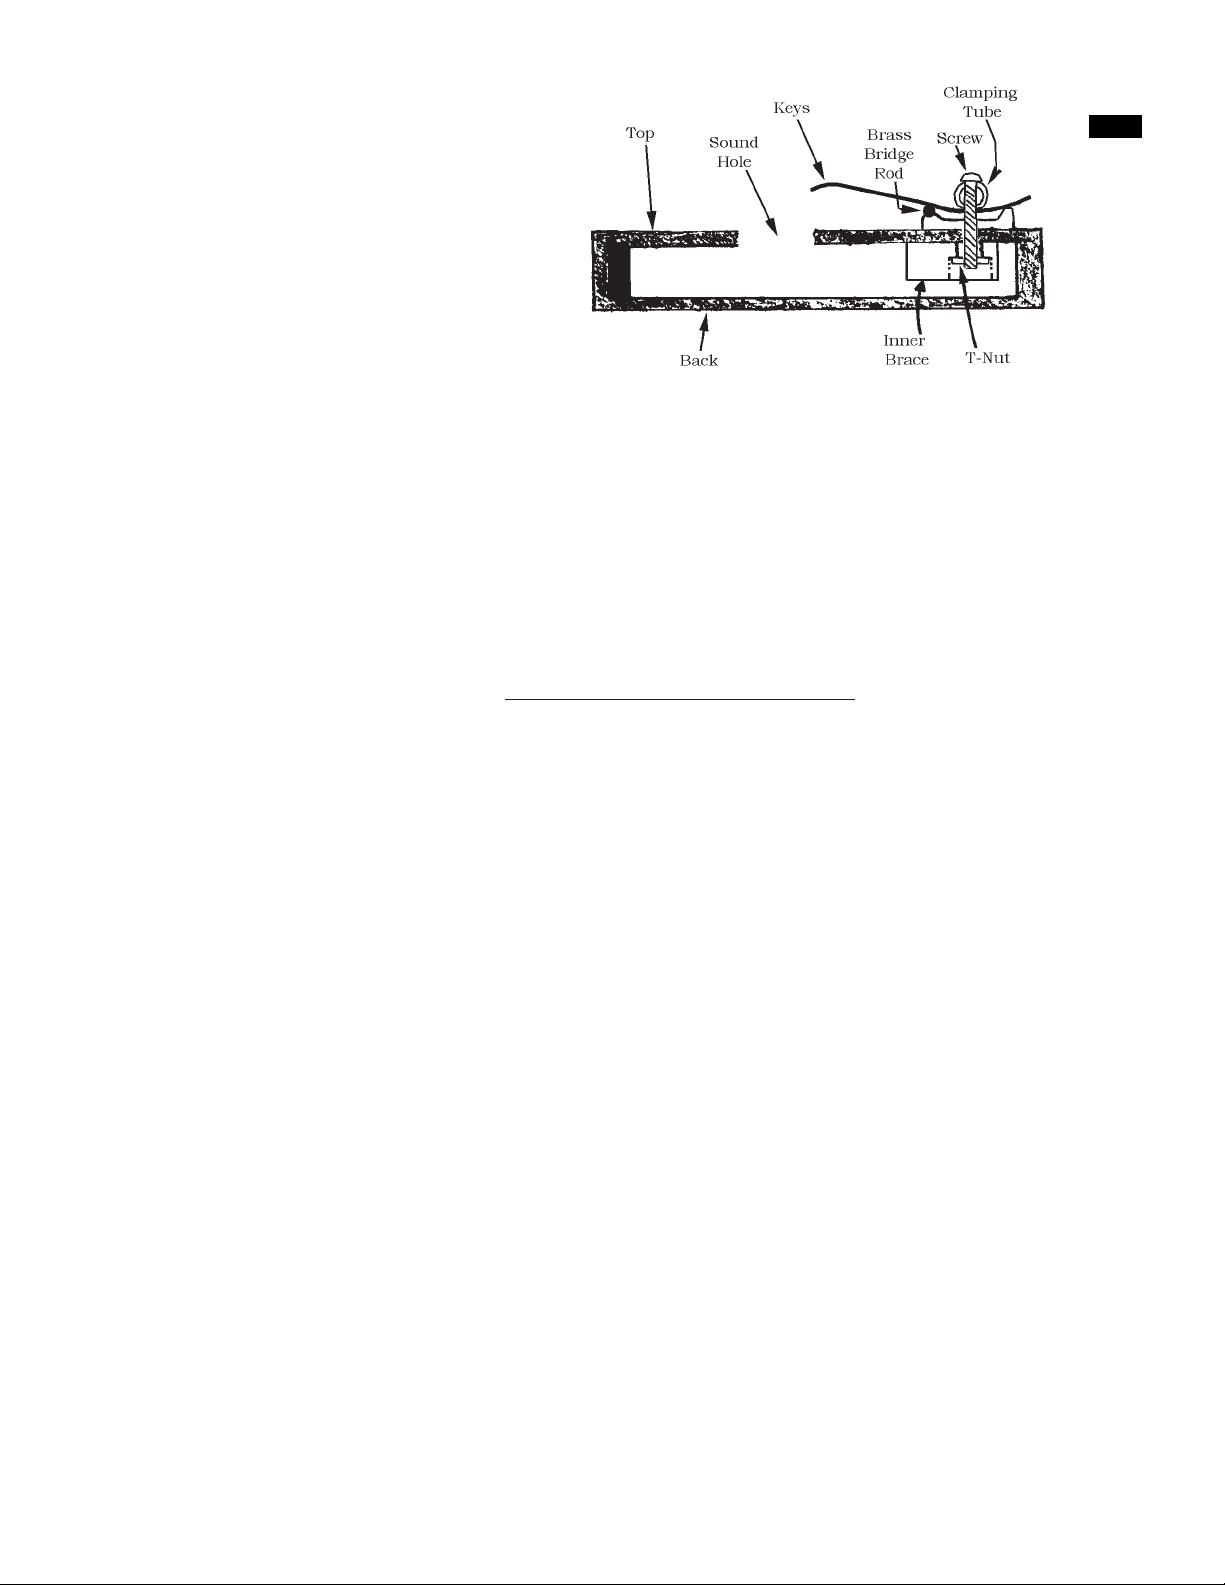
FIG. 16
Slide the KEYS under the BRASS TUBE
tube, with the longest ones in the
middle and the shortest ones toward
each side. NOTE: One end of each key
is bent downward, and that’s the end
you will pluck. It should be pointing
toward the sound hole. (fig. 16)
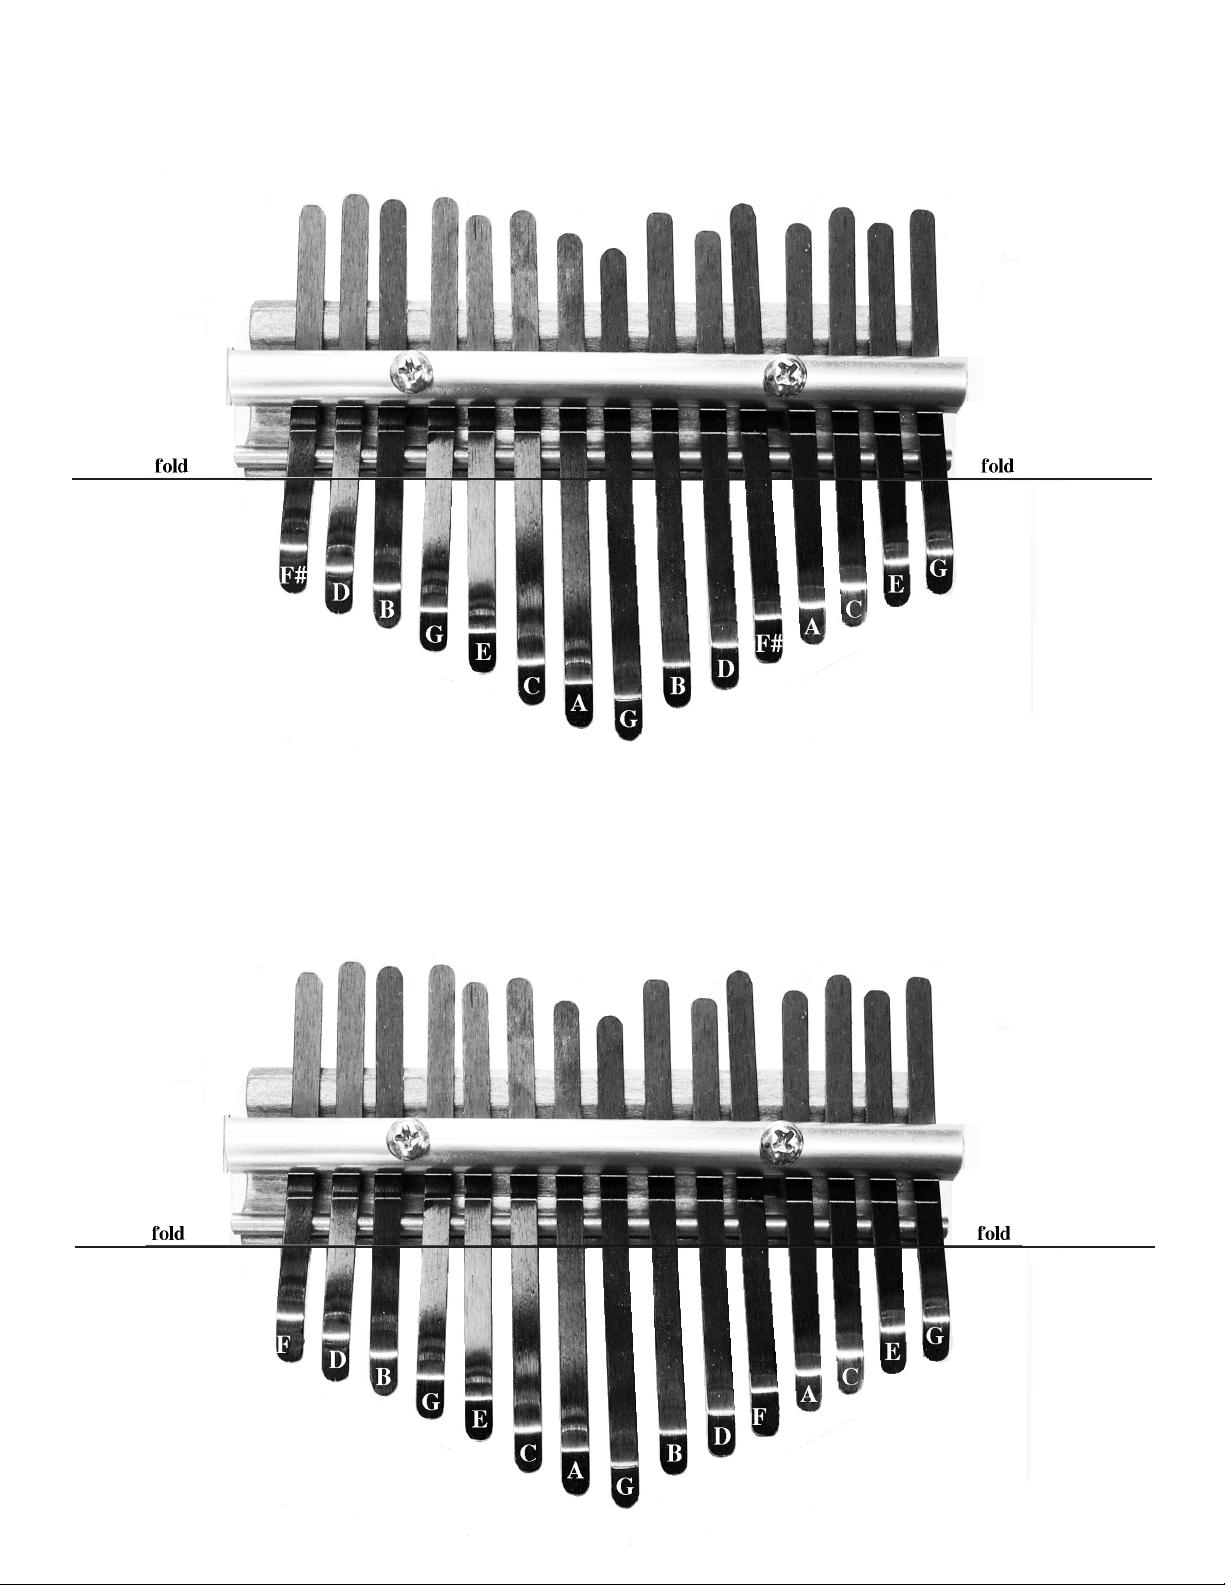
Use one of the TUNING CHARTS (see page 7) to arrange the keys to match the image, and
“hand tighten” the BRASS TUBE to hold them lightly as you arrange them. Notice there are
three keys to the left of the left screw and four keys to the right of the right screw --- this is help-
ful for getting them spaced evenly. Set the length of each prong to match the TUNING CHART
on page 7 to help get them close to proper pitch.
When you get them close to position, tighten the screws about one full turn so you can pluck
the keys and check each one for pitch. If you have a piano or keyboard available, the longest
note in the center should match the G3 to the left of Middle C on the keyboard. You may also
consult our free ONLINE TUNER at www.harpkit.com/freetuner.
Tune the longest one to G below Middle C and then go up the scale, alternating from left to
right, as shown, for two octaves, pushing each prong upward to raise the pitch, or pulling it
down to lower the pitch.
NOTE: The thumb piano is tuned to the Key of G. You’ll notice that the F notes have a # symbol
behind them, and that indicates F-sharp, which is the black key imediately to the right of the
F note on the piano keyboard.
When you have the prongs in tune, you can tighten the screws to secure the prongs more per-
manently and to raise the ends up for easier plucking.
TROUBLESHOOTING
FINE TUNING
If you hear a buzz or rattle as you play, just tighten the screws a little more.
If one of the highest prongs has a “dead” sound, that means there is an air gap under that end
of the wood bridge. You may not be able to see the crack, but try squirting some Superglue
along the end of the bridge so it soaks into the thin cavity under the bridge. Or, if you can see
the crack, try sanding a scrap of wood to a sharp low-angle wedge and tapping the point into
the gap. That should support the bridge so the tone sounds clear.
The higher notes may go a little sharp when you tighten the screws. You can still adjust their
length, but you’ll probably need to push them with a scrap of wood or a pair of pliers when they
are so tightly held in the bridge.