manuals.online logo
Brands
  1. Home
  2. •
  3. Brands
  4. •
  5. Mustang
  6. •
  7. TV Mount
  8. •
  9. Mustang MV-TILT2 User manual

Mustang MV-TILT2 User manual

mustanginfo@mustangav.com
ww.mustangav.com
MV-TILT2
page 1
Hardware Description
Bolts: M4 x 12 mm
Bolts: M4 x 30 mm
M4 lock washers
BAG 1
In addition to your hardware kits, you will need a screwdriver. If you
are installing your MV-TILT2 on drywall, you will need a stud finder.
If you are installing your MV-TILT2 on brick or concrete, you will need
an electric drill and an 8 mm masonry bit.
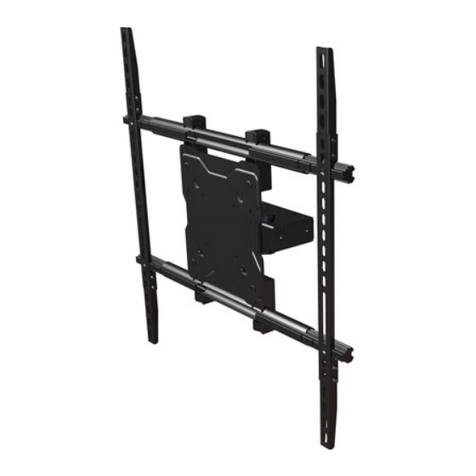
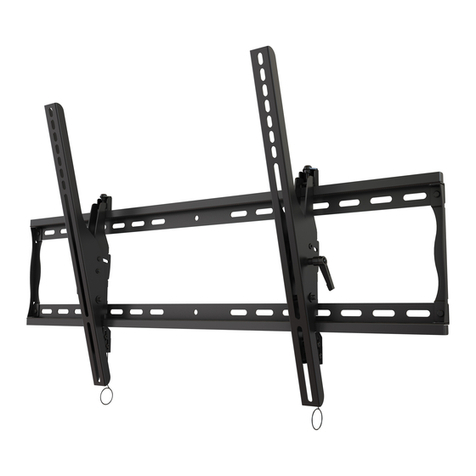
Your MV-TILT2 comes with all of the components you need to
assemble your mount:
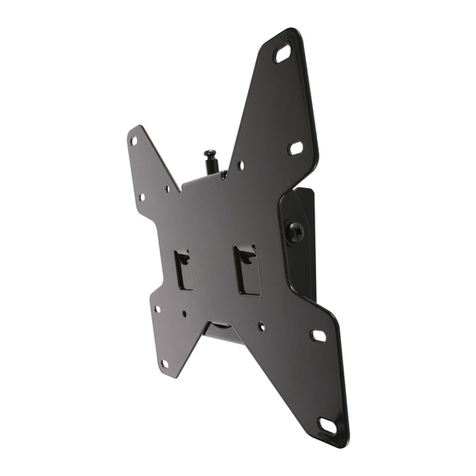
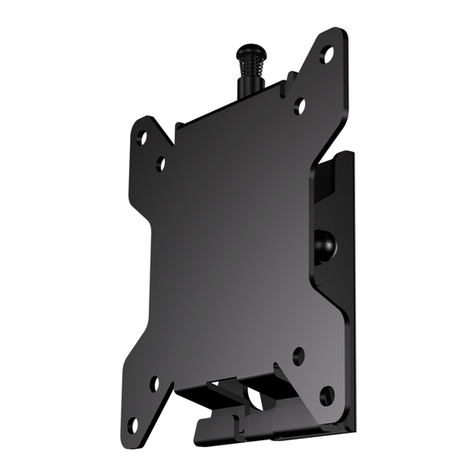
1) The wall bracket provides the frame of support for the
mounting rails and mounts directly to the mounting surface.
2) The mounting rails will attach directly to your flat panel display.
3) The adjustment bar is located at the bottom of the wall
bracket and allows you to adjust the tilt of your flat
panel display.
Once you locate your hardware kits, and the tools you need for
installation, you are ready to start installing the MV-TILT2.
Mount the wall bracket
1. Select the optimum location for your flat panel display.
a) Make sure that there is enough space available for the flat
panel display and consider its dimensions.
b) Measure the diagonal size of your flat panel display
(if necessary).
Note: the MV-TILT2 is designed to support flat panel displays
that measure 26-42” diagonally. If your flat panel display is
larger, you will need to use the MV-TILT3.
2. Determine your mounting type:
a. Wooden stud mounting
1. Locate the center of the wooden stud using an
electronic stud finder.
Note:You should verify the location of each stud using a
small nail or awl.
2. Place the wall bracket against the wall mounting surface.
3. Install a single drywall screw and drywall washer
(from bag 6) on the left side of the top portion of the
wall bracket.
Note: do not completely tighten the screw at this point.
4. Level the wall bracket with a bubble level.
5. Install a second drywall screw and drywall washer
(from bag 6) on the top center portion of the
wall bracket.
6. Repeat steps four and five until all of the drywall screws
and washers are installed. See Figure A.
Your MV-TILT2 comes with six separate hardware bags:
Quantity
4
4
4
Hardware Description
Bolts: M5 x 12 mm
Bolts: M5 x 30 mm
M5 lock washers
Quantity
4
4
4
BAG 2
Hardware Description
Bolts: M6 x 12 mm
Bolts: M6 x 35 mm
M6 lock washers
Quantity
4
4
4
BAG 3
Hardware Description
Bolts: M8 x 16 mm
Bolts: M8 x 40 mm
M8 lock washers
Quantity
4
4
4
BAG 4
Hardware Description
M4/M5 spacers
M6/M8 spacers
M4/M5 washers
Quantity
4
4
4
BAG 5
Hardware Description
Concrete anchors
Drywall screws
Washers
Quantity
4
4
4
BAG 6Figure A
Note: after this step, a drywall screw and washer should be
installed in the upper left corner, bottom left corner, upper
center point, lower center point, upper right corner and lower
right corner of the wall bracket.
7. Tighten all screws.
8. Proceed to “Attach mounting rails to your flat
panel display.”
b. Masonry mounting
1. Position the wall bracket against the wall.
2. Level the wall bracket with a bubble level.
3. Mark the mounting hole locations on the wall using the
wall brackets a template.
4. Place the wall bracket aside.
mustanginfo@mustangav.com
ww.mustangav.com
MV-TILT2
page 2
Hang your flat panel display.
1. Lift the flat panel display into position in front of the wall bracket.
Two or more people should perform this task.
2. Lower the display carefully onto the wall bracket.
Adjust your flat panel display.
1. Pull outward on the bottom of your flat panel display while pulling
one of the knobs on the adjustment bar outward.
2. Turn the adjustment knob clockwise to raise the viewing angle or
counter clockwise to lower the viewing angle.
3. Release your grip on the adjustment bar to lock your display at
the desired tilt angle.
Lock your flat panel display
1. Locate the small metal tabs located on the mounting rails that
attach to your flat panel display.
2. Push the metal tabs inward so that the tabs come into contact
with the cross-bar.
3. Place a small padlock (not supplied) through the holes located on
the tabs and arm brackets
5. Drill six mounting holes using an electric drill and an
8 mm masonry bit.
6. Insert a concrete anchor into each hole.
7. Lightly tap the wall anchors with a hammer flush to
the wall.
8. Place the wall bracket back into position on the wall.
9. Screw a drywall screw and a drywall washer into each of
the six anchors. See Figure B.
Figure B
10. Tighten all of the screws once they are all in place.
11. Proceed to “Attach mounting rails to your flat
panel display.”
Attach mounting rails to your flat panel display
1. Detach the stand on your flat panel display.
Note: if your flat panel display comes with a stand, it must be detached
before your can mount it to the MV-TILT2.
2. Examine the back of your flat panel display to determine which
bolt length you require.
Note: a flat panel display with a flat back usually requires shorter bolts,
while flat panel displays with curved or recessed backs require longer bolts.
3. Test each diameter bolt with your flat panel display until you find
the one that fits.
Note: avoid forcing a bolt into your flat panel display that does not fit as
damage could occur.
4. Place one of the mounting rails gently onto the back of your flat
panel display.
5. Align the rail so that it matches the VESA compliant mounting
holes on the back of your flat panel display.
6. Place the appropriate washer, lock washer and bolt through the
mounting rail.
Note: if your flat panel display requires one of the smaller diameter bolts
(M4 or M5), use a M4 or M5 washer. If your flat panel display has a curved
or recessed back, it may need one of the supplied spacers. Spacers should
be installed directly between the mounting rail and the flat panel display, as
indicated by figure B.
7. Tighten the screw in place to attach the mounting rail to the
flat panel display.
8. Repeat steps 6 and 7 until the mounting rails are securely
attached to the back of your flat panel display. See Figure C.
Figure C
Other Mustang TV Mount manuals

Mustang MPAD-CPU40 User manual

Mustang

Mustang MPAD-CPU40 User manual

Mustang MPT-S22V User manual

Mustang

Mustang MPT-S22V User manual

Mustang MPP-S21V User manual

Mustang

Mustang MPP-S21V User manual

Mustang MPDS-L75U User manual

Mustang

Mustang MPDS-L75U User manual

Mustang MPF-S11V User manual

Mustang

Mustang MPF-S11V User manual

Mustang MPF-S21V User manual

Mustang

Mustang MPF-S21V User manual

Mustang MPA-XHD86U User manual

Mustang

Mustang MPA-XHD86U User manual

Mustang MPA-M44ULL User manual

Mustang

Mustang MPA-M44ULL User manual

Mustang MPA-M44U User manual

Mustang

Mustang MPA-M44U User manual

Mustang MPDS-M44UL User manual

Mustang

Mustang MPDS-M44UL User manual

Mustang MPT-S11V User manual

Mustang

Mustang MPT-S11V User manual

Mustang MV-STA2B User manual

Mustang

Mustang MV-STA2B User manual

Mustang MPAUW-L64U User manual

Mustang

Mustang MPAUW-L64U User manual

Mustang MPA-M22VF User manual

Mustang

Mustang MPA-M22VF User manual

Mustang MPAU-M22V User manual

Mustang

Mustang MPAU-M22V User manual

Mustang MPCD-M44V User manual

Mustang

Mustang MPCD-M44V User manual

Mustang MPMS-9T User manual

Mustang

Mustang MPMS-9T User manual

Mustang MPA-L75U User manual

Mustang

Mustang MPA-L75U User manual

Mustang MV-TILT2B User manual

Mustang

Mustang MV-TILT2B User manual

Mustang MPT-L65UA User manual

Mustang

Mustang MPT-L65UA User manual

Mustang MPC-M44V User manual

Mustang

Mustang MPC-M44V User manual

Mustang MPA-X86U User manual

Mustang

Mustang MPA-X86U User manual

Mustang MPC-X86U User manual

Mustang

Mustang MPC-X86U User manual

Mustang MPT-X85UA User manual

Mustang

Mustang MPT-X85UA User manual

Popular TV Mount manuals by other brands

Leviton EXTENDER BRACKET 47612-28B installation instructions

Leviton

Leviton EXTENDER BRACKET 47612-28B installation instructions

Manta UCH003 user manual

Manta

Manta UCH003 user manual

HONTECH HT-A05 quick start guide

HONTECH

HONTECH HT-A05 quick start guide

Sanus VMCA10 instructions

Sanus

Sanus VMCA10 instructions

Nordic Deltaco ARM-0265 user manual

Nordic

Nordic Deltaco ARM-0265 user manual

FLATLIFT Pop-Up operating manual

FLATLIFT

FLATLIFT Pop-Up operating manual

Monacor IMG STAGELINE PAST-84/SW operating instructions

Monacor

Monacor IMG STAGELINE PAST-84/SW operating instructions

Audio Solutions AS-RC3260 Guide

Audio Solutions

Audio Solutions AS-RC3260 Guide

RCA PRO SELECT MD3790FM installation manual

RCA

RCA PRO SELECT MD3790FM installation manual

CHIEF PSM-2128 installation instructions

CHIEF

CHIEF PSM-2128 installation instructions

Sanus SLF5 instruction manual

Sanus

Sanus SLF5 instruction manual

Turbosound iQ Series quick start guide

Turbosound

Turbosound iQ Series quick start guide

Aritech 6932AMP-SB Installation sheet

Aritech

Aritech 6932AMP-SB Installation sheet

Havis-Shields Dodge Charger Spare Tire Bracket C-TTB-CHGR Install instructions

Havis-Shields

Havis-Shields Dodge Charger Spare Tire Bracket C-TTB-CHGR Install instructions

Novus NVB-BEH24DB Mounting manual

Novus

Novus NVB-BEH24DB Mounting manual

PEERLESS MIS374A Installation and assembly manual

PEERLESS

PEERLESS MIS374A Installation and assembly manual

NCE 2018 Installation instructions & user manual

NCE

NCE 2018 Installation instructions & user manual

FONESTAR STV-651N instruction manual

FONESTAR

FONESTAR STV-651N instruction manual

manuals.online logo
manuals.online logoBrands
  • About & Mission
  • Contact us
  • Privacy Policy
  • Terms and Conditions

Copyright 2025 Manuals.Online. All Rights Reserved.