muth Signal User manual

TOYOTA TUNDRA 2007
Signal
®
Mirror Installation Instructions
Page 1 of 9 pages Supplier Ref. Number: 21001340
Issue: A 5/3/07
Signa
l
®
Mirror Installation Instructions
2007ToyotaTundra(USAbuiltmodelonly)
THE safety accessory of the 21st Century.™
P/N 210-0134-0 Rev. A (5/2/07), BTV © 2007 Muth Mirror S
y
stems, LLC
PROFESSIONALINSTALLATIONRECOMMENDED:
Warrantydoesnotcoverdamagetothevehicleormirrorhousingduetoimproperinstallation.
MuthMirrorSystems,LLC(MMS)assumesnoresponsibilitywithregardtotheaccuracyofthisinformation.
MMSassumesnoliabilityorresponsibilityresultingfromimproperinstallation,eveninrelianceuponthisinformation.Properinstallationis
theresponsibilityoftheinstaller.Itisyourresponsibilitytoverifyanycircuitbeforeinterfacingwithitusingadigitalmultimeter.
PLEASE READ INSTRUCTIONS PRIOR TO INSTALLATION
PROBLEMS OR QUESTIONS?
Technical Assistance is available by calling
Muth Mirror Systems Technicians at:
1-800-844-6616
Monday through Friday
Between 8:00 am and 5:00 p.m. CST
Or through the Muth web site: www.muthco.com

TOYOTA TUNDRA 2007
Signal
®
Mirror Installation Instructions
Page 2 of 9 pages Supplier Ref. Number: 21001340
Issue: A 5/3/07
NOTE: Part number of this accessory may not be
the same as the part number shown.
Item # Qty Req’d. Description
1 4 Wire taps
Kit Contents
Item # Qty Req’d. Description
1 1 LH
Signal®
mirror assembly
2 1 RH
Signal®
mirror assembly
3 1 LH Wire harness
4 1 RH Wire harness
5 1 Hardware bag
6 1 Installation instruction manual
Hardware Bag Contents
Personal/Vehicle Protection Notes
Blankets or towels
Sturdy gloves
Safety glasses (goggles)
Installation Tools Size/Description
Ratchet With extension
Screwdrivers Slotted & Phillips
Sockets 10mm
Pry bar Small (plastic)
Needle nose pliers
Gopher wire (rod)
Electrical Tape
Utility knife
Wire crimper/stripper
Clip Removal [Snap-On] Tool PN: YA331
Multimeter (wire tester)
Recommended Tools
Item # Qty Req’d. Description
Recommended Tools Continued
Special Tools Notes
None
Special Chemicals Notes
Cleaner Household Windex
General Applicability
Conflicts
Item # Accessory
Recommended Sequence of Application
Item # Qty Req’d. Description
Vehicle Service Parts (may be required for reassembly)
*Mandatory
STOP: Damage to the vehicle may occur. Do not
proceed until process has been complied with.
OPERATOR SAFETY: Use caution to avoid risk of injury.
CAUTION: A process that must be carefully observed in
order to reduce the risk of damage to the
accessory/vehicle and to ensure a quality installation.
TOOLS & EQUIPMENT: Used in Figures calls out the
specific tools and equipment recommended for this
process.
REVISION MARK: This mark highlights a change in
installation with respect to previous issue.
Signal®andSignalMirror®areregisteredtrademarksofK.W.MuthCompany,Inc.andmustbeidentifiedassuchonallpromotionalmaterials

TOYOTA TUNDRA 2007
Signal
®
Mirror Installation Instructions
Page 3 of 9 pages Supplier Ref. Number: 21001340
Issue: A 5/3/07
Care must be taken when installing this accessory to ensure damage does not occur to the vehicle. The installation of this accessory
should follow approved guidelines to ensure a quality installation.
These guidelines can be found in the "Accessory Installation Practices" document.
This document covers such items as:
•Vehicle Protection (use of covers and blankets, cleaning chemicals, etc.).
•Safety (eye protection, rechecking torque procedure, etc.).
•Vehicle Disassembly/Reassembly (panel removal, part storage, etc.).
•Electrical Component Disassembly/Reassembly (battery disconnection, connector removal, etc.).
Please see your Toyota dealer for a copy of this document.
REMOVE BATTERY CABLE
1. Protect fender before starting. Do not touch
the positive terminal with any tool when removing cable. Remove
the negative battery cable.
1. Open door, lower windows, remove upper triangular trim panel
by prying off from the top down. We suggest an anti-scratch nylon
type tool to minimize any nicks, scratches, etc. (Fig. 2-1)
DOOR PANEL REMOVAL
2. Remove plastic cover within door release lever. Remove screw
behind plastic cover. (Fig. 2-2)
Fig. 2-1
Fig. 2-2

TOYOTA TUNDRA 2007
Signal
®
Mirror Installation Instructions
Page 4 of 9 pages Supplier Ref. Number: 21001340
Issue: A 5/3/07
Fig. 2-4
Fig. 2-5
Fig. 2-3
3. Remove trim piece from bottom of door handle to expose
screw, remove screw. (Fig. 2-3)
4. Unsnap control panel from door, disconnect all connectors.
(Fig. 2-4)
5. Starting at bottom of panel, gently pull on panel to release all
push pin connections which are around the perimeter of panel.
(Fig. 2-5)

TOYOTA TUNDRA 2007
Signal
®
Mirror Installation Instructions
Page 5 of 9 pages Supplier Ref. Number: 21001340
Issue: A 5/3/07
Fig. 2-7
Fig. 2-8
Fig. 2-6
6. Pull door panel out slightly, disconnect wiring behind door
panel light [located on the lower left hand corner]. (Fig. 2-6)
7. Lift door panel and pull it out partially. Unsnap door lever
cable behind door panel. Remove door panel and set it aside.
(Fig. 2-7)
8. Disconnect mirror harness. Secure the mirror housing with
one hand, remove the (3) nuts holding the mirror housing to the
door frame using a 10mm socket. WARNING: Not securing mirror
housing with one hand before loosening the nuts could cause the
mirror housing to fall and become damaged. Carefully remove
mirror housing from door frame and set mirror housing on a cloth
covered surface. (Fig. 2-8)

TOYOTA TUNDRA 2007
Signal
®
Mirror Installation Instructions
Page 6 of 9 pages Supplier Ref. Number: 21001340
Issue: A 5/3/07
1. Place the mirror housing on a cloth covered, level surface.
Slide one of the supplied foam pads in between the mirror backing
plate and mirror housing to prevent scratching the mirror housing.
Insert the clip removal tool (small pry bar) on the bottom between
mirror backing plate and mirror housing. Slowly push-up (pry)
mirror backing plate until the (4) snap tabs disengage. Disconnect
heater terminals (if heated). Remove mirror from mirror housing.
(Fig. 3-1)
MIRROR REPLACEMENT
WARNING: Safety glasses and sturdy gloves are required for mirror replacement.
2. Using a slotted screwdriver, carefully remove the plastic cover
from beneath the mirror housing. (Fig. 3-2)
3. With a utility knife, cut a small access hole in grommet for
Signal® mirror wire harness. WARNING: Take care not to damage
OEM wires. (Fig. 3-3)
Fig. 3-1
Fig. 3-2
Fig. 3-3

TOYOTA TUNDRA 2007
Signal
®
Mirror Installation Instructions
Page 7 of 9 pages Supplier Ref. Number: 21001340
Issue: A 5/3/07
6. Route
Signal
® mirror wire harness through cut hole made in
the grommet. Pull wire harness through removing any slack in the
Signal
®mirror wire harness. Replace rubber grommet in the sail.
Re-install bottom plastic cover. Guide the
Signal
®mirror wire
harness thru the hole in the door frame and position the mirror
housing assembly onto the mirror mount. Attach the mirror
housing to the mirror mount with (3) mirror mounting nuts and
torque to 71 in.lbf. (A). WARNING: Do not over tighten the mirror
mounting nuts. Reconnect mirror harness. (Fig. 3-6)
4. Start with the shorter of the two
Signal
® mirror wire harnesses,
route the wire from inside housing, along side OEM wire, leaving
about 4-6 inches of wire within the mirror housing. Connect the
mating connectors on the new
Signal
® mirror and the
Signal
®
mirror wire harness. If heated, reconnect the heater wires to the
heater terminals on the back of the new
Signal
® mirror. NOTE:
There is no polarity so the heater wires may be interchanged.
(Fig. 3-4)
5. Carefully tuck all wiring behind motor actuator. CAUTION: Not
doing so, could result in wiring interfering with mirror travel. Align
(4) snap tabs and set
Signal
® mirror against motor mount. Push
down with clip removal tool (pry bar) until (4) snap tabs are in
place. Press down on all sides to ensure proper fit, form, and
function. (Fig. 3-5)
Fig. 3-5
Fig. 3-4
Fig. 3-6

TOYOTA TUNDRA 2007
Signal
®
Mirror Installation Instructions
Page 8 of 9 pages Supplier Ref. Number: 21001340
Issue: A 5/3/07
WARNING: When routing wire into vehicle, it is extremely important to not let wire get pinched or crushed at any time.
Avoid window track and sharp edges at all times. Not doing so may cause circuit shortage problems in the long run.
* Before proceeding, please read remainder of instructions for information regarding wiring identification and options.
** Repeat all of the previous steps to replace the factory mirror on the passenger side door with the new
Signal
®mirror.
Fig. 4-1
Fig. 4-2
WIRE IDENTIFICATION
Wiring location is located on each side of the door panel area.
1. Wiring location for the driver side turn indicator is located on
the driver side door panel area. Locate the RED wire on the bottom
row of the connector next to a white w/ black stripe wire. Turn the
ignition key so that electrical power is on and activate the left turn
indicator. Probe the RED wire with the wire tester to verify that
flashing turn directional power is present. Label that wire as
‘DRIVER SIDE INDICATOR’. Locate the WHITE w/ BLACK STRIPE
wire and label that wire as ‘DRIVER GROUND’.
Wiring location for the passenger side turn indicator is located
on the passenger side door panel area. Locate the PINK wire and
activate the right turn indicator. Probe the wire with the wire tester
to verify that flashing turn directional power is present. Label that
wire as ‘PASSENGER SIDE INDICATOR’. Locate the WHITE w/
BLACK STRIPE wire and label that wire as ‘PASSENGER GROUND’.
(Fig. 4-1)
2. Route
Signal
®
mirror wire harness to open area suitable to
make the connection. Cut wires to length making sure enough
slack is available for splicing. Follow the procedures on the next
page to splice wires together. (Fig. 4-2)
*** RE-CONNECT THE BATTERY CABLE PRIOR TO TURNING
THE IGNITION KEY TO ‘ON’ FOR WIRE TESTING.

TOYOTA TUNDRA 2007
Signal
®
Mirror Installation Instructions
Page 9 of 9 pages Supplier Ref. Number: 21001340
Issue: A 5/3/07
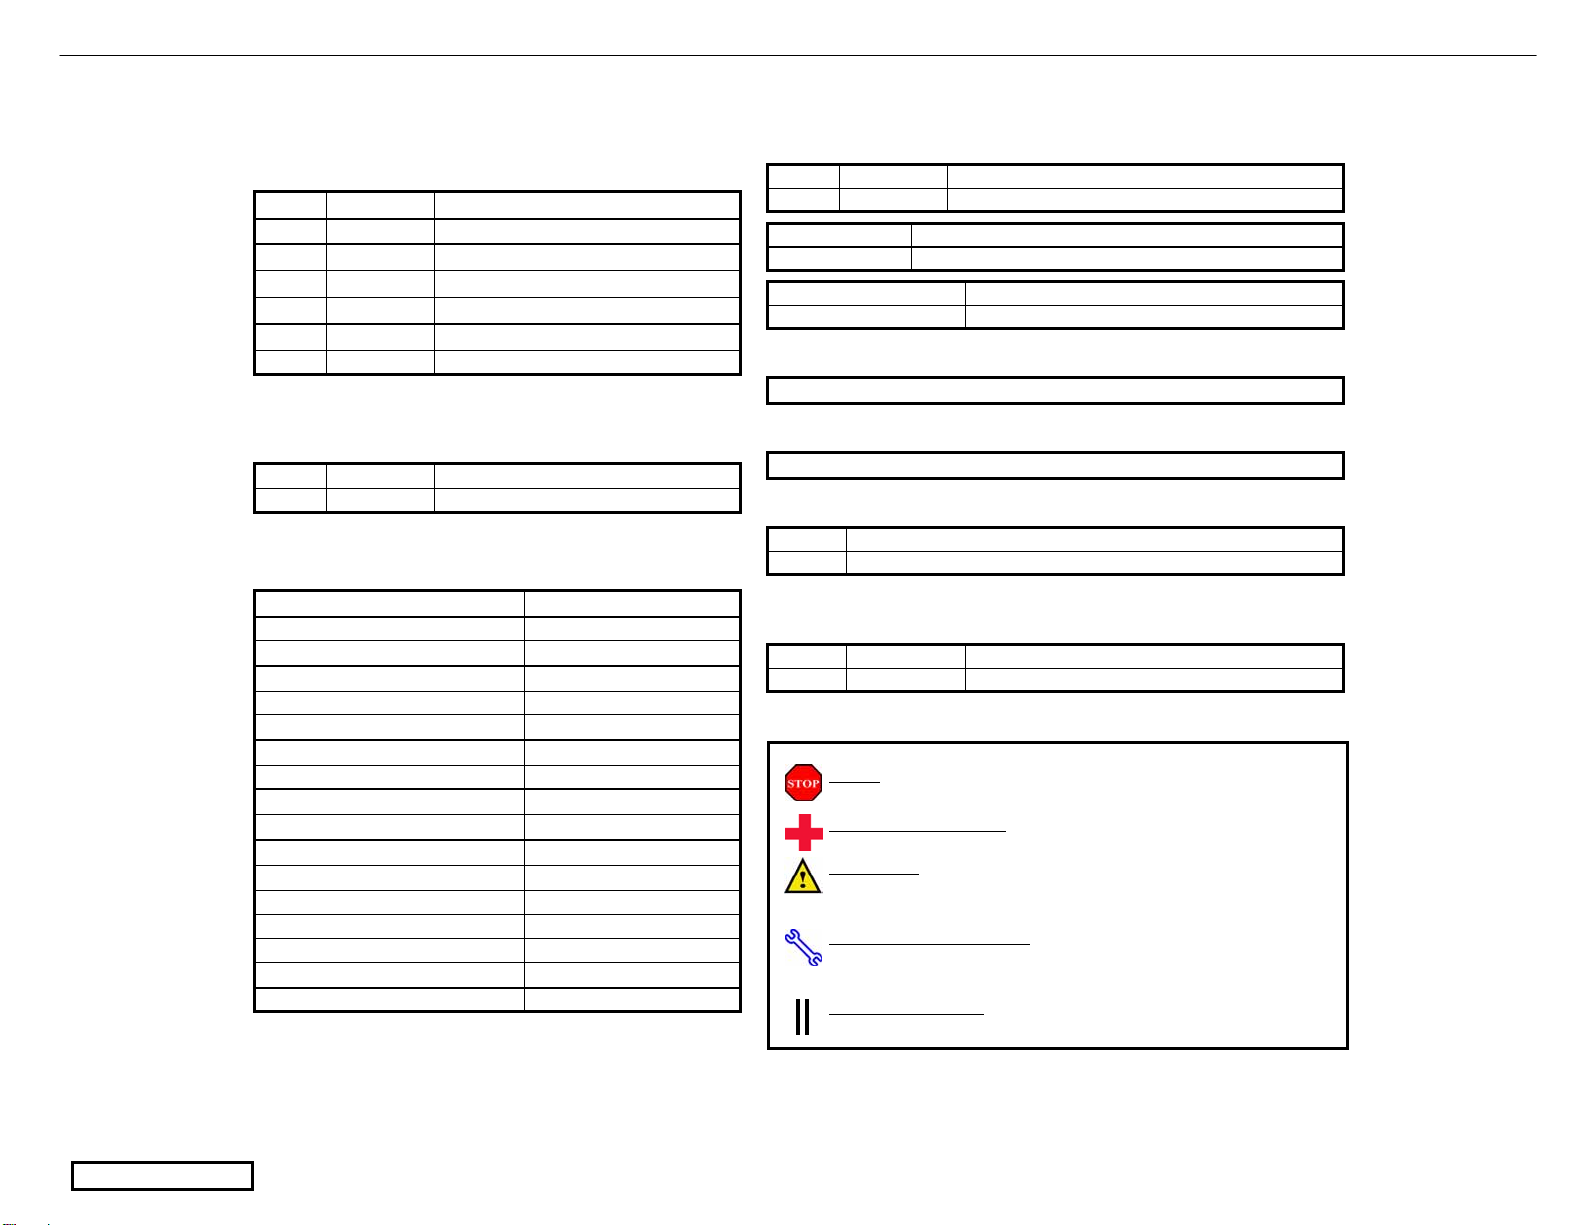
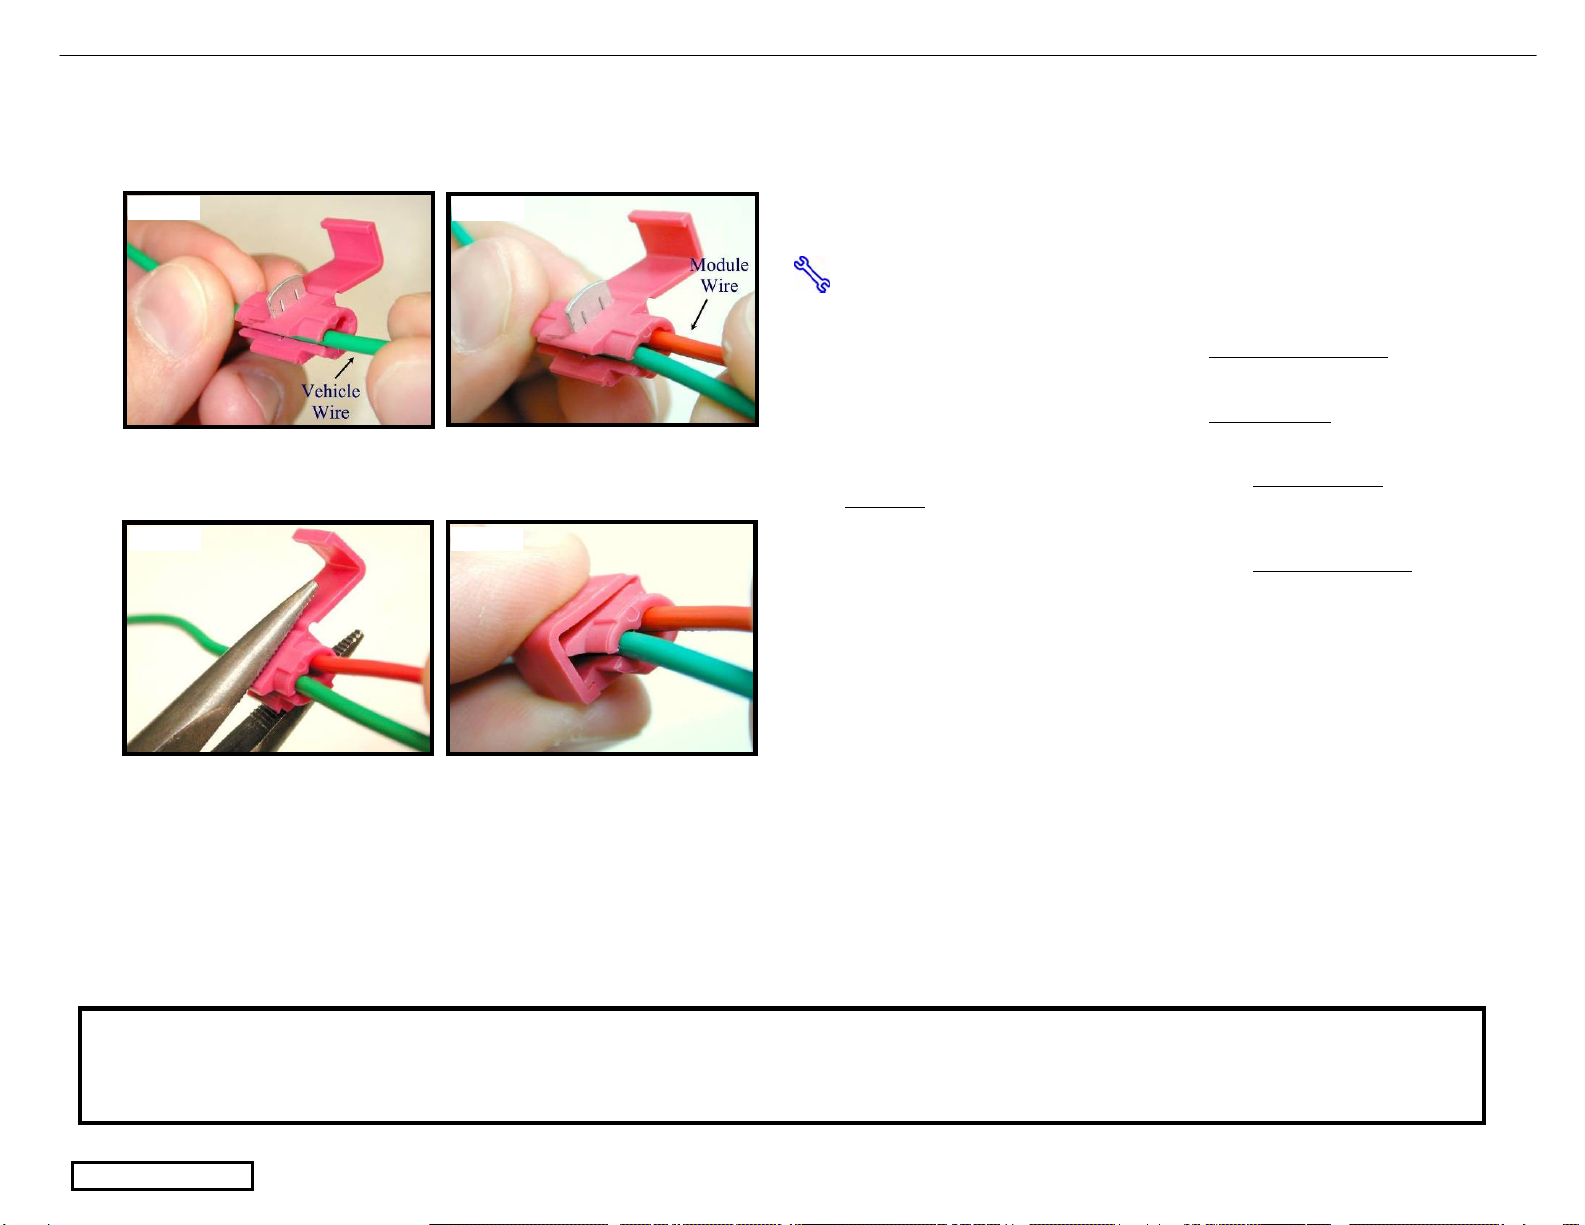
USE THE INCLUDED WIRE TAPS AND FOLLOW THE FOUR STEPS
(TO THE LEFT) TO SPLICE INTO THE TURN INDICATOR AND
GROUNDING WIRES. (Fig A – D)
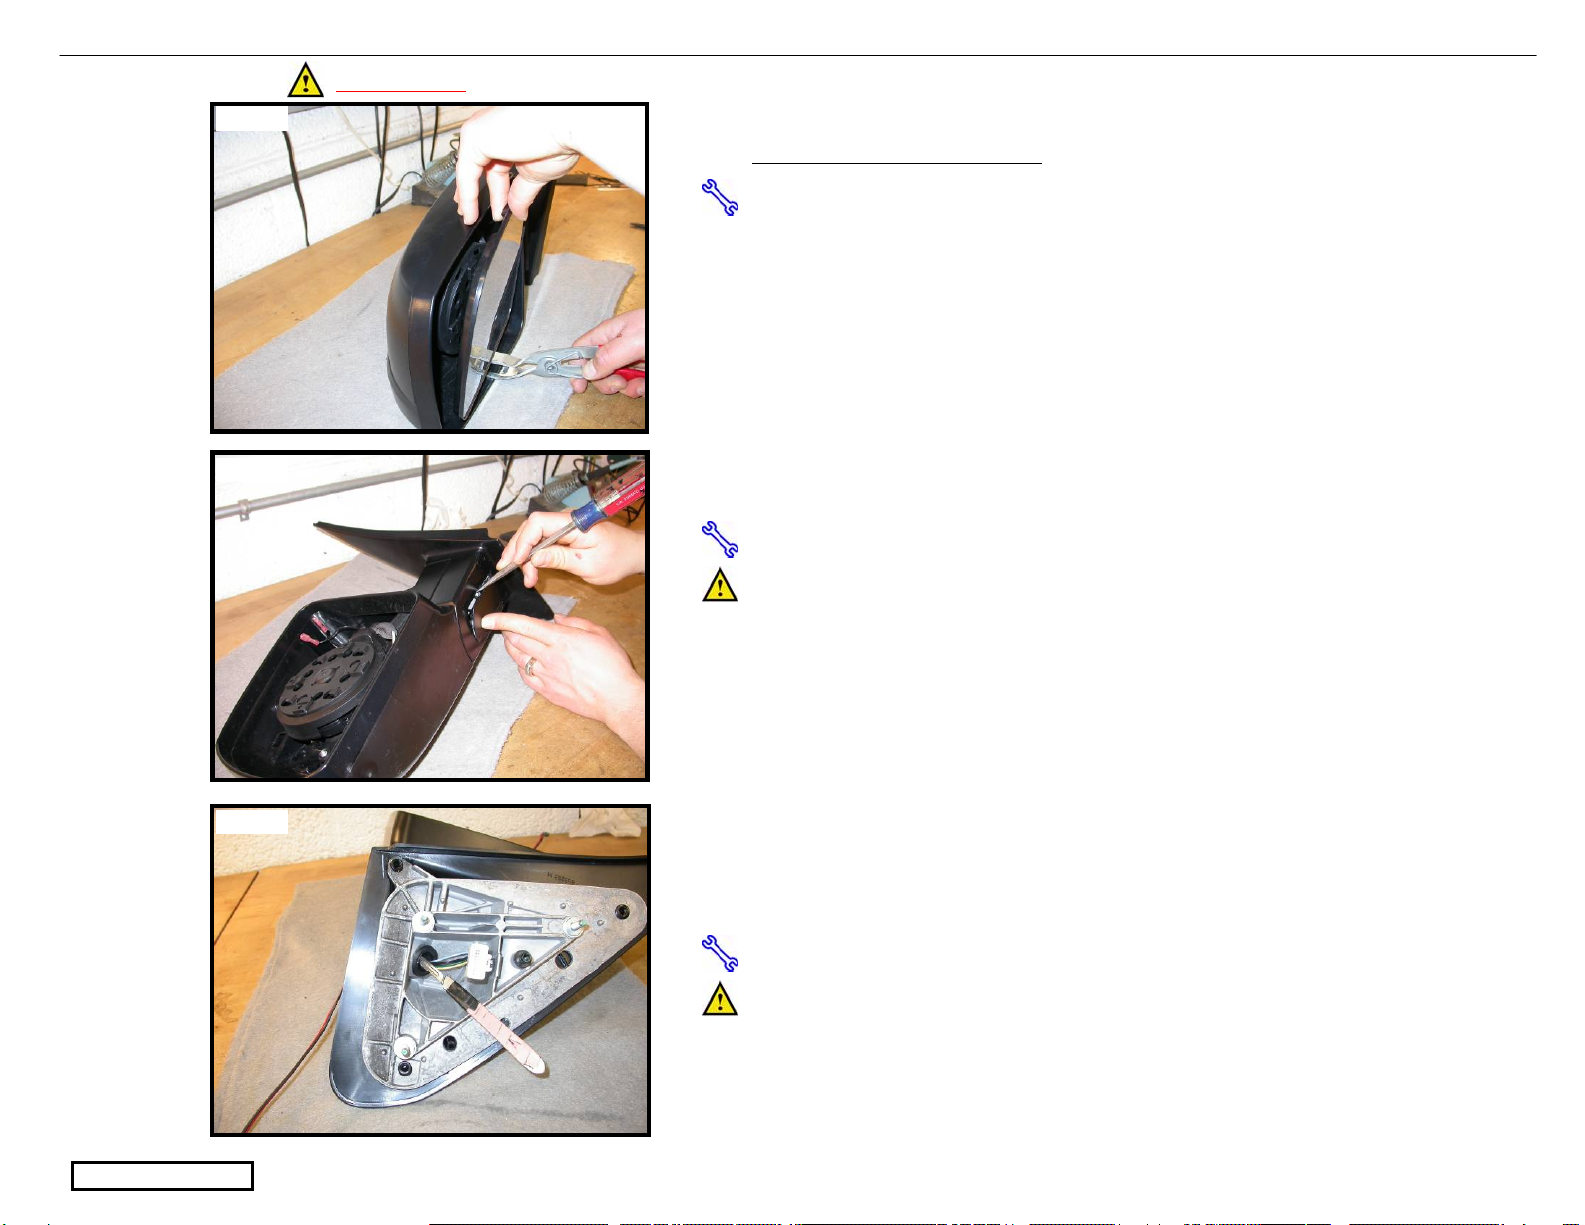
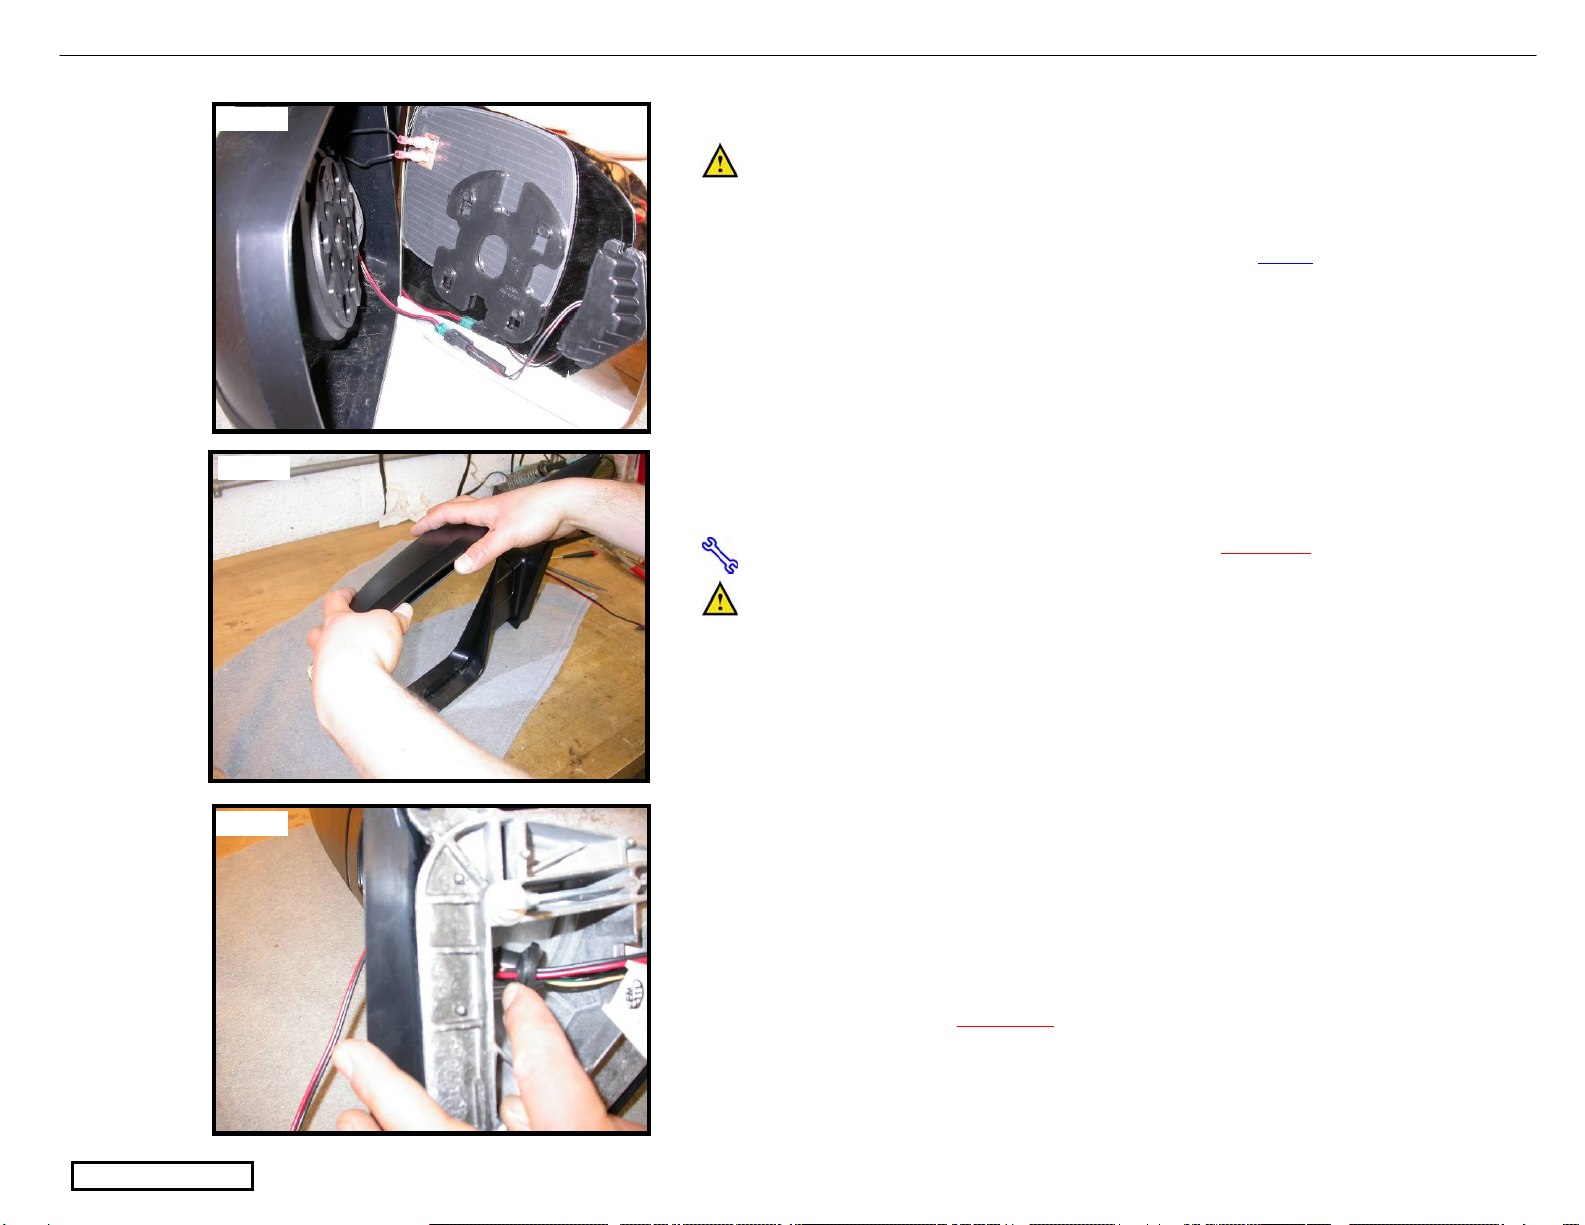
A. Make sure the harnesses are routed securely and enough slack
is left for splicing.
B. Splice the RED wire from the driver side
Signal
®mirror wire
harness into the wire previously labeled ‘driver side indicator’.
C. Splice the BLACK wire from the driver side
Signal
®mirror wire
harness into the wire previously labeled ‘driver ground’.
D. Splice the RED wire from the passenger side
Signal
®mirror
wire harness into the wire previously labeled ‘passenger side
indicator’.
E. Splice the BLACK wire from the passenger side
Signal
®mirror
wire harness into the wire previously labeled ‘passenger ground’.
F. Turn ignition key to the “ON” position and activate each turn
indicator to verify proper operation and illumination of
Signal
®
mirror.
G. Reconnect all original wiring. Turn the ignition power to on,
check to verify all features are working properly.
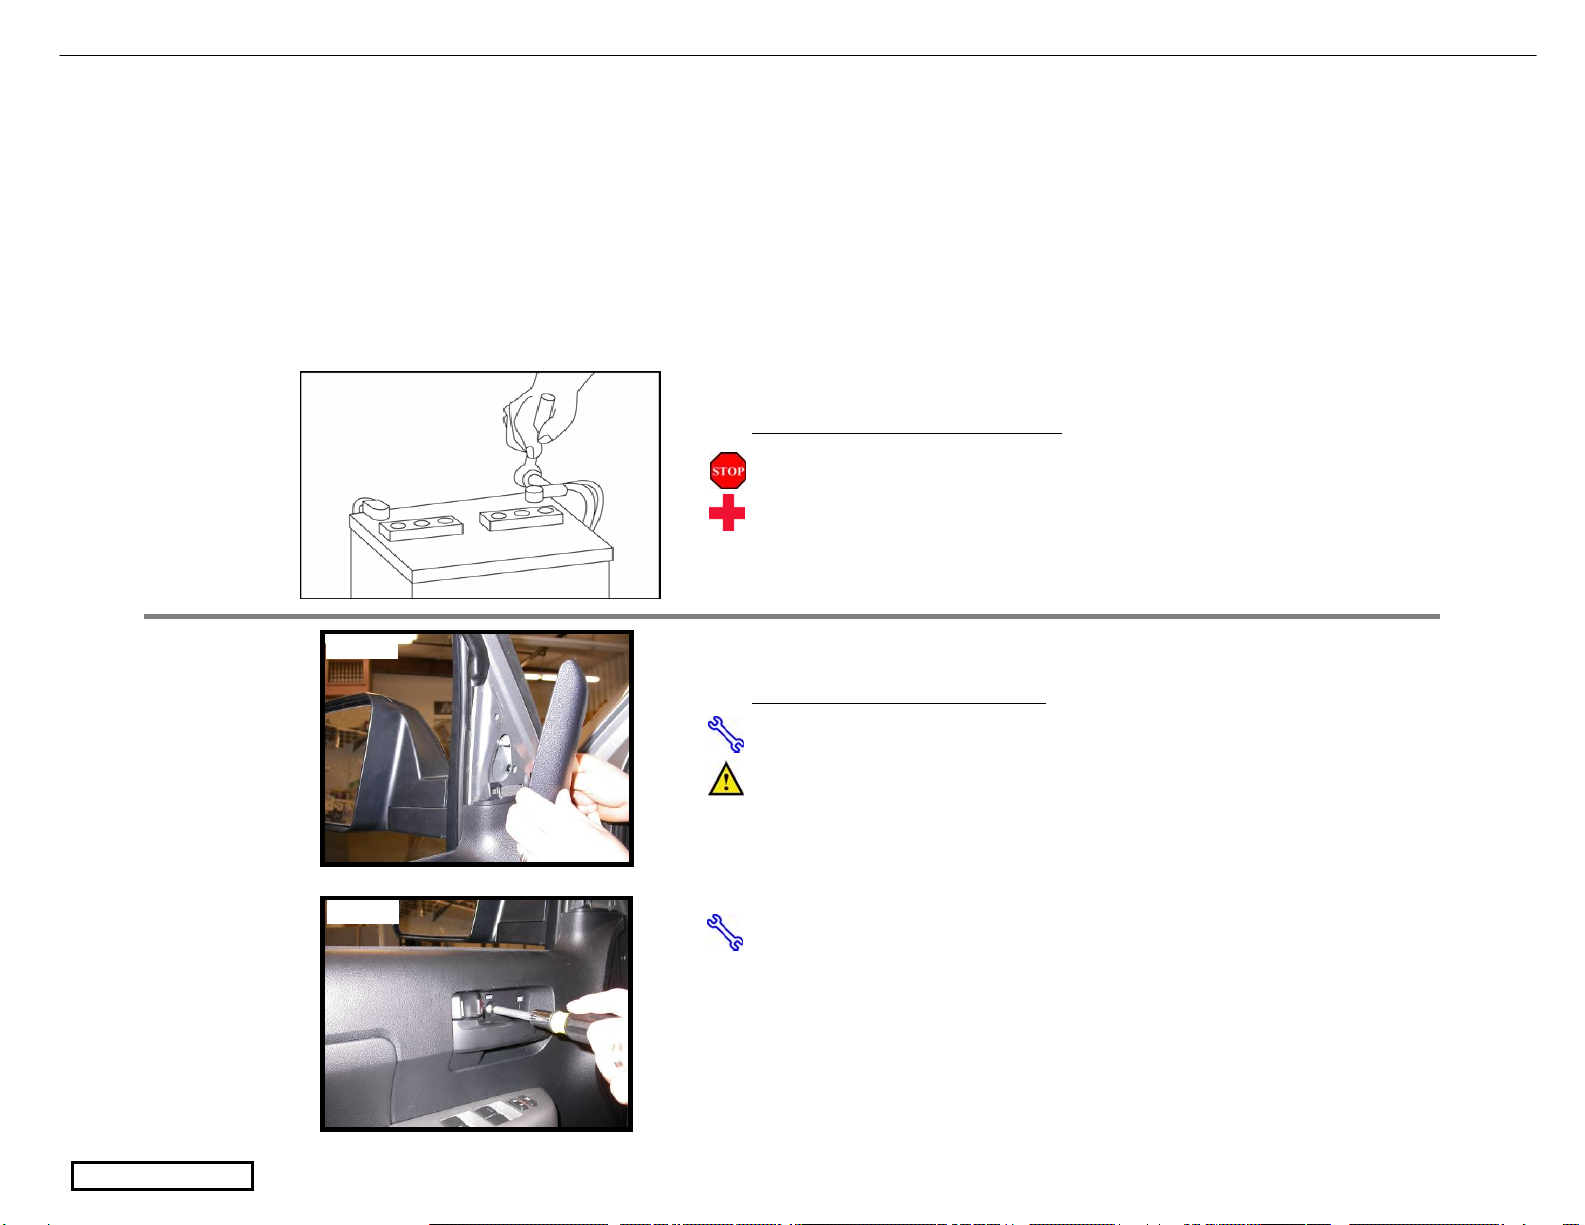
H. Replace the plastic door frame moldings, trim, door panels, and
all accessories.
Muth products are protected by these, and other pending, United States Patents
3,075,779 5,005,009 5,014,167 5,128,659 5,207,492 5,355,284 5,361,190 5,481,409 5,528,422 5,619,374 5,619,375
5,788,357 6,005,724 6,045,243 6,076,948 6,257,746 6,700,123 6,749,325 6,918,685 7,008,091 7,015,642 7,104,676 D363,920
D394,833 D409,540 D425,466 D426,506 D426,507 D427,128 D428,372 D428,373 D428,842 D429,202 D430,088
Fig. B
Fig. A
Fig. DFig. C
Other manuals for Signal
1
Table of contents
Other muth Automobile Accessories manuals

muth
muth Ford Taurus 1996-1999 User manual

muth
muth Signal 210-0133-0 User manual

muth
muth signal mirror User manual

muth
muth signal mirror 2005-2009 Ford Mustang User manual

muth
muth Signal User manual

muth
muth Signal Mirror 2005 -2012 Toyota Tacoma User manual

muth
muth Signal Mirror CRV 1997-2003 User manual
Popular Automobile Accessories manuals by other brands

Volvo
Volvo 30758234 Installation instructions, accessories

Metra Electronics
Metra Electronics 95-8903B installation instructions

Whispbar
Whispbar K429W Fitting instructions

Rydeen
Rydeen DG240 Installation & user manual

Westfalia
Westfalia 96 09 31 Original instructions

Jegs
Jegs 40824 installation instructions