manuals.online logo
Brands
  1. Home
  2. •
  3. Brands
  4. •
  5. Bulldog Security
  6. •
  7. Automobile Accessories
  8. •
  9. Bulldog Security Titan User manual

Bulldog Security Titan User manual

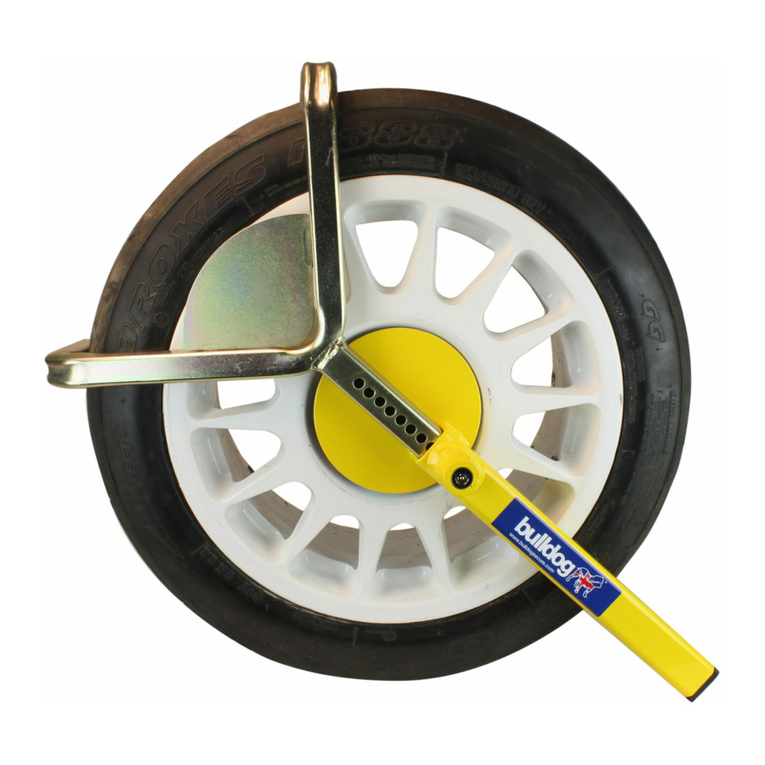
Titan Wheel Clamp Fitting Instructions
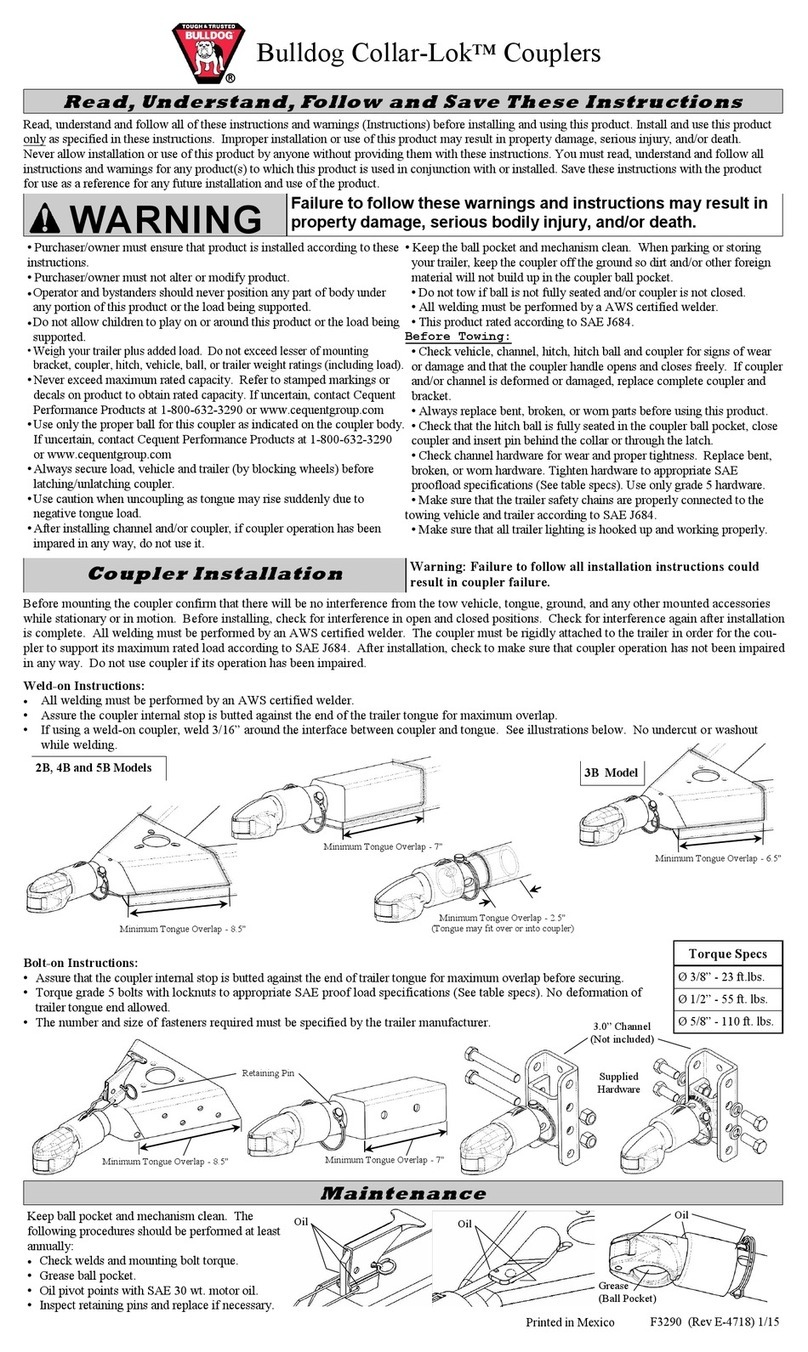
1. CHECK LIST:- 1. Lower arms 2 off 2. Top
arm 3. Disc 4. M12 x 40 coach bolt 5. Spring
washer 6. Hollow nut 7. Cover plate 8. Lock
bolt and keys 9. Red plastic cap 10. Spanner
11. M10 x 45mm coach bolt + M10 nyloc nuts, 2
off each 12. 28mm long bushes, 2 off.
N.B. Please note items 9,8+6 are pre-assembled
into Cover plate (item 7).
2. Position lower arms as shown and lay top arm
on top. Place in position spring washer, push
square head of M12 x 40mm coach bolt into
round disc. (Tap with hammer if tight fit) until
dome head touches disc. Offer up round disc to
lower arm, ensure that the pressed dimple on the
disc locates securely in slot in arm, this is to
prevent turning.
5. With left hand lift nut and disc assembly to
centre of wheel.
6. Still holding nut with left hand swing round top
arm to vertical position.
11+12 11+12
11
2
1.
3.
2.
Spring washer fits
this way up.
1.
2.
3.
7.
12.
11.
8. 6.
4.
5.
10.
9.
3. Insert key and turn ¼ turn anti clockwise to
remove hollow nut from inside cover plate and
screw on finger tight but still allowing arms to
slide freely. Please ensure that the recess on back
of nut is located into hole in large spring washer.
4. Models SW195F, 210DF, 230FD have rubber
discs included. Fit this to the rear of the steel
disc. Push extended clamp arm assembly round
base of wheel as shown.
7. Still holding up nut with left hand pull the right
wheel clamp arm in tightly to tyre.
8. At this point hold up nut with right hand and
pull left wheel clamp arm in tightly to tyre. Now
tighten nut.
9. Using spanner provided tighten nut in a
clockwise direction until it locks up solid.
Note: On low profile tyres it may be necessary to
position the disc slightly above centre of wheel in
order to fit red cover correctly.
10. Ensure lock bolt is unlocked (key inserted and turned
1/4 turn anti-clockwise). Now locate tube on back of
red cover over the hollow nut, then turn key 1/4 turn
clockwise to lock. Note. To prevent lock bolt from
turning when key is operated press thumb against the
face of the red plastic cap. To Un-Lock. Insert key,
rotate ¼ turn anti-clockwise, remove Cover plate,
reverse steps 9 back to 5.
PB48-9
Bulldog Security Products
Units 1 - 4 Stretton Road, Much Wenlock, Shropshire, TF13 6DH.
Tel: 01952 728171 Fax: 01952 728117
Email [email protected] www.bulldogsecure.com
Lock Lubrication.
IMPORTANT - To ensure free movement of the lock,
spray lock mechanism & ball bearings with WD40
(or equivalent) minimum every four months.
We have taken every care in the design and manufacture of this security device and we believe that it is an effective
deterrent. However we cannot guarantee that it will resist the efforts of the most determined Thief, and as such we do
not accept any liability for loss or damage caused by theft, vandalism or other illegal activity against property to which
this device is fitted.

Other Bulldog Security Automobile Accessories manuals

Bulldog Security BulldogOne BD1 User manual

Bulldog Security

Bulldog Security BulldogOne BD1 User manual

Bulldog Security 400Q User manual

Bulldog Security

Bulldog Security 400Q User manual

Bulldog Security 500361 User manual

Bulldog Security

Bulldog Security 500361 User manual

Bulldog Security Collar-Lok User manual

Bulldog Security

Bulldog Security Collar-Lok User manual

Bulldog Security BX1 User manual

Bulldog Security

Bulldog Security BX1 User manual

Bulldog Security Auto Clamp User manual

Bulldog Security

Bulldog Security Auto Clamp User manual

Popular Automobile Accessories manuals by other brands

Vanguard ULTI Bars X3 Fitting instructions

Vanguard

Vanguard ULTI Bars X3 Fitting instructions

Bestop Tigertop Installation instructions and owner's manual

Bestop

Bestop Tigertop Installation instructions and owner's manual

DS Audio DS 003 instruction manual

DS Audio

DS Audio DS 003 instruction manual

Menabo MARIUS Fitting instructions

Menabo

Menabo MARIUS Fitting instructions

v.link VL3-UCON5-F manual

v.link

v.link VL3-UCON5-F manual

VELTIUM LITE Zero user guide

VELTIUM

VELTIUM LITE Zero user guide

Thule Passage 910 installation instructions

Thule

Thule Passage 910 installation instructions

Subaru EyeSight manual

Subaru

Subaru EyeSight manual

Autel MaxiIM TOYOTA 8A BLADE KEY Operation guide

Autel

Autel MaxiIM TOYOTA 8A BLADE KEY Operation guide

Airlocker RD212 installation guide

Airlocker

Airlocker RD212 installation guide

SAFARI SS18HF manual

SAFARI

SAFARI SS18HF manual

Menabo Barra OE Fitting instructions

Menabo

Menabo Barra OE Fitting instructions

Whispbar K144W Fitting instructions

Whispbar

Whispbar K144W Fitting instructions

TeraHop Networks KeyZone KZV-290 Vault installation guide

TeraHop Networks

TeraHop Networks KeyZone KZV-290 Vault installation guide

Flash Cover MN025 installation manual

Flash Cover

Flash Cover MN025 installation manual

Polaire EXCLUSIVE SANCY Fitting instructions

Polaire

Polaire EXCLUSIVE SANCY Fitting instructions

Vintage Air 751163 manual

Vintage Air

Vintage Air 751163 manual

Rear view safety RVS-83112-BA instruction manual

Rear view safety

Rear view safety RVS-83112-BA instruction manual

manuals.online logo
manuals.online logoBrands
  • About & Mission
  • Contact us
  • Privacy Policy
  • Terms and Conditions

Copyright 2025 Manuals.Online. All Rights Reserved.