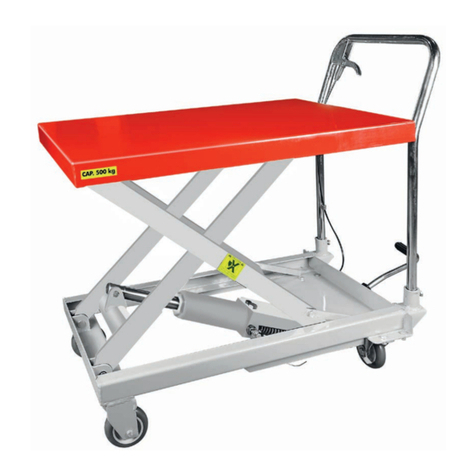
MW TOOLS SL300U User manual

M1.1.SL300U-SL300UM.NLFREN 28082018
HANDLEIDING - MODE D’EMPLOI - MANUAL
SL300U (724563080)
SL300UM (724563081)
Schaarhefbrug
Pont élévateur
Scissor lift
P.02 Gelieve te lezen en voor later gebruik bewaren
P.21 Veuillez lire et conserver pour consultation ultérieure
P.40 Please read and keep for future reference
FR
EN
NL
copyrighted document - all rights reserved by FBC

M1.1.SL300U-SL300UM.NLFREN 28082018
2
NL
1 Verpakking, transport en opslag
AANDACHT!
Het verpakken, heffen, behandelen, vertransporteren en uitpakken mag enkel door bekwaam
personeel worden uitgevoerd.
1.1 Verpakking
Standaard uitrusting
Accessoiredoos, hoofd- en subbalk, bedienconsole.
Verpakkingslijst
Nr. Naam Naam en hoeveelheid accessoires
1 Liftbalk Hoofdbalk 1 stuk
1 Liftbalk Subbalk 1 stuk
2 Bedienconsole 1 set
3 Accessoiredoos 1 set (details in de verpakkingslijst van accessoires)
Inhoud
1 Verpakking, transport en opslag............................................................................................................................... 2
1.1 Verpakking ....................................................................................................................................................2
1.2 Transport ....................................................................................................................................................... 3
1.3 Opslag.......................................................................................................................................................... 4
2 Omschrijving van de machine.................................................................................................................................. 4
2.1 Toepassingsgebied ......................................................................................................................................... 4
2.2 Structuureigenschappen ...................................................................................................................................4
2.3 Uitrusting ....................................................................................................................................................... 4
2.4 Frame............................................................................................................................................................ 4
2.5 Bedienconsole................................................................................................................................................5
3 Specicaties .......................................................................................................................................................... 6
3.1 Belangrijkste technische parameters .................................................................................................................. 6
3.2 Externe afmetingen .........................................................................................................................................7
3.3 Types van geschikte voertuigen.........................................................................................................................8
4 Veiligheidsvoorschriften........................................................................................................................................... 8
5 Installatie............................................................................................................................................................. 11
6 Afstelling............................................................................................................................................................. 15
7 Bediening ........................................................................................................................................................... 16
8 Onderhoud ......................................................................................................................................................... 19
9 Problemen oplossen.............................................................................................................................................. 19
10 Schema hydraulisch systeem ................................................................................................................................ 59
11 Schakelschema .................................................................................................................................................. 61
12 Gascircuit schema .............................................................................................................................................. 63
13 Onderdelen....................................................................................................................................................... 64
14 Verpakkingslijst accessoires ................................................................................................................................. 71
15 EG conformiteitsverklaring ................................................................................................................................... 72
copyrighted document - all rights reserved by FBC

M1.1.SL300U-SL300UM.NLFREN 28082018
3
NL
Afbeelding 1
1.2 Transport
AANDACHT!
De verpakking kan gehesen of verplaatst worden door heftrucks, kranen of bovenloopkranen.
Bij het slingeren moet een tweede persoon altijd zorg dragen voor de lading, om gevaarlijke
schommelingen te vermijden.
Controleer bij de aankomst van het materiaal of alle items van op de aeveringsbon ingesloten zijn. Door het transport zijn het
ontbreken van onderdelen, mogelijke defecten of schade mogelijk.
Als u ontdekt dat er door het transport delen ontbreken of defect of beschadigd zijn, moet u de beschadigde kartons
onderzoeken volgens de “Verpakkingslijst van de accessoires” om de toestand van het beschadigde materiaal en de
ontbrekende onderdelen te veriëren, de leidinggevende of de koerier moet ook onmiddellijk verwittigd worden.
AANDACHT!
De machine is zwaar materiaal. Gebruik geen mankracht voor het laden, lossen en transport, de
werkveiligheid is belangrijk.
Voorts moet het materiaal tijdens het laden en lossen verhandeld worden zoals op de
afbeelding 2.
U
US
SE
ER
R‟
‟S
S
M
MA
AN
NU
UA
AL
L
V
V1
1.
.0
0
2
20
01
14
40
08
8
- 4 -
1.2.Transport:
Packing can be lifted or moved by lift trucks, cranes or bridge cranes. In case of slinging, a
second person must always take care of the load, in order to avoid dangerous oscillations.
During loading and unloading operation, goods must be handled by vehicles or ships.
At the arrival of the goods, verify that all items specified in the delivery notes are included. In case of
missing parts possible defects or damage may due to transport operations.
If finding missing parts, possible defects or damage due to transport, one should examine damaged
cartons according to <<Accessories Packing List>> to verify the condition of damaged goods and
missing parts, also the person in charge or the carrier must be immediately informed.
The machine is heavy goods! Don’t take manpower load and unload and transporting way into
consideration, the safety of working is important.
Furthermore, during loading and unloading operation goods must be handled as shown in the
picture. (Picture 2)
Picture 2 (Goods-lifted)
1.3.Storage:
-The machine equipment should be stocked in the warehouse, if stocked outside should do the disposal
well of waterproof.
-Use box truck in the process of transport, use container storage when shipping.
-The control box should be placed perpendicularly during the transport; and prevent other goods from
extrusion.
-The temperature for machine storage : -25ºC-- 55ºC
2. Manual introduction
This manual has been prepared for workshop personnel expert in the use of the lift operator and
technicians responsible for routine maintenance fitter.
Afbeelding 2 Gehesen materiaal
U
US
SE
ER
R‟
‟S
S
M
MA
AN
NU
UA
AL
L
V
V1
1.
.0
0
2
20
01
14
40
06
6
- 3 -
1. Packing, transport and storage
All packing, lifting, handling, transport and unpacking operations are to be performed exclusively
by expert personnel.
1.1.Packing:
Standard equipment:
Accessory box (3# CTN), main and sub beam (1#CTN), control box 2# CTN).
Packing List
Table 1
Packing dimension picture
NO.
Name
Accessory name and quantity
1
Lift Beam
Main beam 1 piece
1
Lift Beam
Sub beam 1 piece
2
Control Box
1 set
3
Accessory box
1 set(details are in the accessories packing list)
Scissor lift(lengthened platforms):1610X650X230
Scissor lift(simple type):1520X650X230
Picture 1
1520 650
230
80
1610 650
230
80
copyrighted document - all rights reserved by FBC

M1.1.SL300U-SL300UM.NLFREN 28082018
4
NL
1.3 Opslag
• De machine moet in een magazijn worden opgeslagen, indien buiten opgeslagen, moet dit waterbestendig gebeuren.
• Gebruik een bakwagen voor het vertransporteren en een containeropslag bij verscheping.
• De bedienconsole moet loodrecht geplaatst worden tijdens het transport, en moet verhinderen dat ander materiaal wordt
platgedrukt.
• De temperatuur voor machineopslag: -25°C – 55°C
2 Omschrijving van de machine
2.1 Toepassingsgebied
Een schaarhefbrug met medium hefhoogte kan ieder soort toestel van maximum 3000 kg heffen, en is geschikt voor gebruik bij
voertuigtests, en bij het onderhoud en de zorg van auto’s.
Hefbruggen zijn ontworpen en gebouwd om in een werkplaats voertuigen te heffen en in deze verhoogde positie te houden.
Elke ander gebruik van hefbruggen is onbevoegd. Hefbruggen zijn, in het bijzonder, niet geschikt om:
• Spuitwerk te wassen;
• In de openlucht te gebruiken;
• Een verhoogd platform voor personeel te creëren of personeel op te heffen;
• Als een drukpers te gebruiken;
• Als lift te gebruiken;
• Als hefboom te gebruiken om carrosserie te heffen of wielen te vervangen.
De fabrikant is niet aansprakelijk voor eender welke persoonlijke letsels, schade aan de voertuigen of
aan andere eigendom door het incorrect en onbevoegd gebruik van de hefbrug.
2.2 Structuureigenschappen
• Maakt gebruik van verborgen en dunne schaarstructuur, kan gebruikt worden zonder
werkput, de omvang is klein
• Onafhankelijke bedienconsole op laagspanning, goed beveiligd
• Hetzelfde hydraulische volume en cilinder in fase, synchronisatie van de platformen
• Met hydraulisch slot en mechanische beveiliging, het dubbele veiligheidsapparaat opent
automatisch tijdens het neerlaten. Tijdens het sluiten bevindt de veiligheidsklem zich
tegengesteld, veilig en betrouwbaar.
• Eigen bescherming door veiligheidsklep en barstveilige uitrusting voor hydraulische
mislukkingen en bij overladen. Dus wanneer de oliepijp barst, zal de machine niet snel
neervallen.
• Glijdblokken zijn gemaakt uit een materiaal dat niet snel verslijt en geen olie nodig heeft.
• Gebruik hydraulische of elektrische onderdelen van hoge kwaliteit, gemaakt in Italië,
Duitsland, Japan enzovoort.
• Manueel neerlaten, wanneer er geen stroom is.
U
US
SE
ER
R‟
‟S
S
M
MA
AN
NU
UA
AL
L
V
V1
1.
.0
0
2
20
01
14
40
08
8
- 6 -
Safety lock structure
3.3. Equipment
-Machine basement (The position and space of equipment installation)
-Machine frame (The main structure of lift and insurance institution)
-Control box (Machine-controlled part)
3.4. Frame
Make of base plate, connecting rod, main lifting platform, hydraulic oil cylinder and loading dock board
3.5. Control box
Under the control box is hydraulic oil tank and hydraulic pump, valve and other control system. On the
control box is electrical system.
Function of each valve on the power unit
Name
Function
Gear pump
Extract hydraulic oil and provide high pressure.
Connecting block
Connect the motor and the gear pump.
Motor
Provide power for the gear pump.
Overflow valve
Adjust oil pressure.
Throttle valve
Adjust the speed of falling.
Lowering solenoid valve
Control flow of the hydraulic oil.
One-way valve
Control the one-way flow of hydraulic oil.
Ball valve
Debugging and control the returned oil.
Table 2
Picture 3
Picture 4
Platform
Loading dock
board
Oli cylinder Connecting
rod
Base plate
Afb. 3 Veiligheidsslot
2.3 Uitrusting
• Machineondergrond (De positie en het volume van de
uitrustingsinstallatie)
• Machineframe (De hoofdstructuur van de hefbrug en de
verzekeringsinstelling)
• Bedienconsole (onderdeel om de machine te controleren)
2.4 Frame
Het frame bevat de basisplaat, verbindingsstaaf, hoofdhefplatform,
hydraulische oliecilinder en op- en afrijplaat
Afbeelding 4 Frame
U
US
SE
ER
R‟
‟S
S
M
MA
AN
NU
UA
AL
L
V
V1
1.
.0
0
2
20
01
14
40
06
6
- 6 -
Platform
Loading dock
board
Oli cylinder
Connecting
rod
Base plate
Safety lock structure
3.3. Equipment
-Machine basement (The position and space of equipment installation)
-Machine frame (The main structure of lift and insurance institution)
-Control box (Machine-controlled part)
3.4. Frame
Make of base plate, connecting rod, main lifting platform, hydraulic oil cylinder and loading dock board
3.5. Control box
Under the control box is hydraulic oil tank and hydraulic pump, valve and other control system. On the
control box is electrical system.
Function of each valve on the power unit
Name
Function
Gear pump
Extract hydraulic oil and provide high pressure.
Connecting block
Connect the motor and the gear pump.
Motor
Provide power for the gear pump.
Overflow valve
Adjust oil pressure.
Throttle valve
Adjust the speed of falling.
Lowering solenoid valve
Control flow of the hydraulic oil.
One-way valve
Control the one-way flow of hydraulic oil.
Ball valve
Debugging and control the returned oil.
Table 2
Picture 3
Picture 4
Platform
Op- en
afrijplaat
Basisplaat
Verbindings-
staaf
Oliecilinder
copyrighted document - all rights reserved by FBC

M1.1.SL300U-SL300UM.NLFREN 28082018
5
NL
2.5 Bedienconsole
Onder de bedienconsole bevinden zich het hydraulische oliereservoir en de hydraulische pomp, ventielen en andere
controlesystemen. Op de bedienconsole bevindt zich het elektrische systeem.
Functie van iedere ventiel op het toestel:
Naam Functie
Tandwielpomp Hydraulische olie extraheren en hoge druk voorzien
Aansluitblok De motor en de tandwielpomp verbinden
Motor Kracht voorzien voor de tandwielpomp
Overstroomventiel De oliedruk aanpassen
Smoorklep De daalsnelheid aanpassen.
Magnetisch daalventiel De stroom van hydraulische olie controleren
Terugslagklep De eenrichtingsstroom van de hydraulische olie controleren
Kogelkraan De teruggekeerde olie afvoeren en controleren
copyrighted document - all rights reserved by FBC

M1.1.SL300U-SL300UM.NLFREN 28082018
6
NL
3 Specicaties
3.1 Belangrijkste technische parameters
Machine type SL300U
Eenvoudig type SL300UM
Eenvoudig type SL300U Verlengde platformen
Aandrijving Elektrohydraulisch
Hefcapaciteit 3000 kg
Maximum hoogte 1850 mm
Minimum hoogte 105 mm
Lengte platform 1450 mm 1450 - 2250 mm
Breedte platform 635 mm
Duurtijd heffen <55 s
Duurtijd zakken <55 s
Volledige lengte van de machine 2020 mm
Volledige breedte van de machine 2020 mm
Stroomvoorziening 3/N/PE ~ 380 V,
50 Hz, 10 A 230 V, 50 Hz, 10 A 3/N/PE ~ 380 V, 50 Hz, 10 A
Vermogen 2,2 kW
Hydraulische olie 20 l antislijtage hydraulische olie
Gasdruk 6-8 kg/cm²
Werktemperatuur 5-40 °C
Vochtigheid 30-95 %
Geluidsniveau < 70 dB
Hoogte installatie ≤ 1000 m boven zeeniveau
Opslagtemperatuur -25 ~ +55 °C
Motor:
Type Y90L
Max. vermogen 2,2 kW
Max. spanning AC 400 + 5 %
Max. elektriciteit 400 V:5 A / 230 V:10 A
Max. frequentie 50 Hz
Polen 4
Snelheid 1450 tpm
Bouwvorm B14
Isolatieklasse F
Baseer u bij het aansluiten van de motor op de
bijgevoegde diagrammen, de richting van de
motor is in wijzerszin.
Pomp:
Type P4.3
Model Tanwielpomp
Max. doorstroom 4,3 cc/t
Verbinding Verbinding met overvulklep
Druk bij continue werking 210 bar
Druk bij onderbroken werking 150 ~ 300 bar
Voeg 20 liter hydraulische antislijtage olie in het
oliereservoir.
Vereisten
• Betontype 425#, laat het beton 15 dagen drogen
• Maak de ondergrond schoon, dikte van het beton is ≥ 150 mm, de nivellering van de volledige lengte is ≤ 10 mm
Voorzie ook:
• Aansluiting van de bedieningsconsole op het stroomnet (400 V)
• Aansluiting van de bedieningsconsole op een perslucht aanvoerbuis (φ 8x5)
copyrighted document - all rights reserved by FBC

M1.1.SL300U-SL300UM.NLFREN 28082018
7
NL
3.2 Externe afmetingen
Afbeelding 5 Afmetingen hefbrug
U
US
SE
ER
R‟
‟S
S
M
MA
AN
NU
UA
AL
L
V
V1
1.
.0
0
2
20
01
14
40
06
6
- 8 -
4.2 External dimension drawing
Picture 5 (Lift dimension picture)
1870
1450
1850
105 2020
2250
1450
1850
105 2020
635
750
635
2020
simple type lengthened platforms
copyrighted document - all rights reserved by FBC

M1.1.SL300U-SL300UM.NLFREN 28082018
8
NL
3.3 Types van geschikte voertuigen
Deze hefbrug is geschikt voor voertuigen met een totaal gewicht en dimensies, die de gegevens hieronder niet overschrijden.
• Maximum gewicht mag niet meer dan 3000 kg zijn.
• De maximale dimensies van het voertuig:
De volgende diagrammen illustreren de criteria om de bedieningslimieten van de hefbrug te bepalen.
Afbeelding 6
Schaarhefbrug
Min. Max.
A 2000 mm 4000 mm
B 110 mm
C 1900 mm
D 900 mm
4 Veiligheidsvoorschriften
Afbeelding 7
U
US
SE
ER
R‟
‟S
S
M
MA
AN
NU
UA
AL
L
V
V1
1.
.0
0
2
20
01
14
40
06
6
- 9 -
4.3. Types of vehicles suitable for
This lift are suitable for virtually all vehicles with total weight and with dimensions not exceeding the
below data. Maximum weight not exceed than 3000kg.
The max dimension of vehicle:
The following diagrams illustrate criteria used to define the operating limits of the lift.
Picture 5
The lower parts of the vehicle underbody could interfere with structural parts of the lift. Take particular
parts of the sports-car.
The lift will also handle customized or non-standard vehicles provided they are within the maximum
specified carrying capacity.
Also the personnel safety zone must be defined in relation to vehicle with unusual dimensions.
Do not use the lift without protection devices or with the protection devices inhibited.
Failure to comply with this regulation can cause serious injury to persons, and irreparable damage to the
lift and the vehicle being lifted.
Scissor lift
Min
Max.
A
2000
4000
B
110
C
1900
D
900
U
US
SE
ER
R‟
‟S
S
M
MA
AN
NU
UA
AL
L
V
V1
1.
.0
0
2
20
01
14
40
06
6
- 10 -
5. Safety notes
General precautions
The operator and the maintenance fitter are required to observe the prescriptions of safety regulation in
force in the country of installation of the lift.
Furthermore, the operator and maintenance fitter must:
-Always work in the stations specified and illustrated in this manual;
-Never remove or deactivate the guards and mechanical, electrical, or other types of safety devices;
-Read the safety notices placed on the machine and the safety information in this manual.
In the manual all safety notices are shown as follows:
Warning: indicates following operations that are unsafe and can cause minor injury to persons and
damage the lift, the vehicle or other property.
Risk of electric shock: a specific safety notice placed on the lift in areas where the risk of electric shock
is particularly high.
Risk and protection devices
For optimal personal safety and safety of vehicles, observe the following regulations:
-Do not enter the safety and safety of vehicles is being lifted. (Picture 7)
-Be sure to lift only approved vehicles, never exceed the specified carrying capacity, maximum height,
and projection (vehicle length and width);
-Make sure that there is no person on the platforms during up and down movements and during standing
Picture 8
Picture 9
Picture 7
copyrighted document - all rights reserved by FBC

M1.1.SL300U-SL300UM.NLFREN 28082018
9
NL
Algemene voorzorgsmaatregelen
De bediener en de onderhoudspersoon moeten de voorschriften van het veiligheidsreglement, dat van kracht is in het land
waar het toestel geïnstalleerd is, in acht nemen.
• Bovendien moeten de bediener en de onderhoudspersoon:
- Altijd werken in de posities die gespeciceerd en geïllustreerd worden in deze handleiding;
- De beschermingen en mechanische, elektrische, of andere types van veiligheidsinstellingen nooit verwijderen of
deactiveren;
- De veiligheidsmeldingen op de machine en de veiligheidsinformatie in deze handleiding lezen.
Veiligheidsvoorzieningen
• Voor uw veiligheid en de veiligheid van de voertuigen, neem de volgende regulaties in acht:
- Betreed geen voertuig, dat geheven wordt (afbeelding 7).
- Hef enkel goedgekeurde voertuigen, overschrijd nooit de gespeciceerde draagcapaciteit, maximum hoogte, en dimensies
(lengte en breedte van het voertuig).
- Zorg ervoor dat er zich niemand op de platformen bevindt tijdens op- en neerwaartse bewegingen en tijdens stilstand.
U
US
SE
ER
R‟
‟S
S
M
MA
AN
NU
UA
AL
L
V
V1
1.
.0
0
2
20
01
14
40
08
8
- 10 -
5. Safety notes
General precautions
The operator and the maintenance fitter are required to observe the prescriptions of safety regulation in
force in the country of installation of the lift.
Furthermore, the operator and maintenance fitter must:
-Always work in the stations specified and illustrated in this manual;
-Never remove or deactivate the guards and mechanical, electrical, or other types of safety devices;
-Read the safety notices placed on the machine and the safety information in this manual.
In the manual all safety notices are shown as follows:
Warning: indicates following operations that are unsafe and can cause minor injury to persons and
damage the lift, the vehicle or other property.
Risk of electric shock: a specific safety notice placed on the lift in areas where the risk of electric shock
is particularly high.
Risk and protection devices
For optimal personal safety and safety of vehicles, observe the following regulations:
-Do not enter the safety and safety of vehicles is being lifted. (Picture 7)
-Be sure to lift only approved vehicles, never exceed the specified carrying capacity, maximum height,
and projection (vehicle length and width);
-Make sure that there is no person on the platforms during up and down movements and during standing
Picture 8
Picture 9
Picture 7
Afbeelding 8 Afbeelding 9
Algemene risico’s bij het heffen en neerlaten
• De volgende veiligheidsuitrustingen worden gebruikt voor de bescherming tegen het overladen of de mogelijkheid van het
falen van de motor.
• In geval van overladen, zal de overstroomklep openen en meteen olie naar de olietank terugbrengen (afbeelding 8).
• De bodem van iedere oliecilinder bevat een antiklopventiel en een sluitventiel (optioneel). Wanneer de oliepijp barst
tijdens het uitvoeren van hydraulische druk, zullen dit antiklopventiel en sluitventiel in werking treden en de snelheid van het
platform inperken (afbeelding 9).
• De veiligheidsvertanding en de tandwielmodule garanderen de veiligheid van het personeel onder de machine, wanneer
de andere beveiligingsmethodes falen.
• Zorg er dus voor dat de tandwielmodule compleet is en dat de veiligheidsvertanding goed ingeschakeld is (afbeelding 10).
• Niets abnormaal mag op de veiligheidsmodules gelaten worden, om ervoor te zorgen dat de veiligheidsuitrusting normaal
in werking kan treden.
U
US
SE
ER
R‟
‟S
S
M
MA
AN
NU
UA
AL
L
V
V1
1.
.0
0
2
20
01
14
40
08
8
- 11 -
General risks for lifting or descent
The following safety equipments are used to protect over loading or the possibility of engine failure.
In the condition of over loading, the over-falling valve will open and directly return oil to the oil tank.
(Picture 8)
Each bottom of oil cylinder is equipped with antiknock and locked valve(optional). When the oil pipe is
burst in the circuit of hydraulic pressure, the relevant antiknock and locked valve will work and limit the
speediness of platform. (Picture 9)
Safety tooth and gear module are parts which guarantee the safety of personnel beneath the machine in
failure condition of other protections.
So make sure the integrity of gear module and that the safety tooth has occluded completely. (Picture 10)
There is nothing abnormal should be left on the safety modules to prevent safety gear from occlude
normally.
Picture 10
Risk for extrusion
During up and down operations, personnel leave the said area without following the rule and instruction.
During up and down operations, no person is admitted to work beneath the movable parts of the lift,
should work in the safe zone. (Picture 9)
Risk of impact
Before the operator begins up and down movements, make sure that there are no personnel inside the
danger zone. When, due to operational reasons, the lift is stopped at relatively low elevations (lower than
1.75m above the ground) personnel must be careful to avoid impact with parts of the machine not
marked with special colors. (Picture 12)
Picture 11
Picture 12
Afbeelding 10
U
US
SE
ER
R‟
‟S
S
M
MA
AN
NU
UA
AL
L
V
V1
1.
.0
0
2
20
01
14
40
08
8
- 11 -
General risks for lifting or descent
The following safety equipments are used to protect over loading or the possibility of engine failure.
In the condition of over loading, the over-falling valve will open and directly return oil to the oil tank.
(Picture 8)
Each bottom of oil cylinder is equipped with antiknock and locked valve(optional). When the oil pipe is
burst in the circuit of hydraulic pressure, the relevant antiknock and locked valve will work and limit the
speediness of platform. (Picture 9)
Safety tooth and gear module are parts which guarantee the safety of personnel beneath the machine in
failure condition of other protections.
So make sure the integrity of gear module and that the safety tooth has occluded completely. (Picture 10)
There is nothing abnormal should be left on the safety modules to prevent safety gear from occlude
normally.
Picture 10
Risk for extrusion
During up and down operations, personnel leave the said area without following the rule and instruction.
During up and down operations, no person is admitted to work beneath the movable parts of the lift,
should work in the safe zone. (Picture 9)
Risk of impact
Before the operator begins up and down movements, make sure that there are no personnel inside the
danger zone. When, due to operational reasons, the lift is stopped at relatively low elevations (lower than
1.75m above the ground) personnel must be careful to avoid impact with parts of the machine not
marked with special colors. (Picture 12)
Picture 11
Picture 12
Afbeelding 11 Afbeelding 12
Pletgevaar
• Tijdens de op- en neerwaartse bewegingen, verlaat het personeel de vermelde zone volgens de regels en instructies.
• Tijdens de op- en neerwaartse bewegingen, is het niet toegestaan onder de bewegende delen van de hefbrug te werken.
Het werk moet gebeuren in de veilige zone (afbeelding 11).
copyrighted document - all rights reserved by FBC

M1.1.SL300U-SL300UM.NLFREN 28082018
10
NL
U
US
SE
ER
R‟
‟S
S
M
MA
AN
NU
UA
AL
L
V
V1
1.
.0
0
2
20
01
14
40
08
8
- 12 -
Risk of falling (vehicle)
This hazard may arise in the case of incorrect positioning of the vehicle on the platforms, overweight of
the vehicle, or in the case of vehicles of dimensions that are not compatible with the capacity of the lift.
When the platform is being tested, the vehicle engine can not be turned on.
There is nothing should be placed on the lift-lowering area and the movable parts of the lift.
Risk of slipping
The floor caused by lubricant contamination of around the lift. The area beneath and immediately
surrounding the lift and also the platforms must be kept clean. Remove any oil spills
immediately.(Picture 14)
Picture 14
Risk of electric shock
Risk of electric shock in areas of insulated and shattered electric equipments
Do not use jets of water, steam solvents or paint next to the lift, and take special care to keep such
substances clear of the electrical control panel.
Risks related to appropriate lighting
The operator and the maintenance fitter must be able to assure that all the areas of the lift are properly
and uniformly illuminate compliance with the laws in force in the place of installation.
During up and down operations, the operator should continually observe the lift and can operate it only in
the position of operator. When lifting and lowering the vehicle, the cushion needs being put in the bottom
of chassis.
The handling of safety devices is strictly forbidden. Never exceed the maximum carrying capacity
of the lift, make sure the vehicles to be lifted have no load.
It is therefore essential to adhere scrupulously to all regulations regarding use, maintenance and
safety contained in this manual.
Picture 13
Afbeelding 14
Afbeelding 13
Stootgevaar
• Zorg ervoor dat niemand zich binnen de gevarenzone bevindt, alvorens de bediener de op- en neerwaartse bewegingen
begint. Wanneer de hefbrug, om operationele redenen, gestopt wordt op relatief lage hoogtes (lager dan 1,75 m boven
de grond), moet het personeel opletten om zich niet te stoten aan delen van de machine, die niet aangeduid zijn met
speciale kleuren (afbeelding 12).
Valgevaar (voertuig)
• Dit risico kan ontstaan door het incorrect plaatsen van het voertuig op de platformen, door overgewicht van het voertuig, of
wanneer de dimensies van het voertuig niet compatibel zijn met de capaciteit van de hefbrug.
• Wanneer het platform getest wordt, mag de motor van het voertuig niet ingeschakeld zijn.
• Er mag niets geplaatst worden in het gebied waar de hefbrug zal neerdalen en op de beweegbare delen van de hefbrug.
Slipgevaar
• Wanneer de vloer rond de hefbrug vervuild is met smeermiddel. Het gebied onder en onmiddellijk naast de hefbrug en de
platformen moet schoon worden gehouden. Verwijder alle gemorste olie onmiddellijk (afbeelding 14).
Gevaar voor elektrische schok
• Er is risico op een elektrische shock waar zich elektrische uitrusting bevindt.
• Gebruik geen waterstralen, stoomoplosmiddel of verf naast de hefbrug, en neem speciale voorzorgen om het elektrische
controlepaneel vrij te houden van dergelijke substanties.
Risico’s verbonden met ongeschikte verlichting
• De bediener en de onderhoudswerker moet kunnen verzekeren dat alle delen van de hefbrug gepast en gelijkmatig belicht
worden, ter naleving van de wetten, die van kracht zijn op de plaats van installatie.
• Tijdens de op- en neerwaartse bewegingen moet de bediener de hefbrug constant in het oog houden, hij mag de hefbrug
enkele bedienen vanaf de bedienerpositie.
AANDACHT!
De behandeling van veiligheidsvoorzieningen is strikt verboden. Overschrijdt nooit de maximum
draagcapaciteit van de hefbrug, zorg ervoor dat de te heffen voertuigen geen lading hebben.
Daarom is het essentieel om de gebruiks-, onderhouds- en veiligheidsvoorschriften in deze
handleiding nauwgezet na te volgen.
copyrighted document - all rights reserved by FBC

M1.1.SL300U-SL300UM.NLFREN 28082018
11
NL
5 Installatie
AANDACHT!
Enkel ervaren en bevoegd personeel is toegestaan om deze handelingen uit te voeren en moet
alle instructies hieronder nauwgezet volgen om mogelijke schade aan de autohefbrug of risico op
verwonding van personen te voorkomen.
Installatievereisten (afbeelding 15)
• De autohefbrug moet conform de gespeciceerde veiligheidsafstanden van muren en palen worden geïnstalleerd. De
gespeciceerde veiligheidsafstand van muren moet minstens 1000 mm bedragen, en er moet rekening gehouden worden
met de nodige ruimte om gemakkelijk te kunnen werken. Ruimte voor de bedieningsconsole en voor mogelijke vluchtwegen
bij noodgevallen is ook noodzakelijk.
• De stroomvoorziening en de pneumatische voeding voor de autohefbrug moeten vooraf in de ruimte voorzien worden.
• De ruimte moet minstens 4000 mm hoog zijn.
• De autohefbrug kan op iedere vloer geplaatst worden, zo lang deze perfect waterpas en stevig genoeg is.
(≥ 250 kg/cm², de dikte van het beton ≥ 150 mm)
• Alle onderdelen van de machine moeten gelijkmatig belicht worden met voldoende licht om ervoor te zorgen dat
aanpassingen en onderhoud veilig kunnen worden uitgevoerd, zonder gereecteerd licht en schitteringen, die de
vermoeidheid van de ogen in de hand kunnen werken.
• De volledigheid van de ontvangen goederen moet gecontroleerd worden vóór de hefbrug geïnstalleerd wordt.
• Het verplaatsen en installeren van de hefbrug moet gebeuren zoals op de afbeelding aangeduid staat.
Afbeelding 15
Nota: Het fundament van het einde van hefplatform P1 en P2 is een betonnen structuur. Als de dikte van het binnenste van de
begane grond minder dan 150 mm is, moet de oppervlakte ter hoogte van P1 en P2 begoten worden: 6000 x 2500 mm met
een beton met een dikte van ≥ 150 mm.
De basisdikte van het beton en de nivellering zijn sleutelelementen om het nivelleren van de machine perfect te kunnen
uitvoeren.
U
US
SE
ER
R‟
‟S
S
M
MA
AN
NU
UA
AL
L
V
V1
1.
.0
0
2
20
01
14
40
06
6
- 13 -
6. Installation
Skilled and authorized personnel only should be allowed to perform these operations, follow all
instructions shown below carefully, in order to prevent possible damage to the car lift or risk of
injury to people.
Installation requirements (Picture 15)
-The car lift must be installed according to the specified safety distances from walls, pole -The specified
safety distances from walls must be 1000 mm at least, taking into consideration the necessary space to
work easily. Because space for the control site and for possible runways in case of emergency is also
necessary.
-The room must be previously arranged for the power supply and pneumatic feed of the car lift.
-The room must be 4000 mm in height, at least.
-The car lift can be placed on any floor, as long as it is perfectly level and sufficiently resistant.
(≥250kg/cm²,the thickness of concrete≥150mm)
-All parts of the machine must be uniformly lit with sufficient light to make sure that the adjustment and
maintenance operations can be performed safely, and without reflected light, glare that could give rise to
eye fatigue.
-The integrality of arrived goods should be checked before the lift is installed.
-Moving and installing lift should follow the process as the picture instructs.
Note: The foundation of the end of the lift platformP1, P2 is the structure of concrete. When the thickness
of inside level ground is less than 150mm, the end of P1, P2 should be irrigated the acreage:
6000×2500mm and thickness of concrete≥150mm
The basic thickness of concrete and leveling are keys, shouldn‟t egregiously expect the ability of level
adjustment of machine-self.
Picture 15
copyrighted document - all rights reserved by FBC

M1.1.SL300U-SL300UM.NLFREN 28082018
12
NL
U
US
SE
ER
R‟
‟S
S
M
MA
AN
NU
UA
AL
L
V
V1
1.
.0
0
2
20
01
14
40
06
6
- 14 -
Installation scheme for scissor lift
Equipment basic picture
Picture 16 (The control box can be placed on the left or right)
Installatieschema van de schaarhefbrug
Afbeelding 16 (De bedieningsconsole kan zowel links als rechts geplaatst worden)
Afbeelding 17
Installatie van het platform
• Plaats de twee hefplatformen in de juiste positie op de locatie.
• De onderste oliecilinder bevindt zich aan de voorzijde van de machine (in
de richting van het voertuig).
• Gebruik een vorkheftruck of andere hefuitrustingen om het platform te heffen
(afbeelding 17) en zorg ervoor dat de veiligheidsvoorzieningen van de
machine ingeschakeld en vergrendeld zijn.
AANDACHT!
Om het falen van de veiligheidsvoorzieningen van de
machine te voorkomen, kan een stuk hout in het middendeel
van de verbindingspalen gestoken worden.
Verbied het werken onder de hefbrug wanneer het
hydraulische systeem niet volledig voorzien is van
hydraulische olie en tijdens op- en neerwaartse
bewegingen.
Pas de oppervlakte tussen de twee platformen aan, bij
het verplaatsen van de hefbrug. Zorg ervoor dat de twee
platformen parallel zijn.
Bedieningsconsole
Afdekplaat
olieslang
Inrijdpunt
auto
U
US
SE
ER
R‟
‟S
S
M
MA
AN
NU
UA
AL
L
V
V1
1.
.0
0
2
20
01
14
40
06
6
- 15 -
Platform Installation:
-Place two lift platforms on the position of the location
-The bottom of oil cylinder is located in the frontage of machine (the direction of getting on the vehicle)
-Use fork car or other lifting equipments to lift the platform (Picture17) and make sure that the safety
equipment of machine is both turned on and locked.
Picture 17
To avoid failure of machine safety equipment, can insert a wood in the middle part of joint-pole.
Prohibit working beneath the lift when hydraulic system is not completely equipped with
hydraulic oil and take the action of up and down operations.
-When moving the lift platform, adjust the space between two platforms; make sure that the two
platforms are parallel.
Ground bolts installation
The ground bolts installation must start after the expiry date on the maintenance of concert, otherwise, it
will affect the quality of solidity.
-Adjust the parallel of the platform and the distance of two platform as Picture 18 requires.
-Fix the anchor bolts with a percussion electric drill (percussion drill bit is of 16), drill to 120mm hole and
clean the hole.(Picture 18)
-Use light hammer to install the ground bolts into the hole (need not install the central expanded nail of
ground bolts, install it after level adjustment.) (Picture 19)
Picture 18 Picture 19 Picture 20
copyrighted document - all rights reserved by FBC

M1.1.SL300U-SL300UM.NLFREN 28082018
13
NL
U
US
SE
ER
R‟
‟S
S
M
MA
AN
NU
UA
AL
L
V
V1
1.
.0
0
2
20
01
14
40
08
8
- 15 -
Platform Installation:
-Place two lift platforms on the position of the location
-The bottom of oil cylinder is located in the frontage of machine (the direction of getting on the vehicle)
-Use fork car or other lifting equipments to lift the platform (Picture17) and make sure that the safety
equipment of machine is both turned on and locked.
Picture 17
To avoid failure of machine safety equipment, can insert a wood in the middle part of joint-pole.
Prohibit working beneath the lift when hydraulic system is not completely equipped with
hydraulic oil and take the action of up and down operations.
-When moving the lift platform, adjust the space between two platforms; make sure that the two
platforms are parallel.
Ground bolts installation
The ground bolts installation must start after the expiry date on the maintenance of concert, otherwise, it
will affect the quality of solidity.
-Adjust the parallel of the platform and the distance of two platform as Picture 18 requires.
-Fix the anchor bolts with a percussion electric drill (percussion drill bit is of 16), drill to 120mm hole and
clean the hole.(Picture 18)
-Use light hammer to install the ground bolts into the hole (need not install the central expanded nail of
ground bolts, install it after level adjustment.) (Picture 19)
Picture 18 Picture 19 Picture 20
Installatie van de verankeringsbouten
Het plaatsen van de verankeringsbouten moet gebeuren na de het opdrogen van het beton, anders zal de kwaliteit van de
stevigheid worden aangetast.
• Pas de parallelle positie van de twee platformen en de afstand tussenbeide aan volgens de aanduidingen op afbeelding
16.
• Maak de verankeringsbouten vast met een klopboormachine met een boor van 16, boor tot 120 mm diepte en maak het
gat schoon (afbeelding 18).
• Gebruik een lichte hamer om de verankeringsbouten in het gat te voegen (de centrale nagel van de verankeringsbouten
moet niet geïnstalleerd worden, dit gebeurt pas na het nivelleren van de machine) (afbeelding 19).
Afbeelding 18 Afbeelding 19 Afbeelding 20
Het nivelleren van de machine
• Met gebruik van een waterpas en de horizontale pijp en door de stelschroeven aan beide zijdes van de basisplaat aan te
passen.
• Als de oneffenheid van het platform het gevolg is van een algemene oneffenheid, gebruik dan een ijzeren blok om het
verschil op te vullen (afbeelding 21).
• Breng na het nivelleren van de machine de centrale nagel van de verankeringsbouten aan en gebruik een zware hamer om
deze vast te hameren (afbeelding 19).
• Schroef de doppen van de verankeringsbouten vast (afbeelding 20).
Afbeelding 21
Verbinding van kabels en pijpen
Verbind de elektrische kabels en de oliepijpen volgens de verbindingsschema’s.
AANDACHT!
Enkel na het verbinden van het hydraulische systeem kan het luchtcircuit aangesloten worden om
de oliepijp, de kabel en de gaspijp niet te beschadigen.
Let bij het verbinden van de oliepijp en de gaspijp vooral op het verbindingspunt van de
pijpen om te voorkomen dat vreemde zaken in het olie- en de gascircuit terechtkomen, wat het
hydraulische systeem kan beschadigen.
U
US
SE
ER
R‟
‟S
S
M
MA
AN
NU
UA
AL
L
V
V1
1.
.0
0
2
20
01
14
40
06
6
- 16 -
Level adjustment
-By using a level bar and the horizontal pipe and adjusting the adjustment screws at two sides of the
base plate.
-If platform unevenness is resulted from basic unevenness, use iron block to fill up the low place.(Picture
21)
-After level adjustment, insert the central expanded nail of ground bolts and use heavy hammer to
hammer it.(Picture 19)
-Screw down the ground bolts cap(Picture 20)
Picture 21
Line connection
Connect the electrical and oil line according to << circuit diagram>> and <<oil hose connection
diagram>>.
Only after connecting the hydraulic system can connect the air loop, can not damage oil pipe,
wire, and gas pipe.
In the process of connecting oil pipe and gas pipe, pay particularly attention to the protection of
pipe tie-in to prevent abnormal thing from entering oil loop and gas loop, then damaging
hydraulic system.
Electric circuit connection
Follow the stated line-diameter and line-number of <<the circuit diagram>> to connect electric circuit.
Picture 22 Picture 23
1
3
4
5
PE
L1
L2
L3
copyrighted document - all rights reserved by FBC

M1.1.SL300U-SL300UM.NLFREN 28082018
14
NL
U
US
SE
ER
R‟
‟S
S
M
MA
AN
NU
UA
AL
L
V
V1
1.
.0
0
2
20
01
14
40
08
8
- 16 -
Level adjustment
-By using a level bar and the horizontal pipe and adjusting the adjustment screws at two sides of the
base plate.
-If platform unevenness is resulted from basic unevenness, use iron block to fill up the low place.(Picture
21)
-After level adjustment, insert the central expanded nail of ground bolts and use heavy hammer to
hammer it.(Picture 19)
-Screw down the ground bolts cap(Picture 20)
Picture 21
Line connection
Connect the electrical and oil line according to << circuit diagram>> and <<oil hose connection
diagram>>.
Only after connecting the hydraulic system can connect the air loop, can not damage oil pipe,
wire, and gas pipe.
In the process of connecting oil pipe and gas pipe, pay particularly attention to the protection of
pipe tie-in to prevent abnormal thing from entering oil loop and gas loop, then damaging
hydraulic system.
Electric circuit connection
Follow the stated line-diameter and line-number of <<the circuit diagram>> to connect electric circuit.
Picture 22 Picture 23
1
3
4
5
PE L1 L2 L3
Verbinding van de stroomkring
Volg de lijndiameters en de lijnnummers van het “Circuitdiagram” om de stroomkring te verbinden.
Afbeelding 23
Afbeelding 22
Enkel een ervaren en bevoegde persoon mag de volgende instructies uitvoeren
• Open de voorkant van de bedieningsconsole.
• Verbinding met de stroomvoorziening: de 400 V AC driefasige aansluitkabels met vier draden (4 x 2,5 mm² kabel) voor de
stroomvoorziening zijn verbonden met L1, L2, L3 en PE in de in de schakelkast van de bedieningsconsole.
• De PE aardingskabel is eerst verbonden met de gemarkeerde bout in de schakelkast (afbeelding 22) en daarna met de
gemarkeerde bout van de twee platformen.
• Als de hefbrug gebruikt wordt op een driefasige 230 V, verander dan de verbinding van de transformator en de motor
(afbeelding 23).
Verbinding van de hydraulische pijplijn
Volg het “oliepijpverbindingsdiagram” om de hydraulische oliepijpen te verbinden.
• Verbind de persluchtleidingen vanaf het “werkingsstopventiel G en H van de bedieningsconsole via de nummering van de
buizen met de oliecilinder. (Zie het “Oliepijpverbindingsdiagram”)
• Let bij het verbinden van de pijpleidingen op het verbindingspunt, zodat geen onzuiverheden in het hydraulische circuit
kunnen terechtkomen.
• Hou bij het verbinden van de pijpleidingen rekening met het nummer van elke pijp.
• Bij de standaardinstallatie staat de bedieningsconsole dicht bij de plaats waar het voertuig op het platform komt. Als deze
aan de rechterkant geplaatst wordt, moet de pijpleiding aangepast worden.
Verbinding van de persluchtpijp
Volg het “gascircuitdiagram” om het gascircuit te verbinden.
• Verbind de φ 8x6 persluchttoevoerpijp met de luchttoevoerklemmen van de pneumatische, elektromagnetische klep
binnenin de bedieningsconsole. (Afbeelding 24)
• Volg het “gascircuitdiagram” om de persluchtpijp vanuit de pneumatische elektromagnetische klep aan de luchtklep met
opgeheven pal te bevestigen. (Afbeelding 25)
• Let op het verbindingspunt van de luchtpijp zodat geen onzuiverheden in het persluchtcircuit terechtkomen.
• Verbind de persluchtpijp met de extra geïnstalleerde olieafscheider, die zich voor de bedieningsconsole bevindt, om de
levensduur van de pneumatische bestanddelen te verlengen en betrouwbaarheid bij uitvoering te garanderen.
U
US
SE
ER
R‟
‟S
S
M
MA
AN
NU
UA
AL
L
V
V1
1.
.0
0
2
20
01
14
40
08
8
- 17 -
Only skilled special person is allowed to perform the operations.
- open the control box‟ front cover
-connection of power supply: the 400VAC three-phase and four-line connection wires (4×2.5mm2 cable
wire) for power supply are connected to L1,L2,L3, and PE labeled entering-wire terminal in control box.
The PE ground wire is connected under the bolt marked ground firstly (Picture 22) and then connected
under the bolt marked ground of two platforms.
-if the lift is operated at 230V three-phase, change the connection on the transformer and motor. (Picture
23)
Hydraulic pipeline connection
Follow <<oil hose connection diagram >> to connect the hydraulic oil hoses
Only skilled and authorized person is allowed to perform the operations. And pay
particularly attention to the protection of vita head.
-Following tubing number to lead the high-pressure tubing out from the “working stop valve G” and “H” of
control box and then connect it to oil cylinder. (Refer to <<oil hose connection diagram>>)
-When connecting tubing, pay attention to the protection of tubing tie-in to prevent impurities from
entering hydraulic circuit.
When connecting the tubing, be care of the mistake of each tubing number.
During the standard installation, control box is in the nearside of vehicle-entering direction. If
placed on the right should adjust relevant tubing.
Compressed air pipe connection
Follow <<gas loop diagram>> to connect gas loop
Only skilled and authorized person is allowed to perform the operations.
-Connect Φ8×6 compressed air supply pipe to the air supply jaws of pneumatic electromagnetic valve
inside the control box. (Picture24)
-Follow <<gas loop diagram >> to lead the compressed air pipe out from pneumatic electromagnetic
valve and then connect it to the uplifted-pawl air valve. (Picture 25)
-Pay attention to the protection of windpipe tie-in to prevent impurities from entering compressed air
circuit.
-Connect compressed air pipe to the extra-installed grease separator which is in front of control box to
prolong the life of pneumatic components and the reliability of action.
Picture 24 Picture 25
Afbeelding 24 Afbeelding 25
copyrighted document - all rights reserved by FBC

M1.1.SL300U-SL300UM.NLFREN 28082018
15
NL
6 Afstelling
Voorbereiding
Voeg olie toe en controleer de faserichting.
Voer na het installeren van de hefbrug en na het verbinden van het hydraulische circuit, het elektrische circuit en het gascircuit
het volgende uit:
• Open het hydraulische oliereservoir, voeg 20 l hydraulische olie toe aan het oliereservoir, de hydraulische olie wordt
voorzien door de gebruiker.
Zorg ervoor dat de hydraulische olie zuiver is en voorkom onzuiverheden in het oliecircuit voor een goede oliedoorstroom en
de optimale werking van de magneetklep.
• Druk op de “POWER” knop om de machine in te schakelen, klik op de “UP” knop om te controleren of de motor in
wijzerszin draait (kijk hiervoor naar beneden). Als dit niet het geval is, druk op de “POWER” knop en verander de fase
van de motor.
• Bij het inschakelen van de stroom, is een hoog voltage aanwezig in de bedieningsconsole, enkel bevoegd personeel mag
dit bedienen.
Olieafstelling
• Open alle drie de kogelstopkranen (draai kraan G 1 tot 2 cirkels tegen wijzerszin, draai kraan I tegen wijzerszin en kraan
H in een hoek van 90°.
• Druk op de “UP” knop, de motor start met het heffen van de twee platformen tot de hoogste positie.
• Draai de schroef aan de bovenkant van de hoofdcilinder tegen wijzerszin om deze te openen en de perslucht eruit te laten,
draai daarna de schroef in wijzerszin om deze te sluiten.
• Druk op de “DOWN” knop om de twee platformen neer te laten.
• Herhaal stap 2 tot en met 4 zo’n 2 tot 3 keer tot er geen perslucht meer uit de hoofdcilinder komt.
• Draai kraan I in wijzerszin en kraan H in 90° om deze te sluiten.
• De olieafstelling is afgerond. Als de platformen zich niet op dezelfde hoogte bevinden, kan dit jn afgesteld worden, zoals
hieronder beschreven.
Fijne afstelling van de hoogte van de platformen
• Druk op de “UP” knop om de twee platformen tot op een hoogte van 500 mm te brengen.
• Draai de kogelkraan I voor olieafstelling naar rechts of kraan H in een hoek van 90°.
• Druk kort op de ‘UP’ knop of de ‘DOWN’ knop om het platform op dezelfde hoogte te brengen. Draai de kraan I naar
links of kraan H in een hoek van 90° om te sluiten.
Controleer: of de twee veiligheidspaluitrustingen vlot en betrouwbaar te bereiken zijn en of er geen lek is in het hydraulische
systeem en het luchtsysteem.
AANDACHT!
Bij het uitvoeren van de olieafstelling mogen de platformen niet geladen zijn.
AANDACHT!
Bij het installeren van de luchtpijp mag deze niet geplooid of gebogen worden om te vermijden
dat het gascircuit ruw of gekneld is.
Voordat de persluchttoevoerpijp aan de luchttoevoerklemmen van de pneumatische
elektromagnetische klep binnenin de bedieningsconsole wordt vastgemaakt, wordt best een
olieafscheider geïnstalleerd om de perslucht te scheiden en zo een falen van de pneumatische
celactie te vermijden.
copyrighted document - all rights reserved by FBC

M1.1.SL300U-SL300UM.NLFREN 28082018
16
NL
Machinetest zonder lading:
• Schakel de machine in.
• Druk op de “UP” knop en let op de synchronisatie en de kalmte van het heffen.
• Controleer of de hoogste limiet van de platformen correct is.
• Druk op de “LOCK” knop en controleer of de veiligheidspal zich in de correcte positie bevindt en of er geen lek in het olie-
en gascircuit is.
AANDACHT!
Bij het testen van de hefbrug, zijn personen of andere zaken niet toegestaan bij de twee zijkanten
en onder de machine. Stop de machine tijdig, als iets abnormaals ontdekt wordt. Doe de test
opnieuw na het verwijderen van de obstakels.
Machinetest met lading:
• Rij het voertuig, met een gewicht dat het maximum toegestane gewicht niet overschrijdt, op het platform, daarna moet de
bestuurder het voertuig verlaten.
• Druk op de “UP” knop om het platform te heffen en let op de synchronisatie en de kalmte van het heffen.
• Check of het rooster en de hydraulische pomp normaal werken.
• Controleer of de hoogste limiet van de platformen correct is.
• Druk op de “LOCK” knop en controleer of de veiligheidspal zich in de correcte positie bevindt en of er geen lek in het olie-
en gascircuit is.
AANDACHT!
Bij de machinetest met lading, zijn personen of andere zaken niet toegestaan bij de twee
zijkanten en onder de machine.
Test met een voertuig dat het maximum hefgewicht niet overschrijdt.
Controleer of er een lek is in het olie- en gascircuit. Stop de machine tijdig, als iets abnormaals
ontdekt wordt. Doe de test opnieuw na het verwijderen van de obstakels.
7 Bediening
AANDACHT!
Enkel bekwaam en geoefend personeel mag de bediening uitvoeren. Volg de volgende
procedures.
Vóór de bediening:
• Verwijder de obstakels rond de hefbrug vóór de bediening.
• Let op de synchronisatie en de kalmte van het heffen.
• Controleer of de veiligheidsklem soepel en betrouwbaar is.
• Controleer of de hefbrug automatisch zal stoppen bij het bereiken van z’n hoogste positie.
• Controleer of er geen luchtlek is in de solenoïdeklep, in de luchtcilinder, in de luchtpijp en in de verbinding.
• Controleer of het geluid van de motor en de tandradpomp in werking normaal is.
• Controleer of het te heffen voertuig of andere goederen de capaciteit van de hefbrug niet overschrijden.
U
US
SE
ER
R‟
‟S
S
M
MA
AN
NU
UA
AL
L
V
V1
1.
.0
0
2
20
01
14
40
08
8
- 19 -
When conducting oil make-up operation, the platforms must not be load.
Picture 26
No load of main machine test:
-Turn on the power QS.
-Press “UP” button SB1, pay attention to the synchronization and placidity of the lifting.
-Check whether heightest limit of platforms is correct and reliable.
-Press “LOCK” button SB3,check whether safety pawl is correctly located, the oil line and the gas line are
leakage.
When testing the lift, no person or other things are allowed to stand or be put near the two sides
and beneath the machine. If any abnormal is found, stop it timely. After clearing obstacles, do the
test again.
Load of main machine test
-Drive the vehicle whose weight doesn‟t exceed maximum lift weight to the platform, and then the driver
leave it.
-Press “UP” button SB1, lift the platform and pay attention to the synchronization and placidity of the
lifting.
-Check whether rack and hydraulic pump work normally .
-Check whether heightest limit of platforms is correct and reliable.
-Press “LOCK” button SB3,check whether safety pawl is correctly located,the oil line and the gas line are
leakage.
When beginning load of machine test, no person or other things are allowed to stand or be put
near the two sides and beneath the machine.
Test vehicle whose weight doesn’t exceed maximum lift weight.
Check whether the oil line and the gas line are leakage. If any abnormal is found, stop it timely.
After clearing obstacles, do the test again.
G
I
A
B
EF
D
C
H
Afbeelding 26
copyrighted document - all rights reserved by FBC

M1.1.SL300U-SL300UM.NLFREN 28082018
17
NL
Opmerkingen voor bediening
• De snelheid van het voertuig, wanneer het op de hefbrug rijdt, mag niet meer dan 5 km/u zijn.
• Bij het stoppen van het voertuig zit het voorwiel in het midden van de groef in de draaischijf (de positie van de groef is
aanpasbaar) en het achterwiel op de schuifplaat.
• Trek de handrem op en gebruik antislipmiddel voor voertuigen (voorzien door de gebruiker).
• Druk op de “UP” knop om het voertuig 200 – 300 mm te heffen, let op de synchronisatie van het heffen.
• Blijf op de “UP” knop drukken tot het voertuig de benodigde hoogte heeft bereikt.
• Let op de synchronisatie van het heffen en het dalen. Als iets abnormaals ontdekt wordt, stop de machine dan tijdig,
controleer en verwijder het probleem.
• De hefbrug moet vergrendeld worden om de twee veiligheidsklemmen van de platformen in dezelfde horizontale positie
te houden tijdens het onderhoud en de aanpassing van de opstelling van de vier wielen. Enkel na het vergrendelen mag
personeel onder de hefbrug en onder het voertuig komen.
• Controleer of de veiligheidsklem volledig uit de veiligheidsuitrusting is en of er personeel rond het voertuig en het platform
is.
• Druk op de “DOWN” knop om het voertuig naar de grond of op gewenste hoogte te laten dalen.
• Wanneer de uitrusting voor een lange tijd of ’s nachts niet wordt gebruikt, moet de machine verlaagd worden tot op de
laagste positie, tot op de grond, het voertuig moet verwijderd worden en de stroomvoorziening moet uitgeschakeld worden.
Instructies over de werking van het bedieningspaneel
U
US
SE
ER
R‟
‟S
S
M
MA
AN
NU
UA
AL
L
V
V1
1.
.0
0
2
20
01
14
40
08
8
- 20 -
8. Operation
Only skilled and having been trained personnel is allowed to perform the operations. Check
proceedings as following.
Text before operation:
-Clear obstacles around the lift before operation.
-Pay attention to the synchronization and placidity of the lifting.
-Check whether the safety claw is flexible and reliable.
-Check whether the lift will stop automatically when it lift to the heightest position
-No air leakage in the solenoid valve,air cylinder,air hose and union.
-Check whether the working sound of motor and gear pump are normal.
-Check whether the lifting vehicle or other goods exceed the capacity of the lift.
Operation notices
-Speed of vehicle should be kept in 5km/h when vehicle drives on the lift.
-The front wheel lies on the middle of the groove of turntable(the position of groove is adjustable) and the
rear wheel lies on the sliding plate when vehicle stop.
-Tighten the brake and stack up antiskid(equipped by user) for vehicles.
-Press up button to lift the vehicle for 200-300mm,pay attention to the synchronization of the lifting.
-Go on press up button to lift the vehicle to the needed height.
-The chassis of vehicle should be filled up with rubber mat when the sub machine is lifting and lowering.
The telescopic boom of sub machine should be taken back when the lift lowers.
-Pay attention to the synchronization of the lifting and lowering. If any abnormal is found, stop the
machine timely, check and remove the trouble.
-The lift should be locked to keep the two insurance claw of platform in the same horizonal height during
maintenance and four wheel alignment adjustment. Only after locking operation, personnel can enter
below the lift and vehicle.
-Check whether the insurance claw is out of the insurance gear entirely and personnel is around the
vehicle and the platform.
-Press down button to lower the vehicle to the ground or needed height.
-When the equipment is not used for a long time or over night, the machine should be lowered to the
lowest position on ground, and remove vehicle, and cut off power supply.
Instructions on control panel operation
Picture 27
DOWN
POWER
LOCK
BUZZER
UP
SCISSOR LIFT
Afbeelding 27
U
US
SE
ER
R‟
‟S
S
M
MA
AN
NU
UA
AL
L
V
V1
1.
.0
0
2
20
01
14
40
08
8
- 21 -
Emergency manual operation for lowering (power failure)
When lowering through manual operation, should observe the condition of platform at any time because
there are vehicles on the platform. If there is something abnormal, screw down oil loop valve
immediately.(refer to Picture 26)
The process of manual operation
-Firstly lift two safety pawls of platform and use thin iron bar to fill up it.
-Switch off the power button (avoid abruptly incoming electricity). Open the back cover of control box to
find the electromagnetic valve A for lowering.
-Loosen manual oil loop stud anticlockwise at the end of lowering electromagnetic valve core, then the
platform begins lowering.(Picture 28)
-After the machine has been lowered, screw down manual oil loop stud clockwise timely, the process of
manual lowering comes to the end.(Picture 29)
Raising
Turn on the power switch
Press UP button
Motor drives the gear pump work
The lift is raised
Cylinder piston drives the platform move up
Locking
Turn on the power switch
Press the LOCK button
The lift is locked
Picture 29
Picture 28
Lowering
Turn on the power switch
Press UP button for 2-3s
The life is unlocked
The lift is lowered
Press DOWN button
Heffen Vergrendelen
Neerlaten
Schakel de machine in
Druk op de UP knop
De motor drijft de tandwielpomp aan
Het platform wordt geheven
Schakel de machine in
Druk op de UP knop gedurende 2 à
3 seconden
De hefbrug is ontgrendeld
Druk op de DOWN knop
Schakel de machine in
Druk op de LOCK knop
De hefbrug is geheven De hefbrug is
neergelaten
De hefbrug is
vergrendeld
copyrighted document - all rights reserved by FBC

M1.1.SL300U-SL300UM.NLFREN 28082018
18
NL
U
US
SE
ER
R‟
‟S
S
M
MA
AN
NU
UA
AL
L
V
V1
1.
.0
0
2
20
01
14
40
08
8
- 21 -
Emergency manual operation for lowering (power failure)
When lowering through manual operation, should observe the condition of platform at any time because
there are vehicles on the platform. If there is something abnormal, screw down oil loop valve
immediately.(refer to Picture 26)
The process of manual operation
-Firstly lift two safety pawls of platform and use thin iron bar to fill up it.
-Switch off the power button (avoid abruptly incoming electricity). Open the back cover of control box to
find the electromagnetic valve A for lowering.
-Loosen manual oil loop stud anticlockwise at the end of lowering electromagnetic valve core, then the
platform begins lowering.(Picture 28)
-After the machine has been lowered, screw down manual oil loop stud clockwise timely, the process of
manual lowering comes to the end.(Picture 29)
Raising
Turn on the power switch
Press UP button
Motor drives the gear pump work
The lift is raised
Cylinder piston drives the platform move up
Locking
Turn on the power switch
Press the LOCK button
The lift is locked
Picture 29
Picture 28
Lowering
Turn on the power switch
Press UP button for 2-3s
The life is unlocked
The lift is lowered
Press DOWN button
Manueel neerlaten bij noodgevallen (stroomstoring)
Bij het manueel neerlaten moet de toestand van het platform voortdurend in acht genomen worden, omdat er zich voertuigen
op het platform bevinden. Schroef het oliestroomventiel meteen dicht, als er iets abnormaals voorvalt (afbeelding 26)
Het proces van manuele bediening
• Verwijder eerst de veiligheidspallen van het platform en gebruik een smalle ijzeren bar om deze leegte op te vullen.
• Leg de aan/uit knop af (om plots inkomende energie te vermijden). Open de achterkant van de bedieningsconsole om de
elektromagnetische klep A voor het neerlaten te vinden.
• Maak de manuele oliestroomknop op het einde van het elektromagnetische daalventiel tegen wijzerszin los, dan begint
het platform te dalen (afbeelding 28).
• Als de machine volledig is neergelaten, draai op tijd de manuele oliestroomknop in wijzerszin dicht, het manueel neerlaten
is beëindigd (afbeelding 29).
Afbeelding 29Afbeelding 28
copyrighted document - all rights reserved by FBC

M1.1.SL300U-SL300UM.NLFREN 28082018
19
NL
8 Onderhoud
Enkel bekwaam personeel is toegestaan deze handelingen uit te voeren
Dagelijks te controleren
De gebruiker moet een dagelijkse check uitvoeren. Een dagelijkse check van het veiligheidssysteem is zeer belangrijk – het
ontdekken van defecten in het apparaat vóór de bediening kan u tijd besparen en een groot verlies, letsels en verwondingen
voorkomen.
• Veeg altijd schoon, houd de machine altijd schoon.
• Verwijder obstakels en olie op de grond, hou de werkomstandigheden schoon.
• Controleer de volledigheid van elk veiligheidsapparaat, zorg ervoor dat de beweging ervan soepel en betrouwbaar is.
• Controleer de betrouwbaarheid van de veiligheidsschakelaar.
• Controleer of er olie of lucht uit de machine lekt.
Wekelijks te controleren
• Alle lagers en scharnieren van deze machine moeten een keer per week met olie gesmeerd worden.
• Controleer de werkingscondities van de veiligheidsonderdelen.
• Controleer de hoeveelheid olie in het oliereservoir. Er is voldoende olie als het rijtuig tot in de hoogste positie geheven kan
worden. Zoniet, dan is er onvoldoende olie aanwezig.
• Controleer of de expanderbouten goed vastzitten.
Maandelijks te controleren
• De veiligheidsuitrusting, de bovenste en de onderste glijdblokken en andere beweegbare delen moeten eenmaal per
maand gesmeerd worden.
• Controleer of de funderingsbouten goed vastzitten.
• Controleer schaafplekken en lekken in de olie- en luchtpijp.
Jaarlijks te controleren
• De hydraulische olie moet één keer per jaar vervangen worden. Het olieniveau moet altijd aan de bovengrens gehouden
worden.
• Controleer op schaafplekken en schade van alle actieve onderdelen.
• Controleer of de kogellager gesmeerd is. Smeer deze als hij sleept.
De machine moet neergelaten zijn tot op de laagste positie bij het vervangen van de hydraulische olie. Laat eerst de oude olie
eruit en lter de hydraulische olie altijd.
Opslag na gebruik
Wanneer de machine voor een lange tijd niet gebruikt wordt:
• Schakel de stroom uit. Laat alle actieve delen ventileren en smeer ze.
• Draineer de hydraulische olie uit de oliecilinder, de oliepijp en het oliereservoir.
• Bedek de machine met een stofvrij omhulsel.
9 Problemen oplossen
Problemen Oorzaken Oplossingen
De motor werkt niet tijdens
het heffen. Verbinding van de stroomtoevoerkabels is
niet correct. Controleer en corrigeer de kabelverbinding
De AC aansluiting in het circuit van de motor
werkt niet. Als de motor werkt, wanneer de aansluiting naar
beneden geforceerd wordt met een isolatiestaaf,
controleer het controlecircuit.
Als het voltage aan beide uiteindes van de
aansluitingsspoel normaal is, vervang de
contactor.
De veiligheidsschakelaar is niet gesloten. Controleer de veiligheidsschakelaar en de kabels
en pas de schakelaar aan of vervang deze.
copyrighted document - all rights reserved by FBC

M1.1.SL300U-SL300UM.NLFREN 28082018
20
NL
Problemen Oorzaken Oplossingen
Bij het heffen werkt de
motor, maar is er geen
hefbeweging.
De motor draait omgekeerd. Verander de fases van de stroomtoevoerkabel.
Bij het heffen van licht materiaal zijn er
geen problemen, bij het heffen van zwaar
materiaal wel.
De hefbrug is overladen en kan het materiaal
niet dragen. Laat de hefbrug langzaam zakken
en verwijder het voertuig.
De spoel van het magnetisch daalventiel is
verstopt met vuil. Maak de spoel schoon.
Er is niet genoeg hydraulische olie aanwezig. Voeg hydraulische olie toe.
Het “werkingsstopventiel” is niet gesloten. Draai het “werkingsstopventiel” dicht.
Bij het indrukken van de
“DOWN” knop, wordt de
machine niet neergelaten.
De veiligheidspallen zijn niet losgemaakt uit
de veiligheidstanden. Hef eerst een beetje en laat dan zakken.
De veiligheidspal is niet opgeheven. De luchtdruk is niet hoog genoeg, de
veiligheidspal zit vast of de gaspijp is gebroken,
pas de druk aan, controleer de gaspijp en
vervang deze.
Het magnetische luchtventiel werkt niet. Het magnetische luchtventiel wordt aangespoord,
maar opent het luchtcircuit niet, controleer en
vervang het magnetische luchtventiel.
Het magnetische daalventiel wordt
aangespoord, maar werkt niet. Controleer de stop en de spoel van het
magnetische daalventiel en controleer of de
koperen moer volledig aangespannen is,
enzovoort.
Het “antiklopventiel” is geblokkeerd. Verwijder het “antiklopventiel” uit de
olietoevoeropening op de bodem van de
oliecilinder en maak het “antiklopventiel” schoon.
De machine zakt extreem
traag met normale
ladingen.
De hydraulische olie is te taai, bevroren (in
de winter) of verslechterd. Vervang de hydraulische olie volgens de
instructies van de handleiding.
Het “antiklopventiel” dat barsten in de
oliepijp voorkomt, is geblokkeerd. Verwijder of sluit de luchttoevoerpijp en sluit dus
de veiligheidspal van de machine zonder deze
op te liften.
Verwijder het “antiklopventiel” uit de
olietoevoeropening op de bodem van de
oliecilinder en maak het “antiklopventiel” schoon.
Het linkse en rechtse
platform zijn niet
synchroon en niet op
dezelfde hoogte.
De lucht in de oliecilinder is niet volledig
uitgelaten. Volg de instructies bij “Olieafstelling”
Een olielek in de oliepijp of bij de
verbindingen. Maak de oliepijpverbindingen strakker of
vervang de oliekeerringen, stel dan de olie af en
nivelleer.
Het “olieafstelstopventiel” kan niet strak
gesloten worden en de olie moet bijna iedere
dag afgesteld worden.
Vervang het olieafstelstopventiel, stel dan de olie
af en pas aan.
Luidruchtig heffen en dalen De machine is niet genoeg gesmeerd. Smeer alle scharnieren en bewegende delen
(ook de zuigerstang) met machineolie.
De basis of de machine zit gedraaid. Pas de nivellering van de machine opnieuw aan
en vul gaten onder de basis op.
copyrighted document - all rights reserved by FBC
This manual suits for next models
3
Table of contents
Languages:
Other MW TOOLS Lifting System manuals