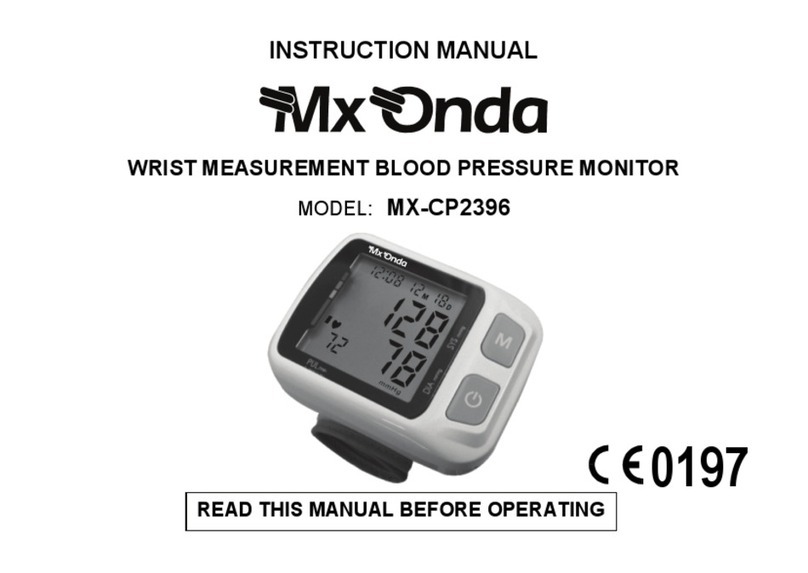
Mx Onda MX-CP2396 User manual

INSTRUCTION MANUAL
WRIST MEASUREMENT BLOOD PRESSURE MONITOR
MODEL: MX-CP2396
READ THIS MANUAL BEFORE OPERATING
MODEL: MX-CP2396
0197

2
NAME OF EACH PART
BEFORE USE THE BLOOD PRESSURE MONITOR
Please read kindly these instructions and keeping for a later use.
After unpacking, verifies that the apparatus is not damaged. In case of doubt it
does not use it; contact with the service of technical assistance.
Battery cover
Memory
position
Systolic
pressure
Power ON/OFF
Button
Memory button
Diastolic
pressure
Pulse
Date
Hour
User

3
The packing material (plastic bags, etc.) does not have to be left within reach of
the children, since they are a potential source of danger.
The manufacturer declines any responsibility by damages derived from an
inadequate, incorrect or imprudent use of the apparatus.
This apparatus has been only designed for domestic use. In case of professional
use, inadequate use or breach of the instructions, the manufacturer declines any
responsibility; it does not accept any responsibility and the guarantee will lack
validity.
Please do not use the cuff other than supplied by the manufacturer, otherwise it
may bring biocompatible hazard and might result in measurement error.
No component can be maintained by user in the monitor. The circuit diagrams,
component part, list, descriptions, calibration instructions, or other information with
will assist the user´s appropriately qualified technical personnel to repair those
parts of equipment with are designated reparably can be supplied.
The device is not intended for use on children, pregnant women. (Clinical testing
has not been conducted on children, pregnant women.).
WARNING
THIS PRODUCT CAN NOT BE USED ON INFANTS

4
SYMBOLS SHOW IN THE DISPLAY
Symbol
Condition/cause
Number of user
This symbol appears when the pulse is located .
The display shows this indication when have a irregular
heartbeat.
This symbol appears when the battery are low, and must be
replaced.
Inflate the wrist cuff
The pressure in cuff is instable, or much remnant air in cuff
mmHg
Pressure in mercury millimetres
Memory position

5
NOTICE BEFORE MEASUREMENT
Avoid eating, smoking, and intensive activity 30 minutes before measuring.
Please sit down while measuring. During measurement, please make sure the cuff
stays at the same height as the heart. Either above or below the position, the
accuracy will be affected.
During measurement, do not speak or move body and arm.
During measurement, keep you comfortable, steady and quiet.
Measuring at the same arm each time because the blood pressure in different arm
may change more than 40mmHg.
Between each measurement, you need 3min to let blood circulation of the arm
recover.
The cuff size is suitable for adult’s arm.
The man with arrhythmia is not acceptable for this blood pressure monitor.
Please avoid strong magnetism interfere, such as mobile telephone, microwave
oven, etc.
If you do not use the BPM for a long time, please take out the battery.
Please wear the cuff on the left wrist
Please do not share the cuff with other infective person to avoid cross-infection.
Stay still, calm and rest for 5 minutes before blood pressure measurement.

6
BATTERY LOADING
To insert or change the batteries follow the next steps:
1. Open battery cover at the left of the machine.
2. Load two “AAA” size batteries. Please pay
attention to the polarity.
3. Close the battery cover.
Notes:
When replace the batteries the date and the hour will erase.
The batteries contain polluting materials of environment, for that reason
once exhausted the batteries, does not throw them to the sweepings,
disposed in adapted for their recycled one.
If it does not use the apparatus for a long period of time, extracts the
batteries and keep in a dry place.
Does not use 1.2 V rechargeable batteries.
The patient is an intended operator.
It is suggested that the blood pressure monitor be kept at least 30 cm away
from other wireless devices, such as WLAN unit, microwave oven, etc
Swallowing batteries and/or battery fluid can be extremely dangerous. Keep
the batteries and the unit out of the reach of children and disabled persons.

7
If you are allergic to plastic/rubber, please don’t use this device.
Do not use this unit in a moving vehicle, This may result in erroneous
measurement.
Consult your physician if you have any doubt about below cases:
1. The application of the cuff over a wound or inflammation disease.
2. The application of the cuff on any limb where intravascular access or
therapy, or an arterio-venous (A-V) shunt, is present
3. The application of the cuff on the arm on the side of a mastectomy
4. Simultaneously used with other monitoring medical equipments on the
same limb
5. Need to check the blood circulation of the user.
Too frequent measurements may cause injury due to blood flow interference
When is necessary to change the batteries?
When the screen shows the symbol it indicates that the batteries are
exhausted and must be replaced by other new ones.

8
SETTING THE CLOCK AND ADJUSTING THE DATE
The clock of this device is designed to indicate the hours in 12 or 24 hour
format and the date in "month / day" mode. To set the date and time, proceed
as follows:
With the blood pressure monitor turned off, press and hold the " " and M
buttons for three seconds at a time. The digits of the time format will blink
(Fig. 1).
1. Press the Mbutton successively and select the time format.
2. Press the " " button and the corresponding year digits will blink (Fig. 2),
3. Press the Mbutton to select the year.
4. Press the " " button and the month digits will blink (Fig. 3).
5. Press the Mbutton repeatedly and select the month.
6. Press the " " button and the digits for the day will flash (Fig. 4).
7. Press the Mbutton to set the day.
8. Press the " " button and the corresponding hour digits will blink (Fig. 5).
9. Press the Mbutton to set the hour.
10. Press the " " button and the minute digits will blink (Fig. 6)
11. Press the Mbutton to set the minutes.
12. Press the " " button again to store the data.

9
Fig. 1 Fig.2 Fig. 3 Fig. 4 Fig. 5 Fig. 6
Notes:
It is very important to keep the date and time updated as these are stored
together with the measured values.
When replacing the batteries, the date and time will be erased, and the
display will show the menu for setting the date and time.
During the setting of the clock and setting the date, if a minute passes
without touching any buttons, the tensiometer will turn off and will not
store the entered data.

10
WRIST CUFF CONNECTING
1. Be sure to place the wrist cuff on bare skin of left
wrist, and place monitor on the centre of wrist.
2. Place wrist cuff 1-2 cm above wrist joint.
3. Wrist cuff connecting should make wrist feel no
much tension. Don’t connect too tense
(otherwise the measurement will be not precise.
4. If the cuff is too long, fix the over plus cuff on the
Nylon fibulae of cuff.
5. Keep up right position on the same level of heart.
6. To avoid arm moving, place the plastic box of
the monitor under the arm is recommended.
Note:
When the cuff is dirty, detach it from the
equipment, wash the cuff by hand with proper
detergent and rinse it in the enough cold water,
dry in air. Never iron it.
This product can’t be used on infants and can’t
be used on other uses than blood pressure
measurement.

11
CORRECT POSTURE TO USE A BLOOD PRESSURE MONITOR
The position of pressure monitor in relation to the heart is extremely important
to be able to obtain a correct measurement.
If the pressure monitor is placed above or under the height of the heart the
values of the measurement can more decrease or increase respectively, of
significant form with respect to the real value.
Always to measure the blood pressure on
seated position.
Place his left elbow on a table or similar surface.
Place the arm in such a way that pressure
monitor is to the height of the heart, the hand will
have to be open (to see illustration).
Relax the arm and you place it of such form that
can see its internal side.
If You it wishes it can use the protective case to
support the arm.
Be seated with your feet flat on the floor, and
don’t cross your legs.

12
MEASURING PROCESS
The blood pressure has four independent memories ( , , and ) for
four different users. In each memory, up to 30 measurements are
automatically stored and you must select the desired memory position before
carrying out the measurement.
1. Once placed the blood pressure on the wrist:
Press the on / off button , the display will
show all the digits and then show the number
of the last user who used the device.
If you want to change user press the memory
button (M) successively and choose the
desired user ( , , or ) otherwise wait
a few seconds and the device will start the
measurement process.
If the screen shows the symbol " " it indicates that the wristband
contains air and this will be expelled, then the wristband will be inflated
automatically.
During the inflation of the wristband the device will automatically select
the pressure level, depending on each person.

13
2. Once the wristband is inflated and the pulse is
localized, the " " symbol will begin to flash at
the pulse rate, the wristband will begin to deflate
at constant speed and the display will show the
value of the pressure decreasing
Note: To avoid errors during measurement do not move your wrist and do
not talk. At any time during the measurement you can turn off the appliance
by pressing the button
3. Once the measurement is complete, the display
will show the systolic pressure value (SYS), the
diastolic pressure value (DIA) in millimeters of
mercury (mmHg) and the pulses per minute
(PUL n / min). In the illustration, the systolic
pressure was 130 mmHg, the diastolic pressure
was 82 mmHg and the pulse was 56 beats per
minute. The measured values together with the
date and time are automatically stored in the
memory.

14
4. If the screen shows the symbol it indicates
that there is a possible alteration in the heart
rate. A normal heart of a body at rest beats
between 60 and 100 palpitations per minute with
a rhythm rhythm. This rhythm can increase with
physical exercise, stress or with some diseases.
Other causes that produce alterations in the
heart rate are cholesterol, diabetes, obesity and
certain medications or drugs, such as caffeine or
tobacco.
5. On the left side of the screen is the pressure
indicator according to the classification criteria of
the World Health Organization (WHO). This
indicator consists of four marks or colors: green
(normal tension), yellow (prehypertension),
orange (high tension) and red (hypertension).
At the end of the measurement, a rectangle flashing indicating the pressure
will appear next to this indicator.
In the illustration, the rectangle is in the yellow zone (prehypertension). This
information is generic and only serves as a reference.

15
6. If you want to make a new measurement, you must turn off and on the
appliance again, but keep in mind the following suggestions:
After carrying out the blood pressure measurement, if you want to make
a new measurement in the same person you should wait for 3 to 5
minutes, so that the blood circulation returns to normal. This time varies
according to each person.
The blood pressure values depend on many factors, so it is not possible
to provide a valid diagnosis by virtue of a single measurement. For this
reason, by measuring the blood pressure regularly, a more complete
follow-up of the patient can be carried out.
TURN OFF
To turn off the blood pressure monitor press the “ ” button. However, once
the measurement is completed, the appliance will automatically turn off after 1
minute.
Note: It may happen that the device shuts down if it is close to equipment
that generates interference or electrostatic discharge.
READING MEMORY RESULTS
This device has four independent memories ( , , and ) for four
different users and up to 30 measurements are stored in each memory. The

16
storage in the memory (previously selected) is carried out automatically, the
last measurement is recorded in position 1, moving the penultimate
measurement to position 2 and so on. When the capacity of the selected
memory is complete when performing a new measurement, the first position
will be deleted.
To access the memory press the Mbutton and the screen will show the last
user number selected, to change the user press the “ ” button successively
and the screen will show the chosen user as well as the total of measurements
(Fig. 1), press Mbutton or wait a few seconds and the screen will show the
average of all the measurements made in the memory of the selected user
(Fig. 2).
Fig. 1 Fig.2 Fig. 3 Fig. 4
If you press the Mbutton again, the display will show the average of the last 7
measurements taken before noon (Fig. 3). Pressing the Mbutton again the
screen will show the average of the last 7 measurements made after 1 noon

17
(Fig. 4). The average value of all the results which is measured from 5 o’clock
to 9 o’clock in last 7 days in the current user memory zone. The average value
of all the results which is measured from 18 o’clock to 20 o’clock in last 7 days
in the current user memory zone
Press the Mbutton for the fourth time to access the different memory
locations, press repeatedly to check all the memory positions of the selected
user. In any of the cases mentioned above the screen will show the stored
values; Maximum tension (systolic), minimum tension (diastolic), pulse and
condition according to the classification criteria of the World Health
Organization.
Notes:
The memories will remain stored even when the device does not have the
batteries installed.
If there are no stored measurements, the display will show the digits " 0".
At any time you can exit memory mode by pressing the “ ” button, or allow
1 minute to pass without pressing any button
Deleting measurements from the memory
To clear all memory locations, access the memory and then press and hold
the Mbutton for three seconds.

18
ASSESSING HIGH BLOOD PRESSURE FOR ADULTS
The follow standards for assessing high blood pressure (without regard to age
or gender) have been established as a guide line. Please note that other risk
factors (e.g. diabetes, obesity, smoking, etc.) need to be taken into
consideration and may affect these figures. Consult with your physician for
accurate assessment.
CLASSIFICATION OF BLOOD PRESSURE FOR ADULTS

19
TECHNICAL ALARM DESCRIPTION
The monitor will show 'HI' or 'Lo' as technical alarm on LCD with no delay if the
determined blood pressure (systolic or diastolic) is outside the rated range
specified in part SPECIFICACIONS. In this case, you should consult a
physician or check if your operation violated the instructions.
The technical alarm condition (outside the rated range) is preset in the factory
and cannot be adjusted or inactivated. This alarm condition is assigned as low
priority according to IEC 60601-1-8.
The technical alarm is non-latching and need no reset. The signal displayed on
LCD will disappear automatically after about 8 seconds.

20
TROUBLESHOOTING (1)
Problem
Possible cause
Solution
LCD display
shows
abnormal
result
The cuff position was not correct or
it was not properly tightened
Apply the cuff correctly and try
again.
Body posture was not correct
during testing
Review the “BODY POSTURE
DURING MEASUREMENT”
sections of the instructions and re-
test.
Speaking, arm or body movement,
angry, excited or nervous during
testing
Re-test when calm and without
speaking or moving during the test.
Irregular heartbeat (arrhythmia)
It is inappropriate for people with
serious arrhythmia to use this
Electronic Sphygmomanometer.
Other manuals for MX-CP2396
1
Table of contents
Other Mx Onda Blood Pressure Monitor manuals