Mycricket UM185C User manual

www.mycricket.com
1 Table of Contents
Contents
BEFORE USING UM185C .........................................2
About this User Manual................................................................................................... 3
Product Overview ........................................................................................................... 3
What’s Inside the Product Package.................................................................................. 3
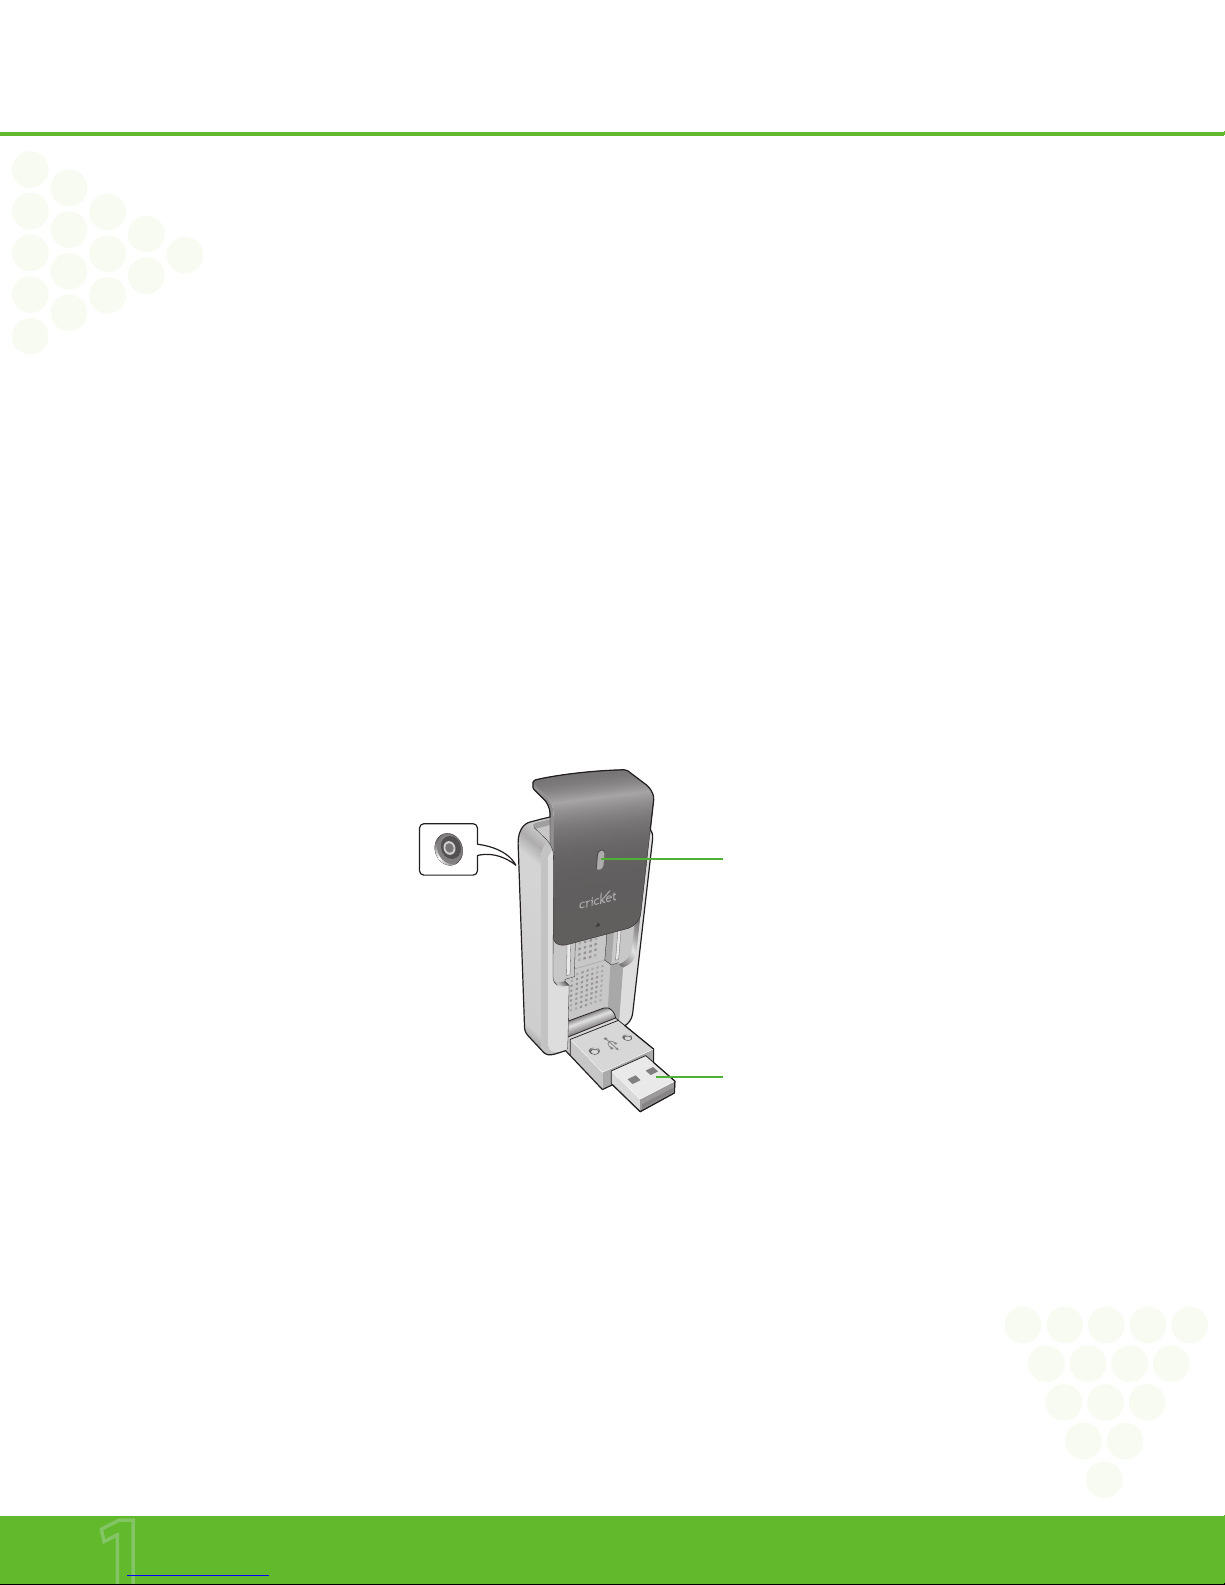
Introduction to Cricket UM185C Wireless USB Modem...................................................... 3
Product Features............................................................................................................. 4
Product Handling............................................................................................................ 4
Configuration ................................................................................................................. 4
INSTALLATION AND SETUP .....................................5
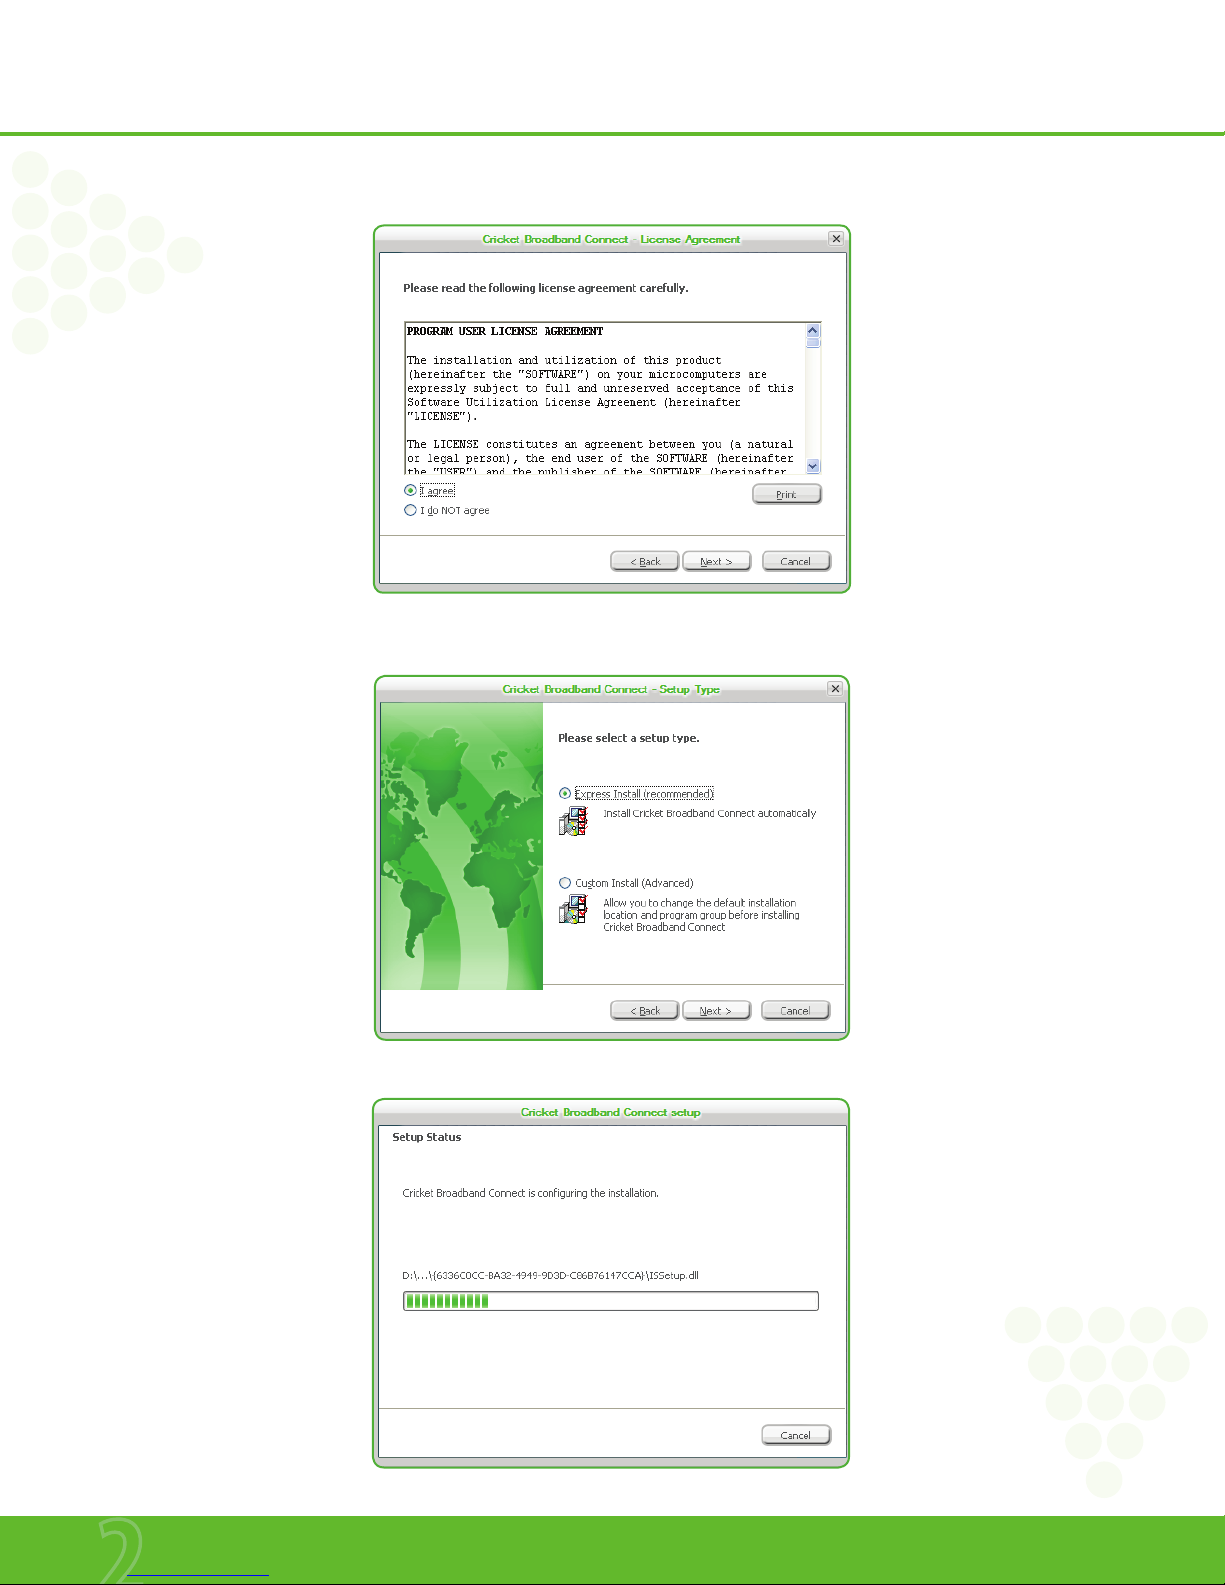
The Cricket Broadband Connect Setup Program (WINDOWS)............................................. 6
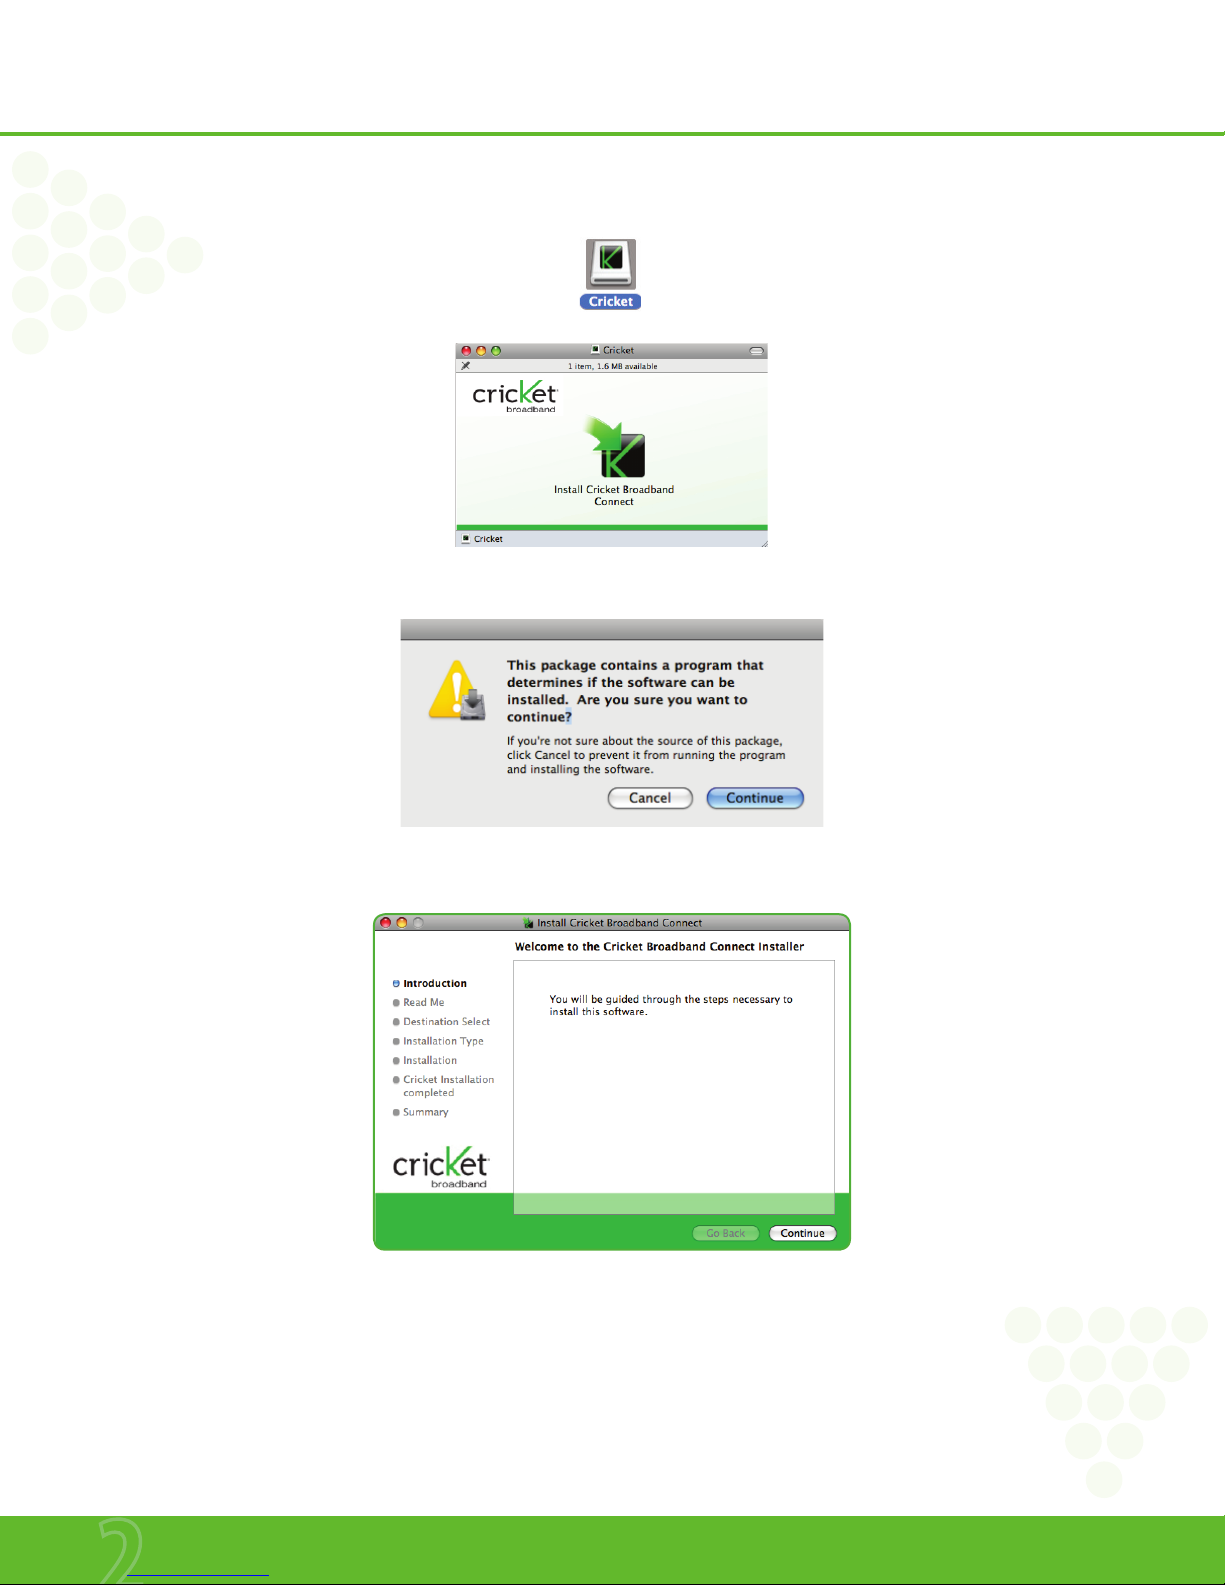
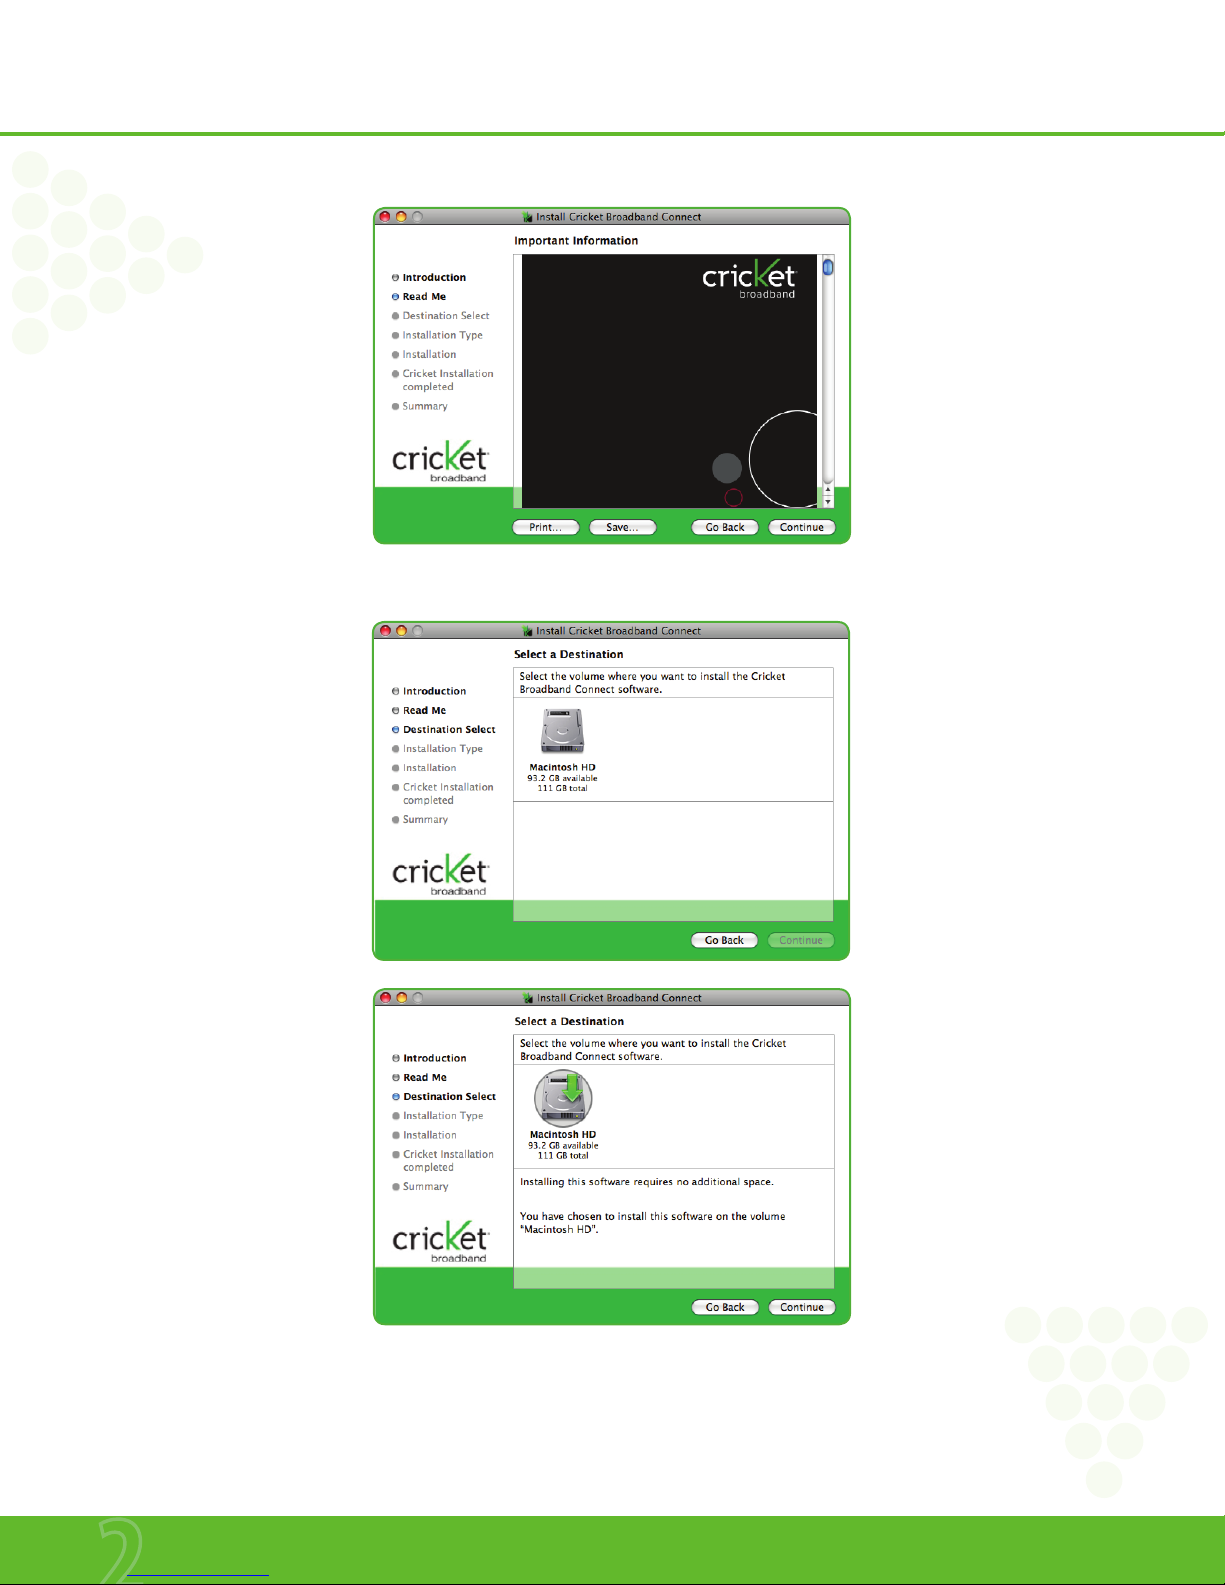
The Cricket Broadband Connect Setup Program (MAC)...................................................... 9
INSTALLING UM185C............................................13
Precautions .................................................................................................................. 14
Recommended System Requirements............................................................................ 14
Installing Software ...................................................................................................... 14
USING CRICKET BROADBAND CONNECT .................16
Features ....................................................................................................................... 17
Getting Started............................................................................................................. 17
Connecting ................................................................................................................... 18
Additional Features....................................................................................................... 19
The File Menu ............................................................................................................... 21
The View Menu ............................................................................................................. 21
The Tools Menu............................................................................................................. 23
The Option Menu .......................................................................................................... 26
The Help Menu.............................................................................................................. 28
REGULATORY AND SAFETY INFORMATION.............. 30
Regulatory Notices ....................................................................................................... 31
Operating Conditions ................................................................................................... 31
Warnings and Cautions ................................................................................................. 31
Safety Precautions ...................................................................................................... 32
APPENDIX ...........................................................33
Glossary........................................................................................................................ 34
Specific Absorption Rates (SAR)..................................................................................... 35
Safety Information for RF Exposure ............................................................................... 36
U.S. Federal Communications Commission Radio Frequency Interference Statement ...... 37
12 MONTH LIMITED WARRANTY...................................................................................... 38

www.mycricket.com
1
Before Using UM185C
This chapter provides important information about
using the UM185C including:
About this User Manual
Product Overview
What’s Inside the Product Package
Introduction to Wireless UM185C USB Modem
Product Features
Product Handling
Configuration

www.mycricket.com
Before Using UM185C
3 Before Using UM185C
ABOUT THIS USER MANUAL
You will find all the information you need to install and use the UM185C in this user manual. Before using the UM185C, you must properly install the Cricket Broadband Connect
by closely following the installation instructions.
INSTRUCTIONS
• The software needed to install and configure your UM185C USB device is already included on the device.
• It is highly recommended that you read the safety precautions described in this manual before using the UM185C.
PRODUCT OVERVIEW
Thank you for purchasing the Cricket Wireless UM185C USB Modem. The UM185C is a 3G wireless device that enables high-speed wireless communication from your laptop or
desktop computer. The UM185C is simple to install and use.
WHAT’S INSIDE THE PRODUCT PACKAGE
The following items are included in the product package. If any of the items listed below are missing, please contact the retail location where you purchased the product.
• UM185C Wireless USB Modem
• Quick Start Guide
INTRODUCTION TO CRICKET UM185C WIRELESS USB MODEM
The Cricket UM185C is designed for your laptop or desktop computer’s USB port, which is available in most models. The UM185C can be used to access the Internet, your
company’s intranet, or you can use it to send and receive email. It is extremely useful when you are away from the office, on the road, or wherever a wireline Internet access is
not readily available.
nBlue light: Connected to laptop or desktop computer and detected to network
Red light: Connected to laptop or desktop computer but out of service status
Before Using UM185C
USB Connector
External Antenna
Booster Jack
(on the back side)
LED status
indicator *

www.mycricket.com
Before Using UM185C
4 Before Using UM185C
PRODUCT FEATURES
• Power management: The UM185C utilizes power management and system overhead reduction functions provided by the USB interface for maximum power savings.
• Antenna design: Efficient, innovative internal antenna design optimizes data transfer rate and sensitivity to network signals.
• USB Modem that supports Type A USB Port interface.
• Supports North American US_PCS, Wireless CDMA and AWS bands.
• Utilizes QUALCOMM QSC6085 chipset.
• Supports 3G network technologies.
• Maximum Data Rate: 3.1 Mbps download; 1.8 Mbps upload.
• Supports Windows XP and Vista systems with installed host software and driver.
• Compatible with Mac OS x 10.4.11 or higher.
• Provides Cricket Wireless Internet service.
• The datacard cover automatically closes when you push the designated point as displayed in the following figure.
• When using the UM185C, please slide the black USB cover UP for the best reception.
PRODUCT HANDLING
1. Do not put any adhesive label on the USB connector. It may leave a sticky residue that can cause problems inside the USB port.
2. The UM185C USB device should easily slide into the USB port. Do not force the UM185C into the USB port as it may cause damage to the modem and/or the
port.
3. Keep the UM185C in a dry and clean place. (Storage temperature: -22°F to 149°F [- 30°C to 65°C]).
Keep your device away from liquids, dust and excessive heat.
CONFIGURATION
To use the UM185C, you should first install the software included on the device and configure the UM185C USB device. See the next section for more information on software
installation and USB device configuration.

www.mycricket.com
Installation and Setup
2
The Cricket Broadband Connect and installation and setup
procedure of your USB modem.
The Cricket Broadband Connect Setup Program (WINDOWS)
The Cricket Broadband Connect Setup Program (MAC)

www.mycricket.com
Installation and Setup
6 Installation and Setup
This chapter will guide you through the installation and setup process for Cricket Broadband Connect. Before getting started, you should become familiar with the
documentation that came with your wireless device.
GETTING STARTED WINDOWS
Follow these steps to install Cricket Broadband Connect:
1. Turn on your computer and close all applications.
2. Insert the UM185C into the USB port.
3. If set up does not automatically start:
a. Click the Start Button
b. Choose My Computer
c. Find and double click on the drive icon (Cricket Broadband Connect) that represents the data card.
4. Follow the steps in the next section.
GETTING STARTED MAC
Follow these steps to install Cricket Broadband:
1. Turn on your computer and close all applications.
2. Insert the UM185C into the USB port.
3. Find and double click on the drive icon that represents the data card.
4. Find and run the Cricket Broadband icon in the MAC Cricket broadband folder.
5. Double click the Cricket Broadband icon to begin the installation.
6. Follow the steps in the next section.
THE CRICKET BROADBAND CONNECT SETUP PROGRAM WINDOWS
STEP 1: To install on your hard drive, connect your device to your PC. The installation process will start automatically.
Select the language for the installation from the choices below – “English”and“Spanish”and click “Next.”
Installation and Setup

www.mycricket.com
Installation and Setup
7 Installation and Setup
STEP 2: In the“Cricket Broadband Connect – License Agreement”screen, you will see the program user license Agreement. In order to install and use this product, you must
agree with the terms of this agreement. Select“I agree”then click the “Next”button to continue. If you do not agree with this agreement, click the“Cancel”button to exit.
STEP 3: After agreeing to the License Agreement, you will see the“Cricket Broadband Connect - Setup Type”screen. You can select from the two setup type – Express install or
Custom Install. It is recommended that you choose Express Install. Click the“Next” button to continue.
STEP 4: During this step, the components of Cricket Broadband Connect are being installed onto your computer.

www.mycricket.com
Installation and Setup
8 Installation and Setup
STEP 5: “The Install shield Wizard has successfully installed Cricket Broadband Connect“ appears on the screen. Click the“Finish”button.
nAfter complete the installation, Important Customer Imformation will be installed to your PC. Adobe Acrobat reader required to view this file. If Adobe Acrobat reader is already installed,
the screen will be seen as followed.
STEP 6: The setup program will create an Access shortcut and the Cricket Broadband Connect will launch automatically. Now the installation is complete.

www.mycricket.com
Installation and Setup
9 Installation and Setup
THE CRICKET BROADBAND CONNECT SETUP PROGRAM MAC
STEP 1: Click the Cricket Broadband Connect setup program.
When the pop-up screen appears to confirm installing the software, click the“Continue” button to continue with the installation process.
STEP 2: The“Welcome”screen appears. Click the“Continue”button.

www.mycricket.com
Installation and Setup
10 Installation and Setup
STEP 3: The“Read Me”screen appears. Click the“Continue” button.
STEP 4: You are now ready to select the location on your computer where Cricket Broadband Connect should be installed.

www.mycricket.com
Installation and Setup
11 Installation and Setup
STEP 5: During this step the components of Cricket Broadband Connect are being installed onto your computer. Installation will occur to the destination folder specified in Step
3 above or you may change the installation location by pressing“Change Installation Location...”.
STEP 6: Installing the software requires you to restart your computer when the installation is complete. Please check that no other programs are running, then press “Continue
Installation”.
STEP 7: While your computer is running the installer script, do not turn your computer off.

www.mycricket.com
Installation and Setup
12 Installation and Setup
STEP 8: If you want to create an Access shortcut on your desktop, select “Create an alias on the desktop”and press“Continue”.
STEP 9: Installation is now complete. Click the“Restart”button to leave the Cricket Broadband Connect setup program and restart your computer.
nPlease note that Text Messaging is currently unavailable on Mac; this functionality is coming soon!
nTo view the Guide go to Help > Guide. Adobe Acrobat reader is required.

www.mycricket.com
Installing UM185C
3
This chapter addresses the hardware
installing procedure.
Precautions
Recommended System Requirements
Installing Software

www.mycricket.com
Installing UM185C
14 Installing UM185C
PRECAUTIONS
• Once the modem has been inserted into the laptop or desktop computer, do not remove it without first completing the unplugging/ejection process.
RECOMMENDED SYSTEM REQUIREMENTS
Cricket Broadband Connect operates in Windows® 2000, XP or Vista environments.
Check the following points in order to ensure the application works correctly:
• Minimum screen resolution recommended: 800x600 256 colors
• 30 MB available hard disk space
WINDOWS® 2000 SERVICE PACK 4
• 300 MHz Processor or higher
• 512 MB of RAM recommended
• Service Pack 4
WINDOWS® XP SERVICE PACK 2 OR HIGHER
• 300 MHz Processor or higher
• 512 MB RAM recommended
• Service Pack 2
WINDOWS® VISTA SERVICE PACK 1 OR HIGHER
• PC featuring a Pentium® IV 2 GHz or better processor.
• 512 MB of RAM recommended.
MAC OS X 10.4.11 OR HIGHER
INSTALLING SOFTWARE
INSTALLATION
• If you install Cricket Broadband Connect, it will install the USB Driver for the UM185C. Follow the instructions from the Cricket Broadband Connect for installation.
WARNINGS!
• Make sure to complete the unplugging/ejection process BEFORE removing the UM185C. If you remove the device improperly, the product may be damaged.
n• If you have inserted the device properly, Windows will inform you of the new hardware. Wait until Windows completes the “Found New Hardware”task. In Windows XP, several tool tips
similar to the“Found New Hardware” function will appear and disappear in the system tray automatically. In Windows Vista, several tool tips similar to the“Installing device driver soft-
ware” function will appear and disappear in the system tray automatically. Once hardware detection is complete, you will be prompted to start activation.
• It is normal to hear a short beep sound each time you insert or remove the UM185C. It is an audible notification that your laptop or desktop computer recognizes the new hardware.

www.mycricket.com
Installing UM185C
15 Installing UM185C
nWhen removing the UM185C, always grip the top and bottom of the modem and push/pull carefully.

www.mycricket.com
4
Using Cricket Broadband Connect
This chapter provides information about
Cricket Broadband Connect software.
Features
Getting Started
Connecting

www.mycricket.com
Using Cricket Broadband Connect
17 Using Cricket Broadband Connect
Today’s online world offers more services everyday and Cricket Wireless gives you the tools you need to take advantage of the best in connectivity solutions. With Cricket
Broadband Connect, enjoy the freedom and convenience of wireless Internet connectivity from your computer!
FEATURES
WWAN WIRELESS WIDE AREA NETWORK, 1xEVDO/1xRTT SPECIFIC FEATURES
• Configures your laptop or desktop computer to use your wireless device as a modem.
• Creates a Cricket Wireless Internet connection.
• Copy utility to create wireless copies of your dial-up connections, if supported by your device.
• Signal strength display for your Wireless USB Modem.
• Features a test function for your WWAN device.
nA WWAN capable device is required to use the WWAN features. Individual WWAN features are also device dependent as described in the WWAN section above.
OTHER FEATURES
• Can also be used to launch all of your dial-up networking connections, if desired.
• Can launch your browser, e-mail client, VPN or a program of your choice upon connection.
• Logs connections used, duration and bytes sent and received.
• See the section “Additional Features”for more information about the features of Cricket Broadband Connect.
GETTING STARTED
Double click on the Cricket Broadband Connect icon on your desktop or click on the Windows Start menu and select Cricket Broadband Connect from the list of Programs.
ABOUT THE NETWORKS VIEW
The Cricket Broadband Connect will open the Broadband Networks window by default. This view is where you manage your Broadband connections. The Broadband Networks
window displays all currently available network connections.
At a glance you can see the signal strength. Your current connection state and the elapsed time of the connection are displayed along the bottom of the status bar.

www.mycricket.com
Using Cricket Broadband Connect
18 Using Cricket Broadband Connect
CONNECTING
Cricket Broadband Connect allows users to connect to the data network by clicking one button on the main UI. This can also be access by selecting the File > Connect to
Internet.
To help ensure users data usage stays within their data plans, there is an option in the application to set Cricket Broadband Connect to Disconnect the Internet connection after
a specific amount of time or after a specific amount of data has been exchanged.
When creating the Internet connection, Cricket Broadband Connect must get the phone number from the device and include it as the username when needed. The Data
Connection is accessed using the modem or over NDIS.
Once your device is properly configured, connecting to the Internet is as simple as selecting the network connection type shown in the list and clicking the connect button.
Once connected, the Earth shape button will change to“Disconnect”. Simply click this to end your current connection. To connect to any other network shown, select it, and
then select “Earth shape”.
THE STATUS BAR
Information regarding your current network connection can be seen in the status bar along the bottom of the Cricket Broadband Connect interface. For more information on this
status bar, see the section “The Status Bar” in the“Additional Features”section.
At any time during your connection you can check your current connection speed and throughput stats in the Statistics tab of the Session Information window. To see this
window, select“Statistics”from the“View”menu.
The Connection Monitor window displays information about your data connection.
The Statistics section provides real time data throughput for current data connection. The Received tab provides received real time throughput. The transmitted tab provides
transmitted real time throughput.
The status section indicates the status, the duration and the speed of your connection. This information is required to be the same as the information displayed on the main
screen.
The Internet Protocol (TCP/IP) button displays the Internet Protocol (TCP/IP) windows shows the Internet Protocol properties.

www.mycricket.com
Using Cricket Broadband Connect
19 Using Cricket Broadband Connect
USING THE “DATA” CONNECTION:
By default Cricket Broadband enables the software for data connections. If your connection fails when you try to connect, please try to reconnect.
DORMANCY:
The data session becomes dormant if you are not sending or receiving any data. As soon as you resume sending or receiving data, the data session will return to an active state.
ADDITIONAL FEATURES
In addition to the basic features mentioned in previous sections, Cricket Broadband Connect has the additional features listed below.
STATUS BAR
The details of your current connection can be seen in the status bar at the bottom of Cricket Broadband Connect interface. This status bar is always visible when the interface is
fully expanded.
CONNECTION STATUS
The text on the status bar reflects your current state. During an active connection, this text will change to“Connected”. If you are not connected, it will display“Not Connected”.
WWAN USB MODEM STATUS AREA
The text can change to the following:
• Device not connected: Your WWAN USB Modem is removed from the laptop.
• Device not activated: Your USB Modem needs to be activated. Select“Activation” from the Options menu.
THROUGHPUT
The amount of data that you have sent and received since the current network connection was initiated can be seen by holding the mouse over the green up and down arrows
on the left side of the status bar.
ELAPSED TIME
The amount of time that has elapsed since the current network connection was initiated is tracked on the lower left side of the status bar.

www.mycricket.com
Using Cricket Broadband Connect
20 Using Cricket Broadband Connect
QUICK LAUNCH ICONS
• INTERNET – Launch default Internet browser.
• EMAIL – Launch default e-mail client
• TEXT MSG – Launch to send a SMS
• CONNECTION LOG – Launch Data connection logs
TEXT MSG
This module lets you handle text messages easily, allowing you to edit and send text messages via the keyboard of your computer.
HOW IT WORKS
Messages are downloaded from the device to the PC automatically.
Unread messages are kept at the Service Center for a specified time. This time is specified by the message sender using the Validity option in the Send options window (Text
Msg > Tools > Options) .
SEND TEXT MSG
1. From the main application window, click the Text Msg button.
The Send Text Message window displays.
2. Enter your contact details in the appropriate field or click the To... button in order to copy the information from the Contacts.
nYou can send a message to several recipients; to do so enter recipient’s numbers separated by a semicolon.
3. Enter your message.
4. Click the Send button to complete the transmission.
nA text message has a limit (up to 150 characters) which depends on the service center that will forward your message. An indicator at the bottom right of the window indicates the total
number of messages that will be sent.
RECEIVE TEXT MSG
1. From the application main window, select View > Text Msg > Inbox.
Or double-click the envelope in the status area.
The Inbox window displays.
If your mobile phone contains received messages and if it is connected to your PC, the messages are transferred automatically to the Inbox.
2. Click . Check whether you have received new text messages.
REPLY TO A TEXT MSG
1. From the application main window, select View > Text Msg > Inbox.
Or double-click the envelope in the status area.
The Inbox window displays.
2. Select the message you want to respond to.
3. Click . This button displays the Send Text Message window, and the fields corresponding to the recipient’s name and number are filled in automatically.
4. To send your response, proceed as you would to send a new text message.
Table of contents