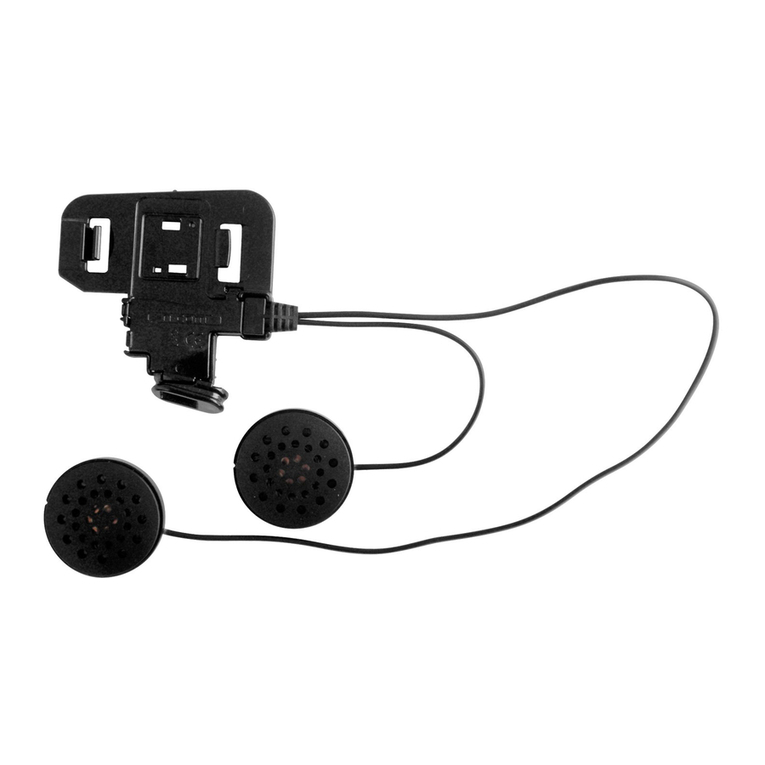
N-Com basic kit multi User manual

EN SAFETY AND INSTRUCTIONS FOR USE

2
Congratulations on your purchase of a Nolan N-Com product.
The N-Com Basic Kit MULTI was designed and built using the latest technologies
and the best materials. Long tests and thorough system development have made
it possible to achieve the highest sound quality.
The Basic Kit MULTI system can be used in combination with an N-Com
system (Bluetooth Kit3, Bluetooth Kit2, Bluetooth Kit X-Series or Intercom
Kit) as a passenger connected via cable, or by itself for cable connection to
a multimedia device (MP3, radio for motorcycle-to-motorcycle
communication, etc.) or to a cell phone (please visit www.n-com.it for
compatibility tables).

Table of contents
1.WARNINGS AND SAFETY............... 4
1.1. Reference standards ............................4
1.2. Road safety ........................................5
1.3. Switching on the system in safe
environments ........................................ 5
1.4. Interferences ........................................6
1.5. Appropriate use.....................................6
1.6. Qualified personnel...............................7
1.7. Disposal ........................................7
2.CONTENTS OF THE PACKAGING ..8
3.INSTALLING THE BASIC MULTI ..... 9
3.1. Example of installation in Jet and Mini-
Jet helmets ........................................9
3.2. Example of installation in Flip-up/Full-
face helmets ......................................12
4.USE WITH CELL PHONE/AUDIO
SOURCES ..................................... 17
5.INTERPHONE VIA CABLE ............ 18
5.1. Possible configurations .......................19
6.LIMITED WARRANTY.................... 20
6.1. Warranty coverage..............................20
6.2. Exclusions and limitations of the
coverage .......................................20
6.3. Validity of this limited warranty ...........21
6.4. Procedure for the forwarding of claims22
7.WARRANTY REGISTRATION
FORM............................................ 23

4
1. WARNINGS AND SAFETY
Read this User Manual carefully, as well as the User Manuals for other N-Com kits that you will be using with the N-
Com Basic Kit MULTI. Read the simple rules listed below. Failure to comply with these rules may lead to dangerous
situations.
Caution: The product cannot be used in official or non-official competitions, motordromes, circuits, racing tracks
and the like.
Caution: Installation of the N-Com Basic Kit MULTI system results in a weight increase of approximately 70g,
which is added to the weight of the helmet and of the other accessories.
Warning: The electronic components of the N-Com system mounted inside the helmet are not waterproof.
Consequently, make sure the inside of the helmet, including the comfort padding, does not get wet in
order to avoid damage to the system. If it does, remove the N-Com system and the helmet comfort
padding and let it air dry.
1.1. Reference standards
The Basic Kit MULTI of the N-Com line complies with EEC directive
EMC 2004/108

5
1.2. Road safety
Always obey all Traffic Regulations in force. While riding the motorcycle, your hands should always be
engaged in actually riding the vehicle. Any operation to the N-Com system must be carried out with the
vehicle stopped. Specifically:
Set your cell phone on automatic answer (see the cell phone instructions to do this).
If your cell phone is not equipped with this function, first stop your vehicle in a safe area, in compliance with
Traffic Regulations and then answer the call.
Do not make any calls while riding. Stop your vehicle in a safe place in compliance with Traffic Regulations,
and then make the call.
Adjust the volume so that it does not cause a disturbance or distraction while riding and at the same time
allows you to distinctively hear background noises.
Do not operate your cell phone or other devices connected to N-Com while riding your motorcycle.
In all cases, obey the Traffic Regulations and remember that riding the motorcycle has absolute priority over
any other maneuver.
1.3. Switching on the system in safe environments
When using the N-Com system, comply with all limitations and instructions related to the use of
cell phones.
Do not turn on your cell phone or the N-Com system whenever their use is forbidden or when the devices can
cause interference or dangerous situations.
Turn off while refueling. Do not use the N-Com system in filling stations. Do not use the device near
combustible materials or chemical products.

6
Turn off in proximity to explosive materials.
1.4. Interferences
All phones and devices with wireless signal transmission are subject to interferences that may affect the
performance of the device connected to them. These interferences are not ascribable to a defect of the
N-Com system.
1.5. Appropriate use
Use the device only in the normal position, as described in the product documentation. Do not attempt
to disassemble, tamper with or modify any part of the N-Com system.
Caution: Adjust the volume of the N-Com system (where provided) and of the audio sources connected to it before
you use the system on the road.
Caution: Adjusting the volume to very high levels may cause damage to your hearing
Caution: Adjust the volume of the N-Com system (where provided) and of the audio sources connected to it so as
to avoid audio reproduction at high volumes. Constant exposure to high audio volumes may damage your
hearing.
Caution: An incorrect installation of the system in the helmet may alter the aerodynamic and safety characteristics
of the helmet itself, thus creating dangerous conditions. Install the N-Com system according to the
instructions provided in the product documentation. In case of doubt, please contact your local N-Com
dealer.

7
1.6. Qualified personnel
Only qualified personnel can carry out technical assistance on this product. In case of any malfunction,
always turn to your local dealer.
The helmet is a safety device. Tampering with it and/or with the electronic system inside the helmet, in
addition to invalidating the product warranty, can also lead to dangerous situations.
1.7. Disposal
Refer to this user manual and to manuals related to other parts of the N-Com system in order to disassemble the
system from the helmet. Once the system has been disassembled, dispose of it according to the following
instructions:
The presence of a crossed-out wheelie bin indicates that in the European Union the product is subject
to separate collection at the end of its useful life (European Directive 2002/96/EC).
Do not dispose of these products together with undifferentiated urban waste.
The proper disposal of obsolete equipment contributes to preventing possible negative consequences on
people’s health and on the environment.
For more detailed information on the disposal of obsolete equipment, contact your municipality, a waste
disposal service or the store where the product was purchased.

8
2. CONTENTS OF THE PACKAGING
Intercom Wire
Wiring system
Removable microphone
Velcro used
to secure the
speakers
Velcro used to
secure the
microphone
Adhesive tape

9
3. INSTALLING THE BASIC MULTI
3.1. Example of installation in Jet and Mini-Jet helmets
Fig. 1
Fig. 2
Simulate positioning the microphone to determine the position where the support Velcro should be glued (Fig.
1). After installing the microphone, the anti-wind sponge should be in front of the mouth.
Thoroughly clean the surface where the microphone Velcro will be applied.
Apply the microphone Velcro to the helmet shell and allow it to fully adhere for at least 12 hours.
WARNING: On certain types of jet helmets the microphone can also be applied inside the helmet. In this case,
install the microphone as illustrated for a flip-up/full-face helmet (chapter 3.2.).

10
Fig. 3
Fig. 4
Fig. 5
Remove the inner lining, if present.
Cut the Velcro used to secure the speakers so as
to obtain two pieces that adapt to the shape of
the helmet ears area (Fig. 3).
Remove the film from the Velcro and position the
latter on the helmet ear area. Repeat the
procedure on both sides.
N.B.: If possible, position the Velcro underneath
the comfort padding (Fig. 4).
Position the speaker so that it adheres perfectly
to the Velcro (Fig. 5). Repeat the procedure on
the opposite side.

11
Fig. 6
Fig. 7
Fig. 8
Hook up the microphone to the connector on the wiring
system (Fig. 6).
Position the microphone so that it adheres to the piece
of Velcro (Fig. 8).
CAUTION: After installing the microphone, make sure
the white dot and the writing “N-com” on the
microphone face the mouth (Fig. 12). When using the
microphone, keep it near your mouth.
Arrange the cables inside the helmet, in the bottom
part.
Put the comfort padding back in place, making sure
that the connection jack cable sticks out (Fig. 8).

12
3.2. Example of installation in Flip-up/Full-face helmets
Fig 9
Fig 10
Remove the cheek pads (Fig. 10).

13
Fig. 11
Fig 12
Simulate positioning the microphone in order to determine where to apply the support Velcro. After installing
the microphone, its sponge must be positioned in front of the mouth.
N.B.: In case is not possible to insert the microphone into the shell you might install it out of it as shown in
Fig. 1 for Jet helmets.
Thoroughly clean the surface where the microphone Velcro will be applied.
Apply the microphone Velcro to the helmet shell and allow it to fully adhere for at least 12 hours (Fig. 11).
Apply the microphone making it stick to the Velcro (Fig. 12).
CAUTION: After installing the microphone, make sure the white dot and the writing “N-com” on the
microphone face the mouth (Fig. 12). When using the microphone, keep it near your mouth.

14
Fig. 13
Fig. 14
Remove the “Noise Reducers” from the cheek pads, if installed, and their Velcro
Cut out the Velcro used to secure the speakers so as to obtain two pieces that adapt to the shape of the
helmet ear area (Fig. 14).
N.B.: Make sure the underchin hole is not blocked.
Remove the film and apply the Velcro used to secure the speakers to the cheek pad, in the ear area.
Repeat the procedure for the other cheek pad.

15
Fig. 15
Fig. 16
Position the two speakers inside the cheek pads, making the Velcro stick properly (Fig. 15-16).

16
Fig. 17
Fig. 18
Connect the microphone to the connector on the wiring system (Fig. 17).
Put the cheek pads back in their housing and position the cables in the recess found in the left cheek pad (Fig.
18).
Insert the cheek pads again, making sure that the connection jack sticks out of the shell edge.

17
4. USE WITH CELL PHONE/AUDIO SOURCES
The Basic Kit MULTI system can be connected to an external audio source such as cell phones, MP3 readers,
satellite navigators, etc. using a Multimedia Wire or Mobile wire of the N-Com Range, according to the compatibility
table provided below:
COMPATIBILITY TABLE
CABLE COMPATIBILITY
Mobile Wire
Cables for connection to cell phones.
Please visit www.n-com.it for compatible cell
phones
Multimedia Wire
Cables for multimedia sources (MP3, Radio
bike to bike, GPS, etc.) (Please visit www.n-
com.it for the full list of cables)
Multimedia Wire2
Cable for stereo connection to MP3 readers,
Satellite navigators, etc. (Please visit www.n-
com.it for full list of cables)
Multimedia MCS Wire
Cables for connection to the audio systems
(Motorcycle Communication System) of
motorcycles such as Honda Goldwing, Harley
Davidson Ultra Glide, BMW K1200 LT
Warning: Use N-Com line connection cables exclusively

18
5. INTERPHONE VIA CABLE
The Basic Kit MULTI system can be connected via cable to one of the following interphone systems of the N-Com line
using an Intercom Wire:
Bluetooth Kit3
Bluetooth Kit2.1
Bluetooth Kit2
Bluetooth Kit
Intercom Kit
Bluetooth Kit X-Series
Hook up the pilot’s helmet (A) to the passenger’s helmet (B) using the special Intercom wire as follows:
• connector 1 in the small jack (diameter 2.5 mm) of the pilot’s helmet
• connector 2 in the large jack (diameter 3.5 mm) of the passenger’s helmet

19
5.1. Possible configurations
*N-Com Intercom Kit, Bluetooth Kit, Bluetooth Kit X-
Series systems

20
6. LIMITED WARRANTY
With this LIMITED WARRANTY CERTIFICATE, Nolangroup warrants this Product to be free from defects in material and
workmanship at the time of its original purchase by the buyer.
We invite you to:
- Read the cautions pertaining to safety and proper use.
- Read the warranty terms and conditions.
- Keep the originals sales receipt. This must be shown in case of repairs covered by warranty. In these cases, the
product has to be taken back to the dealer where it was purchased.
6.1. Warranty coverage
If any defect covered by this limited warranty certificate is discovered within 2 (two) years from the purchase date shown on
the tax receipt, Nolangroup shall repair or replace the defective product through its distribution network after having verified the
defect. Nolangroup shall supply all the material and labor that is reasonably required to remedy the defect, except in those
cases where the damage is caused by one of the items listed in the following paragraph “Exclusions and limitations of the
Coverage”.
6.2. Exclusions and limitations of the coverage
This warranty only covers defects in materials and manufacturing. Nolangroup shall not be considered responsible for product
defects that can be attributed, either partially or in full, to any other cause, including but not limited to:
a) Defects or damages resulting from using the Product in conditions that differ from the usual ones.
b) Damages caused by improper use not conforming with normal operation in accordance with the product operating and
maintenance instructions provided by Nolangroup.
c) Negligence and normal wear of internal and external parts.
d) Any damage caused by an accident;
e) Any change or modification made to the helmet or to the N-com system by the user or by third parties.
f) Color changes or damages caused by exposure to harmful chemical products.
g) The use of incompatible accessories that are not part of the N-Com product range.
h) Moreover, the warranty does not cover product defects caused by fortuitous events, modifications or adjustments,
causes of force majeur or damages deriving from the product coming in contact with liquids.
Other manuals for basic kit multi
1
Table of contents
Other N-Com Conference System manuals
Popular Conference System manuals by other brands

ASCO POWER TECHNOLOGIES
ASCO POWER TECHNOLOGIES 5350 installation manual

IAI
IAI RCP6S instruction manual

Sony
Sony Ipels PCS-G50 Brochure & specs

Toa
Toa TS-801 instruction manual

Grandstream Networks
Grandstream Networks GVC3202 Quick installation guide

VADDIO
VADDIO GroupSTATION 999-8900-000 Installation and user guide

NEXTTEQ
NEXTTEQ IR Link instruction manual

Grandstream Networks
Grandstream Networks GVC3200RMT user guide

Unify
Unify OpenScape Business V2 How-to

NEC
NEC Conference Max Plus Getting started guide

AKE
AKE PowerCom plus Series Operating and installation instructions

Bosch
Bosch DCN Next Generation Installation and operation manual