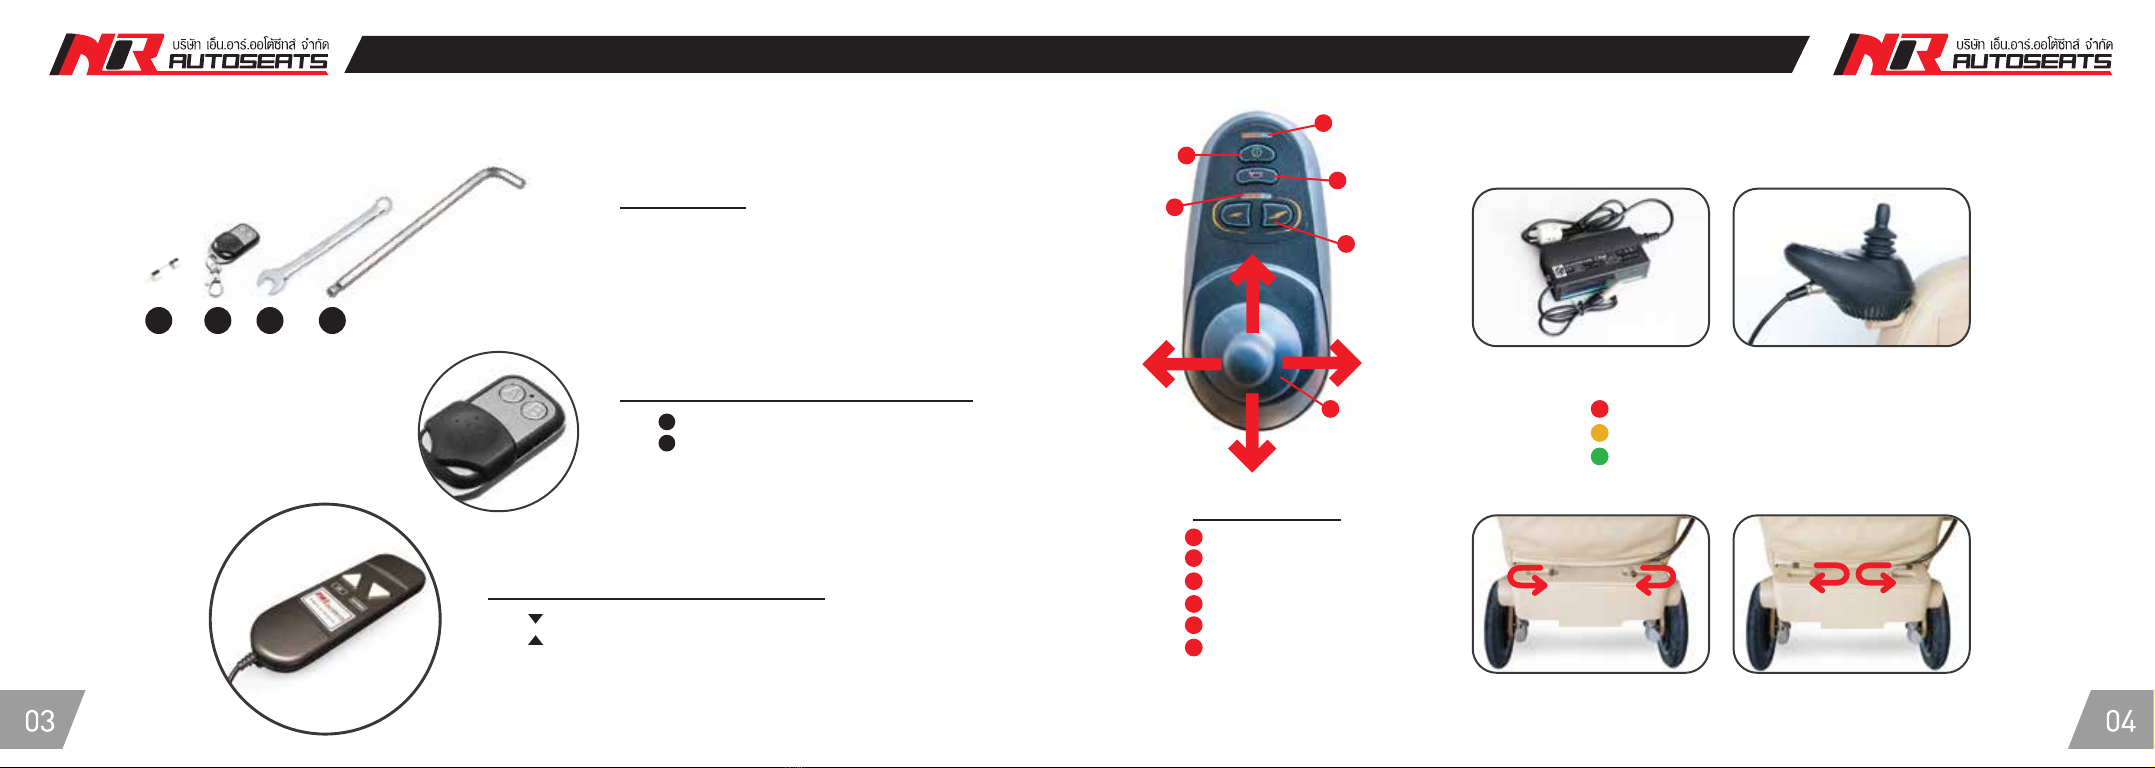
User guide for wheelchair and handling User guide for wheelchair and handling
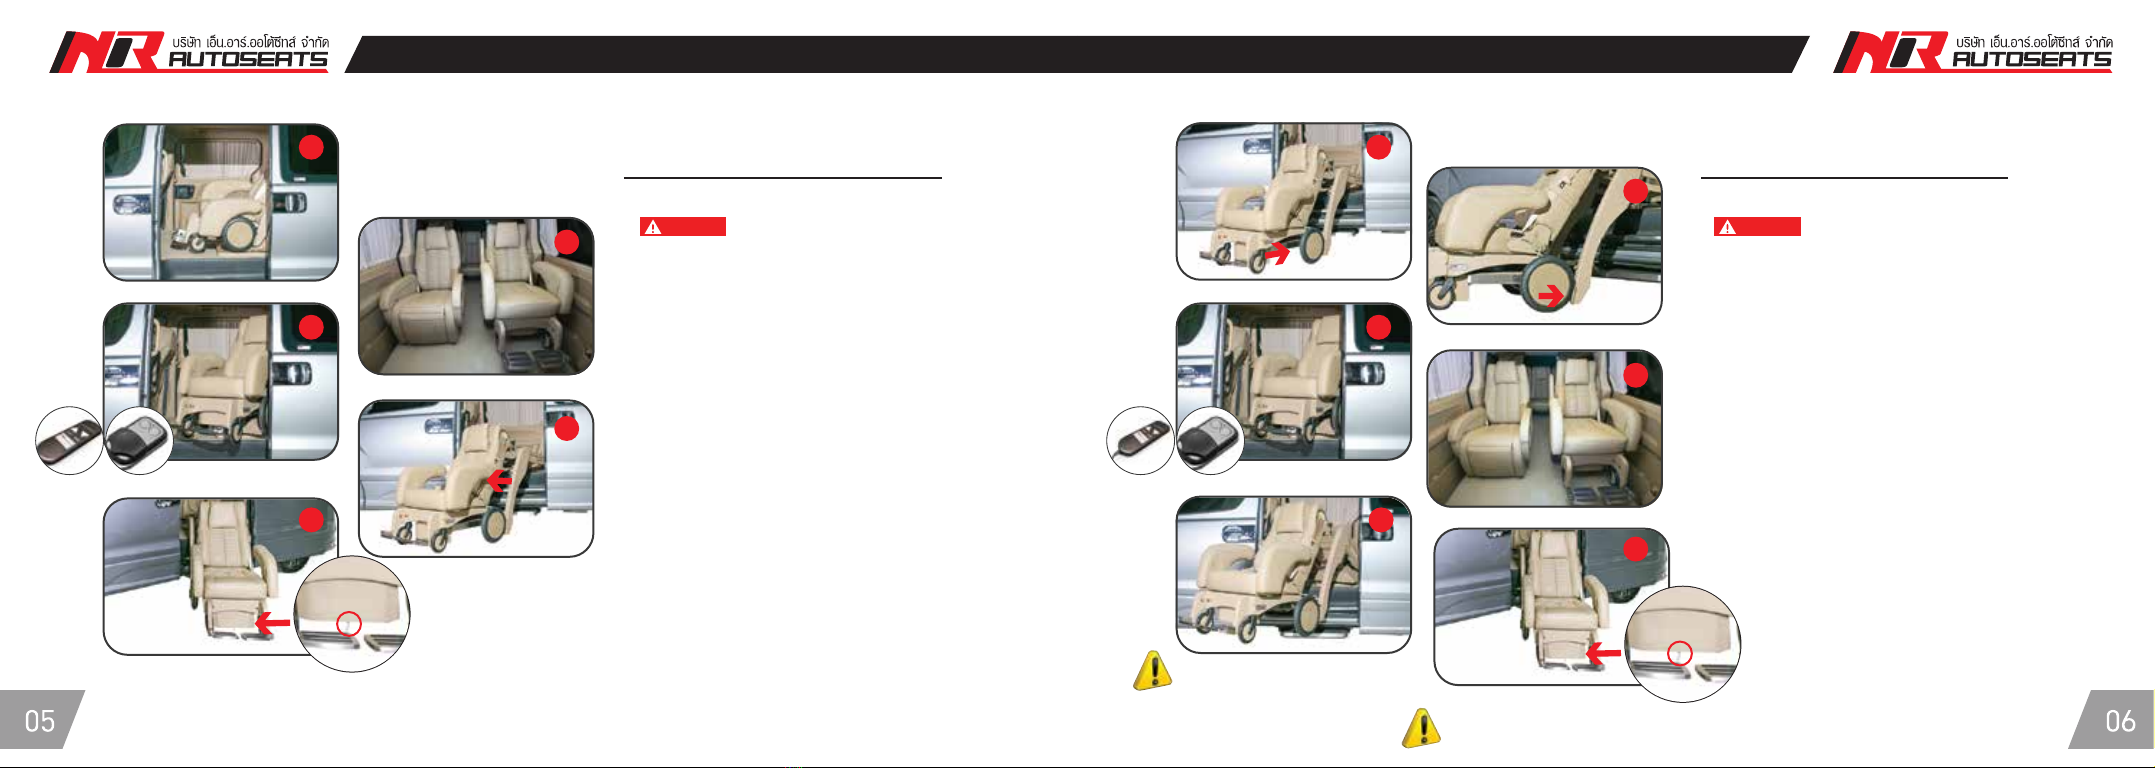
Wheelchair ascending steps
Wheelchair descending steps
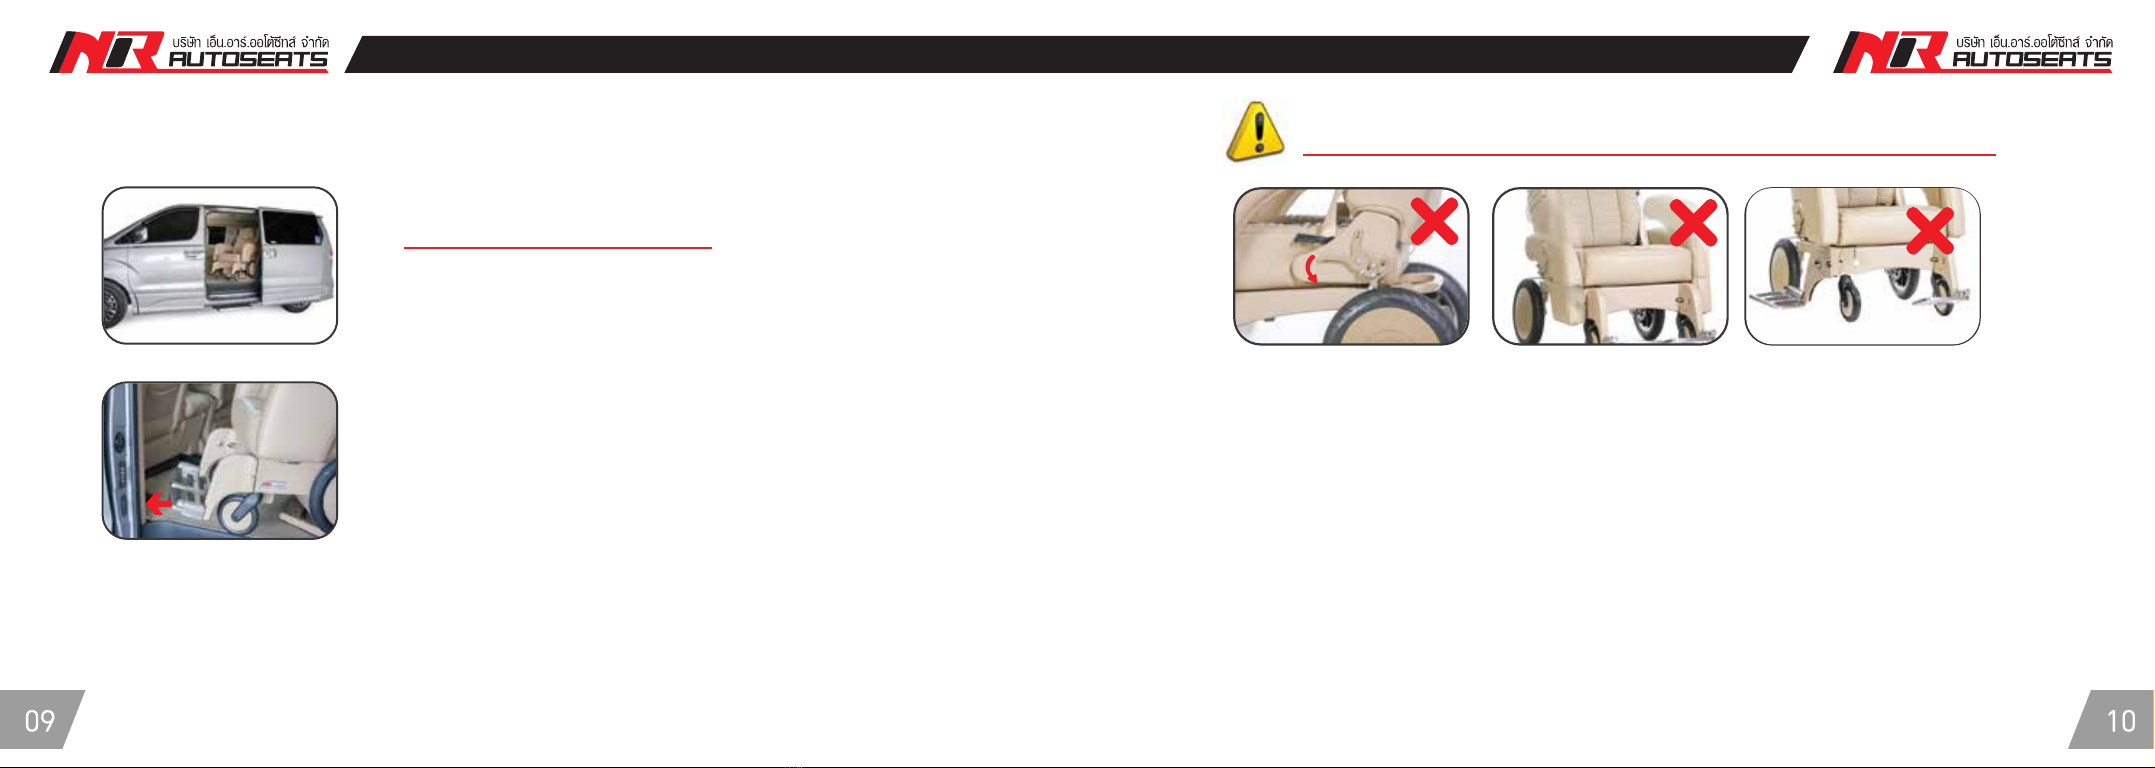
1. Slide the door open to full extend (fixture 1)
2. adjust back rest by 10 degrees to clear
the head position from the ceiling.
3. Hold A or Down button to descend wheelchair.
4. While wheelchair is descending, clear all obstacle
from the rotation path
(wheelchair might stick at the adjacent seat).
5. Wheelchair can be strolled once the system indicates
steps complete sound.
6. Limit sensor will warn immediately when the height
of the floor exceeds maximum capacity.
Caution Caution
The system is reset once the limit sensor touches the floor
level and indicate with long beep sound
** sound indication if wheelchair
is not locked into position
1. Attach wheel chair to the lock in position 1
2. Both back wheel must touch
the lift system.
3. Once the wheelchair is locked into position,
Hold B or Up button until the lifting system ascend
the wheelchair to its resting position.
4. There will be indication sound every time
the step is completed.
5. If the wheel chair is not locked into position,
the system will stop mid process and
indicate 2 consecutive beep sound.
6. Hold A or Down button until the wheelchair
descends and rest on the ground in starting position
to reset the system. Once stationary, check that
the wheelchair is locked into position
and repeat step 1,2, and 3
1 1
2
3 3
4
4
5
56
6