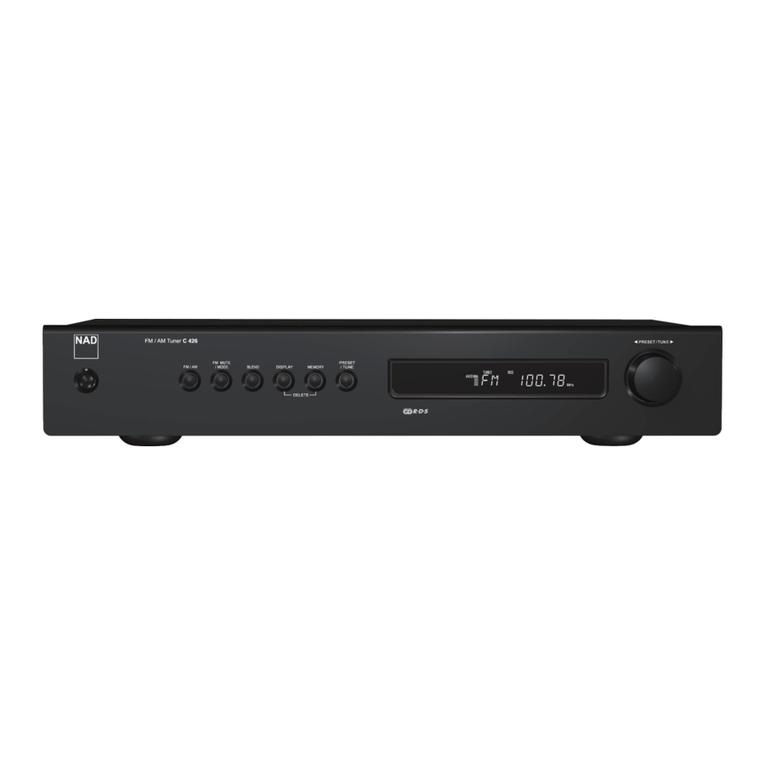
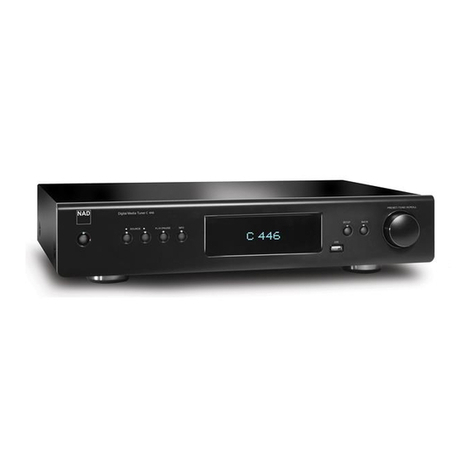
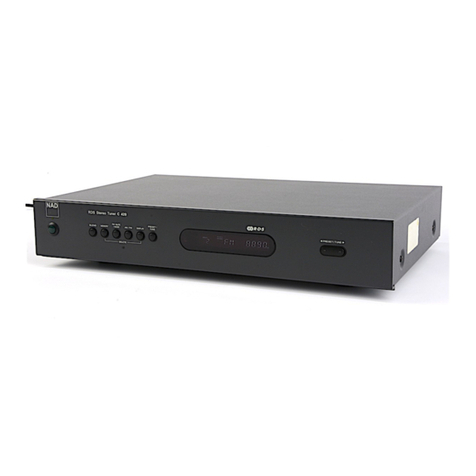
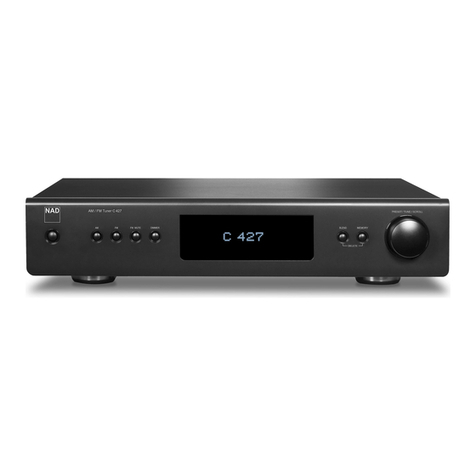
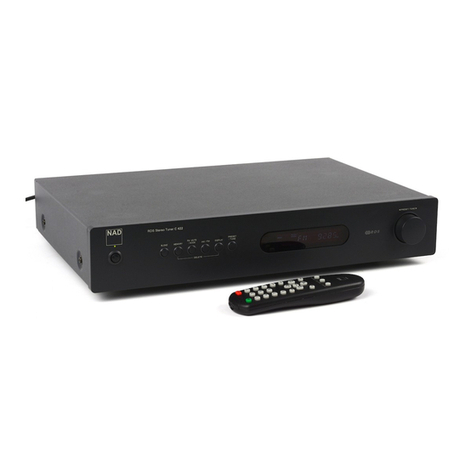
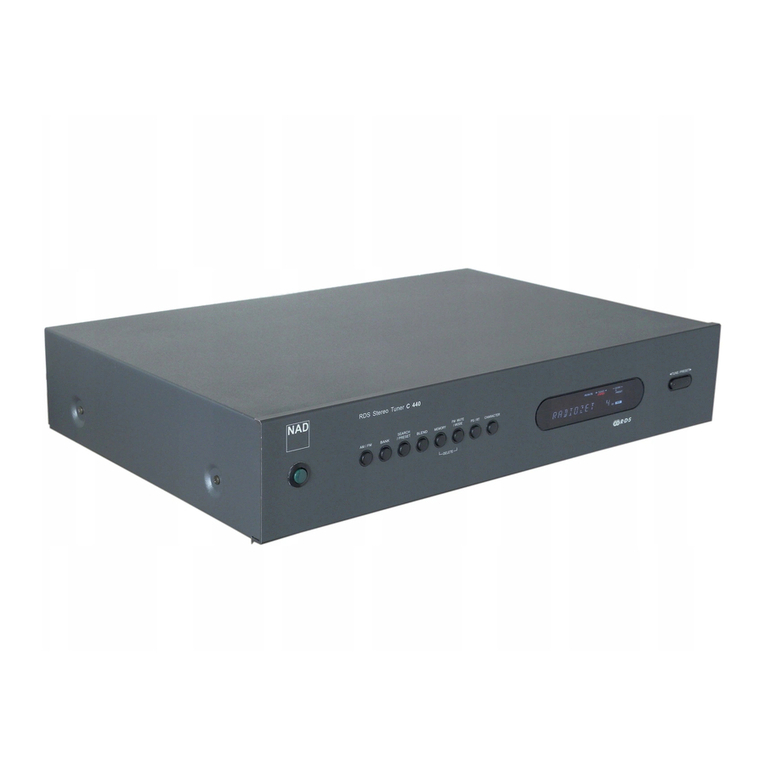
NAD 414 User manual

GB
F
D
E
I
P
S
NA
D
414
• OWNER'S MANUAL
• MANUEL D'INSTALLATION
• BEDIENUNGSANLEITUNG
• MANUAL DEL USUARIO
• MANUALE DELLE ISTRUZIONI
• MANUAL DO PROPRIETÁRIO
• BRUKSANVISNING

Warning: To reduce the risk of fire or electric shock, do not expose this
unit to rain or moisture.
The graphic symbol of a lightning flash with an arrow point within a trian-
gle signifies that there is dangerous voltage within the unit and it
poses a hazard to anyone removing the cover to gain access to the
interior of the unit. Only qualified service personnel should
make any such attempt.
The graphic symbol of an exclamation point within an equilateral trian-
gle warns a user of the device that it is necessary to refer to the
instruction manual and its warnings for proper operation of the unit.
Do not place this unit on an unstable cart, stand or tripod,
bracket or table. The unit may fall, causing serious injury to a
child or adult and serious damage to the unit. Use only with a
cart, stand, tripod, bracket or table recommended by the man-
ufacturer or sold with the unit. Any mounting of the device on a
wall or ceiling should follow the maufacturer’s instructions and
should use a mounting accessory recommended by the manu-
facturer.
An appliance and cart combination should be moved with care. Quick stops,
excessive force and uneven surfaces may cause the appliance and cart combi-
nation to overturn.
Read and follow all the safety and operating instructions before connecting or
using this unit. Retain this notice and the owner’s manual for future reference.
All warnings on the unit and in it’s operating instructions should be adhered to.
Do not use this unit near water; for example, near a bath tub, washbowl, kitchen
sink, laundry tub, in a wet basement or near a swimming pool.
The unit should be installed so that its location or position does not interfere with
its proper ventilation. For example, it should not be situated on a bed, sofa, rug
or similar surface that may block the ventilation openings; or placed in a built-in
installation, such as a bookcase or cabinet, that may impede the flow of air
through its ventilation openings.
The unit should be situated from heat sources such as radiators, heat registers,
stoves or other devices (including amplifiers) that produce heat.
The unit should be connected to a power supply outlet only of the voltage and
frequency marked on its rear panel.
The power supply cord should be routed so that it is not likely to be walked on or
pinched, especially near the plug, convenience receptacles, or where the cord
exits from the unit.
Unplug the unit from the wall outlet before cleaning. Never use benzine, thinner
or other solvents for cleaning. Use only a soft damp cloth.
The power supply cord of the unit should be unplugged from the wall outlet when
it is to be unused for a long period of time.
Care should be taken so that objects do not fall, and liquids are not spilled into
the enclosure through any openings.
This unit should be serviced by qualified service personnel when:
A. The power cord or the plug has been damaged; or
B. Objects have fallen, or liquid has been spilled into the unit; or
C. The unit has been exposed to rain or liquids of any kind; or
D. The unit does not appear to operate normally or exhibits a marked change in
performance; or
E. The device has been dropped or the enclosure damaged.
DO NOT ATTEMPT SERVICING OF THIS UNIT YOURSELF.
REFER SERVICING TO QUALIFIED SERVICE
PERSONNEL.
Upon completion of any servicing or repairs, request the service shop’s assur-
ance that only Factory Authorized Replacement Parts with the same characteris-
tics as the original parts have been used, and that the routine safety checks
have been performed to guarantee that the equipment is in safe operating condi-
tion.
REPLACEMENT WITH UNAUTHORIZED PARTS MAY RESULT IN FIRE,
ELECTRIC SHOCK OR OTHER HAZARDS.
ATTENTION
POUR PREVENIR LES CHOCS ELECTRIQUES NE PAS UTILIER
CETTE FICHE POLARISEE AVEC UN PROLONGATEUR, UNE
PRISE DE COURANT OU UNE AUTRE SORTIE DE COURANT,
SAUF SI LES LAMES PEUVENT ETRE INSEREES A FOND SANS
EN LAISSER AUCUNE PARTIE A DECOUVERT.
CAUTION
TO PREVENT ELECTRIC SHOCK DO NOT USE THIS POLARIZED
PLUG WITH AN EXTENSION CORD, RECEPTACLE OR OTHER
OUTLET UNLESS THE BLADES CAN BE FULLY INSERTED TO
PREVENT BLADE EXPOSURE.
If an indoor antenna is used (either built into the set or installed separately),
never allow any part of the antenna to touch the metal parts of other electrical
appliances such as a lamp, TV set etc.
CAUTION
POWER LINES
Any outdoor antenna must be located away from all power lines.
OUTDOOR ANTENNA GROUNDING
If an outside antenna is connected to your tuner or tuner-preamplifier, be sure
the antenna system is grounded so as to provide some protection against volt-
age surges and built-up static charges. Section 810 of the National Electrical
Code, ANSI/NFPA No. 70-1984, provides information with respect to proper
grounding of the mast and supporting structure, grounding of the lead-in wire to
an antenna discharge unit, size of grounding conductors, location of antenna dis-
charge unit, connection to grounding electrodes and requirements for the
grounding electrode.
a. Use No. 10 AWG (5.3mm2) copper, No. 8 AWG (8.4mm2) aluminium, No. 17
AWG (1.0mm2) copper-clad steel or bronze wire, or larger, as a ground wire.
b. Secure antenna lead-in and ground wires to house with stand-off insulators
spaced from 4-6 feet (1.22 - 1.83 m) apart.
c. Mount antenna discharge unit as close as possible to where lead-in enters
house.
d. Use jumper wire not smaller than No.6 AWG (13.3mm2) copper, or the equiva-
lent, when a separate antenna-grounding electrode is used. see NEC Section
810-21 (j).
EXAMPLE OF ANTENNA GROUNDING AS PER NATIONAL ELECTRICAL
CODE INSTRUCTIONS CONTAINED IN ARTICLE 810 - RADIO AND TELEVI-
SION EQUIPMENT.
NOTE TO CATV SYSTEM INSTALLER: This reminder is provided to
call the CATV system installer’s attention to Article 820-22 of the
National Electrical Code that provides guidelines for proper grounding
and, in particular, specifies that the ground cable ground shall be con-
nected to the grounding system of the building, as close to the point of
cable entry as practical.
NA
D
2
CAUTION
RISK OF ELECTRIC
SHOCK DO NOT OPEN
ATTENTION:
RISQUE DE CHOC ELECTRIQUE
NE PAS OUVRIR
CAUTION: TO REDUCE THE RISK OF ELECTRIC SHOCK, DO NOT REMOVE COVER (OR BACK).
ATTENTION: AFIN DEVITER UN CHOC ELECTRIQUE, ET LES CONSEQUENCES GRAVES QUI
POURRAIENT EN RESULTER, TENTEZ PAS D'OUVRIR L'APPAREIL ET DE TOUCHER AUX
COMPOSANTS INTERNES SANS LA PRESENCE D'UNE SERVICE PERSONNEL.
THE FOLLOWING PRECAUTIONS AND SAFETY INSTRUCTIONS
ARE REQUIREMENTS OF UL AND CSA SAFETY REGULATIONS

NA
D
3
REAR PANEL CONNECTIONS
FIGURE 1. FIGURE 2.
FRONT PANEL CONTROLS
Australian version only
European version only

NOTES ON INSTALLATION.
Your NAD 414RDS should be placed on a firm,
level surface. Avoid placing the unit in direct sunlight,
near sources of heat and damp or in poorly ventilated
positions.
It comes with phono leads for connection to your
amplifier. Ensure that leads and connectors are not
damaged in any way and all connectors are firmly
pushed home.
If the unit is not going to be used for some time,
disconnect the plug from the AC socket.
Should water get into your NAD 414RDS, shut off
the power to the unit and remove the plug from the
AC socket. Have the unit inspected by a qualified ser-
vice technician before attempting to use it again.
Do not remove the cover, there are no user-ser-
viceable parts inside.
Use a dry soft cloth to clean the unit. If necessary,
lightly dampen the cloth with soapy water. Do not use
solutions containing benzol or other volatile agents.
QUICK START
1. Use the phono-to-phono lead to connect the NAD
414RDS left & right outputs to the Tuner Input of your
amplifier.
2. Plug in the AC power cord.
3. Connect AM and FM antenna.
4. Press the POWER button to turn on the NAD
414RDS.
5. Press the AM or FM button to select AM or FM
reception.
6. Use TUNE/PRESET to select a station
REAR PANEL CONNECTIONS.
1. FM ANTENNA
A ribbon wire FM antenna is included and should
be connected to the FM connector at the rear of the
unit (see fig 1 - Australian versions should use the
‘balun’ adapter supplied). The ribbon aerial should be
mounted on a vertical surface and placed so that it
forms a ‘T’.
Experiment with placement of the antenna to find
the position that gives the best signal strength and
lowest background noise. The signal strength meter
in the Display Panel will help to indicate the better
antenna positions.
An inadequate FM signal normally results in high
levels of hiss, especially in stereo, and interference
from external electrical sources. In areas of poor FM
reception, the tuner section’s performance can be
improved by using an externally mounted FM anten-
na. A qualified aerial installer will be able to advise
and fit a recommended aerial for your reception con-
ditions.
2. AM ANTENNA
An AM loop antenna is supplied with the NAD
414RDS and is required for AM reception. To connect
the AM antenna, first press the keys on the Antenna
terminals downwards. Insert the bare antenna wires
into the two terminal holes and push the connector
keys upwards again to secure the connection.
Test various positions for the antenna but always
ensure the loop is placed vertically for best reception.
Placing the antenna close to large metal items such
as metal shelves or radiators may interfere with
reception. (see fig 2)
3. OUTPUT
The 414’s analogue audio output. Using twin
phono-to-phono leads, connect to the left (white) and
right (red) outputs to the ‘Tuner’ input or other line-
level input such as ‘Aux’ input of your amplifier. Do
not connect this cable to the amplifier’s PHONO input
jacks.
4. NAD-LINK IN OUT
The NAD-Link connector is used to pass com-
mands from other units fitted with NAD-Link connec-
tors. This allows centralised control of a complete
system, and also allows some of the basic functions
of the NAD 414RDS to be controlled using a NAD-
linked amplifier’s remote control or gives system con-
trol from more than one room. To function with other
units, connect the Tuners NAD-Link OUT to the NAD-
Link IN on the other unit. NAD-Link connectors can
be daisy-chained, IN to OUT, so that a whole system
can be controlled from the remote control facilities of
one unit.
5. AC LINE CORD.
Connect this power cord to an AC mains wall outlet
Plug the AC power cord into a live AC wall socket
or to an AC convenience outlet at the rear of your
amplifier.
FRONT PANEL CONTROLS.
1. POWER ON/OFF.
POWER switches the player on or off. Pressing the
power switch turns the Tuner on, indicated by the
Display Panel becoming active. Pressing the POWER
button again will switch the player off.
When switched Off, no power is supplied to the
NAD 414RDS’s electronics, but all Memory Preset
settings still remain stored.
CAUTION: The power does not switch off com-
pletely when the POWER button is switched to off.
Please disconnect your NAD 414RDS from the AC
outlet when it is not being used for long periods of
time.
NA
D
4
GB NAD 414 RDS STEREO AM/FM TUNER

GB
2. IF BAND
Pressing the IF BAND button selects Wide or
Narrow IF band operation as indicated by the LED’s
next to the button. The normal setting is WIDE which
is suitable for most reception conditions. However
should two received radio stations be operating on
frequencies very close to each other, then selecting
NARROW will help reject interference from the
unwanted station.
3. CHARACTER
CHARACTER Button is used to enter the names of
Preset radio stations for display when the station is
selected. Used together with the TUNE/PRESET (11)
knob and MEMORY (8) Buttons.
4. DISPLAY
Pressing the DISPLAY button switches between
the station display options seen in the Display Panel.
Options RDS Station Non-RDS
Station
Normal PS* User entered
station name
Pressing:
DISPLAY x1 RT* Station frequency
DISPLAY x2 CT* -
DISPLAY x3 Frequency -
* For information on the Radio Data Service, refer to
the list in the section “USING RDS”.
5. PTY TP AF
Pressing PTY TP AF allows you to search for other
stations using the RDS Programme Type, Traffic
Information and Alternative Frequencies features and
is used with the SCAN (6) button. The information is
displayed for three seconds after which the display
returns to showing the station initials and frequency.
Display Panel information
Normal operation
RDS Station Non-RDS Station
Station initials & frequency Station frequency
Pressing: PTY TP AF
RDS Station Non-RDS Station
PTY Programme Type ‘NOT RDS’
Pressing: PTY TP AF
RDS Station Non-RDS Station
TP Traffic Information ‘TP’
Pressing: PTY TP AF
RDS Station Non-RDS Station
AF Alternative Frequencies ‘NOT RDS’
6. SCAN
Pressing SCAN sets the NAD 414RDS scanning
through each of the Preset stations to automatically
sample each of the Preset stations in a particular
Memory Bank. Each station is heard for six seconds
and then Scan switches to the next Preset station.
When a suitable station is heard, press SCAN again
to cancel the Scanning process. SCAN is also used
in conjunction with the NAD-414’s PTY TP AF Button
(5) to find the strongest signal version of the current
station, stations which have similar programming, or
stations that carry traffic information in their broad-
casts.
7. BANK
Pressing BANK switches between the three Preset
Memory Banks (A, B or C). These Banks can contain
a mix of up to ten AM and FM stations. The Bank
selected is shown in the Display Panel.
8. MEMORY
Used to store stations into the three Preset Memory
banks or to store user defined names for non-RDS
Preset stations. Used in conjunction with the PRE-
SET (12) button and the TUNE/PRESET (11) knob.
When Memory is active, the Preset number flashes
and the red ‘Memory’ indicator is shown in the
Display Panel.
9. FM MUTE/MODE
If a strong stereo FM signal is being received, your
NAD 414RDS will automatically switch to Stereo FM
operation, which is shown by the STEREO indicator
in the Display Panel, and the tuner will mute when
searching between stations.
Weak stereo signals however, may have a high
level of background hiss. Switching to Mono Mode by
depressing the FM MUTE/MODE button will cancel
most or all of this background noise. Press the FM
MUTE/MODE switch again to return to Auto Stereo
FM operation. The FM Mute On/Off status is shown
in the Display Panel and Auto/Mono Mode is shown
in the APR section of the Display Panel.
10. AUTOTUNE
Pressing the AUTOTUNE Button puts the NAD
414RDS into Autotune mode. Turning the
TUNE/PRESET (11) knob clockwise or anti-clockwise
will set the tuner searching up or down the radio fre-
quencies to find the first station that is being received
with a reasonably strong signal (three or more bars
on the Tuning Strength Meter).
11. TUNE/PRESET
The TUNE/PRESET knob is used to manually or
automatically tune to a radio station, select a Preset
station or to program station names into your NAD
414RDS.
12.PRESET
Pressing PRESET, allows you to select any of the
stations that have been stored in the Preset Memory
Banks. Select the Bank into which you have stored
the station using the BANK (7) button, and then turn
the TUNE/PRESET knob to select the required
Preset station. The Preset number and station name
NA
D
5

or frequency will be shown in the Display Panel.
13. FM
The FM button switches the tuner to FM reception.
The Display Panel shows the frequency of the tuned
station and which band is selected. The FM tuning is
in 0.025MHz increments
14. AM
The AM button switches the tuner to AM reception.
The Display Panel shows the frequency of the tuned
station and which band is selected. The AM tuning is
in 9kHz increments.
The IF BAND, FM MUTE/MODE, DISPLAY, PTY
TP AF buttons do not operate for AM stations.
15. DISPLAY PANEL
The Display Panel shows information about the
NAD 414RDS operating modes and information
about the station currently selected.
STATION DATA Displays the station name, fre-
quency and other information supplied on the RDS
service or entered manually by the user.
APR section
RF MODE Your NAD 414RDS will automatically
select the RF Mode that works best with the signal
being received. DX is selected for normal strength
signals and LOCAL is selected when it is tuned into
stations with very strong radio signals that could
cause distortion.
STEREO MODE Tuner automatically switches to
stereo when a stereo station is received (AUTO) or is
always in Mono (MONO). Indicates whether the
Tuner is in FM Mute/Auto Mode (ON) or FM Mute
Off/Mono Mode (OFF)
SIGNAL STRENGTH Displays the strength of the
received radio signal. Maximum signal strength is
indicated by five bars. One or two bars indicates inad-
equate signal strength that may be prone to interfer-
ence and noise.
FM MUTE Indicates whether the Tuner is in FM
Mute/Auto Mode (ON) or FM Mute Off/Mono Mode
(OFF)
>TUNED< Shows that the station is correctly
tuned.
STEREO Shows that an FM station is transmitting
in stereo and the Tuner is operating in Auto Mode.
MEMORY Lights when the Memory function is
active and stations or characters are being entered
into memory.
RDS Indicates that the station selected is transmit-
ting RDS information
BANK Displays the current Memory Bank selected
PRESET NUMBER Displays the current Memory
Preset number
FINDING AND STORING AM & FM STATIONS
USING AUTOTUNE.
You can use the SEARCH mode to automatically
look for stations, and then use the STORE mode to
enter them into the NAD 414RDS memory.
First select the AM or FM band using the AM or FM
button. If you want to search for the main stations
available in your area, then the NAD 414RDS will
search only for strong signals (three or more bars on
the Signal Strength Display) and all weak stations will
be muted and passed over. If you want to include all
signals in the search, no matter how weak, switch the
FM Muting off by pressing the FM MUTE button. FM
Mute On/Off is shown in the Display Panel.
Now press AUTOTUNE and turn the TUNE/PRE-
SET knob clockwise to search up the frequency band
or anti-clockwise to search down the frequency band.
When the tuner finds a broadcast signal of ade-
quate strength (shown by at least three bars of the
tuning strength meter and the >TUNE< indicator illu-
minating) then the automatic search stops at that sta-
tion. If the station is transmitting RDS information, the
RDS indicator will light up and station initials and fre-
quency will be shown in the Display Panel. If a non-
RDS station is found, then just the frequency will be
shown.
To store that station as a Preset, press MEMORY.
The Memory indicator will be displayed and the
Preset section will flash in the Display Panel.
Press BANK to select which of the three Banks of
Presets you want to store the station into. Turn the
TUNE/PRESET knob to select which Preset number
you wish to assign to the station (shown as a flashing
number in the Display Panel) and then press MEMO-
RY again. The Memory light in the Display Panel will
go out and the station is now stored in your NAD
414RDS memory.
You can enter a new station into an unused Preset
or over-write an existing programmed Memory
Preset. By doing this you will replace all the data pre-
viously held on that Preset number.
To exit the Memory mode without storing a station,
leave all the controls untouched; the Memory mode
will automatically cancel itself after 8 seconds. The
Memory Presets are held in non-volatile memory, so
they will remain stored, even if the Tuner is switched
off or unplugged from the mains supply.
SELECTING A PRESET STATION.
To select a Memory Preset station, press the PRE-
SET Button and then select which Bank of Presets
you want to use by pressing the BANK button. Turn
the TUNE/PRESET knob until the right Preset is
found and shown in the Display Panel. Any unused
Presets will be skipped and it is not possible to select
a Bank unless it has at least one Preset stored into it.
If you want to automatically search the whole bank
for a suitable programme, press SCAN. The NAD
414RDS will then scan through all the Preset stations
in the current Bank, playing each for 6 seconds.
When a suitable programme is heard, press SCAN
again to cancel the scanning mode.
NA
D
6
GB

GB
DELETING A STORED STATION.
You can empty a Preset by deleting the stored
information. First select the Memory Preset to be
emptied and then press the MEMORY button, hold it
down and press FM MUTE/MODE. The Memory
Preset will then be deleted and ‘—’ appears as the
Preset number. You can store a new station into a
used Preset, by simply going through the Preset stor-
ing process and placing a new station over the exist-
ing one.
FINDING AND STORING AM & FM STATIONS
USING MANUAL TUNING.
You can also manually TUNE stations and store
them into the NAD 414RDS memory.
First select the AM or the FM band using the AM or
FM button. Select FM Mute On or Off as required.
Then turn the TUNE/PRESET knob clockwise to
search up the frequency band or anti-clockwise to
search down the frequency band.
When the tuner is properly locked onto a station
then the >TUNE< indicator will illuminate. If you have
difficulty tuning between two stations on adjacent fre-
quencies, switch the IF BAND0 to ‘Narrow’. This will
make it easier for your NAD 414RDS to lock onto the
required station.
If the station is transmitting RDS information, the
RDS indicator will light up and station initials and fre-
quency will be shown in the Display Panel. If a non-
RDS station is found, then just the frequency will be
shown.
Store the station into memory in the same way as
described in ‘Finding And Storing AM & FM Stations
Using Autotune.’
STORING A STATION NAME.
When a station is transmitting RDS information,
your NAD 414RDS will automatically show the station
initials and frequency when its Preset is used.
Although the Tuner automatically shows the frequen-
cy of any other non-RDS Preset station, it also allows
you to type in the station name to make it easier to
identify which station is stored in the Memory Preset.
To enter a name, first select the Preset you want to
attach a name to. Then press CHARACTER and the
first space in the Station Data area of the Display
Panel will flash. Turn the TUNE/PRESET knob to
select the first character (see Character list for refer-
ence). Pressing MEMORY will store the first charac-
ter and move forward to the next space on the line.
Use the TUNE/PRESET knob again to select the next
character in the name and press MEMORY to store it.
Continue until the station name is complete (up to 8
characters). Press CHARACTER again to store the
completed name.
This function is only available for non-RDS stations.
RDS stations will always display their transmitted
name and this cannot be over-written using CHAR-
ACTER.
There are 54 characters available including a blank
space.
(*show Character set per T-450RDS manual*)
USING RDS.
An increasing number of FM radio stations are
transmitting additional services and information digi-
tally encoded into the normal FM signal. This Radio
Data System (RDS) makes it easier to find the right
station by displaying its name and frequency. It can
also display the type of programming the station is
transmitting, whether it transmits traffic information,
and can also display additional text information, such
as the title of current track being played.
RDS also makes it easier to find the other stations
that may be of interest. Using the SCAN function lets
you search for the strongest signal version of the sta-
tion you are listening to, find other stations with simi-
lar types of programme or find other stations that
carry traffic information.
There are six RDS Services and although your
NAD 414RDS is able to display and use all of these,
not every radio station transmits the full six. Some
may only send the Programme Service Name and
Identification.
The six RDS services are:-
PS Programme Service Name
Shows the station’s initials
PTY Programme Type
Shows the type of programme being transmitted.
Can be used to search for other similar programmes
being transmitted by other stations
TP Traffic Programme
Shows whether the station supplies traffic informa-
tion. Can be used to search for other stations trans-
mitting traffic information.
AF Alternate Frequencies
Used to search for other frequencies that the cur-
rent station is being transmitted on.
RT Radio Text
Displays additional information about the current
programme such as the programme’s name or the
name of the current track being played.
CT Clock Time
When an RDS station brodcasting CT information is
received, a clock will appear on the display within 1
minute from the time the station is received.
DISPLAYING RDS INFORMATION.
When an RDS station is received, the RDS indica-
tor will show in the Display Panel and your NAD
414RDS will use the Programme Service Name (PS)
data to display the station’s initials and frequency in
the Station Data section of the Display Panel.
You can see the other RDS information by pressing
the DISPLAY button.
Pressing DISPLAY once will switch to Programme
Identification and display the station’s full name,
description and frequency.
If no Programme Identification is being transmitted
then ‘No Text’ will be displayed instead.
Pressing DISPLAY again will show the Radio Text
information, if transmitted.
If no Radio Text information is being transmitted
then either ‘No Update’ or the current time will be dis-
NA
D
7

played instead.
It takes two or three seconds for the Radio Text
information to be fully transmitted. If the RDS section
of the tuner is waiting to be updated then ‘WAIT’ will
appear in the Display Panel.
Pressing DISPLAY three times will display the fre-
quency that your NAD 414RDS is tuned to.
For non-RDS stations, the DISPLAY button will
switch between displaying the user-entered station
name (if any) and the frequency.
RDS station Non-RDS Station
Normal Operation
RDS Station initials (PS) User-entered station
name (or frequency if no
name has been entered)
Pressing: DISPLAY x1
RT* Current tuned frequency
Pressing: DISPLAY x2
CT* -
Pressing: DISPLAY x3
Current tuned frequency
* For information on the Radio Data Service, refer
to the list in the section “USING RDS”.
USING RDS TO SEARCH FOR STATIONS
AND INFORMATION.
RDS offers a facility to automatically search for
other stations that are transmitting similar program-
ming, or are provide traffic information or are stronger
transmissions of the same station on alternative fre-
quencies.
To use RDS to search for stations transmitting simi-
lar types of programme type, press the PTY TP AF
Button once. The current station’s programme type
will be displayed for two seconds in the Station Data
section of the Display Panel (see list below). Press
SCAN while this is displayed and your NAD 414RDS
will automatically search for other RDS stations trans-
mitting the same programme type. Each matching
station is heard for six seconds and its frequency
flashes, then Scan goes on to the next station that is
transmitting the same programme type. Press SCAN
again to stop the scanning process on a particular
station.
If you want to search for a particular programme
type then press the PTY TP AF Button once and then
use the TUNE/PRESET knob to choose the pro-
gramme type. Press SCAN to find any matching pro-
grammes.
To use RDS to search for stations transmitting traf-
fic information (usually after news bulletins), press the
PTY TP AF Button twice and press SCAN. Your NAD
414RDS will search out the first RDS station that
includes traffic information in their broadcasts. ‘*TP*’
indicates an RDS station that includes traffic informa-
tion, ‘TP’ indicates an RDS station that does not give
out traffic information or a non-RDS station.
To use RDS to search for a stronger signal for the
current station, press PTY TP AF Button three times
and press SCAN. Your NAD 414RDS will search out
the strongest signal for the current station.
This is normally used on In-Car systems to auto-
matically switch to the strongest version of a national
radio station when travelling. But it can be used to
check that you are tuned to the optimum signal for
that particular station.
RDS Search Options
press
PTY TP AF x 1 PTY Programme Type
Used to search for other similar programmes being
transmitted by other stations.
PTY TP AF x 2 TP Traffic Programme
Used to search for other stations transmitting traffic
information.
PTY TP AF x 3 AF Alternate Frequencies
Used to search for other strong frequencies that the
current station is being transmitted on.
The Programme Types can fall into one any one of
these 15 different categories.
Programme Types (PTY)
NONE No programme type information
transmitted
NEWS News programme
AFFAIRS Current affairs programme
INFO General information programme
SPORT Sport programme
EDUCATE Educational programme
DRAMA Plays or drama programme
CULTURE Culture/discussion programme
SCIENCE Science programme
VARIED Other general programme material
POP M Popular Music programme
ROCK M Rock Music programme
M.O.R. M Middle of the road music
programme
LIGHT M Light music/light classical
programme
CLASSICS Classical music programme
OTHER M Other types of music such as Jazz.
Folk, Country, Reggae, R&B etc.
Displaying clock time (CT)
If the station you are listening to is not an RDS sta-
tion, this function cannot be used.
1. Press the DISPLAY button and RT information
will be dispalyed.
2. Press the DISPLAY button one more time.
• A clock will appear on the display within one min-
ure after receiving a station broadcasting CT informa-
tion.
NO UPDATE or NO TIME will appear on the dis-
play within several seconds after receiving a station
which does not broadcast CT information. Then, the
PS information will be displayed.
NA
D
8
GB

GB
TROUBLESHOOTING
NO SOUND
Power AC lead unplugged or power not switched on. Check AC lead.
Signal leads incorrectly connected. Check connections to amplifier.
Station not selected or weak signal with FM Mute on. Re-tune or switch off FM Mute.
Internal fuse blown. Consult dealer.
NO SOUND ONE CHANNEL
Signal leads to amplifier disconnected or damaged. Check leads and connections.
NOISE
Hiss. Weak signal. Check signal strength meter. Check station
tuning. Adjust or replace antenna.
Distortion. Multi-path signals or interference Check station tuning. Adjust or replace antenna.
from another station. Select ‘Narrow’ IF Setting.
Whistles or buzzes on FM & AM. Interference from Check station tuning. Switch off or move the other
electrical sources - computers, games consoles. source of the electrical noise.
Whistles or buzzes on AM: Interference from Check station tuning. Adjust or replace
fluorescent lighting or electrical motors. AM antenna.
NO RDS INFORMATION
Station signal too weak. Check signal strength meter. Check station
tuning. Adjust or replace antenna.
Station not transmitting RDS. No remedy.
NA
D
9
There are 54 characters available including a
blank space.

NOTES CONCERNANT L’INSTALLATION
Poser le NAD 414RDS sur une surface stable,
plane et horizontale. Eviter les rayons directs du
soleil et les sources de chaleur et d’humidité, ainsi
que les endroits où une ventilation correcte ne peut
pas être assurée.
Si l’appareil doit rester inutilisé pendant un certain
temps, débrancher le cordon d’alimentation de la
prise de secteur murale. Si de l’eau pénètre à
l’intérieur du NAD 41 RDS, couper l’alimentation de
l’appareil et retirer la fiche de la prise secteur. Faire
contrôler l’appareil par un technicien de service après
vente qualifié, avant toute tentative de remise en ser-
vice.
Ne pas retirer le couvercle. A l’intérieur, il n’y a
aucun élément sur lequel l’utilisateur peut intervenir.
Utiliser un chiffon doux sec et propre pour nettoyer
l’appareil. Si nécessaire, humecter le chiffon avec un
peu d’eau savonneuse. Ne pas utiliser de solution
contenant du benzol ou tout autre agent volatile.
MISE EN ROUTE RAPIDE
1. Utiliser le câble phono à phono pour brancher les
sorties gauche et droite du NAD 414 RDS à l’entrée
tuner de votre amplificateur.
2. Brancher le cordon d’alimentation secteur.
3. Brancher l’antenne AM et FM.
4. Appuyer sur le bouton MARCHE/ARRET [POWER]
pour mettre en marche le NAD 414 RDS.
5. Appuyer sur le bouton AM ou FM pour choisir la
réception AM ou FM.
6. Utiliser ACCORDAGE/PREREGLAGE
[TUNE/PRESET] pour sélectionner une station.
BRANCHEMENTS SUR LA FACE
ARRIERE
1. ANTENNE FM
Une antenne filiaire FM, sous forme de câble plat,
est livrée avec le tuner. Cette antenne se branche à
l’arrière de l’appareil ( (Cf. Figure 1) Les versions dis-
tribuées au Australie doivent être branchées à l’aide
de l’adaptateur “balun” fourni). L’antenne câble plat
doit être fixée sur une surface verticale, et doit former
un “T”.
Faire des essais en mettant l’antenne dans dif-
férentes positions, de manière à obtenir le meilleur
signal possible avec un minimum de bruit de fond.
L’indicateur de puissance de signal, situé sur la Face
Parlante, permettra de parfaire le positionnement de
l’antenne.
Un signal FM insuffisant entraîne un sifflement,
surtout en réception stéréophonique, et permet au
tuner de capter des interférence en provenance de
sources électriques extérieures. Dans les endroits où
la réception FM est mauvaise, il est possible
d’améliorer les performances du tuner en utilisant
une antenne FM montée à l’extérieur du bâtiment. Un
installateur d’antennes qualifié pourra donner les con-
seils appropriés, et poser une antenne adaptée aux
conditions de réception locales.
2. AM ANTENNA [ANTENNE AM].
Une antenne cadre AM est livrée avec le
NAD 414 RDS, et permet de recevoir les stations
émettant sur la bande AM. Pour brancher l’antenne
AM, enfoncer tout d’abord les “clés” sur les bornes
d’Antenne [Antenna]. Insérer les câbles d’antenne
dénudés dans les deux trous des bornes, puis
ramener les clés des bornes vers le haut pour en
assurer la fixation (Cf. Figure 2).
Faire des essais en mettant l’antenne dans dif-
férentes positions, mais en s’assurant que le cadre
est toujours vertical afin que la réception soit opti-
male. Le fait de positionner l’antenne à proximité
d’éléments métalliques de taille importante, comme
des étagères en métal ou des radiateurs par exem-
ple, peut affecter la réception .
3. OUTPUT [SORTIE]
OUTPUT est la sortie audio analogique du 414. A
l’aide de câbles phono à phono doubles, brancher les
sorties gauche (blanche) et droite (rouge) à l’entrée
tuner ou à toute autre entrée niveau-ligne de l’amplifi-
cateur, l’entrée Aux par exemple. Ne pas brancher ce
câble aux jacks d’entrée PHONO de l’amplificateur.
4. NAD-LINK OUT [SORTIE LIAISON-NAD]
Le connecteur de Liaison-NAD [NAD-Link] sert à
relayer les commandes en provenance d’autres
appareils équipés de connecteurs de Liaison-NAD.
Cela permet d’assurer une commande centralisée
pour tout un réseau, et aussi de commander cer-
taines fonctions de base du NAD 414 RDS à l’aide de
la télécommande d’un amplificateur relié à la Liaison-
NAD, ou de commander la chaîne depuis plusieurs
pièces. Pour assurer le relais vers d’autres appareils,
relier le connecteur de SORTIE Liaison-NAD [NAD-
Link OUT] du Tuner à l’ENTREE NAD-Link [NAD-Link
IN] de l’autre appareil. Il est possible de relier les con-
necteurs de Liaison-NAD en chaîne, ENTREE vers
SORTIE, et donc de commander tout un réseau
d’appareils à l’aide de la télécommande d’un seul
d’entre eux.
5. CORDON D’ALIMENTATION SECTEUR
Brancher ce cordon d’alimentation à une prise
murale secteur.
Brancher le cordon d’alimentation secteur à une
prise secteur murale active ou à une prise secteur
commutée à l’arrière de votre amplificateur.
NA
D
10
FTUNER AM/FM STEREO NAD 414 RDS

F
COMMANDES SUR LA FACE PARLANTE
1. POWER ON/OFF [MARCHE/ARRET]
L’interrupteur de marche/arrêt met l’appareil en
marche ou hors tension. Une impulsion sur cet inter-
rupteur met le Tuner sous tension, ce qui est signalé
par la mise en marche de l’affichage. Une deuxième
impulsion sur l’interrupteur POWER remet l’appareil
hors tension.
Lorsque cet interrupteur est en position ARRET
[OFF], l’électronique du NAD 414 RDS n’est plus ali-
mentée, mais tous les réglages sont conservés.
ATTENTION: Lorsque l’interrupteur est mis sur
ARRET [OFF], l’alimentation n’est pas totalement
coupée. Débrancher le NAD 414 RDS de la prise
secteur lorsqu’il doit rester inutilisé pendant une péri-
ode prolongée.
2. IF BAND [BANDE IF]
En appuyant sur le bouton IF BAND on choisit entre
un fonctionnement Bande IF Large ou Bande IF
Etroite, l’état étant indiqué par la diode électrolumi-
nescente qui se trouve à côté du bouton. Le réglage
normal se fait sur LARGE [WIDE] car cette plage
convient à la plupart des conditions de réception.
Cependant, lorsque deux stations reçues opèrent sur
des fréquences très proches, il peut s’avérer judi-
cieux de sélectionner ETROITE [NARROW] pour
annuler les interférences engendrées par la station
non désirée.
3. CHARACTER [CARACTERE]
Le bouton CARACTERE [CHARACTER] permet
d’entrer les noms des stations de radio préréglées
afin qu’ils s’affichent lorsque la station est choisie. Il
s’utilise avec le bouton ACCORDAGE/PRE-
REGLAGE [TUNE/PRESET] (11) et les boutons
MEMOIRE [MEMORY] (8).
4. DISPLAY [AFFICHAGE].
Lorsque l’on appuie sur le bouton AFFICHAGE
[DISPLAY] les différentes options d’affichage du pan-
neau d’affichage défilent.
Options Station RDS Station non RDS
Normal
PS* Nom de la station entrée
par l’utilisateur
AFFICHAGE x 1
RT* Fréquence de la station
AFFICHAGE x 2
CT* -
AFFICHAGE x 3
Fréquence -
* Pour plus d’informations sur le système “Radio
Data Service”, se reporter à la liste de la
section “UTILISATION DU RDS”.
5. PTY TP AF
Le bouton PTY TP AF permet la recherche d’autres
stations de Type Programme RDS, des Informations
Routières et d’Autres Fréquences. Ce bouton s’utilise
avec le bouton ECHANTILLONNAGE [SCAN] (6).
Les différentes informations sont affichées pendant 3
secondes puis l’affichage revient aux initiales de la
station et à sa fréquence.
Informations affichées sur le Panneau d’Affichage
Station RDS Station non RDS
Fonctionnement normal
Initiales et fréquence Fréquence de la station
de la station
Impulsion sur PTY TP AF
PTY (Type de Programme) “PAS RDS [NOT RDS]”
Impulsion sur PTY TP AF TP
(Informations Routières) “TP”
Impulsion sur PTY TP AF
AF (Autres Fréquences) “PAS RDS [NOT RDS]”
6. SCAN [ECHANTILLONNAGE ]
Après une impulsion sur ECHANTILLONNAGE
[SCAN] le NAD 414 RDS balaye chacune des sta-
tions Préréglées afin d’échantillonner automatique-
ment chaque station préréglée d’une Banque de
Mémoire donnée. On entend chaque station pendant
six secondes, avant que la fonction ne passe à la sta-
tion Préréglée suivante. Dès que l’on entend une sta-
tion convenable, il suffit de réappuyer sur ECHANTIL-
LONNAGE [SCAN] pour arrêter le balayage des sta-
tions préréglées. On peut aussi utiliser cette fonction
d’échantillonnage avec le bouton PTY TP AF (5) du
NAD 414, afin de trouver la fréquence sur laquelle la
station actuelle émet le plus fort, d’autres stations
dont la programmation est similaire, ou des stations
dont les émissions comportent des informations
routières.
7. BANK [BANQUE]
Le bouton BANQUE [BANK] commute entre les
trois Banques de Mémoire Préréglées (A, B ou C).
Ces banques peuvent contenir jusqu’à dix stations
AM et/ou FM différentes. Le numéro de la Banque en
cours d’utilisation est indiqué sur le Panneau
d’Affichage.
8. MEMORY [MEMOIRE]
Cette commande permet de stocker des stations
dans les trois banques de stations préréglées, ou de
stocker des noms définis par l’utilisateur pour les sta-
tions préréglées non RDS. Elle s’utilise avec les bou-
tons de PREREGLAGE [PRESET] (12) et
ACCORDAGE/PREREGLAGE [TUNE/PRESET] (11).
Lorsque la fonction Mémoire est active, le numéro de
la station préréglée clignote, et l’indicateur rouge
“Mémoire” [Memory] est allumé sur le Panneau
d’Affichage.
NA
D
11

9. FM MUTE/MODE [SILENCE FM/MODE]
Si le tuner reçoit un signal stéréophonique FM puis-
sant, le NAD 414 RDS se met automatiquement en
mode FM Stéréo, ce qui est indiqué par l’indicateur
STEREO sur l’Affichage. Pendant la recherche, le
son du tuner est coupé entre les stations.
Cependant, les signaux stéréophoniques faibles
comportent parfois un niveau de sifflement élevé en
bruit de fond. Le passage en mode monophonique,
en appuyant sur le bouton SILENCE FM/MODE [FM
MUTE/MODE], a pour effet d’annuler le bruit de fond
(en grande partie ou en totalité). Appuyer à nouveau
sur le bouton SILENCE FM/MODE [FM
MUTE/MODE] pour repasser en mode
FM Auto Stéréo. L’état (Arrêt ou Marche) de la fonc-
tion SILENCE FM/MODE. est indiqué dans la partie
APR du Panneau d’Affichage.
10. AUTOTUNE [ACCORDAGE
AUTOMATIQUE ]
Une impulsion sur le Bouton d’ACCORDAGE
AUTOMATIQUE [AUTOTUNE] met le NAD 414 RDS
en mode d’Accordage Automatique. Le fait de tourner
le bouton ACCORDAGE/PREREGLAGE
[TUNE/PRESET] (11) en sens horaire ou en sens
anti-horaire provoque une recherche (en montant ou
en descendant) de la première station reçue avec un
signal relativement fort (au moins trois barres sur
l’Indicateur de Puissance du Signal).
11. TUNE/PRESET [ACCORDAGE/PRE-
REGLAGE ]
Le bouton d’ACCORDAGE/PREREGLAGE
[TUNE/PRESET] permet d’accorder manuellement
ou automatiquement une station de radio, de sélec-
tionner une station Préréglée ou de programmer des
noms de stations dans votre NAD 414 RDS.
12. PRESET [PREREGLAGE]
Une impulsion sur PREREGLAGE [PRESET] per-
met de sélectionner l’une quelconque des stations
stockées dans les Banques de Mémoires des
Stations Préréglées. Choisir la Banque dans laquelle
on a stocké la station, à l’aide du bouton BANK
[BANQUE] (7), puis tourner le bouton
d’ACCORDAGE/PREREGLAGE [TUNE/PRESET]
pour obtenir la station Préselectionnée voulue. Le
numéro de préréglage et le nom ou la fréquence de
la station seront indiqués sur le Panneau d’Affichage.
13. FM
Le bouton FM met le tuner en mode de réception
FM. Le Panneau d’Affichage indique la fréquence de
la station accordée, et la bande sélectionnée.
L’accordage FM se fait par incréments de 0,025 MHz.
14. AM
Le bouton AM met le tuner en mode de réception
AM. Le Panneau d’Affichage indique la fréquence de
la station accordée, et la bande sélectionnée.
L’accordage AM se fait par incréments de 9 kHz.
Les boutons BANDE IF [IF BAND], SILENCE
FM/MODE [FM MUTE/MODE], AFFICHAGE [DIS-
PLAY] et PTY TP AF ne fonctionnent pas pour les
stations AM.
15. PANNEAU D’AFFICHAGE
Le Panneau d’Affichage fournit des indications con-
cernant les modes de fonctionnement du
NAD 414 RDS, et des informations concernant la sta-
tion actuellement sélectionnée.
La fenêtre DONNEES STATION [STATION DATA]
affiche le nom de la station, la fréquence et toute
autre information fournie par le système RDS ou pro-
grammée manuellement par l’utilisateur.
Section APR
RF MODE (MODE RF). Votre NAD 414 RDS
sélectionnera automatiquement le Mode RF qui fonc-
tionne le mieux avec le signal reçu. Il sélectionne DX
pour les signaux de puissance normale, ou LOCAL
lorsqu’il est accordé sur les stations dont le signal
radio est très fort, et susceptible de provoquer des
distorsions.
STEREO MODE.(MODE STEREO) Le tuner se
met automatiquement en mode stéréo lorsqu’il capte
une station stéréo (AUTO), sinon il est toujours en
mode Mono (MONO). Cet affichage indique si le
tuner est en mode Silence FM/Auto (ALLUME) ou en
mode Silence FM Arrêté/Mono (ETEINT).
SIGNAL STRENGTH (PUISSANCE SIGNAL)
Affiche la puissance du signal radio reçu. Un signal
de puissance maximale est indiqué par cinq barres.
Une indication d’une ou deux barres veut dire que le
signal est inadéquat, et risque d’être perturbé par des
interférences et du bruit.
FM MUTE (SILENCE FM) Indique si le tuner est
en mode Silence FM/Auto (ALLUME) ou en mode
Silence FM Arrêté/Mono (ETEINT).
>TUNED< (>ACCORDEE<) Indique que la station
est correctement accordée.
STEREO. Indique qu’une station FM transmet en
stéréo, et que le Tuner fonctionne en Mode Auto.
MEMORY (MEMOIRE) . S’allume lorsque la fonc-
tion Mémoire est active et que des stations ou des
caractères sont en train d’être entrés en mémoire.
RDS. Indique que la station sélectionnée émet des
informations RDS.
BANK (BANQUE) Affiche le numéro de la Banque
de Mémoire actuellement sélectionnée.
PRESET NUMBER.(NUMERO DE PRESELEC-
TION) Affiche le numéro de la Présélection Mémoire
actuellement accordée.
RECHERCHE ET MISE EN MEMOIRE
DES STATIONS AM ET FM A L’AIDE DE
LA FONCTION AUTO-ACCORDAGE
[AUTOTUNE]
On peut utiliser le mode de RECHERCHE
[SEARCH] pour rechercher automatiquement les sta-
tions, puis la fonction de MISE EN MEMOIRE
[STORE] pour les enregistrer dans la mémoire du
NAD 414 RDS.
NA
D
12
F

F
Choisir d’abord la bande de fréquences AM ou FM
à l’aide du bouton AM ou FM. Si l’on souhaite ne
rechercher que les principales stations locales, le
NAD 414 RDS ne localise que les signaux de forte
puissance (au moins trois barres sur l’Indicateur de
Puissance du Signal), et coupe et ignore toutes les
stations faibles. Si l’on souhaite inclure toutes les sta-
tions dans la recherche, y compris les plus faibles,
arrêter la fonction Silence FM en appuyant sur le
bouton SILENCE FM [FM MUTE]. L’activité ou l’inac-
tivité de la fonction Silence FM sont indiquées sur le
Panneau d’Affichage.
Appuyer sur ACCORDAGE AUTOMATIQUE
[AUTOTUNE], puis tourner le bouton
d’ACCORDAGE/PREREGLAGE [TUNE/PRESET] en
sens horaire pour rechercher les stations en montant
la bande de fréquences, ou en sens anti-horaire pour
les rechercher en descendant la bande de
fréquences.
Dès que le tuner s’accorde sur un signal d’émission
suffisamment fort (donnant une indication d’au moins
trois barres sur l’indicateur de puissance, et provo-
quant l’allumage de l’indicateur >ACCORDEE<
[>TUNE<], la recherche automatique s’arrête sur la
station correspondante. Si cette station émet des
informations RDS, le témoin RDS s’allume et les ini-
tiales et la fréquence de la station sont indiquées par
le Panneau d’Affichage. Si la station trouvée n’est
pas une station RDS, l’affichage indique uniquement
la fréquence.
Pour mettre cette station en mémoire en tant que
station préréglée, appuyer sur MEMOIRE [MEMO-
RY]. L’indicateur de Mémoire s’affiche, et la section
de Préréglage s’allume sur le Panneau d’Affichage.
Appuyer sur BANQUE [BANK] pour choisir laquelle
des trois Banques de Stations Préréglées doit être
utilisée pour stocker la station. Tourner le bouton
ACCORDAGE/PREREGLAGE [TUNE/PRESET] pour
choisir le numéro de Station Préselectionnée que l’on
veut attribuer à la station (ce numéro clignote sur le
Panneau d’Affichage), puis réappuyer sur MEMOIRE
[MEMORY]. Le témoin Mémoire du Panneau
d’Affichage s’éteint, et la station est désormais stock-
ée dans la mémoire de votre NAD 411 RDS.
Une nouvelle station peut être stockée soit dans
une Station Préréglée libre, soit à la place d’une
Station Préréglée existante. En stockant une nouvelle
station dans l’emplacement d’une Station Préréglée
déjà utilisé, on efface toutes les données que conte-
nait précédemment ce numéro de Station Préréglée.
Pour quitter le mode de Mise en Mémoire sans
stocker une station, laisser les commandes sans y
toucher. Le mode mémoire s’auto-annule après
8 secondes. Les Stations Préréglées sont stockées
dans une mémoire non volatile, et resteront donc en
mémoire même en cas de mise hors tension ou de
débranchement du cordon d’alimentation du tuner.
SELECTION D’UNE STATION PREREGLEE
Pour sélectionner une Station Préréglée en
Mémoire, appuyer sur le bouton de PREREGLAGE
[PRESET], puis choisir la banque de stations
préréglées que l’on souhaite utiliser en appuyant sur
le bouton BANQUE [BANK]. Tourner le bouton
ACCORDAGE/PREREGLAGE [TUNE/PRESET]
jusqu’à ce que le numéro de la station préréglée
voulue soit affiché sur le Panneau d’Affichage. Le
sélecteur saute les numéros de Stations Préréglées
non affectés, et il n’est pas possible de sélectionner
une Banque si elle ne contient pas au moins une sta-
tion préréglée.
Pour rechercher une station convenable dans
l’ensemble de la banque, appuyer sur ECHANTIL-
LONNAGE [SCAN]. Le NAD 414 RDS balaye alors
toutes les Stations Préréglées de la Banque actuelle,
et échantillonne chacune d’elle pendant 6 secondes.
Dès que l’on trouve une station convenable, il suffit
de réappuyer sur ECHANTILLONNAGE [SCAN] pour
arrêter le balayage.
EFFACEMENT D’UNE STATION PREREGLEE
Il est possible de vider une Station Préréglée en
effaçant les informations stockées. Commencer par
sélectionner la Station Préréglée à effacer, puis
appuyer sur le bouton MEMOIRE [MEMORY] et, en
maintenant la pression sur ce bouton, appuyer aussi
sur le bouton SILENCE FM/MODE [FM
MUTE/MODE]. La Station Préréglée en Mémoire est
alors effacée, et le numéro de la station est remplacé
par “—”. Il est possible de stocker une nouvelle sta-
tion dans une Station Préréglée déjà occupée en
suivant simplement la procédure normale de stock-
age d’une Station Préréglée, et en écrasant l’anci-
enne station avec la nouvelle.
RECHERCHE ET MISE EN MEMOIRE DES
STATIONS AM ET FM PAR ACCORDAGE
MANUEL
On peut aussi ACCORDER [TUNE] des stations
manuellement, pour les enregistrer dans la mémoire
du NAD 414 RDS. Choisir d’abord la bande de
fréquences AM ou FM, à l’aide du bouton AM ou FM.
Mettre la fonction SILENCE FM [FM MUTE] en mode
activé ou désactivé, suivant le cas.
Tourner ensuite le bouton ACCORDAGE/PRE-
REGLAGE [TUNE/PRESET] en sens horaire pour
balayer la bande de fréquences en montant, ou en
sens anti-horaire pour la balayer en descendant.
Lorsque le tuner s’est verrouillé correctement sur
une station, le témoin >ACCORDEE< [TUNED]
s’allume. En cas de difficulté pour effectuer un
accordage entre deux stations émettant sur des
fréquences voisines, mettre le sélecteur de
BANDE IF [IF BAND] sur “Etroite” [“Narrow”]. Votre
NAD 414 RDS aura alors plus de facilité pour se ver-
rouiller sur la station voulue.
Si la station émet des informations RDS, l’indica-
teur RDS s’allume et les initiales et la fréquence de la
station sont affichées sur le Panneau d’Affichage. S’il
s’agit d’une station non RDS, le Panneau d’Affichage
indique uniquement la fréquence.
Stocker la station dans la mémoire en procédant de
la manière décrite sous “Recherche et Mise en
Mémoire des Stations AM et FM à l’aide de la fonc-
tion Auto-Accordage [Autotune]”.
NA
D
13

MISE EN MEMOIRE DU NOM D’UNE
STATION
Lorsqu’une station émet des informations RDS,
votre NAD 414 RDS indique automatiquement les ini-
tiales et la fréquence de la station dès que vous
appelez le numéro de Station Préréglée qui lui corre-
spond. Le Tuner affiche automatiquement la
fréquence de toute autre station préréglée non RDS,
et permet aussi d’entrer le nom de la station afin qu’il
vous soit plus facile d’identifier la station stockée
sous le numéro de Station Préréglée concerné.
Pour entrer le nom, il faut d’abord sélectionner la
Station Préréglée à laquelle on souhaite affecter un
nom. Appuyer ensuite sur CARACTERE [CHARAC-
TER] : la premier espace caractère de la zone de
Données Station du Panneau d’Affichage clignote.
Tourner le bouton ACCORDAGE/PREREGLAGE
[TUNE/PRESET] pour sélectionner le caractère
souhaité (se référer à la liste des Caractères).
Appuyer sur MEMOIRE [MEMORY] pour mettre le
premier caractère en mémoire et passer à l’espace
caractère suivant sur la ligne. Tourner à nouveau le
bouton ACCORDAGE/PREREGLAGE [TUNE/PRE-
SET], pour sélectionner le caractère suivant du nom,
puis appuyer à nouveau sur MEMOIRE [MEMORY]
pour le mettre en mémoire. Continuer de la même
manière pour constituer le nom de la station (8 carac-
tères maximum). Appuyer une nouvelle fois sur CAR-
ACTERE [CHARACTER] pour mettre en mémoire le
nom complet. Cette fonction n’est disponible que
pour les stations non RDS. Les stations RDS
afficheront toujours le nom transmis par l’émetteur, et
il est impossible de modifier ce nom à l’aide de la
fonction CARACTERE [CHARACTER].
54 caractères sont disponibles, y compris un
espace.
UTILISATION DU RDS
De plus en plus de stations FM émettent des ser-
vices et informations supplémentaires à codage
numérique, combinés avec le signal FM normal. Ce
“système de données radio” (“Radio Data System” ou
RDS) facilite la recherche de la bonne station en
affichant son nom et sa fréquence. Ce système peut
aussi afficher le type de programmation émise par la
station de radio, si elle émet des informations
routières, et peut même afficher des informations
textuelles supplémentaires telles que le titre de la
piste qui est en train de passer sur les ondes.
RDS facilite aussi la recherche d’autres stations
susceptibles d’être intéressantes. A l’aide de la fonc-
tion SCAN, on peut rechercher la fréquence d’émis-
sion la plus forte de la station que l’on est en train
d’écouter, trouver d’autres stations dont le pro-
gramme est similaire, ou trouver d’autres stations qui
émettent des informations routières.
Il existe six Services RDS, et bien que votre
NAD 414 RDS soit capable de les afficher et de les
utiliser tous, toutes les stations radio n’émettent pas
les six. Certaines stations RDS se contentent d’émet-
tre le Nom du Service Programme et l’Identification.
Les six Services RDS sont les suivants :
PS Nom du Service Programme
Indique les initiales de la station
PTY Type de Programme
Indique le type de programmation émise. Peut être
utilisé pour rechercher d’autres programmes sem-
blables émis par d’autres stations
TP Programme Routier
Indique si la station émet des informations routières.
Peut être utilisé pour rechercher d’autres stations
émettant des informations routières.
AF Autres Fréquences
S’utilise pour rechercher les autres fréquences sur
lesquelles émet la station écoutée.
RT Texte Radio
Affiche d’autres informations concernant le pro-
gramme écouté, telles que le nom du programme ou
le titre de la piste en train de passer.
CT Heure Horloge
Lors de la réception d’une station RDS qui émet des
informations CT, une horloge apparaît sur l’affichage
dans la minute qui suit le captage de la station.
AFFICHAGE DES INFORMATIONS RDS
Lors de la réception d’une station RDS, l’indicateur
RDS apparaît sur le Panneau d’Affichage, et votre
NAD 414 RDS utilise le Non du Service Programme
(PS) pour afficher les initiales et la fréquence de la
station dans la partie Données Station du Panneau
d’Affichage. Pour voir les autres informations RDS,
on appuie sur le bouton d’AFFICHAGE [DISPLAY].
Une première impulsion sur AFFICHAGE [DIS-
PLAY] affiche l’Identification du Programme, c’est à
dire le nom complet de la station, sa description et sa
fréquence.
Si la station n’émet aucune Identification de
Programme, l’affichage indique “No Text” (“aucun
texte”).
Une deuxième impulsion sur AFFICHAGE [DIS-
PLAY] affiche les informations Texte Radio, si la sta-
tion en émet.
Si la station n’émet aucune donnée Texte Radio,
l’affichage indique soit “No Update” (“aucune mise à
jour”), soit l’heure.
Il faut deux ou trois secondes pour émettre la total-
ité de l’information Texte Radio. Si la section RDS du
tuner attend d’être mise à jour par l’émission, le mot
“WAIT” (“ATTENDRE”) apparaît sur le Panneau
d’Affichage.
Une troisième impulsion sur AFFICHAGE [DIS-
PLAY] affiche la fréquence sur laquelle est accordé
votre NAD 414 RDS.
Pour les stations non RDS, le bouton permute
entre l’affichage du nom de la station défini par l’util-
isateur (le cas échéant) et la fréquence de la station.
NA
D
14
F

F
Station RDS Station non RDS
Normal
Initiales de la station Nom de la station mis en
RDS (PS) mémoire par l’utilisateur
(ou fréquence, si aucun
nom n’a été défini)
Appuyer sur :
AFFICHAGE [DISPLAY] :
x 1 RT* Fréquence actuellement
accordée
x 2 CT* -
x 3 Fréquence actuellement -
accordée
* Pour toute information concernant le Radio Data
System, se reporter à la liste dans la section “UTILI-
SATION DU RDS”
UTILISATION DU RDS POUR
RECHERCHER LES STATIONS ET LES
INFORMATIONS
Le RDS permet de rechercher automatiquement
les autres stations émettant une programmation sem-
blable, ou fournissant des informations routières, ou
qui sont des transmissions plus puissantes de la
même station sur d’autres fréquences.
Pour utiliser le RDS pour rechercher des stations
émettant des programmes de type similaire, appuyer
une fois sur le bouton PTY TP AF. Le type de pro-
gramme de la station actuelle s’affiche pendant deux
secondes dans la partie Données Station du
Panneau d’Affichage (voir la liste ci-après). Appuyer
sur ECHANTILLONNAGE [SCAN] pendant l’affichage
de cette information, et votre NAD 414 RDS
recherchera automatiquement les autres stations
RDS émettant le même type de programme. Chaque
station correspondant au type recherché passe pen-
dant six secondes, pendant lesquelles sa fréquence
clignote ; Scan passe ensuite à la station suivante
émettant le même type de programme. Appuyer à
nouveau sur ECHANTILLONNAGE [SCAN] pour
arrêter la séquence d’échantillonnage sur une station
quelconque.
Pour rechercher un type de programme particulier,
appuyer une fois sur le bouton PTY TP AF, puis utilis-
er le bouton ACCORDAGE/PREREGLAGE
[TUNE/PRESET] pour choisir le type de programme
à rechercher. Appuyer sur ECHANTILLONNAGE
[SCAN] pour lancer la recherche des stations corre-
spondant à la description.
Pour utiliser le RDS pour rechercher des stations
émettant des informations routières (normalement à
la suite des flashs d’informations), appuyer deux fois
sur le bouton PTY TP AF, puis appuyer sur le bouton
ECHANTILLONNAGE [SCAN]. Votre NAD 414 RDS
recherchera la première station RDS qui inclut des
informations routières dans ses émissions. “*TP*”
indique une station qui inclut des informations
routières, alors que “TP” indique une station qui
n’émet aucune information routière ou une station
non RDS.
Pour utiliser le RDS pour rechercher un signal plus
puissant pour la même station, appuyer trois fois sur
le bouton PTY TP AF, puis appuyer sur ECHANTIL-
LONNAGE [SCAN]. Votre NAD 414 RDS recherchera
le signal le plus puissant pour la station écoutée.
Cette fonction trouve toute son utilité sur les
autoradios, car elle les permet, pendant les déplace-
ments, de capter en permanence le signal le plus
puissant d’une station de radio nationale. De plus elle
permet aussi de vérifier que l’on est bien accordé sur
le meilleur signal pour la station concernée.
Options de recherche RDS
Appuyer sur PTY TP AF x1
PTY Type de Programme
S’utilise pour rechercher des programmes similaires
émis par d’autres stations.
Appuyer sur PTY TP AF x2
TP Programme d’Informations Routières
S’utilise pour rechercher d’autres stations émettant
des informations routières.
Appuyer sur PTY TP AF x3
AF Autres Fréquences
S’utilise pour rechercher d’autres fréquences fortes
d’émission de la même station.
Les Types de Programme tombent dans l’une des
quinze catégories suivantes :
Types de Programmes (PTY)
NONE Aucune information n’est émise
concernant le type de programme
NEWS Actualités
AFFAIRS Affaires courantes
INFO Informations générales
SPORT Sport
EDUCATE Programmes éducatifs
DRAMA Pièces de théâtre ou critiques
théâtrales
CULTURE Programmes culturels ou débats
SCIENCE Programmes scientifiques
VARIED Divers
POP M Programmes de musique pop
ROCK M Programmes de musique ROCK
M.O.R. M Programmes de musique “Middle
of the Road”
LIGHT M Programmes de musique légère
CLASSICS Programmes de grande musique
OTHER M Autres types de musique : Jazz,
Folk, Country, Reggae,
Rhythm & Blues, etc ...
Affichage de l’heure (CT)
Si la station que l’on écoute n’est pas une station
RDS, cette fonction ne peut pas être utilisée.
1. Appuyer sur le bouton d’AFFICHAGE
[DISPLAY] : l’information RT sera affichée.
2. Appuyer une deuxième fois sur le bouton
d’AFFICHAGE [DISPLAY] .
NA
D
15

Une horloge apparaît sur l’affichage dans la
minute qui suit le captage d’une station émettant des
informations de type CT.
“NO UPDATE” (PAS DE MISE A JOUR) ou “NO
TIME” (PAS D’HEURE) s’afficheront plusieurs secon-
des après avoir capté une station n’émettant pas des
informations CT. Les informations PS sont ensuite
affichées.
NA
D
16
F
DEPANNAGE
AUCUN SON
Cordon secteur débranché, ou alimentation coupée. Vérifier le cordon secteur.
Câbles de signaux mal branchés. Vérifier les branchements de l’amplificateur.
Aucune station sélectionnée, ou signal faible alors Réaccorder la station, ou couper la fonction Silence FM
que la fonction Silence FM [FM Mute] est active. [FM Mute].
Fusible interne grillé. Consulter le revendeur.
PAS DE SON SUR UNE VOIE
Câbles de signaux débranchés de l’amplificateur Vérifier les câbles et les branchements.
ou détériorés.
BRUIT
Sifflement - Signal faible. Contrôler l’indicateur de puissance. Vérifier l’accordage de
la station. Régler ou remplacer l’antenne.
Distorsion - Signaux reçus sous plusieurs angles, Vérifier l’accordage de la station. Régler ou remplacer
ou interférences provenant d’autres stations. ’antenne.
Sifflements ou bourdonnements sur la bande Vérifier l’accordage de la station. Eteindre ou déplacer la
FM et sur la bande AM : Interférences en source du bruit électrique.
provenance d’autres sources électriques
- ordinateurs, consoles de jeux.
Sifflements ou bourdonnements sur la bande AM : Vérifier l’accordage de la station. Régler ou remplacer
Interférences en provenance d’éclairages ou de l’antenne AM.
moteurs électriques.
AUCUNE INFORMATION RDS
Le signal de la station est trop faible. Observer l’indicateur de puissance du signal. Vérifier
l’accordage du signal. Régler ou remplacer l’antenne.
La station n’émet pas en RDS. Aucun remède.
54 caractères sont disponibles, y compris
un espace.

D
HINWEIS ZUM AUFSTELLEN
Stellen Sie den NAD 414RDS auf eine feste, ebene
Fläche. Das Gerät nicht direktem Sonnenlicht ausset-
zen bzw. neben Heizquellen oder in feuchten und
schlecht belüfteten Räumen aufstellen. Das Gerät
wird mit Phonoleitungen zum Anschluß an Ihren
Verstärker geliefert. Leitungen und Anschlüsse auf
Schäden überprüfen. Alle Anschlüsse müssen fest
eingesteckt sein. Soll das Gerät über einen längeren
Zeitraum nicht benutzt werden, den Stecker aus der
Netzsteckdose ziehen.
Falls Wasser in Ihren NAD 414RDS gelangt, den
Strom abschalten und das Netzkabel aus der
Steckdose ziehen. Lassen Sie das Gerät vor dem
erneuten Einschalten von einem Service-Techniker
überprüfen.
Die Abdeckung nicht entfernen, da sich dort keine
Teile befinden, die vom Anwender zu warten sind.
Das Gerät mit einem trockenen, weichen Tuch
reinigen. Gegebenenfalls das Tuch leicht mit
Seifenlauge befeuchten. Keine Benzollösungen oder
sonstigen flüchtigen Mittel verwenden.
SCHNELLSTART
1. Die linken und rechten Ausgänge des NAD
414RDS mit der Phono-an-Phono-Leitung an den
Tuner-Eingang Ihres Verstärkers anschließen.
2. Das Netzkabel einstecken.
3. Die UKW- und MW-Antenne anschließen.
4. Den NAD 414RDS durch Drücken der Taste
POWER (Strom) einschalten.
5. Für den MW- bzw. UKW-Empfang die Taste AM
(MW) bzw. FM (UKW) drücken.
6. Über TUNE/PRESET einen Sender wählen.
ANSCHLÜSSE AUF DER RÜCKSEITE
1. UKW-ANTENNE
Eine UKW-Drahtantenne ist im Lieferumfang
enthalten; diese ist an der Geräterückseite an den
FM-Anschluß anzuschließen (bei Australian-
Versionen ist der mitgelieferte “Balun”-Adapter zu
verwenden - siehe Abb. 1). Die Drahtantenne ist so
auf einer vertikalen Fläche zu montieren, daß sie ein
“T” bildet.
Die Antennen versuchsweise ausrichten, um
Signalstärke und Hintergrundgeräusch zu optimieren.
Beachten Sie dabei den Signalstärkemesser.
Ein zu schwaches UKW-Signal hat normalerweise
besonders bei Stereowiedergabe hohe Rauschpegel
und Störungen von externen Elektroeinrichtungen zur
Folge. In Gegenden mit schwachem UKW-Empfang
kann die Leistung des Tuners durch eine im Freien
angebrachte UKW-Antenne verbessert werden. Ein
Antennenfachmonteur wird Sie bei der Auswahl und
Montage der für Ihre Empfangsbedingungen richtigen
Antenne beraten.
2. MW-ANTENNE
Für den MW-Empfang ist eine Antenne erforderlich;
dem NAD 414RDS ist eine MW-Ringantenne
beigepackt. Zum Anschluß der MW-Antenne als
erstes die Zungen an den Antennenklemmen nach
unten drücken. Die freiliegenden Antennendrähte in
die beiden Klemmenlöcher einführen; die
Anschlußzungen wieder nach oben drücken, um den
Anschluß zu sichern.
Die Antenne versuchsweise an verschiedenen
Orten aufstellen; für den besten Empfang ist jeweils
sicherzustellen, daß die Schleife vertikal steht. Die
Antennen nicht neben große Metallobjekte (z.B.
Metallregale oder Heizkörper) stellen, da diese den
Empfang stören können (siehe Abb. 2).
3. OUTPUT (Ausgang)
Der Analogaudioausgang des 414. Den linken
(weißen) und den rechten (roten) Ausgang an den
Eingang des Tuners bzw. an einen anderen
Hochpegel-Eingang (z.B. den Eingang AUX an Ihrem
Verstärker) mit einer Phono-an-Phono-Doppelleitung
verbinden. Dieses Kabel darf nicht an die
Eingangsbuchsen PHONO des Verstärkers
angeschlossen werden.
4. NAD-LINK IN OUT (NAD-Verbindung
Ein/Aus)
Der Anschluß NAD-LINK dient zur Übertragung von
Befehlen von anderen, mit NAD-LINK-Anschlüssen
ausgestatteten Einrichtungen. Hierdurch kann die
komplette Anlage zentral gesteuert werden;
außerdem lassen sich einige Grundfunktionen des
NAD 414RDS über die Fernbedienung eines über
NAD-LINK verbundenen Verstärkers steuern bzw. die
Anlage läßt sich von mehreren Räumen aus steuern.
Zur gemeinsamen Funktion mit anderen Geräten die
Buchse NAD-LINK OUT des Tuners mit der Buchse
NAD-LINK IN am anderen Gerät verbinden. Die NAD-
LINK-Anschlüsse können in Reihe angeschlossen
werden, IN an OUT, so daß die gesamte Anlage über
die Fernbedienung eines Gerätes gesteuert werden
kann.
5. AC LINE CORD (Netzstromkabel)
Das Netzkabel an die Netzsteckdose anschließen.
Das Netzstromkabel in eine stromführende
Netzsteckdose bzw. in einen Wechselstromausgang
auf der Rückseite Ihres Verstärkers einstecken.
BEDIENLEISTE
1. POWER ON/OFF (Netzschalter Ein/Aus)
Über die Taste POWER wird der Tuner ein- bzw.
ausgeschaltet. Durch Drücken der Taste POWER
wird der Tuner eingeschaltet; nun leuchtet das
Anzeigefeld. Durch abermaliges Drücken der Taste
POWER wird der Tuner ausgeschaltet.
Bei Unterbrechung der Stromversorgung an die
NA
D
15
UKW/MW-STEREO-TUNER NAD 414 RDS

Elektronik des NAD 414RDS bleiben die abgespe-
icherten Einstellungen jedoch erhalten.
ACHTUNG: Steht die Taste POWER auf OFF
(Aus) schaltet der Strom nicht vollkommen ab. Wenn
Sie den NAD 414RDS über einen längeren Zeitraum
nicht gebrauchen, ziehen Sie den Stecker bitte aus
der Steckdose.
2. IF BAND
Breiter (WIDE) bzw. enger (NARROW) IF-
Bandbetrieb wird durch Drücken der Taste IF BAND
gewählt. Die Standardeinstellung ist WIDE (breit), die
für die meisten Empfangsverhältnisse geeignet ist.
Wenn jedoch zwei Radiosender mit dicht
nebeneinander liegenden Frequenzen senden, wird
durch Wahl vom engem Bandbetrieb über NARROW
die Störung vom unerwünschten Sender herabgeset-
zt.
3. CHARACTER (Zeichen)
Über die Taste CHARACTER werden die Namen
von programmierten Sendern eingegeben, die bei
Anwahl angezeigt werden. Wird mit dem Knopf
TUNE/PRESET (Suchen/Vorgabe) (11) und der
Speichertaste MEMORY (8) verwendet.
4. DISPLAY (Anzeige)
Durch Drücken der Anzeigetaste DISPLAY wird
zwischen den im Anzeigefeld erscheinenden
Senderanzeigeoptionen geschaltet.
Optionen
RDS-Sender Nicht RDS-Sender
Normal
PS* Vom Benutzer eingegebener
Sendername
Die Taste DISPLAY einmal drücken
RT* Senderfrequenz
Die Taste DISPLAY zweimal drücken
CT* -
Die Taste DISPLAY dreimal drücken
Frequenz -
* Weitere Angaben über den Radiodatendienst
(Radio Data Service, RDS) sind in Abschnitt "Über
den Umgang mit RDS" aufgeführt.
5. PTY TP AF
Über die Taste PTY TP AF können Sie andere
Sender in Verbindung mit der Suchtaste SCAN (6)
mit Hilfe der RDS-Einrichtungen Programmart,
Verkehrsinformationen (Traffic Information) und alter-
native Frequenzen (Alternative Frequencies) durch-
suchen. Die Informationen werden drei Sekunden
lang angezeigt; es werden anschließend die
Kennbuchstaben und Frequenz des Senders wieder
angezeigt.
Informationen im Anzeigefeld
RDS-Sender Nicht-RDS-Sender
Normalbetrieb
Senderkennbuch Senderfrequenz
staben und -frequenz
PTY TP AF drücken
PTY Programmart Nicht-RDS
PTY TP AF drücken
TP Verkehrsinformationen TP
PTY TP AF drücken
AF Alternative NICHT-RDS
Frequenzen
6. SCAN (Durchsuchen)
Nach Drücken der Taste SCAN durchsucht der
NAD 414RDS alle programmierten Sender, um jeden
programmierten Sender in einer bestimmten
Speicherbank abzutasten. Es wird jeder Sender
sechs Sekunden lang abgespielt und dann auf den
nächsten programmierten Sender fortgeschaltet. Am
gewünschten Sender die Taste SCAN erneut drück-
en, um den Suchlauf abzubrechen. Der Suchvorgang
SCAN wird auch in Verbindung mit der Taste PTY TP
AF (5) des NAD 414 benutzt, um das stärkste Signal
für den jeweiligen Sender, Sender mit ähnlichem
Programminhalt, oder Sender, die Verkehrsansagen
bringen, zu finden.
7. BANK (Speicherbank)
Durch Drücken der Taste BANK die drei
Vorgabenspeicher (A, B und C) anwählen. Diese
Banken können bis zu zehn MW- und UKW-Sender
gemischt speichern. Die jeweils angewählte
Speicherbank erscheint im Anzeigefeld.
8. MEMORY (Speicher)
Mit der Speichertaste MEMORY werden die
Sendervorgaben in den drei Speicherbanken bzw. die
benutzerdefinierten Namen für Nicht-RDS-
Sendervorgaben gespeichert. Die Taste MEMORY
wird in Verbindung mit der Taste PRESET (12) und
dem Drehknopf TUNE/PRESET (11) verwendet. Bei
aktiver MEMORY-Funktion blinkt die
Vorgabenummer und im Anzeigefeld leuchtet die rote
MEMORY-Meldeleuchte.
9. FM MUTE/MODE (UKW-
Suchlauf/-Dämpfung)
Bei einem starken Stereo-UKW-Signal schaltet Ihr
NAD 414RDS automatisch auf Stereo-UKW-Betrieb,
wobei die STEREO-Meldelampe im Anzeigefeld
leuchtet und der Tuner beim Suchlauf gedämpft wird.
Bei schwachen Stereosignalen entsteht u.U.
starkes Sirren im Hintergrund; in diesem Fall durch
Drücken der Taste FM MUTE/MODE auf Mono-
Betrieb schalten, um dieses Sirren weitgehend oder
ganz auszuschalten. Erneutes Drücken der Taste FM
MUTE/MODE schaltet wieder auf automatischen
Stereo-UKW-Betrieb. Der aktuelle Schaltzustand der
NA
D
18
D

D
UKW-Dämpfung (Ein/Aus) wird im Anzeigefeld
angezeigt; der Schaltzustand Auto/Mono-Betrieb wird
im APR-Bereich des Anzeigefeldes angezeigt.
10. AUTOTUNE (Sendersuchlauf)
Durch Drücken der Taste AUTOTUNE den NAD
414RDS auf AUTOTUNE-Betrieb schalten. Durch
Drehen des Drehknopfes TUNE/PRESET (11) nach
links oder rechts den Sendersuchlauf nach dem
nächsten brauchbaren Signal (mindestens drei
Striche am Signalstärkemesser) auslösen.
11. TUNE/PRESET (Suchen/Vorgabe)
Mit dem Drehknopf TUNE/PRESET einen Sender
manuell oder automatisch suchen, einen vorprogram-
mierten Sender wählen oder Senderstationen im
NAD 414RDS benennen.
12. PRESET (Vorgabe)
Mit der Taste PRESET nach Belieben einen in
einer Speicherung vorprogrammierten Sender
anwählen. Über die Taste BANK (7) die
entsprechende Speicherbank wählen und mit dem
Drehknopf TUNE/PRESET den gewünschten Sender
wählen. Vorgabenummer und Name bzw. Frequenz
des Senders erscheinen im Anzeigefeld.
13. FM (UKW)
Mit der Taste FM den Tuner auf UKW schalten. Im
Anzeigefeld erscheinen Frequenz und Wellenbereich
des aktuellen Senders. Der UKW-Skalenteilungswert
beträgt 0,025 MHz.
14. AM (Mittelwelle)
Mit der Taste AM den Tuner auf Mittelwelle schal-
ten. Im Anzeigefeld erscheinen Frequenz und
Wellenbereich des aktuellen Senders. Der MW-
Skalenteilungswert beträgt 9 kHz.
Bei Mittelwelle-Sendern bleiben die Tasten IF
BAND, FM MUTE/MODE, DISPLAY, PTY TP AF
ohne Wirkung.
15. ANZEIGEFELD
Im Anzeigefeld erscheinen Informationen über die
Betriebsarten des NAD 414RDS und den aktuellen
Sender.
In der Anzeige STATION DATA (Senderdaten)
erscheinen Sendername, -frequenz und andere vom
RDS-Dienst bereitgestellte bzw. vom Benutzer
eingegebene Informationen.
APR-Bereich
RF MODE (HF-Betrieb). Ihr NAD 414RDS wählt
automatisch den für das vorhandene Signal opti-
malen HF-Betrieb. Bei normal starken Signalen wird
DX gewählt und bei Sendern mit sehr starkem,
eventuell verzerrendem Funksignal wird LOCAL
gewählt.
STEREO MODE (Stereobetrieb). Entweder schaltet
der Tuner automatisch bei vorhandenem
Stereosignal auf STEREO (AUTO-Betrieb) oder er ist
ständig auf MONO geschaltet. Zeigt an, ob der Tuner
auf FM MUTE/AUTO MODE (ON) oder FM MUTE
OFF/MONO MODE (OFF) geschaltet ist.
SIGNAL STRENGTH (Signalstärke). Zeigt die
Stärke des vorhandenen Funksignals als
Strichbalken mit maximal fünf Strichen an. Einer oder
zwei Striche zeigen ein nicht ausreichend starkes,
eventuell störungsanfälliges Signal an.
FM MUTE (UKW-Dämpfungsanzeige). Zeigt an,
ob der Tuner auf den Betrieb FM MUTE/AUTO
MODE (ON) oder FM MUTE OFF/MONO MODE
(OFF) geschaltet ist.
>TUNED< (Abgestimmt). Zeigt an, daß die
Abstimmung optimiert ist.
STEREO-Anzeige. Zeigt an, daß ein UKW-Sender
in Stereo sendet und der Tuner im Auto-Betrieb
arbeitet.
MEMORY (Senderspeicheranzeige). Die
Senderspeicheranzeige leuchtet bei aktiver
Senderspeicherfunktion bzw. Eingabe von Sendern
bzw. Zeichen.
RDS (Radiodatendienst-Anzeige). Zeigt an, daß
der aktuelle Sender RDS-Informationen sendet.
BANK (Speicherbankanzeige). Zeigt die gegen-
wärtig gewählte Speicherbank an.
PRESET NUMBER (Sendervorgabenummer-
Anzeige). Zeigt die Nummer der gegenwärtigen
Sendervorgabe an.
WÄHLEN UND ABSPEICHERN VON MW-
UND UKW-SENDERN MIT DER AUTOTUNE-
EINRICHTUNG
Sie können im Suchbetrieb Sender automatisch
suchen und im Speicherbetrieb abspeichern.
Zuerst über die AM/FM-Taste das Mittelwellen-
/UKW-Wellenband anwählen. Wenn Sie die
Hauptsender in Ihrer Gegend aussuchen wollen,
sucht der NAD 414RDS nur starke Signal (ab 3
Striche am Signalstärkemesser), wobei alle
schwachen Sender gedämpft und nicht berücksichtigt
werden. Wenn Sie alle vorhandenen Signale
einschließlich schwache durchsuchen wollen, durch
Drücken der Taste FM MUTE die UKW-Dämpfung
ausschalten. Der Schaltzustand ist im Anzeigefeld
durch FM MUTE ON/OFF angezeigt.
Die Taste AUTOTUNE drücken und den Drehknopf
TUNE/PRESET nach links bzw. rechts drehen, um
das Frequenzband entsprechend zu durchsuchen.
Der automatische Suchlauf hört bei Auffindung
eines angemessen starken Signals (mindestens 3
Striche am Signalstärkemesser und Leuchten der
Meldelampe >TUNE<) auf. Werden RDS-
Informationen gesendet, so leuchtet die RDS-
Meldelampe bei gleichzeitiger Anzeige der Sender-
Kennbuchstaben und -Frequenz im Anzeigefeld. Wird
ein Nicht-RDS-Sender gefunden, so wird nur die
Frequenz angezeigt. Den Sender gegebenenfalls
über die Taste MEMORY als Vorgabe speichern. Die
Meldelampe MEMORY leuchtet und im Anzeigefeld
blinkt der Vorgabebereich.
Durch Drücken der Taste BANK die gewünschte
NA
D
19

Sendervorgaben-Speicherbank anwählen. Durch
Drehen des Drehknopfes TUNE/PRESET die gewün-
schte Vorgabenummer (blinkende Nummer im
Anzeigefeld) wählen und die Taste MEMORY erneut
drücken. Die Meldelampe MEMORY im Anzeigefeld
erlischt und der Sender ist jetzt als Vorgabe abgespe-
ichert.
Wird der Sender unter einer schon besetzten
Vorgabenummer gespeichert, so wird der bisher
unter dieser Nummer gespeicherte Sender gelöscht.
Wenn Sie den vorhandenen Sender doch nicht als
Vorgabe speichern wollen, keine Steuereingriffe
vornehmen; nach circa 8 Sekunden wird die
Betriebsart Senderspeicher automatisch gelöscht.
Die Sendervorgaben werden in leistungsloser
Speicherung und deshalb von Trennung der
Stromzufuhr unabhängig gespeichert.
WÄHLEN EINER SENDERVORGABE
Zum Wählen einer Sendervorgabe: Die Taste PRE-
SET drücken. Durch Drücken der Taste BANK die
gewünschte Sendervorgaben-Speicherbank wählen.
Den Drehknopf TUNE/PRESET drehen, bis die
gewünschte Vorgabe im Anzeigefeld erscheint. Es
werden freie Vorgaben und leere Sendervorgaben-
Speicherbanken übersprungen.
Wenn Sie die ganze Sendervorgaben-
Speicherbank nach einem bestimmten Programm
durchsuchen wollen, die Taste SCAN drücken. Der
NAD 414RDS durchsucht dann alle Sendervorgaben
in der jeweiligen Speicherbank, und läßt jeden
vorhandenen Sender 6 Sekunden lang spielen. Beim
gewünschten Sender die Taste SCAN erneut drück-
en, um Suchlauf zu unterbrechen.
LÖSCHEN EINER SENDERVORGABE
Um eine Sendervorgabe zu löschen, die
Sendervorgabe wählen und die Taste MEMORY
gedrückt halten und die Taste FM MUTE/MODE gle-
ichzeitig drücken. Die Sendervorgabe ist jetzt
gelöscht; die Vorgabenummer wird durch "--" ersetzt.
Sie können jederzeit einen neuen Sender in diesem
Speicherplatz als Vorgabe speichern.
WÄHLEN UND ABSPEICHERN VON MW-
UND UKW-SENDERN MIT DER
MANUELLEN TUNE-EINRICHTUNG
Sie können auch Sender manuell abstimmen und
speichern: mit der Taste AM bzw. FM das
Wellenband MW bzw. UKW wählen.
Die Funktion FM MUTE (UKW dämpfen) nach
Belieben ein- bzw. ausschalten.
Den Drehknopf TUNE/PRESET nach links oder
rechts drehen, um das Frequenzband aufwärts bzw-
abwärts zu durchsuchen.
Bei Aufschalten einer Station leuchtet die
Meldelampe >TUNE<. Lassen sich zwei
nebeneinanderliegende Sender schwer auseinander
halten, den Schalter IF BAND auf "NARROW" schal-
ten, um das Aufschalten des gewünschten Senders
zu erleichtern.
Werden RDS-Informationen gesendet, so leuchtet
die RDS-Meldelampe und im Anzeigefeld erscheinen
die Sender-Kennbuchstaben und -Frequenz. Bei
Nicht-RDS-Sendern wird nur die Frequenz angezeigt.
Den Sender wie im Abschnitt "Wählen und
Abspeichern von MW- und UKW-Sendern mit der
AUTOTUNE-Einrichtung" abspeichern.
SPEICHERN EINES SENDERNAMENS
Werden RDS-Informationen gesendet, so zeigt der
NAD 414RDS automatisch die Sender-
Kennbuchstaben und -Frequenz bei Anwahl dieser
Sendervorgabe an. Obwohl der Tuner automatisch
die Frequenz aller Sendervorgaben anzeigt (auch
Nicht-RDS-Vorgaben), kann auch jeweils eine
Senderbezeichnung zur Erkennung der
Sendervorgaben eingegeben werden.
Hierzu die zu nennende Sendervorgabe wählen.
Die Taste CHARACTER drücken; der
Anzeigebereich Senderdaten im Anzeigefeld blinkt.
Den ersten Buchstaben durch Drehen des
Drehknopfes TUNE/PRESET wählen (siehe hierzu
die Zeichenliste). Die Taste MEMORY drücken; es
wird der erste Buchstabe gespeichert und auf das
nächste Zeichenfeld gerückt. Mit dem Drehknopf
TUNE/PRESET den nächsten Buchstaben des
Namens wählen. Die Taste MEMORY drücken, um
diesen Buchstaben zu speichern. Diesen Vorgang
wiederholen, bis die ganze Senderbezeichnung
(maximal 8 Zeichen) eingegeben wurde. Die Taste
CHARACTER erneut drücken, um die
Senderbezeichnung zu speichern.
Dieser Vorgang gilt nur für Nicht-RDS-Sender. Bei
RDS-Sendern wird stets der vom Sender ausges-
trahlte Name angezeigt.
Im Zeichensatz sind 54 Zeichen einschließlich
Leerfeld enthalten.
RDS-BETRIEB
Es werden zunehmend zusätzliche digital-codierte
Dienste und Informationen im normalen UKW-Signal
gesendet - der sogenannte Radiodatendienst, RDS.
Es wird beispielsweise zur Erkennung des Senders
der Name und die Sendefrequenz angezeigt.
Angezeigt wird gegebenenfalls auch der
Programminhalt; ob Verkehrsansagen durchgegeben
werden oder nicht; Klartextmitteilungen wie beispiel-
sweise der Name des gegenwärtig abspielenden
Titels. Mit RDS können auch Sender gezielt gesucht
werden. Mit der Durchlauffunktion (SCAN) können
Sie:
- das jeweils stärkste Signal des gewünschten
Senders,
- andere Sender mit ähnlichem Programminhalt,
- andere Sender, die Verkehrsansagen bringen,
suchen.
Der NAD 414RDS Tuner ist für alle 6 vorhandenen
RDS-Dienste ausgerüstet, die jedoch nicht von allen
Sendern in vollem Umfang übertragen werden.
Manche senden nur den Programmdienstnamen und
die Senderbezeichnung.
NA
D
20
D
Other manuals for 414
1
Table of contents
Languages:
Other NAD Tuner manuals
Popular Tuner manuals by other brands

Optimus
Optimus MM-CDT Installation and operating instructions

Sirius Satellite Radio
Sirius Satellite Radio SIR-ECL1 installation guide

Sirius Satellite Radio
Sirius Satellite Radio SIR-GM1 installation guide

Alinco
Alinco EDX-1 instruction manual

Onkyo
Onkyo TX-SV434 Service manual

Pioneer
Pioneer F-91 Service manual