184.7
6
49
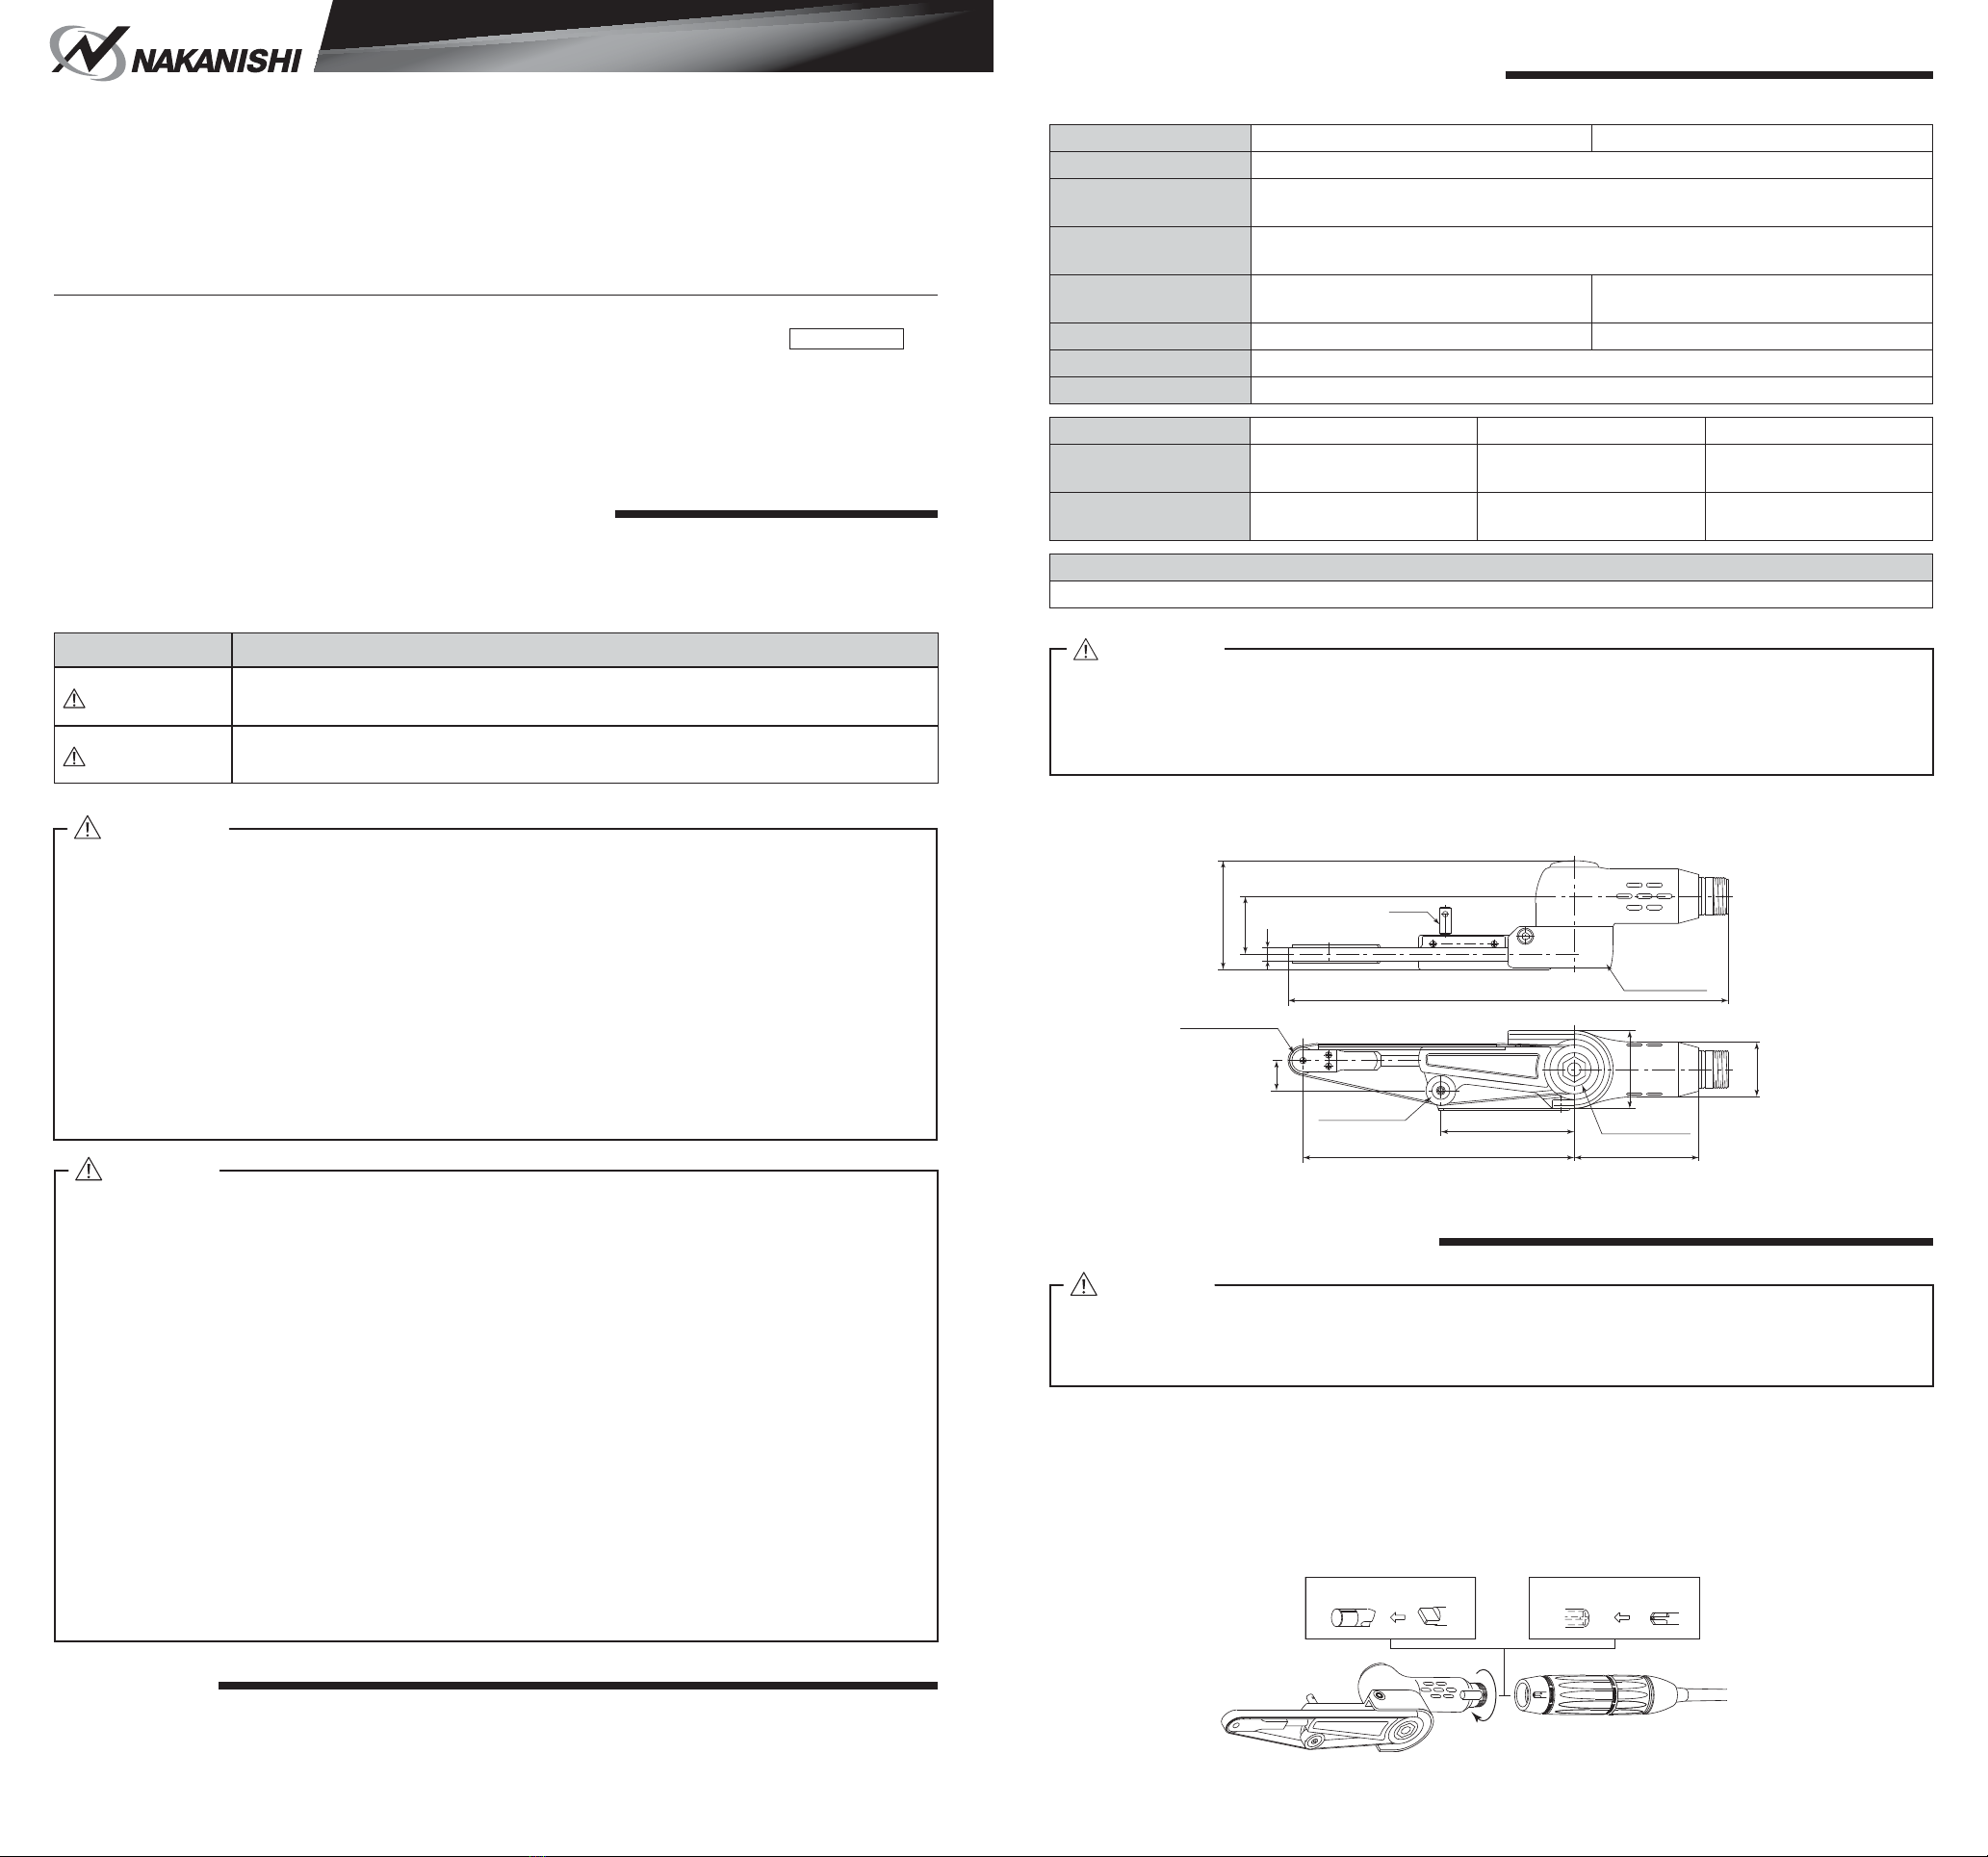
Belt Section
Lever
26
FINE BELT SANDER
KBS-101
ȭ35
13.5
Drive Pulley
122 60 56
Tension Pulley
Center pulley
ȭ24.5
CAUTION
OPERATION MANUAL
Transmission clutch Transmission clutch
EBS - 101KBS - 101
Tighten
Thank you for purchasing this Attachment. The Emax EVOlution Control Unit and Brushless Motor, or ROTUS Air
Motor, or Espert 500 Control Unit and Brushless Motor are required to drive this Attachment. Read this and all
the associated component Operation Manuals carefully before use. Always keep this Operation Manual in a place
where a user can referred to for reference at any time.
1. CAUTIONS FOR HANDLING AND OPERATION
■Read these cautions carefully and only use in the manner intended.
■These warnings and cautions are intended to avoid potential hazards that could result in personal injury to the
operator or damage to the device. These are classi¿ed as follows in accordance with the seriousness of the risk.
OM-K0478E
4. CONNECTING TO THE MOTOR
Model KBS - 101 EBS - 101
Belt speed 0 - 705m / min (11.8m / s)
Maximum Allowable
Motor Rotation Speed Less than 30,000min-1 (rpm)
Belt Width x
all circumferences 8mm, 6mm, 4mm x all circumferences 300mm
Applicable Motor
ENK - 410S, ENK - 250T (Emax EVOlution)
IM - 301, IM - 300 (ROTUS)ENK - 500C, ENK - 500T (Espert 500)
Weight 350g 355g
Vibration Level Less than 2.5m / s2
Noise Level at 1m distance
Less than 70dB (A)
Standard Accessories
・Allen Wrench (3mm)・・1pc. Sand Belt・・9 categories x 2pcs.
Fine Belt Sander
.%6 (%6
002
For Emax EVOlution / ROTUS Air Motor For Espert 500
2. FEATURES
①Light-weight, compact, minimal vibration and a small diameter grip design keep the hand free from fatigue for
long ,continuous operation.
②The angle of the belt section is fully adjustable.
③Exchanging the belt simply done by lever release.
3. SPECIFICATIONS AND DIMENSIONS
3 - 1 Speci¿cation
Fig. 1
Fig. 2
①Do not drop or hit this Attachment, as shock can cause damage to the internal components.
②Be sure to clean the each part before replacing the belt. If polishing particles to the belt or
Attachment damage to the belt or Attachment can occur due to the loss of precision.
③When cleaning a Attachment, stop the motor and remove dirt with a brush or a cloth. Do not
blow compressed air into the Attachment. Foreign particles or polishing debris may get into
the ball bearings.
④Use for dry sanding only, the FINE BELT SANDER is not designed for wet sanding. Water
penetration into the bearings will cause damage to the bearings.
⑤Stop operating immediately when abnormal rotation or any unusual vibrations are observed.
Afterwards, please check the content of Section 8 "TROUBLESHOOTING".
⑥Always check if the belt and the each part are damaged before and after operating.
⑦No lubrication is required because grease impregnated ball bearings are used.
⑧After repair, initial operation, or long periods of non operational time, please use the following
break-in procedure. Start rotating slowly and over a short period of time, then increase the
speed gradually until reaching the maximum allowable speed.
⑨Do not disassemble, modify or attempt to repair the Attachment. Additional damage will occur
to the internal components. Service must be performed by NSK NAKANISHI or an authorized
service center.
⑩Do not leave the belt sunder in direct sun light or extremely dry place. It causes deterioration.
3 - 2 Outside View
Class Degree of Risk
WARNING A safety hazard could result in bodily injury or damage to the device
if the safety instructions are not properly followed.
CAUTION A hazard that could result in light or moderate bodily injury or damage
to the device if the safety instructions are not followed.
WARNING
①This Attachment is designed for hand use. Never install this Attachment or any hand tool on a
machine such as a special purpose machine, NC lathe or mill.
②
Do not exceed the " Maximum Allowable Motor Rotation Speed " (Refer to " 3 - 1 Speci¿cations ").
③When sensing that the Attachment and motor are overheated during operation, reduce the
working force or the motor rotation speed, or stop the operation until the Attachment cools
down before restarting.
④Do not touch the belt and pulley while it is rotating. It is very dangerous.
⑤Always use a protective cover, safety glasses or face shield anytime this device is in use.
⑥Do not exceed the maximum recommended allowable speed. For your safety, use speeds
below the maximum allowable speed.
⑦Do not apply heavy pressure to the belt or try to polish with the edge of the belt as the belt may
break and injure the operator.
CAUTION
Make sure your hands and all interlocking parts of the Attachment and brushless motor are
clean before connecting the brushless motor to the Attachment. This is critical in preventing
contaminants from entering the brushless motor or Attachment.
Align the threads on the front end of the motor and the rear end Attachment, and turn the Attachment
clockwise. If the drive shaft of the motor does not engage properly to the drive dog on the Attachment,
it may only turn aprroximately two threads before stopping. DO NOT FORCE THEM TOGETHER. Turn
the Attachment back a few threads, rotate the Attachment by hand to engage the drive shaft and the
drive dog, and screw them together.
Temperature Humidity Atmospheric Pressure
Operation Environment 0 - 40°CMAX.75%
(No condensation) 800 - 1,060hPa
Transportation and
Storage Environment -10 - 50°C 10 - 85% 500 - 1,060hPa
WARNING
・Do not exceed the " Maximum Allowable Motor Rotation Speed ".
・When sensing that the Attachment and motor are overheated during operation, reduce the
working force or the motor rotation speed, or stop the operation until the Attachment cools
down before restarting.


