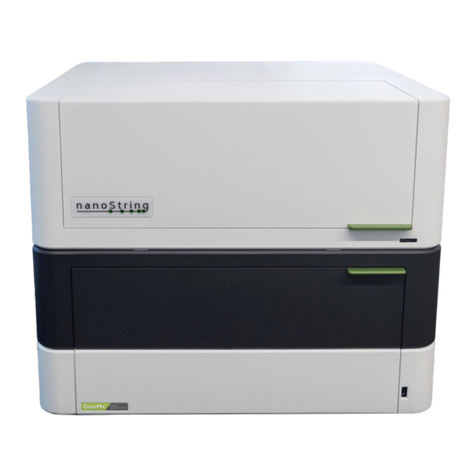
nanoString nCounter Pro User manual


nCounter Pro Analysis System User Manual SEV-00184-01
2
NanoString Technologies, Inc.
530 Fairview Ave N
Seattle, Washington 98109
www.nanostring.com
T: 206.378.6266
T: 888.358.6266
E: support@nanostring.com
Sales Contacts
United States: us.sales@nanostring.com
EMEA: europe.sales@nanostring.com
Asia Pacific & Japan: apac.sales@nanostring.com
Other Regions: info@nanostring.com
EU Authorized Representative
NanoString Technologies
Germany Gmbh
Birketweg 31
80639 Munich
Germany
UK Authorized Representative
NanoString Technologies
Europe Limited
11th Floor Whitefriars
Lewins Mead
Bristol BS1 2NT
United Kingdom

SEV-00184-01 nCounter Pro Analysis System User Manual
FOR RESEARCH USE ONLY. Not for use in diagnostic procedures.
3
Rights, License, & Trademarks
Use
For research use only. Not for use in diagnostic procedures.
Intellectual Property Rights
This nCounter® Pro Analysis System User Manual and its contents are the property of NanoString
Technologies, Inc. (“NanoString”), and are intended solely for use by NanoString customers, for the
purpose of operating the nCounter Pro Analysis System. The nCounter Pro Analysis System
(including both its software and hardware components) and this User Manual and any other
documentation provided to you by NanoString in connection therewith, are subject to patents,
copyright, trade secret rights and other intellectual property rights owned by, or licensed to,
NanoString. No part of the software or hardware may be reproduced, transmitted, transcribed,
stored in a retrieval system, or translated into other languages without the prior written consent of
NanoString. For a list of patents, see https://www.nanostring.com/about-us/legal/patents/.
Limited License
Subject to the terms and conditions of the nCounter Pro Analysis System contained in the product
quotation, NanoString grants you a limited, non-exclusive, non-transferable, non-sublicensable,
research use only license to use the proprietary nCounter Pro Analysis System only in accordance
with the manual and other written instructions provided by NanoString. Except as expressly set
forth in the terms and conditions, no right or license, whether express, implied or statutory, is
granted by NanoString under any intellectual property right owned by, or licensed to, NanoString
by virtue of the supply of the proprietary nCounter Pro Analysis System. Without limiting the
foregoing, no right or license, whether express, implied or statutory, is granted by NanoString to
use the nCounter Pro Analysis System with any third-party product not supplied or licensed to you
by NanoString or recommended for use by NanoString in a manual or other written instruction
provided by NanoString.
Trademarks
NanoString, NanoString Technologies, the NanoString logo, and nCounter are trademarks or
registered trademarks of NanoString Technologies, Inc., in the United States and/or other countries.
All other trademarks and/or service marks not owned by NanoString that appear in this document
are the property of their respective owners.
Copyright
©2022 NanoString Technologies, Inc. All rights reserved.

nCounter Pro Analysis System User Manual SEV-00184-01
FOR RESEARCH USE ONLY. Not for use in diagnostic procedures.
4
Table of Contents
Rights, License, & Trademarks ................................................................................................................... 3
Introduction ................................................................................................................................................. 6
Product Use Limitations.......................................................................................................................... 6
Product Components .............................................................................................................................. 6
Overview of the Procedure..................................................................................................................... 6
Online Training at NanoString University.............................................................................................. 6
Manual Conventions ................................................................................................................................ 7
Instrument Specifications ....................................................................................................................... 7
Environmental Requirements................................................................................................................. 7
Safety Information (English) .................................................................................................................. 8
Caution Symbols .................................................................................................................................. 8
Informations de Sécurité (Français) ...................................................................................................... 9
Symboles Attention ............................................................................................................................. 9
Hardware Overview.................................................................................................................................. 10
General Information............................................................................................................................... 10
Prep Station............................................................................................................................................ 11
Digital Analyzer...................................................................................................................................... 12
Prep Station............................................................................................................................................ 13
Select Instrument Mode .................................................................................................................... 13
Exit Life Sciences Mode..................................................................................................................... 13
Digital Analyzer...................................................................................................................................... 14
Select Instrument Mode .................................................................................................................... 14
Exit Life Sciences Mode..................................................................................................................... 14
Operating the Prep Station ...................................................................................................................... 16
Prior to Initiating a Run......................................................................................................................... 16
Waste Removal .................................................................................................................................. 16
Consumables Required...................................................................................................................... 17
Initiating a Run....................................................................................................................................... 18
Pausing or Aborting a Run................................................................................................................ 27
When Run is Complete...................................................................................................................... 27
Operating the Digital Analyzer ................................................................................................................ 29
Enterprise Package................................................................................................................................ 29
User Management.............................................................................................................................. 30
Login Settings .................................................................................................................................... 32
Archive Settings................................................................................................................................. 33
Cartridge Tracking Settings .............................................................................................................. 34
Audit Report Generation................................................................................................................... 34

SEV-00184-01 nCounter Pro Analysis System User Manual
FOR RESEARCH USE ONLY. Not for use in diagnostic procedures.
5
Overview of File Structure.................................................................................................................... 35
Navigating File/Folder Screens ........................................................................................................ 36
Reporter Library Files............................................................................................................................ 37
Upload RLFs via FTPS........................................................................................................................ 39
Cartridge Definition Files ...................................................................................................................... 41
Creating a CDF on a Personal Computer......................................................................................... 43
Upload CDFs via USB Flash Drive .................................................................................................... 50
Upload CDFs via FTPS....................................................................................................................... 51
Creating a CDF on the Digital Analyzer........................................................................................... 53
Initiating a Run....................................................................................................................................... 59
Pausing a Run..................................................................................................................................... 63
Completing a Run .............................................................................................................................. 65
Download RCC Files via USB Flash Drive ........................................................................................ 66
Download RCC Files via Email .......................................................................................................... 67
Download RCC Files via SSH (SFTP)................................................................................................ 67
Download RCC Files via FTPS........................................................................................................... 68
Technical Support & Maintenance ........................................................................................................... 70
Technical Support.................................................................................................................................. 70
Online Training at NanoString University............................................................................................ 70
Prep Station Maintenance..................................................................................................................... 71
System Setup ..................................................................................................................................... 72
System Hardware............................................................................................................................... 74
System Software................................................................................................................................ 84
Troubleshoot ...................................................................................................................................... 85
Shutdown System.............................................................................................................................. 90
Digital Analyzer Maintenance............................................................................................................... 91
System Setup ..................................................................................................................................... 92
System Software................................................................................................................................ 95
Troubleshoot ...................................................................................................................................... 96
User Profile ......................................................................................................................................... 97
System Information ........................................................................................................................... 97
Disk Cleanup....................................................................................................................................... 97
Shutdown System.............................................................................................................................. 99
Cleaning.................................................................................................................................................. 99
Prep Station........................................................................................................................................ 99
Digital Analyzer.................................................................................................................................. 99
Disposal of Electronic Equipment........................................................................................................ 99
Symbols and Definitions......................................................................................................................... 100

nCounter Pro Analysis System User Manual SEV-00184-01
FOR RESEARCH USE ONLY. Not for use in diagnostic procedures.
6
Introduction
Product Use Limitations
The nCounter Pro Analysis System is intended for applications for which approval/clearance is not
required and for research use. This system may only be used with NanoString’s nCounter reagents.
See the documentation that accompanies the reagents for information regarding performance and
sample type limitations.
Product Components
The nCounter Analysis System consists of two instruments: The Prep Station and the Digital
Analyzer. A power cable is included with each instrument. The Prep Station also includes a pipette
tip rack, a liquid waste container, a solid waste container, and silicone grease. Customers may
expand the system by adding additional Prep Stations.
Overview of the Procedure
1.
After sample processing and hybridization has been completed according to the assay or reagent
instructions, samples are loaded onto the Prep Station, where they are purified and immobilized
onto the internal surface of a sample cartridge. This process takes 2–3 hours, depending on the
number of samples run and the sensitivity setting selected.
2.
The sample cartridge is then transferred to the Digital Analyzer for imaging and analysis.
3.
During processing with the nCounter Analysis System, email alerts may be used to track sample
status if the system has been networked and properly configured (optional).
4.
Finally, results are available for download directly from the Digital Analyzer.
Online Training at NanoString University
NanoString University is an online training platform for instructional videos and documents to
accompany your NanoString instrument and assays. Create a free account at
https://university.nanostring.com.

SEV-00184-01 nCounter Pro Analysis System User Manual
FOR RESEARCH USE ONLY. Not for use in diagnostic procedures.
7
Manual Conventions
The following conventions are used throughout this manual and are described for your reference.
NOTE: This notation indicates general information that may be useful for improving assay
performance. These notes may clarify other instructions or provide guidance to improve
the efficiency of the assay workflow.
IMPORTANT: This notation indicates important information that is critical to ensure a
successful assay. Following these instructions may help improve the quality of your data.
CAUTION: This notation indicates the potential for bodily injury or damage to the
instrument if the instructions are not followed correctly. Always carefully read and follow
the instructions accompanied by this symbol to avoid potential hazards.
Instrument Specifications
Test Lanes per Run
1–12
Weight
Prep Station 5s: 150 lbs/68 kg
Digital Analyzer 5s: 265 lbs/120 kg
Dimensions (W x D x H)
Prep Station 5s: 35.0 x 26.4 x 24.6 in/89 x 67 x 63 cm
Digital Analyzer 5s: 26 x 26 x 19 in/66 x 66 x 48 cm
Power Requirements
100–240 VAC, 610 VAC
Fuse
8A (100–120 VAC) or 4A (200–240 VAC)
Environmental Requirements
Temperature: 18–28°C
Humidity: < 80% relative humidity (non-condensing)
Text Style
Meaning
Bold
Bold text is typically used to highlight a specific button, keystroke, or menu option. Bold text
may appear elsewhere to highlight important text or terms.
Italic Italic text is typically used to highlight references to another section of the manual. Italic text
may also be used to highlight references to other manuals or instructional material. These are
often accompanied by a hyperlink that will take you directly to the referenced document or
section.

nCounter Pro Analysis System User Manual SEV-00184-01
FOR RESEARCH USE ONLY. Not for use in diagnostic procedures.
8
Safety Information (English)
The nCounter Analysis System may only be operated by appropriately trained, professional users.
NanoString recommends that all users read and understand this manual prior to attempting to
operate the system. Keep this manual with the instruments for easy access to instructions and safety
information. Failure to comply with the instructions in this manual may pose a dangerous risk to the
operator and void the manufacturer’s warranty.
•The Digital Analyzer is a Class 1 laser product. The instrument contains an internal Class 2 laser
barcode reader. Class 2 laser radiation exposure is possible while the Digital Analyzer cover is
opened. Do not stare into the barcode reader laser beam.
•The Prep Station is a piece of electrical equipment for measurement, control, and laboratory
use. It contains high voltage and heater modules indicated by symbols on the deck. Avoid
contacting the heater module and electrodes. The instrument is equipped with a safety
interlock that will prevent voltage from being applied while the door of the instrument is open.
•Do not use this device in close proximity to sources of strong electromagnetic radiation or
vibration, as it may interfere with proper operation.
•Do not attempt to install, move, or disassemble the instrumentation.
•Do not override the door sensors (pinch hazard exists).
•Ensure that all consumables are properly inserted into the system prior to starting.
•Operate the system using only NanoString nCounter reagents in accordance with their
indications for use.
•Wear gloves while operating or performing user maintenance on the instrumentation.
•Do not attempt to wash the Prep Station’s electrodes or allow water or other solvents to come
into contact with the electrodes.
•If it becomes necessary to wash either instrument’s touchscreen, use a damp cloth to gently
wipe the surface. Do not use excessive water or other solvents, which may damage the screen.
Caution Symbols
BIOHAZARD: Potential hazardfrom a biologicalsource exists.If you chooseto use biohazardous materials on yourPrep Station,
the instrument may become contaminated with biohazardous materials. Please affix the proper warning labels to your Prep
Station if you use biohazardous inputs. Be careful not to touch this area withoutgloves or other personal protective equipment.
ELECTRICAL HAZARD
CAUTION HOT SURFACE

SEV-00184-01 nCounter Pro Analysis System User Manual
FOR RESEARCH USE ONLY. Not for use in diagnostic procedures.
9
Informations de Sécurité (Français)
Le système d’analyse nCounter ne peut être utilisé que par des professionnels dûment formés.
NanoString recommande que tous les utilisateurs lisent et comprennent ce manuel avant toute
tentative d’utilisation du système. Garder ce manuel à proximité des instruments pour pouvoir
accéder facilement aux instructions et aux informations de sécurité. Le non-respect des instructions
décrites dans ce manuel peut présenter un risque élevé pour l’opérateur et invalider la garantie du
fabricant.
•L’analyseur numérique est un produit laser de classe 1. L’instrument contient un lecteur de codes-barres laser
de classe 2 lecteur interne. Une exposition à des rayonnements laser de classe 2 est possible lorsque le capot
de l’analyseur numérique est ouvert. Ne pas fixer du regard le faisceau laser d’un lecteur de codes-barres.
•La station de préparation est un équipement électrique pour la mesure, le contrôle et l’utilisation en
laboratoire. Celle-ci utilise des modules chauffants et de la haute tension indiquées par des symboles sur le
châssis. Évitez tout contact avec le module chauffant et les électrodes. L’instrument est doté d’un
mécanisme de verrouillage de sécurité qui empêche l’application d’une tension pendant que la porte de
l’instrument est ouverte.
•Ne pas utiliser ce dispositif à proximité de sources de fortes vibrations ou radiations électromagnétiques, car
celles-ci peuvent interférer avec le bon fonctionnement de l’équipement.
•Ne pas essayer d’installer, de déplacer ou de démonter les instruments.
•Ne pas court-circuiter les capteurs de la porte en raison des risques de pincement.
•S’assurer que tous les consommables sont correctement insérés dans le système avant de commencer une
procédure.
•N’utiliser le système qu’avec les kits de test nCounter de NanoString et conformément à leur mode d’emploi.
•Porter des gants pendant l’utilisation et la maintenance des instruments.
•Ne pas essayer de laver les électrodes de la station de préparation et éviter que de l’eau ou tout autre
solvant entre en contact avec les électrodes.
•Ne pas essayer de laver l’écran tactile des instruments et éviter que de l’eau ou tout autre solvant entre en
contact avec les écrans tactiles.
Symboles Attention
BIOHAZARD: Existence d’un danger potentiel provenant d’une source biologique. Si vous choisissez d’utiliser du matériel
biologique
dangereux sur votre station de préparation, l’instrument peut être contaminé par ce matériel à risque biologique. S’ il
vous
plaît apposer l’étiquetage de mise en garde appropriée à votre station de préparation si vous utilisez des échantillons
biologiques
dangereux. Faites attention de ne pas toucher cette zone sans gants ou sans autres équipements de protection
personnelle.
RISQUE ÉLECTRIQUE
ATTENTION SURFACE CHAUDE

nCounter Pro Analysis System User Manual SEV-00184-01
FOR RESEARCH USE ONLY. Not for use in diagnostic procedures.
10
Hardware Overview
General Information
The instrument serial number and compliance
information can be found on the rating plate on
the back panel of each instrument (Figure 1).
Please refer to the rating plate and declaration
of conformity (EU only) for compliance
information.
Figure 1: Serial number and compliance information
for the Prep Station (left) and Digital Analyzer (right).
Both instruments contain a touchscreen to enable operation of the instrument. The touchscreen
enables the user to operate the system by touching a selection on the screen. There are several
buttons that appear in the touchscreen user interface. The Main Menu for each instrument is shown
in Figure 2.
Figure 2: Main Menu on the touchscreens of the Prep Station (left) and the Digital Analyzer (right).

SEV-00184-01 nCounter Pro Analysis System User Manual
FOR RESEARCH USE ONLY. Not for use in diagnostic procedures.
11
NOTE: The Prep Station and the Digital Analyzer are stand-alone units. These instruments do not
require connection to a personal computer and are not networked to one another. Connecting the
Digital Analyzer to anetwork is optional and enables data delivery to the user via a network connection.
Likewise, if the Prep Station is networked, then notifications can be sent to users. The instruments do
not communicate with each other.
Prep Station
The Prep Station is a multi-channel pipetting robot that processes samples to prepare them for data
collection on the Digital Analyzer. The instrument performs liquid transfers, magnetic bead
separations, and immobilization of molecular labels on the sample cartridge surface (Figure 3).
Prior to placing samples in the
Prep Station, samples need to be
hybridized according to the
protocol outlined in the
appropriate user manual (e.g.
nCounter miRNA Assay Manual
(MAN-C0009) or nCounter Gene
Expression CodeSet RNA
Hybridization Protocol (MAN-
10056)). On the Prep Station deck,
hybridized samples are purified
and immobilized in a Sample
Cartridge for data collection
(Figure 4).
All consumable components and
reagents required for sample
processing on the Prep Station are
provided in the nCounter Master
Kit and must be loaded onto the
Prep Station deck prior to use. No
reagent preparation or dilutions
are required. The Prep Station can
process up to 12 lanes per run in
approximately 2.5 to 3 hours
depending on the protocol used.
Figure 4:
The Prep Station deck.
Figure 3:
The nCounter Prep Station.

nCounter Pro Analysis System User Manual SEV-00184-01
FOR RESEARCH USE ONLY. Not for use in diagnostic procedures.
12
Digital Analyzer
The nCounter Digital Analyzer is a
multi-channel epifluorescence
scanner specifically configured for
use with NanoString’s nCounter
Cartridges. Up to 6 cartridges can be
loaded on the Digital Analyzer for
sequential processing (Figure 5).
The Digital Analyzer collects data by
taking images of the immobilized
fluorescent reporters in the sample
cartridge with a CCD camera
through a microscope objective lens.
At the standard data resolution, 280
fields of view (FOV) are collected
per flow cell (cartridge lane) yielding
data consisting of hundreds of
thousands of target molecule counts. The number of images taken corresponds to the number of
reporters counted. This determines, in part, the dynamic range and level of sensitivity in the system.
Images are processed internally, and each lane produces one RCC (Reporter Code Count) file
containing the counts for that lane. The RCC files are downloaded as a zipped folder of comma
separated value (CSV) files. These can be imported and analyzed using NanoString's nSolverTM
Analysis Software or other data analysis and visualization software packages, such as ROSALIND
cloud platform.
Figure 5:
The nCounter Digital Analyzer.

SEV-00184-01 nCounter Pro Analysis System User Manual
FOR RESEARCH USE ONLY. Not for use in diagnostic procedures.
13
Prep Station
Select Instrument Mode
After turning on the Prep Station, the first
screen to appear is titled ‘Select Instrument
Mode’ (Figure 6).
Press the green icon labeled NanoString® Life
Sciences to enter Life Sciences mode. The
system will load the application and present the
Main Menu (Figure 7).
Exit Life Sciences Mode
The user may exit Life Sciences mode by
pressing the exit button located at the bottom
of the Main Menu (Figure 7).
The ‘Exit Life Sciences Mode’ confirmation
screen will appear (Figure 8).
Press ok to exit Life Sciences mode and return
to the ‘Select Instrument Mode’ screen (Figure
6). Press cancel to return to the Main Menu.
Figure 6
: The Prep Station ‘Select Instrument
Mode’ screen.
Figure 7:
The Prep Station Main Menu in Life
Sciences mode.
Figure 8:
The Prep Station ‘Exit Life Sciences
Mode’ confirmation screen.

nCounter Pro Analysis System User Manual SEV-00184-01
FOR RESEARCH USE ONLY. Not for use in diagnostic procedures.
14
Digital Analyzer
Select Instrument Mode
After turning on the Digital Analyzer, the first
screen to appear is titled ‘Select Instrument
Mode’ (Figure 9). Press the green icon labeled
NanoString® Life Sciences to enter Life Sciences
mode.
If login settings are enabled, a Welcome screen
will appear, and the user will need to log in by
pressing main menu (Figure 10; see the section
on Enterprise Package settings in the Operating
the Digital Analyzer section).
After logging in, or if the login settings are not
enabled, the system will present the Main Menu
(Figure 11). The logout button will only appear if
a user is logged in.
Figure 9:
The Digital Analyzer ‘Select Instrument
Mode’ screen.
.
Figure 10:
The Digital Analyzer ‘Welcome’ screen.
Figure 11:
The Digital Analyzer Main Menu in Life
Sciences mode.

SEV-00184-01 nCounter Pro Analysis System User Manual
FOR RESEARCH USE ONLY. Not for use in diagnostic procedures.
15
Exit Life Sciences Mode
The user may exit Life Sciences mode by
pressing the exit button located at the bottom
of the Main Menu (Figure 11).
The ‘Exit Life Sciences Mode’ confirmation
screen will appear (Figure 12).
Press ok to exit Life Sciences mode and return
to the ‘Select Instrument Mode’ screen (Figure
9). Press cancel to return to the Main Menu.
Figure 12:
The Digital Analyzer ‘Exit Life Sciences
Mode’ confirmation screen.

nCounter Pro Analysis System User Manual SEV-00184-01
FOR RESEARCH USE ONLY. Not for use in diagnostic procedures.
16
Operating the Prep Station
Prior to Initiating a Run
Waste Removal
Prior to starting a new run, ensure that the waste containers have been emptied. Empty waste
containers are required for every run.
1.
Remove the combined waste receptacle by lifting it straight up and out of the Prep Station.
2.
Remove the liquid waste container from the combined receptacle by using the latch on the front
and dispose of the liquid appropriately.
3.
Verify that the plastic rack holding the used piercers, tip sheaths, prep plates, and strip tubes
from the previous run have all been removed from the deck.
CAUTION: If waste containers are not emptied, tips could come into contact with waste
liquids and contaminate samples, or excess tips could pile up and cause a system
malfunction.
AVERTISSEMENT: Si les récipients à déchets ne sont pas vidés, les embouts peuvent entrer
en contact avec des déchets liquides et contaminer les échantillons, ou un trop grand
nombre d’embouts pourrait s’accumuler et entraîner un dysfonctionnement du système en
matière du sécurité.
CAUTION: Used plastic ware, such as reagents, cartridges, and pipetting tips, must be
collected and disposed of properly in accordance with local safety regulations and
laboratory procedures.
AVERTISSEMENT: Les récipients en plastique usagés, tels que les plaques de réactifs, les
cartouches et les embouts de pipetage,doivent être collectés et misaurebut correctement
selon les procédures du laboratoire et les règlementations locales en matière du sécurité.
CAUTION: Do not dispose of biohazardous samples in the sink or other drain. Dispose of
all samples in accordance with local safety regulations and laboratory procedures.
AVERTISSEMENT: Ne pas verser les échantillons à risque biologique dans l’évier ou
autres canalisations sanitaires. Jeter tous les échantillons selon les lois locales de sécurité
et les règles de laboratoire.

SEV-00184-01 nCounter Pro Analysis System User Manual
FOR RESEARCH USE ONLY. Not for use in diagnostic procedures.
17
Consumables Required
All the consumable items required to run the Prep Station are included in the nCounter Master Kit.
This kit contains the reagents and consumables required to process 1, 4 or 16 cartridges depending
on the Master Kit size purchased (12-rxns, 48-rxns, or 192-rxns). No reagent preparation or dilutions
are required.
For each cartridge (12 lanes), the components of the nCounter Master Kit include:
•Two nCounter Prep Plates (foil-sealed, 96-well plates of Prep Station reagents; stored at 4°C;
also referred to as Reagent Plates)
•One nCounter Cartridge (foil-sealed pouch; stored at -20°C)
•One nCounter Prep Pack (stored at room temperature)
oRacked Tips and Foil Piercers
o12-Tube Strips and Caps
oTip Sheaths
oCartridge Adhesive Covers
oHybridization Buffer

nCounter Pro Analysis System User Manual SEV-00184-01
FOR RESEARCH USE ONLY. Not for use in diagnostic procedures.
18
Initiating a Run
The following workflow begins after samples have been hybridized overnight, according to the
protocol outlined in the user manual specific to the assay (such as the nCounter miRNA Assay Manual
(MAN-C0009) or the nCounter Gene Expression CodeSet RNA Hybridization Protocol (MAN-
10056)). On the Prep Station deck, hybridized samples are purified and immobilized in a Sample
Cartridge for data collection (Figure 4).
1.
To set up a new run, press start processing
from the Main Menu (Figure 13).
2.
The ‘Select Protocol’ screen will appear (Figure
14). Select one of three protocols for processing
samples:
oHigh Sensitivity: Recommended for most
samples. Increases the binding of all
molecules to the slide by ~2-fold and adds
an extra 30 minutes to the processing time.
oStandard: Suitable for situations where the
sample loaded per lane exceeds the
recommended amount, where the
experimental conditions are known to be
near the saturation point of the instrument,
or where the user is attempting to
maximize the throughput of the
instrument.
oLegacy Protocol: Consistent with Prep Station software versions released before 2015; can
be used to maintain consistency on long-term projects. Used for a Maintenance Dry Run.
NOTE: All protocols use the same reagents.
3.
Press next.
Figure 14:
The ‘Select Protocol’ screen.
Figure 13:
The Main Menu.

SEV-00184-01 nCounter Pro Analysis System User Manual
FOR RESEARCH USE ONLY. Not for use in diagnostic procedures.
19
4.
The ‘Select sample tubes’ screen will
appear (Figure 15). Select the sample
positions that will be processed. Green
tubes will be processed, and grey tubes will
not be processed. If processing fewer than
12 tubes, begin with tube 1. Press next.
NOTE: Each prep plate contains enough
reagents for 6 cartridge lanes. If processing
more than 6 lanes, use two prep plates. If
processing 6 lanes or less, use only one prep
plate, placed in the front position, and
ensure the hybridized samples are in tubes
1-6 of the 12-tube strip.
Any number of lanes between 1–12 will still consume an entire Cartridge.
5.
The ‘Warm Reagents & Cartridge’ screen
will appear (Figure 16). Cartridges and
reagent plates (prep plates) (Figure 17)
must be at room temperature prior to
processing. Remove the prep plates from
storage at 4°C and the nCounter
Cartridges from storage at -20°C. Allow
them to equilibrate to room temperature
for 10–15 minutes.
NOTE: If the cartridges and prep plates are
not at room temperature prior to use, assay
variability may increase. Do not open the
cartridge pouch until it has reached room
temperature. This will prevent
condensation on the cartridge.
Figure 15:
The ‘Select sample tubes’ screen.
Figure 16:
The ‘Warm Reagents & Cartridge’
screen
.
Figure 17:
A sealed cartridge (left) and reagent plate (‘prep plate’) (right).

nCounter Pro Analysis System User Manual SEV-00184-01
FOR RESEARCH USE ONLY. Not for use in diagnostic procedures.
20
Centrifuge the prep plates at 2000gfor 2 minutes to collect all liquids in the bottom of the wells
prior to loading the prep plates onto the Prep Station deck. After centrifugation, visually inspect
plates to ensure that reagents have collected at the bottom of each well. Press next.
6.
The ‘Waste Receptacles’ screen will appear
(Figure 18). Remove the liquid waste container
from the combined receptacle and dispose of
the liquid appropriately. See the previous section
on Waste Removal for further information.
Tips should be discarded into the appropriate
waste stream as outlined in the local
organization’s laboratory procedures.
If the system is not being used to handle
biohazardous samples, liquid waste may be
disposed of in the sink or other drain. Press next.
7.
The ‘Reagent Plate’ screen will appear
(Figure 19). Remove the clear plastic lids and
place the prep plates on the deck. Make sure
plates are oriented with the label facing the
operator and that they are flush with the deck
surface by aligning the plate on the positioning
pin and pressing down firmly near the plate
catch (Figure 20). If running 6 or fewer lanes,
only the front plate needs to be loaded onto the
deck. Press next.
NOTE: If the plate is placed incorrectly, the Prep
Station will pause the protocol until the user
intervenes.
IMPORTANT: Do not remove the foil or pierce the wells on the reagent plate. The Prep
Station will pierce the wells during processing.
Figure 18:
The ‘Waste Receptacles’ screen.
Figure 19:
The ‘Reagent Plate’ screen.
Table of contents
Other nanoString Laboratory Equipment manuals