NI PXI-5660 Getting Started Guide 2 ni.com
This icon denotes a caution, which advises you of precautions to take to avoid injury, data loss,
or a system crash. When this symbol is marked on a product, refer to the Read Me First: Safety
and Electromagnetic Compatibility for information about precautions to take.
When symbol is marked on a product, it denotes a warning advising you to take precautions
to avoid electrical shock.
When symbol is marked on a product, it denotes a component that may be hot. Touching this
component may result in bodily injury.
bold Bold text denotes items that you must select or click in the software, such as menu items and
dialog box options. Bold text also denotes parameter names.
italic Italic text denotes variables, emphasis, a cross-reference, or an introduction to a key concept.
Italic text also denotes text that is a placeholder for a word or value that you must supply.
monospace Text in this font denotes text or characters that you should enter from the keyboard, sections
of code, programming examples, and syntax examples. This font is also used for the proper
names of disk drives, paths, directories, programs, subprograms, subroutines, device names,
functions, operations, variables, filenames, and extensions.
monospace
Italic text in this font denotes text that is a placeholder for a word or value that you must
italic
supply.
Platform Text in this font denotes a specific platform and indicates that the text following it
applies only to that platform.
1. Verifying System Requirements
Your system must meet certain requirements to use NI RF vector signal analyzers. For more information
about minimum system, recommended system, and supported application development environments
(ADEs), refer to the NI RF Signal Analyzers Readme, which is available with the NI-RFSA software.
Note After you install NI-RFSA, you can access the NI RF Signal Analyzers Readme at Start»
All Programs»National Instruments»NI-RFSA»Documentation or online at ni.com/
downloads.
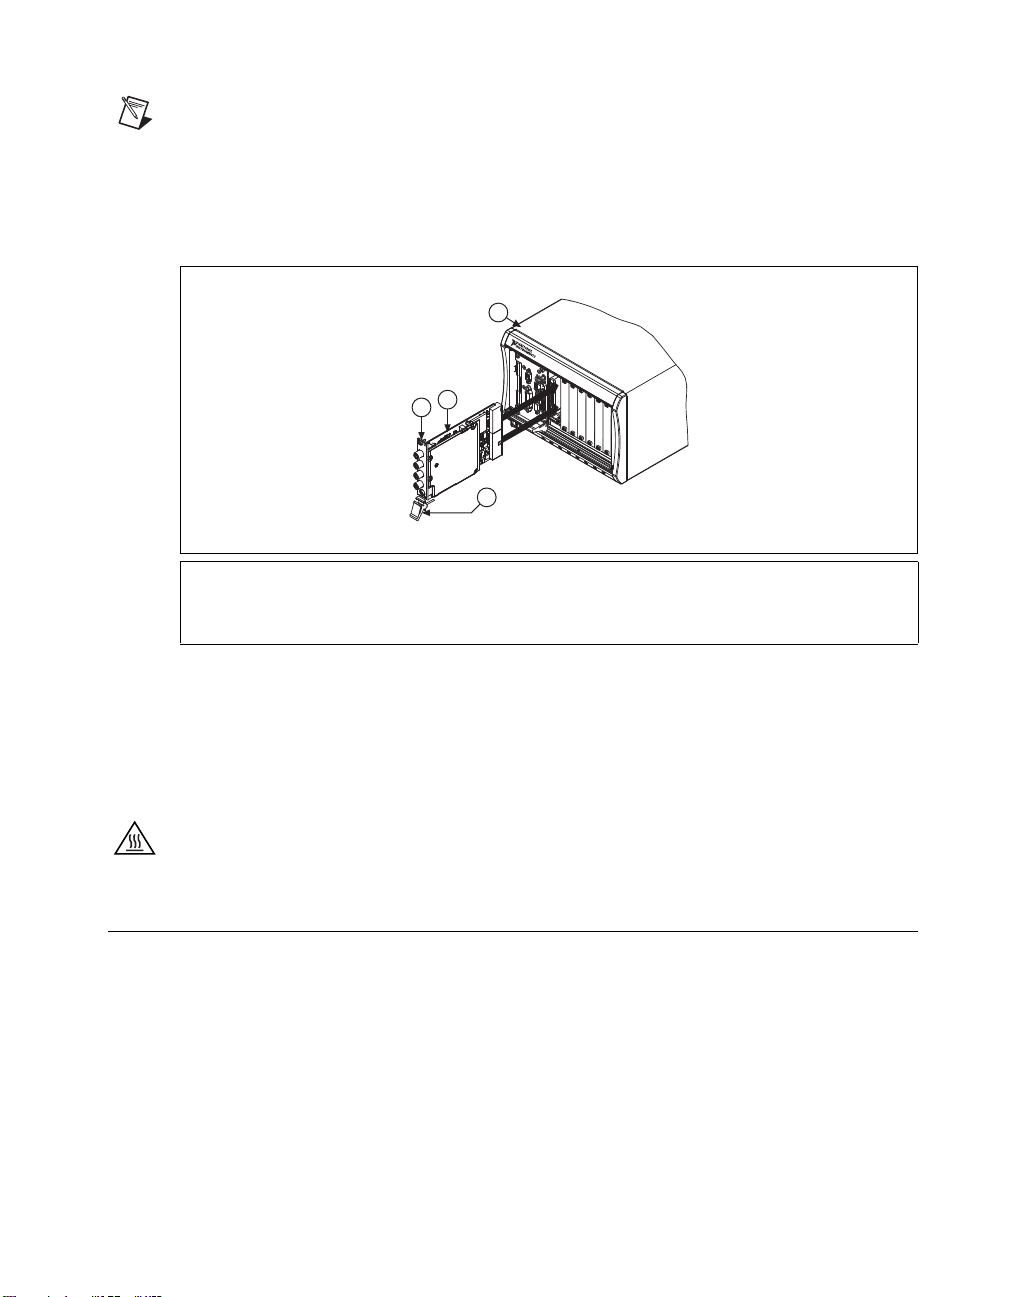
2. Unpacking
RF vector signal analyzer hardware modules ship in antistatic packages to prevent damage from
electrostatic discharge (ESD). Because ESD can damage several components of the hardware modules,
store all modules in the antistatic envelopes when not in use.
Caution Never touch exposed connector pins.
To avoid damage when handling the RF vector signal analyzer hardware modules, take the following
precautions:
• Ground yourself using a grounding strap or by touching a grounded object.
• Touch the antistatic package to a metal part of your computer chassis before removing the hardware
module from the package.
Remove each hardware module from the package and inspect it for loose components or any signs of
damage. Notify NI if any hardware module appears damaged in any way. Do not install a damaged
module into your system.