Page 5 Page 10
15-20. PRESET STATION MEMORYAND TOP/>||, INT,RPT, RDM BUTTONS
a) During radio mode:
When pressed short,these buttons select a preset station directly.
If the six buttons are pressed for more than 2 seconds, the station
currently being listened to is memorized into the selected preset button.
b) During CD/MP3/WMA mode:
Press the TOP/>|| buttonbriefly to interrupt the playback of the disc.
Press again toresume normal playback.
Press the TOP/>|| buttonand hold for approximately 0.5 seconds to play
the first track of the current disc.
Press the INT button to play the first 10 seconds part of each track, and the
LCD will display INT ON.
Press again to stop scan, while the currently selected track will be played,
and the LCDwill display INT OFF.
Press the RPT button to play the current track repeatedly, and the LCD will
display RPT ONE.
Press again tocancel this function, and the LCD will display RPT OFF.
During MP3/WMAmode, press the RPT button twice continuously to play the
tracks in the current folder repeatedly and RPT ABM will be visible on the LCD.
Press the RDM button to play all tracks on disc in random order, and the LCD
will display RDM ON.
Press again tocancel this function, and the LCD will display RDM OFF.
c) During thenormal playback of CDs in MP3/WMAformat:
Press the radio preset button 6 and 5 to move up and down10 tracks at a time.
21. LOC BUTTON
Radio station search mode is divided by this LO/DX switch, this button can be
used to control an attenuator in the tuner during search. The detecting level
of seek, scan, auto-memory will be reduced as much as the attenuated level
of the tuner. In radio mode, press the LOC button to change local reception or
distance reception.
Note: This button is only for FM reception. In AM mode, LOC is void.
22. SCAN BUTTON
Press the SCN button to scan the radio frequency. If a valid signal has detected,
the current frequency will be hold and blinked for 5 seconds, then press SCN
again to stop scan and remain the current frequency; otherwise, the radio will
go on to scan the other radio frequency five seconds later.
23. AUX INPUT JACK
Press the mode button to select auxiliary input playing mode. You can connect
any matched externalaudio device tothe auxiliary input jack. Use the volume
control to adjust volume.
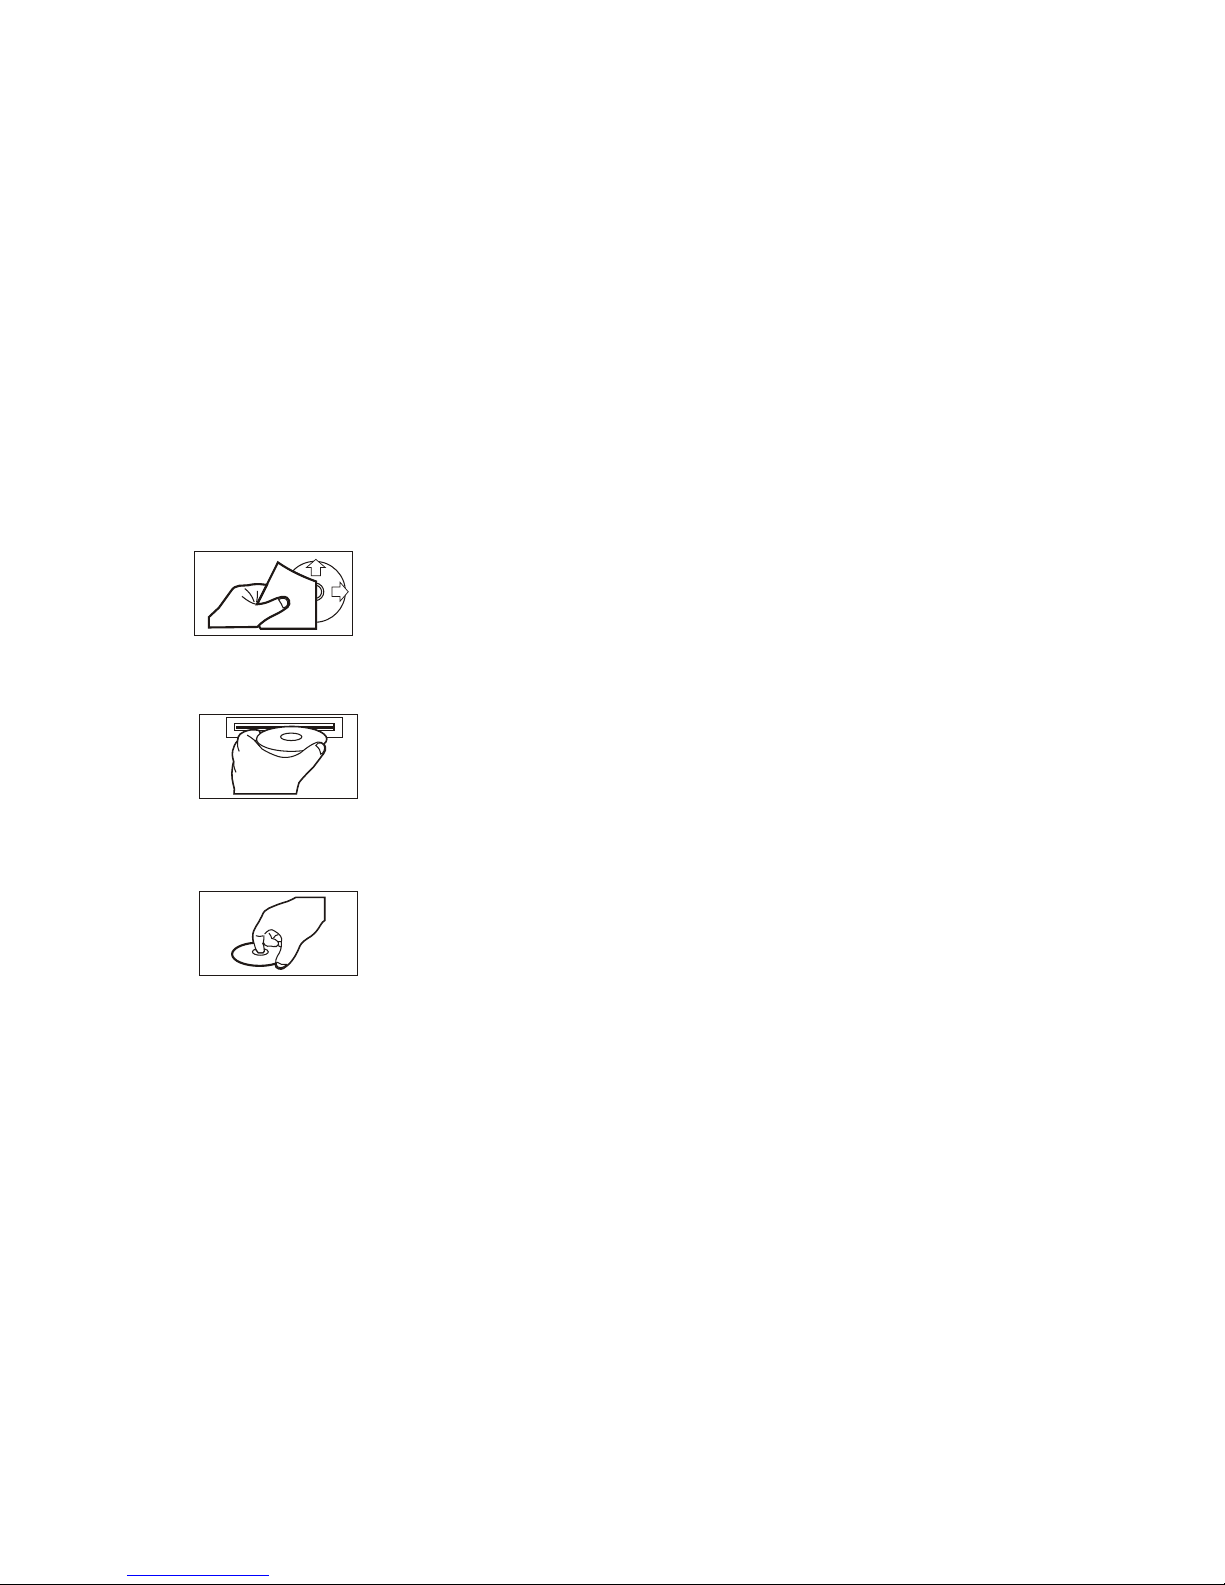
24. EJECT KEY
In the power on state, the loaded disc can be ejected by pressing the EJ key.
25. CD SLOT
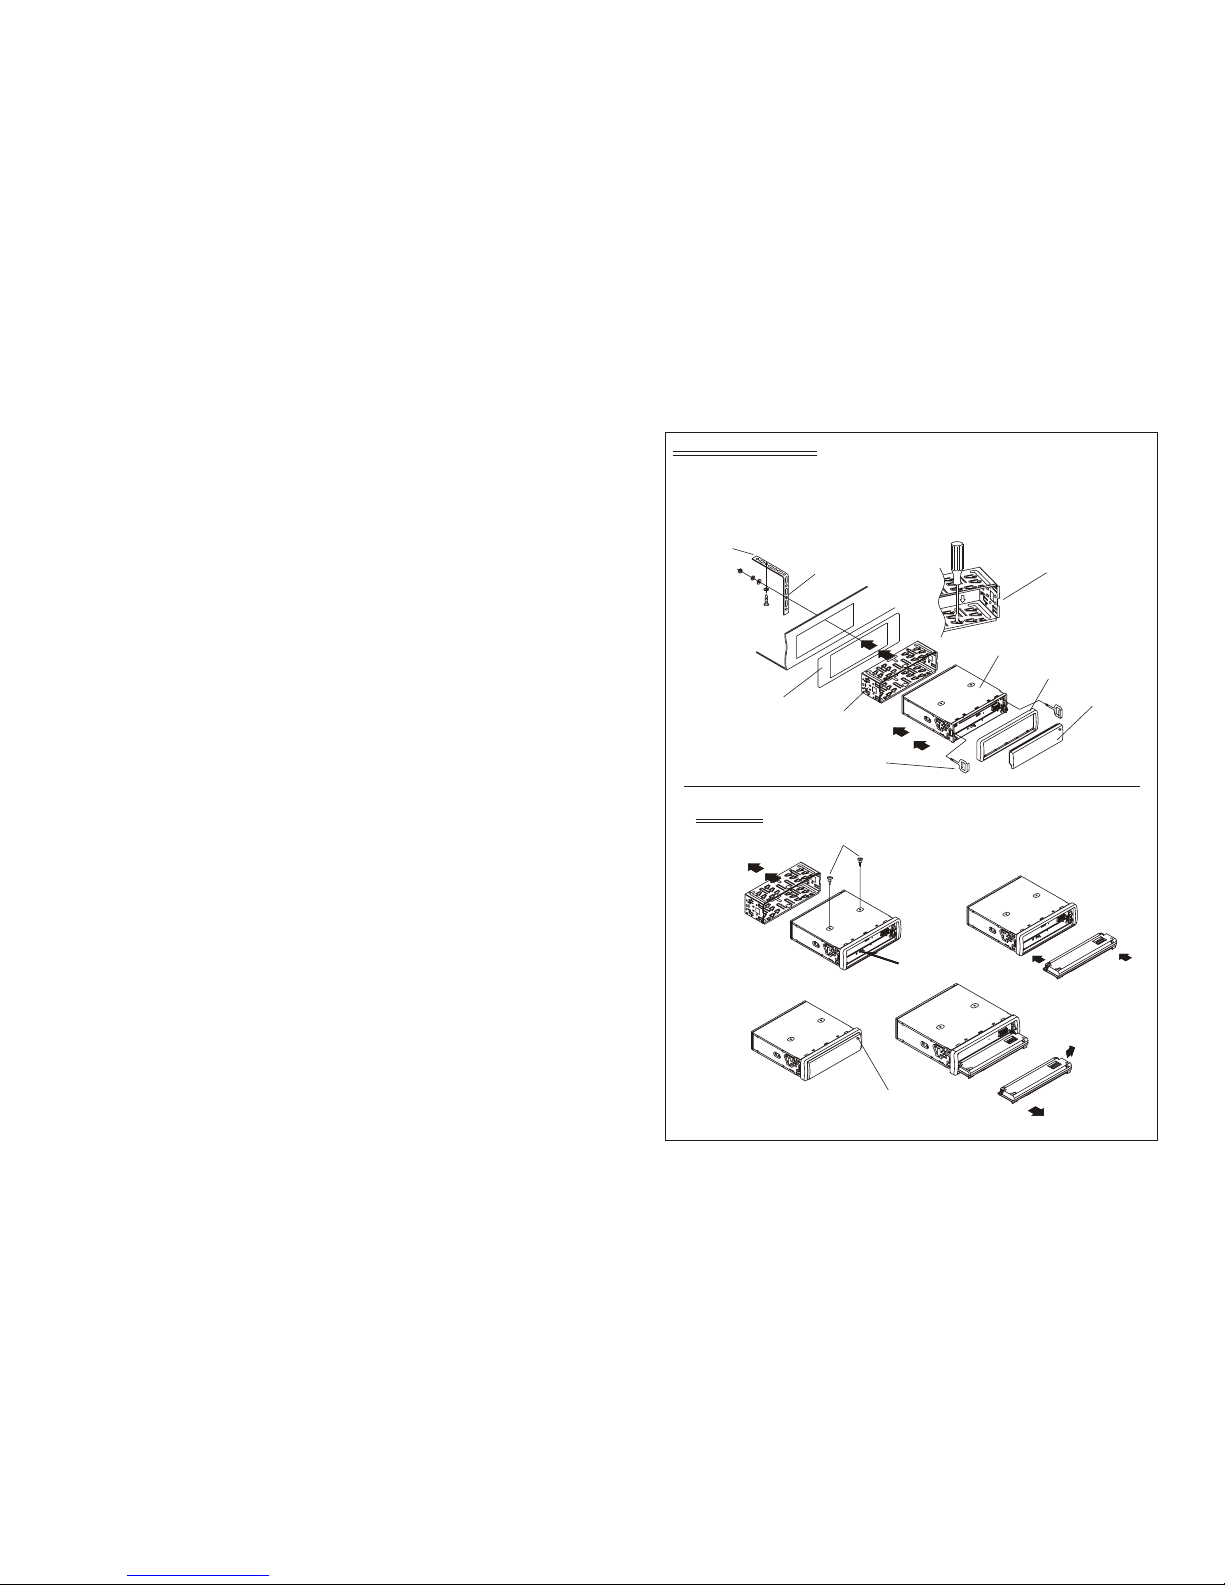
INSTALLATION METHOD
This is an anti-theft installation method.
The main unit wears a METAL MOUNTING SLEEVE.
Please connect the wiring, eg, the Power Supply, the Speakers and the Antenna
according to the requirements of this Instruction Manual, then install the metal
mounting sleeve into the car as per the diagram illustrated below.
To boost up the capability of anti-jamming,
please make sure fix tightly the metal support
strap into the metal joint that connect to the
chassis of the car.
METAL SUPPORT STRAP
METAL MOUNTING SLEEVE
DASHBOARD
To remove the unit out of the metal mounting sleeve,
insert the two supplied KEYS into the left and right side
slots of the chassis at the same time. Then pull the chassis
out of the metal mounting sleeve as shown in the right
illustration.
FRONT PANEL
PLASTIC TRIM RING
UNIT CHASSIS
Bend the tabs on the metal mounting
sleeve against the DASHBOARD with
a screwdriver.
NOTE
To attachthe removable faceplate backto the
unit chassis, firstly jointhe left guide blockhole
to the left cylinder, then join theright guide block
hole and the rightcylinder, finally flipthe front
panel up to combinewith chassis.
Before mounting and operating
the CD player,remove the metal
mounting sleeve illustrated bythe
arrows.
Remove the two screwsthat
fix the CD deckmechanism player
during transportation before
mounting the player.
RESET BUTTON
Push this reset buttonwith a cuspidal
object to renovate thedistorted program
once the program isdistorted.
To removethe front panel,
after flip down thefront
control panel, push itrightwards
firstly, then drawthe left of
the front panel outwards.
Before inserting or ejectingdisc, press
the OPEN button toflip down the faceplate.