Page 10
Page 5
12. PRESET STATION MEMORYAND TOP/>||, INT,RPT, RDM BUTTONS
a) During radio mode:
Go to any preset station by pressing one of the 6 preset station buttons (1-6).
If one ofthese buttons is pressed for more than 2 seconds, the station currently
being listened to will be memorized into the selected preset button.
b) During disc, SD or USB mode:
1) Press the TOP/ >|| button briefly to interrupt the playback of the disc, SD
or USB. Press again toresume normal playback of the disc, SD or USB.
Press the TOP/>|| button and hold forapproximately 0.5 seconds to play the
first track of the disc,SD or USB.
2) Press theINT button to sample thefirst 10 seconds part of each track, and the
INT ON will be visible on the LCD display.
In the processof INT, pressINT button again tostop sampling and to continue
playing the currenttrack, and the LCD will display INT OFF.
3) Press the RPT button once toplay the current track repeatedly, and theRPT
ONE will be visible on the LCD display.
During MP3/WMAdisc, SD or USB mode, press the RPT button twice
continuously to play the current folder repeatedly, and the RPT ABM will be
visible on the LCD display.
In the processof RPT, press RPTbutton again to stop playing repeatedly
mode and theLCD will display RPT OFF.
4) Press theRDM button to play all tracks on disc in random order, and the RDM
ON will be visible on the LCD display.
In the process of RDM, press RDM button again to stop playing in random
order and theLCD will display RDM OFF.
c) During thenormal playback of MP3/WMA disc, SD, USB:
Press the radio preset button6 and 5 to move up and down10 tracks at a time.
13. ST/MO BUTTON
In FM mode, press the ST briefly to select stereo or mono sound mode.
14. LOC/DX BUTTON
Radio station searchmode is dividedby this LOC/DX switch, this button can
be used tocontrol an attenuatorin the tuner during search.
In radio mode,press the LOCbutton to change local reception or distance
reception. Local mode improves reception in some areas where the signal
is too strong.
Note: This button is only for FM reception. In AM mode, LOC is void.
15. LOUDNESS BUTTON
When press shortly, the LOUD mode is turned on, its to enhance the basssound
effect when the volume level is low. Press again to cancel the loudness effect.
16. CLOCK BUTTON
Press the CLK button brieflyto display time for 5 seconds on thedisplay, and
then returns to its previous display unless the button is pressed again.
Then press the CLK buttonand hold formore than 1seconds until the real time
flashes on thedisplay. Then you can adjust HOURor MINUTE by rotating the
VOL knob.
INSTALLATION
To boost up the capability of anti-jamming,
please make sure fix tightly the metal support
strap into the metal joint that connect to the
chassis of the car.
METALSUPPORT STRAP
METAL MOUNTING SLEEVE
DASHBOARD
To remove the unit out of the metal mounting sleeve,
insert the two supplied KEYS into the left and right side
slots of the chassis at the same time. Then pull the chassis
out of the metal mounting sleeve as shown in the right
illustration.
FRONT PANEL
PLASTIC TRIM RING
UNIT CHASSIS
Bend the tabs on the metal mounting
sleeve against the DASHBOARD with
a screwdriver.
INSTALLATION METHOD
This is an anti-theft installation method.
The main unit wears a METAL MOUNTING SLEEVE.
Please connect the wiring, eg, the Power Supply, the Speakers and the Antenna
according to the requirements of this Instruction Manual, then install the metal
mounting sleeve into the car as per the diagram illustrated below.
NOTE
Before mounting and operating
the CD player,remove the metal
mounting sleeve illustrated bythe
arrows.
Remove the two screwsthat
fix the CD deckmechanism player
during transportation before
mounting the player.
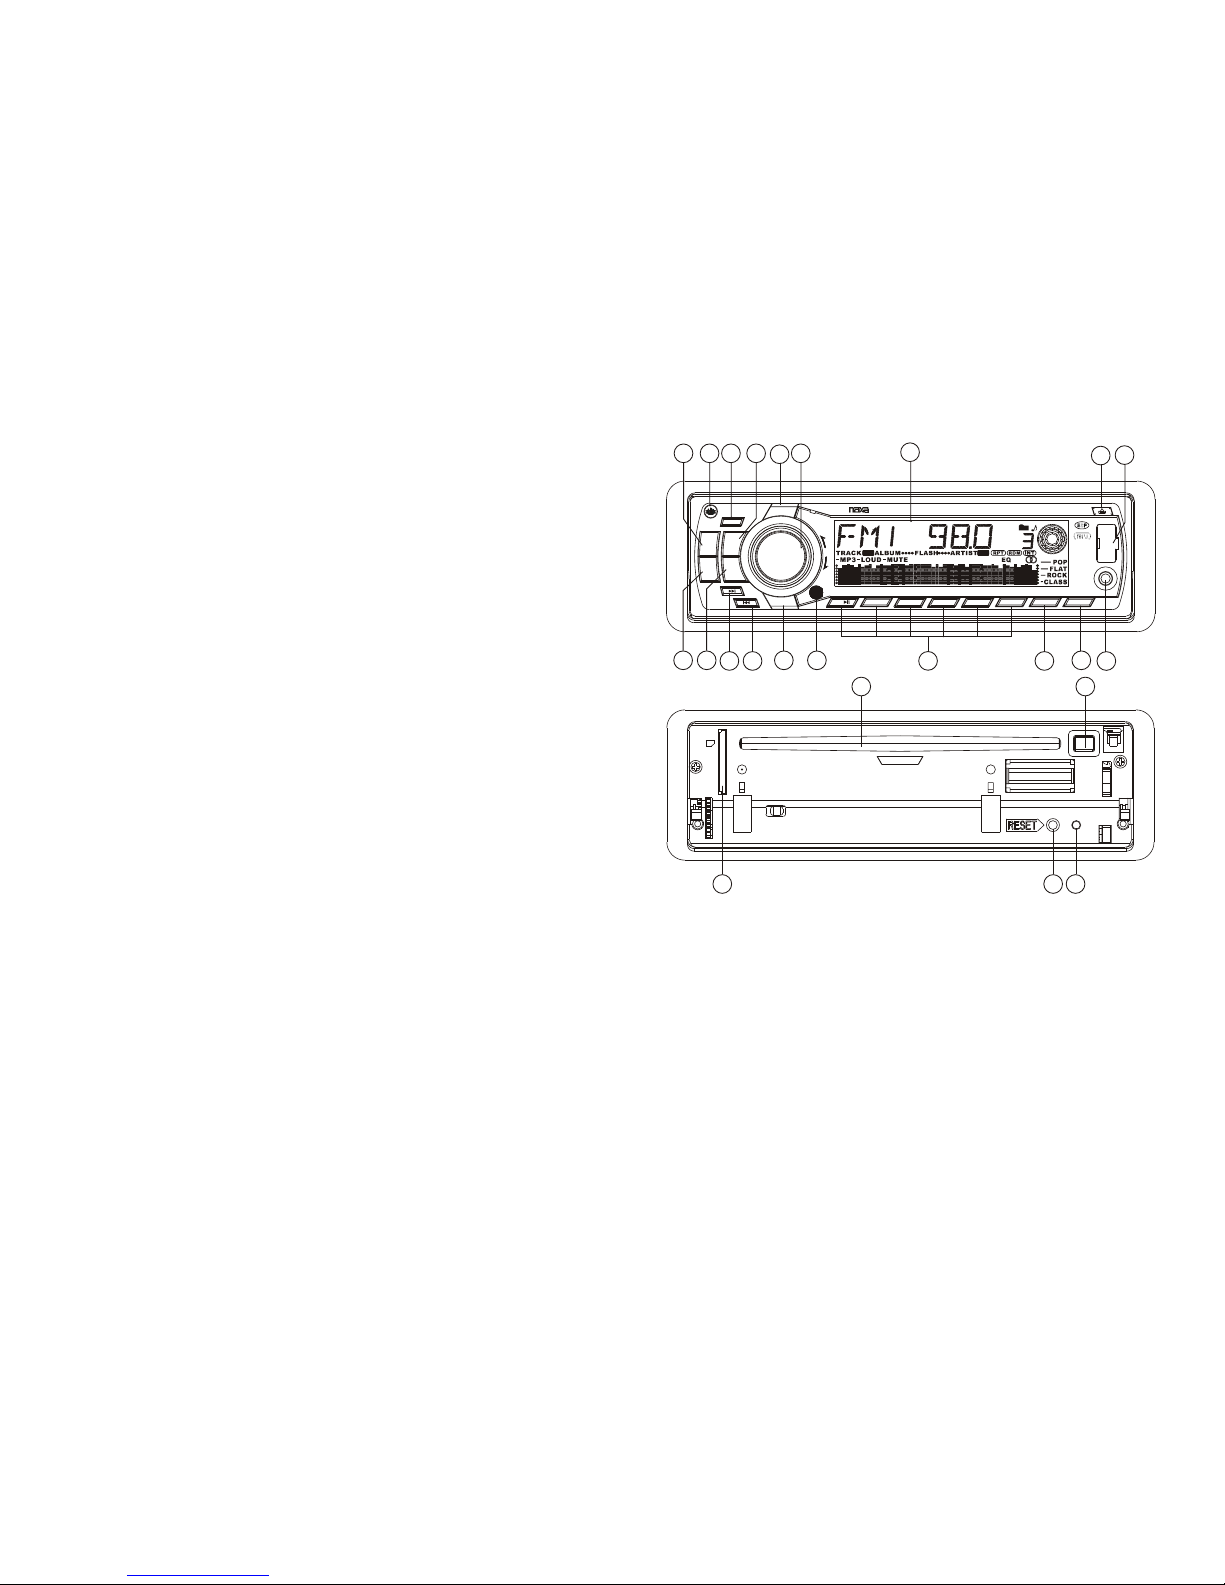
RESET BUTTON
EJECT KEY
Push this reset buttonwith a cuspidal
object to renovate thedistorted program
once the program isdistorted.