manuals.online logo
Brands
  1. Home
  2. •
  3. Brands
  4. •
  5. NCR
  6. •
  7. Controllers
  8. •
  9. NCR EPC4 User manual

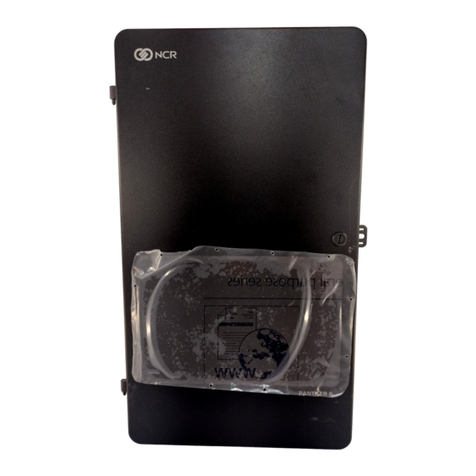
NCR EPC4 User manual

EPC4 Quick Reference Guide
Graphical Overview
Front View Rear View
Accessories Included
1 -6ft (2m) Power Cable 90°
(U.S. Models Only)
1 -15ft (5m) Network Cable
4–Power LED
Solid Red = AC plugged in but
not powered on
Solid Blue = Booting
Solid Green = After boot up
5–Status LED
Solid Red = Initial
Solid Green = After boot up
6–HDD LED
Blinking Blue = Activity
7–Network 1 LED
Blinking Orange = Activity
8–Network 2 LED
Blinking Orange = Activity
Internal Ports and Slots
1 –2x Network LAN 10/100/1000
Port, not powered
2 –4 x Serial Port RS232
3–2x Powered Serial Ports RS232
+12V/500mA each on RTS
4–4 x USB Ports +5V/500mA each
5–PCI-e Expansion Slot
6–SSD, MO-297 SATA 3.0Gb/s
Lock / Secure Enclosure
Recovery Utility
Pressing the Recovery Button on the rear of the unit will cause the EPC4
to boot to its Recovery Mode. This operation will automatically run a
check disk process to attempt to resolve any problems with the disk or
file system and then reboot into Normal Mode. A log of any changes will
be created by the check disk process.
Open Enclosure To Access Internal IO Ports
12345678
14 236 7 5
12
3
4 5
6
• To open enclosure, pull / push enclosure open latch toward the front IO.
• While the open enclosure latch is in the forward position, separate bottom and top housing.
• With EPC4 enclosure closed, pull out lock latch until “Locked” is
displayed
• Use one of the following to secure the device
• Standard Pad lock with a bolt diameter no less than .200” and no
greater than .280”
• Tamper Evident Zip Tie
• Kensington Lock
• Ensure Kensington lock is inserted through the rear IO and into the
Lock Latch
Back Panel Buttons and Ports
Front Panel Buttons and LED’s
1–LCD Display
2–LCD Display Control: NEXT
3–LCD Display Control: SELECT
1 –Power Socket 110-220V 50-60Hz
2–Power On/Off Button
3–Recovery Utility Button
4–DVI Port *
5–PCI-e Slot (Modem Optional)
6–Lock Latch
7–Cable Retention (Cables must route behind
door to be retained)
NCR P/N 497-0476345
Rev C
* Note: The DVI port should only be used for setup, maintenance and troubleshooting. It is not intended for use
during normal operation.
Follow the instructions given below to ensure the safe mounting of the EPC4
bracket on either a wall or under a counter.
• The AC outlet should be installed near the EPC4 and be easily accessible.
• Appropriate Hex or Philips head screw driver is required to seat screws.
Electric screw driver and applicable drill bits are required to create pilot
holes for either screw or wall anchor.
• Wall Mounting
• Secure wall mount bracket to a wall in the orientation shown to the
right
• If there are no studs available, then mount the bracket with four (4)
¼” diameter, 2 ¼” length hollow wall anchors.
• If there is a stud, then one vertical pair of mounting holes should be
mounted to a stud with ¼” diameter, 2” length wood screws. The
other hole pair should be mounted with hollow wall anchors.
• Under Counter Mounting
• Use caution mounting under a counter top not to penetrate the
surface. Do not mount to metal counters, or if the thickness of the
material is less than 1 inch.
• Use four (4) ¼” diameter, 1” length wood screws.
• Special notes about power supply cord when mounting the EPC4 under the
counter or on walls:
• The plug serves as the disconnect.
• Cord shall NOT be attached to the wall or any building structure.
• Cord must not pass through walls, ceilings, floors, or similar openings
in the building structure.
• Route cord away from any edges that can damage the cord.
Install the enclosure bracket to the EPC4 using 4 x of the supplied screws.
Orientation of bracket will be dependant on desired orientation of EPC4.
Optional PCI-e Expansion Usage
EPC4 Quick Reference Guide
Technical Overview
Support Information
EPC4 Product Highlights
Thank you for purchasing the EPC4!
• Robust lockable enclosure with internal I/O ports for enhanced security
• Dual core CPU, DDR3 RAM , & SATA SSD storage provide fast transaction processing
• Solid state design for maximum reliability and silent operation
• Industry standard connectivity including 4 x USB , 4 x serial, and 2 x powered serial
• 2x20 LCD display and front panel LEDs for easily determining device status
• Integrated universal power supply saves space and simplifies installation
• Dual Gigabit Ethernet ports for further isolation of credit network from store network
• PCI-e expansion slot for optional dial-up modem or other expansion
• Optional mounting bracket with quick release and padlock features
Optional Accessories
Visit NCR on the World Wide Web • http://www.ncr.com
•Mounting Bracket
•See optional mounting bracket
instructions
•Modem•PCI-e Expansion Riser Card
•See optional PCI-e expansion
usage instructions
Basic Troubleshooting
Problem Suggestions
The unit will not
power on
• Check to make sure the power cord is firmly plugged in to both the EPC4 and AC
power outlet.
• Press and release the power button to turn the EPC4 on. Do not hold the power
button down longer than one second. The power button is located on the back panel.
• Plug a different device into the A/C outlet to confirm the outlet is
powered.
No network
connectivity
• Check to see if the network cable is firmly plugged in to both the EPC4 and network
outlet.
• Check for network link on the front panel. The amber Network LED is illuminated when
the link is active.
• Check network settings to make sure they are configured correctly.
Optional Mounting Bracket Usage and Installation
Attach the EPC4 with enclosure bracket to the wall bracket as shown (Note: Optional locking feature on
wall bracket)
• The optional PCI-e riser card must be used
• Plug the PCI-e riser card into the expansion slot (shown to the right).
• Secure the supporting bracket to the chassis using supplied screw.
• Plug the PCI-e expansion card into the riser card and secure to the
PCI-e slot on the back panel using supplied nut.
The EPC4 electronic payment controller utilizes a next generation Intel® Atom™ Dual Core Processor which
offers great performance with low power consumption for a more reliable design. Product highlights include:
NCR P/N 497-0476345
Rev C
EPC4 Quick Reference Guide
Technical Overview
Essential Safety Precautions
•To avoid a possibility of electrical shock, be sure to connect the power cord to the EPC4 before connecting it to the A/C
power outlet.
•A fire or electrical shock may result if the voltage used with the EPC4 is beyond the specified range.
•Voltage and frequency rating: 100V –240V AC, 60 –50Hz, 2A.
•To prevent a possible explosion, do not install the EPC4 in areas which contain flammable gases.
•Do not cover or install the EPC4 in an enclosed space.
•The EPC4 is not water resistant and should not be installed in areas where it may be exposed to water or other moisture.
•Use only 26AWG telecommunication line cord when connecting the optional modem.
•The operating temperature range of this device is 32 to 122 F (0 to 50 C). Do not operate the device if the ambient
temperature is not within this range.
IT Power System
The NCR EPC4 terminals are suitable for connection to an IT power system with a phase‐to‐phase voltage not exceeding
240 V.
This device is not intended for use as a workstation.
Cet appareil n’est pas destine à servir d’ordinateur de travail.
Dieses Geräte kann nicht als Arbeitsplatz verwendet werden
Servicing
Warning: This product does not contain user serviceable parts. Servicing should only be performed by a qualified service
technician.
Attention: Ce produit ne contient pas de components reparable par l’utilisateur. Le service ne doit être fait que par un
technicien qualifié.
Warnung: Dieses Produkt enthält keine verbrauchbaren Teile. Service nur durch einen qualifizierten Fachmann.
Fuse Replacement
Warning: For continued protection against risk of fire, replace only with the same type and ratings of fuse.
Attention: Pour prévenir et vous protéger contre un risque de feu, remplacer la fusible avec une autre fusible de même type,
seulement.
Achtung: Gegen schutz vor feuer; ersetzen sie nur sicherungen der selben art und wertung
Power Supply Cord Used as Disconnect Means
Warning: The power supply cord is used as the main disconnect device. Ensure that the socket outlet is located/installed
near the equipment and is easily accessible.
Attention: Le cordon dʹalimentation est utilisé comme interrupteur général. La prise
de courant doit être située ou installée à proximité du matériel et être facile à acceder.
Warnung: Der Stromstecker sollte nahe dem Geräte installiert sein und sollte leicht
zugänglich sein.
AC Power Cord Usage
The attached power cord should only be used with this device. It must not be used with any other device.
Connecting to an AC Source
See the AC requirements in the Site Preparation Guide before connecting to the AC supply.
Voir les exigences de courant alternatif dans le Guide de Préparation de Site avant le fait de raccorder aux réserves de
courant alternatif.
Lithium Battery Warning
Warning: Danger of explosion if battery is incorrectly replaced. Replace only with the same or equivalent type as
recommended by the manufacturer. Discard used batteries according to the manufacturerʹs instructions.
Attention: Il y a danger dʹexplosion sʹil y a remplacement incorrect de la batterie. Remplacer uniquement avec une batterie
du même type ou dʹun type recommandé par le constructeur. Mettre au rebute les batteries usagées conformément aux
instructions du fabricant.
Warnung:: Gefahr von Explosionen wenn die Batterie falsch eingelegt wird. Ersetzen Sie nur mit gleichen oder
gleichwertigen Batterien wie vom Hersteller empfohlen. Entsorgen Sie die Batterien wie vom Hersteller empfohlen.
Battery Disposal (Switzerland)
Refer to Annex 4.10 of SR814.013 for battery disposal.
Peripheral Usage
This terminal should only be used with peripheral devices that are certified by the appropriate safety agency for the
country of installation (e.g. UL, CSA, TUV, VDE) or those which are recommended by NCR Corporation.
Ce terminal devrait être utilisé avec les mécanismes périphériques qui sont certifiés par l’agence appropriée pour le
pays d’installation (UL, CSA, TUV, VDE) ou ceux recommandés par la NCR Corporation. Dieses Terminal sollte nur mit
peripheren Geräten benutzt werden die von der geeigneten Sicherheitsagentur für das Land in dem es installiert wird
(UL, CSA, TUV, VDE) oder jenen die von der NCR empfohlen werden, angeschlossen werden.
Warning: DO NOT connect or disconnect a printer, keyboard, or any other terminal‐powered peripheral while the
terminal is powered on. Doing so may result in peripheral or system damage.
System Weight Considerations for Wall or Ceiling Mounted Equipment
Warning: NCR EPC4 terminal must be mounted securely to prevent a hazard. They must be installed in accordance
with local building codes. The location where the unit is installed should be able to withstand four times the weight of the
unit
Attention –Le NCR EPC4 doit être installer précautionneusement afin d’éviter tout accident éventuel. Il doit être installé
dans le respect des codes de l’établissement.
Warnung: Der NCR EPC4 muss sicher montiert werden um Gefahr zu verhindern. Es muss in Übereinstimmung mit den
örtlichen Bauvorschriften installiert werden.
Grounding Instructions
Warning: Grounding circuit continuity is vital for safe operation of the machine. Never operate the machine with the
grounding conductor disconnected.
In the event of a malfunction or breakdown, grounding provides a path of least resistance for electric current to reduce
the risk of electric shock. This product is equipped with an electric cord having an equipment‐grounding conductor and a
grounding plug. The plug must be plugged into a matching outlet that is properly installed and grounded in accordance
with all local codes and ordinances. Do not modify the plug provided –if it will not fit the outlet, have the proper outlet
installed by a qualified electrician. Improper connection of the equipment‐grounding conductor can result in a risk of
electric shock. The conductor with insulation having an outer surface that is green with or without yellow stripes is the
equipment‐grounding conductor. If repair or replacement of the electric cord or plug is necessary, do not connect the
equipment‐grounding conductor to a live terminal. Check with a qualified electrician or service personnel if the grounding
instructions are not completely understood, or if you are in doubt as to whether the product is properly grounded. Use
only 3‐wire extension cords that have 3‐prong grounding plugs and 3‐pole receptacles that accept the product’s plug.
Repair or replace damaged or worn cords immediately.
Instruction pour Conducteurs
Attention: Assurer la continuité du circuit est essentiel pour un déroulement sécurisé des machines. Ne jamais opérer
les machines avec les conducteur de terre débranchés.
Au cas d’un mauvais fonctionnement ou d’une panne, le conducteur de protection offre une alternative de résistance au
courant électrique, permettant de réduire le choc. Ce produit est équipé dʹun câble électrique et dʹun conducteur de
protection et d’une prise de terre. La prise doit être branchée à un distributeur correspondant et installé en accord avec
les réglementations locales. Ne pas modifier la prise fournit, elle ne fonctionnera pas avec le distributeur et veuillez vous
assurer que le distributeur est installé par un technicien qualifié. Un mauvais branchement de l’équipement ou du
conducteur de protection peut provoquer l’électrocution. Le conducteur avec l’isolement possède une surface externe
qui est verte avec ou sans rayures jaunes est l’équipement de protection du conducteur. Au cas ou une réparation ou le
remplacement d’un des câbles serait nécessaire, veuillez ne pas brancher l’équipement de protection du conducteur au
terminal actif. Vérifiez qu’un électricien qualifié ou un membre du personnel s’en charge si les instructions ne sont pas
parfaitement comprises. Utilisez une extension de trois câbles de prise terrienne et trois pôles de réceptions qui sont
compatibles avec la prise. Réparer ou remplacer immédiatement tout câble endommagé.
ERDUNGSANWEISUNGEN
Warnung: Im Fall einer Funktionsstörung oder eines Zusammenbruchs stellt die Erdung einen Pfad des niedrigsten
Widerstandes für elektrische Strömung zur Verfügung, um das Risiko des Elektroschocks zu reduzieren. Dieses Produkt
ist ausgestattet mit einer elektrischen Schnur die eine Geräteerdungsletung und einen Erdungsstecker. Der Stecker
muss in einer dazugehörigen Steckdose, die geerdet ist, nach den örtlichen Voraussetzungen, eingesteckt werden.
Ändern Sie nicht den Stecker‐sollte der nicht in die Steckdose passen, installieren Sie eine angemessene Steckdose
durch Ihren Elektriker. Ein falscher Anschluß der Geräteerdungsleitung könnte einen elektrischen Schock verursachen.
Die Leitung, die isuliert ist , ist auf der Oberfläche grün mit oder ohne gelbe Streifen und ist die Erdung. Muss die Leitung
oder der Stecker repariert oder ersetzt werden, verbinden Sie nicht die Erdung des Gerätes zu dem Terminal, das in
Betrieb ist. Überprüfen Sie mit einem Elektriker oder einem Serviceangestellten, wenn Sie die Erdungsanweisungen
nicht verstehen, oder wenn Sie bedenken haben, dass das Gerät nicht richtig geerdet ist. Verwenden Sie nur Kabel mit
3 Adern, die eine drei‐Stift Erdung haben , und drei Pole, die den Stecker des Produktes einnehmen.
Reparieren oder ersetzen Sie beschädigte oder verbrauchte Kabel sofort.
NCR P/N 497-0476345
Rev C
EPC4 Quick Reference Guide
Technical Overview
Essential Safety Precautions
Environmental Consciousness
NCR is demonstrating its concern for the environment by designing an intelligent power management system into this
terminal that operates efficiently whether the system is in a stand‐alone or network environment. Do not discard the unit
or its parts (e.g. batteries) with general household waste; recycle or dispose in accordance with your local regulations.
State of California Perchlorate Material Notification
Perchlorate Material —special handling may apply.
See: http://www.dtsc.ca.gov/hazardouswaste/perchlorate
The lithium coin cell batteries in this product contain Perchlorate and are subject to the State of California’s Best
Management Practices (BMP) Regulations for Perchlorate Materials. Please visit the above website for more
information.
Federal Communications Commission (FCC)
This equipment has been tested and found to comply with the limits for a Class A digital device, pursuant to Part 15 of
FCC Rules. These limits are designed to provide reasonable protection against harmful interference when the
equipment is operated in a commercial environment. This equipment generates, uses, and can radiate radio frequency
energy and, if not installed and used in accordance with the instruction manual, may cause harmful interference to radio
communications. Operation of this equipment in a residential area is likely to cause interference in which case the user
will be required to correct the interference at his own expense. NCR is not responsible for any radio or television
interference caused by unauthorized modification of this equipment or the substitution or attachment of connecting
cables and equipment other than those specified by NCR. The correction of interference caused by such unauthorized
modification, substitution or attachment will be the responsibility of the user. The user is cautioned that changes or
modifications not expressly approved by NCR may void the userʹs authority to operate the equipment.
Canadian Department of Communications
These digital apparatuses are Class A digital apparatuses that comply with Canadian ICES‐003. These digital
apparatuses do not exceed the Class A limits for radio noise emissions from digital apparatus set out in the Radio
Interference Regulations of the Canadian Department of Communications. Cet appareil numérique de la classe A est
conforme à la norme NMB‐003 du Canada. Le présent appareil numérique nʹémet pas de bruits radioélectriques
dépassant les limites applicables aux appareils numériques de la classe A prescrites dans le règlement sur le brouillage
radioélectriques édicté par le ministère des Communications du Canada.
International Radio Frequency Interference Statement
Warning: NCR EPC4 Terminal is a Class A products. In a domestic environment these products may cause radio
interference in which case the user may be required to take adequate measures.
Declaration of Conformity
Manufacturer's Name NCR Corporation
Manufacturer's Address NCR Corporation
Hospitality Division –Atlanta
2651 Satellite Boulevard
Duluth, GA 30096‐5810
Type of Equipment Information Technology Equipment—Electronic Payment Controller
Model Number 1646
NCR Corporation, 3097 Satellite Boulevard, Duluth, GA 30096, USA, declares that the equipment specified above
conforms to the referenced EU Directives and Harmonized Standards.
EU Directive Harmonized Standard (s)
2004/108/EC
EN 55022: 1998 + A1: 2000+ A2:2003
EN 55024: 1998 + A1: 2001+ A2:2003
EN 61000-3-2: 2000 + A2: 2005
EN 61000-3-3: 1995 + A1: 2001 + A2: 2005
2006/95/EC (Low Voltage)
EN 60 950-1; 2006/A11:2009
EN 60 825-1; 2007
NCR P/N 497-0476345
Rev C

Other NCR Controllers manuals

NCR 1651 User manual

NCR

NCR 1651 User manual

NCR OPTIC 12 User manual

NCR

NCR OPTIC 12 User manual

Popular Controllers manuals by other brands

Rotenso WINDMI Series user manual

Rotenso

Rotenso WINDMI Series user manual

Walchem WCT400 Series instruction manual

Walchem

Walchem WCT400 Series instruction manual

GARDASOFT RC100 quick start guide

GARDASOFT

GARDASOFT RC100 quick start guide

Omron V680-HAM42-PRT instruction sheet

Omron

Omron V680-HAM42-PRT instruction sheet

Kantech KT-1 installation guide

Kantech

Kantech KT-1 installation guide

VALPES VR Series Installation and operation manual

VALPES

VALPES VR Series Installation and operation manual

SCHIEBEL ACTUSMART manual

SCHIEBEL

SCHIEBEL ACTUSMART manual

Invertek Optidrive VTC user guide

Invertek

Invertek Optidrive VTC user guide

Renogy Adventurer manual

Renogy

Renogy Adventurer manual

RDS Technology Athene 100 user guide

RDS Technology

RDS Technology Athene 100 user guide

Hydraulics Incorporated KWR-004 instruction manual

Hydraulics Incorporated

Hydraulics Incorporated KWR-004 instruction manual

Leviton lumina LU20S installation instructions

Leviton

Leviton lumina LU20S installation instructions

Supreme Heating Aqua-Gen 2 instructions

Supreme Heating

Supreme Heating Aqua-Gen 2 instructions

Luxmann RI-AC001A user guide

Luxmann

Luxmann RI-AC001A user guide

Weidmüller UC20-SL2000-EC-CAN manual

Weidmüller

Weidmüller UC20-SL2000-EC-CAN manual

R & M XGC-1 Specification sheet

R & M

R & M XGC-1 Specification sheet

Baseus CGNL020101 user manual

Baseus

Baseus CGNL020101 user manual

Rev-A-Shelf Tresco Lighting FREEDiM L-WLD-RGB-WH-1 installation instructions

Rev-A-Shelf

Rev-A-Shelf Tresco Lighting FREEDiM L-WLD-RGB-WH-1 installation instructions

manuals.online logo
manuals.online logoBrands
  • About & Mission
  • Contact us
  • Privacy Policy
  • Terms and Conditions

Copyright 2025 Manuals.Online. All Rights Reserved.