1
A201NE
A201NE User Guide Contents
Introduction
Introduction.........................................................................3
Getting Started
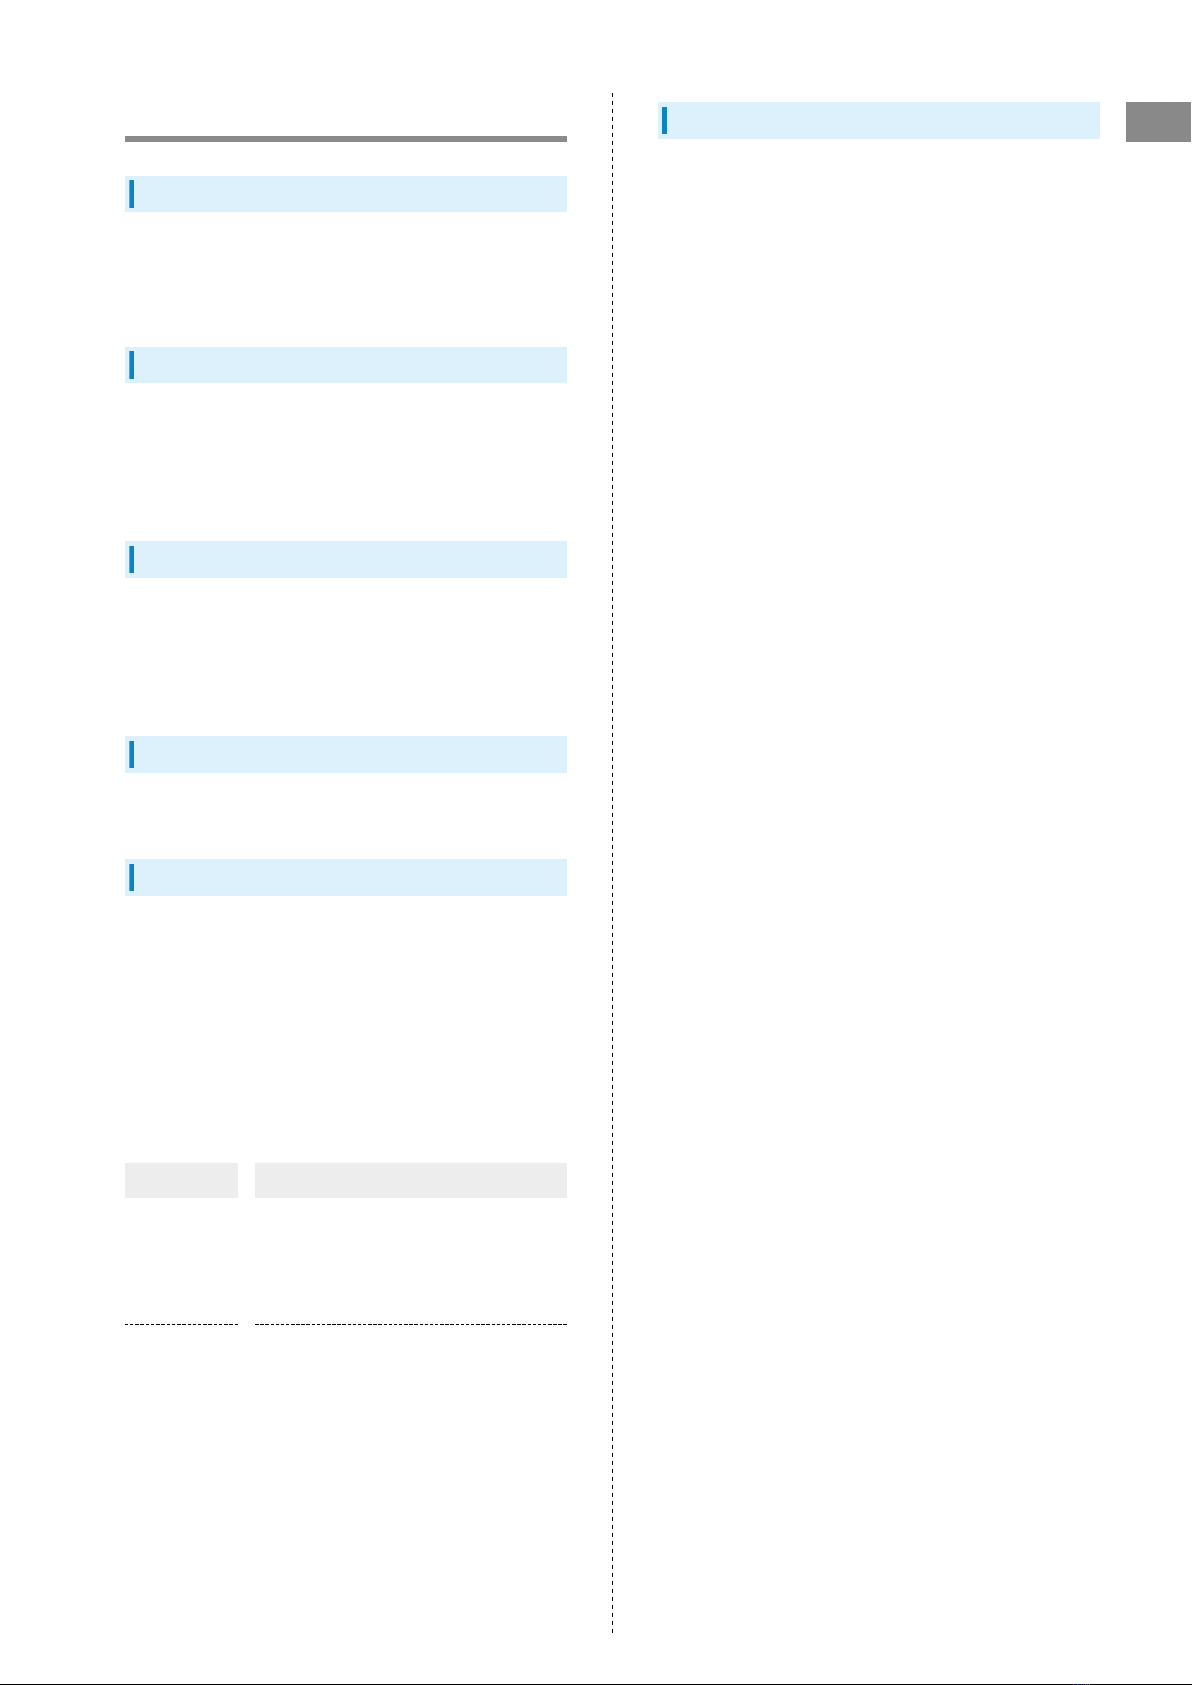
Parts & Functions............................................................... 8
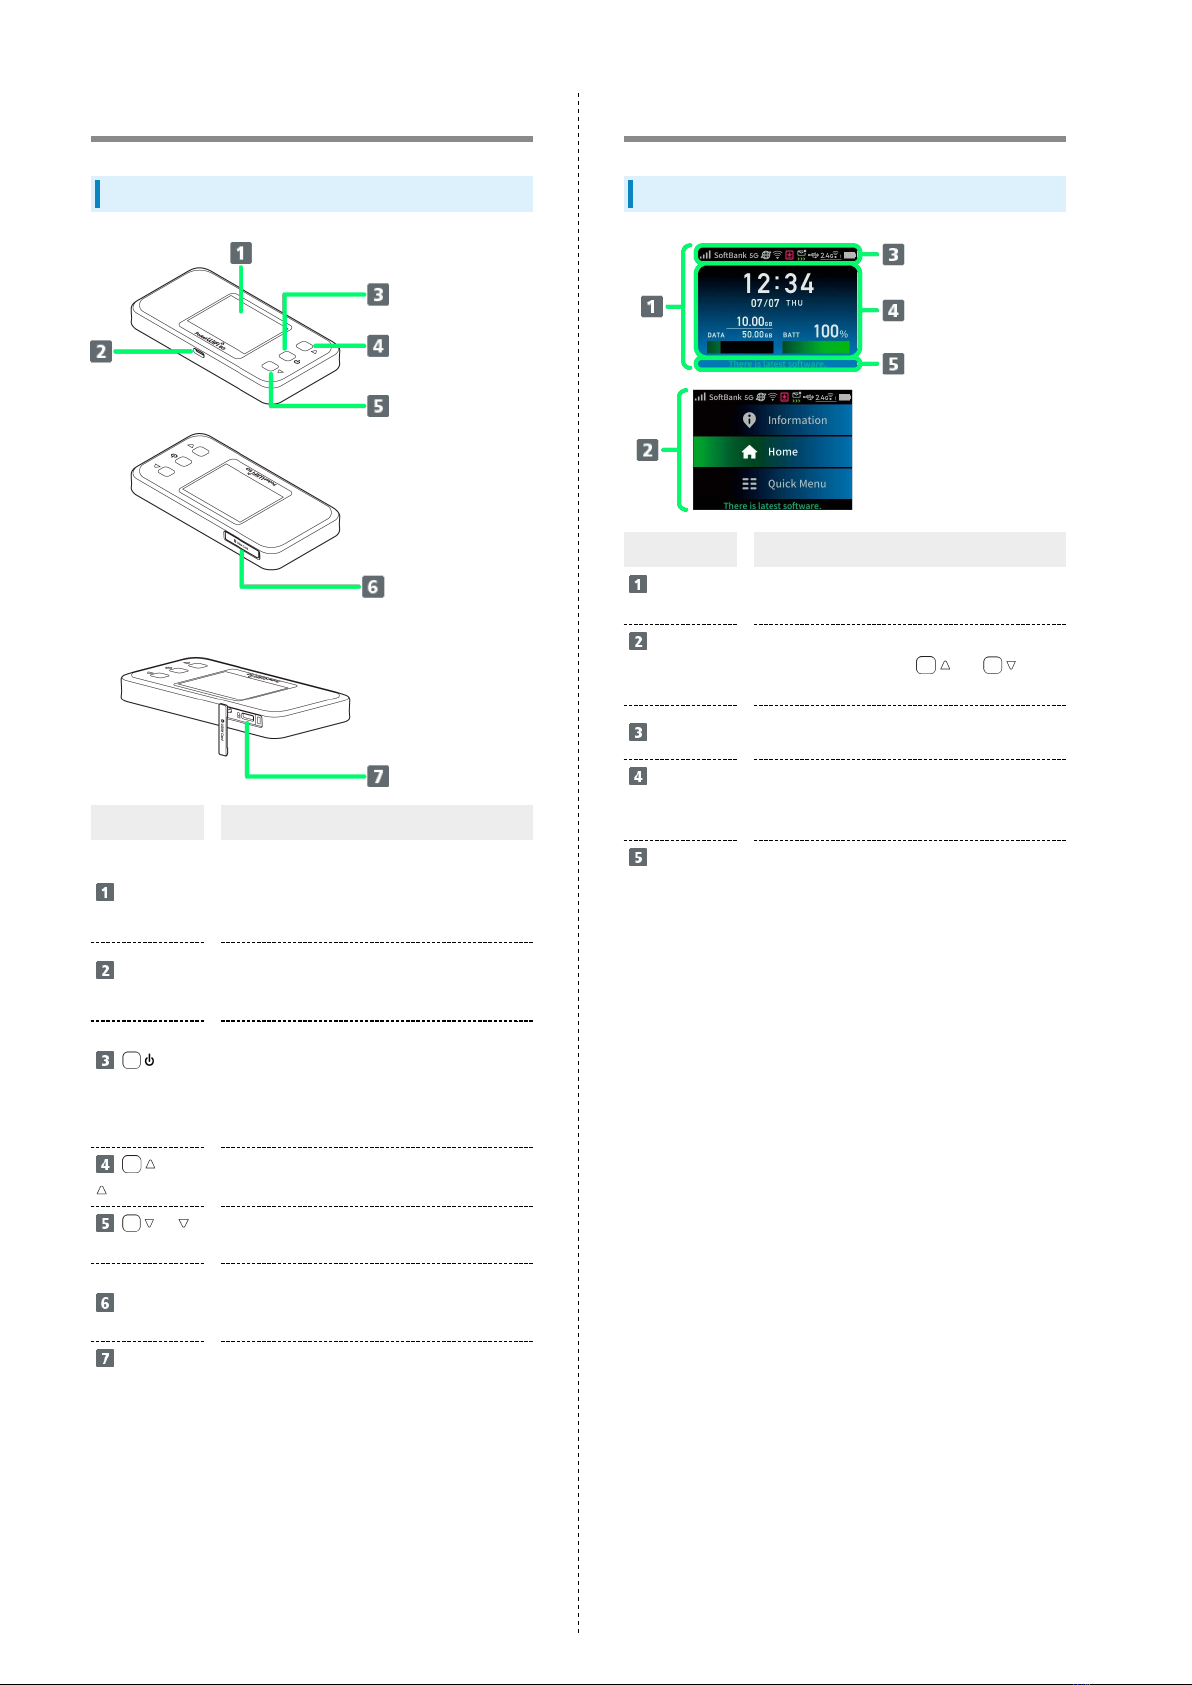
Home Screen.........................................................................8
Notifications of Data Usage.............................................11
USIM Card.......................................................................... 12
Charging Battery...............................................................13
Power On/Off....................................................................15
Connecting with WLAN
WLAN (Wi-Fi)..................................................................... 18
Activating WLAN (Wi-Fi) Function...................................18
Connecting Windows PC....................................................19
Connecting Mac................................................................. 21
Connecting Android™ Device............................................23
Connecting iPhone/iPad.................................................... 25
Connecting Wi-Fi Compatible Devices..............................30
Connecting WPS Supported WLAN Devices...................... 31
Connecting with USB Cable (Windows)
USB Connection with a Windows PC................................. 36
Connecting/Disconnecting to a Windows PC....................36
Installing/Uninstalling Driver (Windows)........................ 37
Connecting with USB Cable (Mac)
USB Connection with Mac................................................. 40
Connecting/Disconnecting to a Mac.................................40
Installing/Uninstalling Driver (Mac)................................ 41
Settings (Using Router Menu)
Displayed Menus................................................................ 44
Showing/Setting Data Usage............................................44
Setting Wi-Fi Spot............................................................ 51
Checking Notifications..................................................... 54
Checking WLAN Connected Device Information............... 56
Setting Guest SSID............................................................57
Using WPS..........................................................................58
Other Settings.................................................................. 60
Checking Wi-Fi Router Information................................. 90
Operation for Setting Data Traffic.................................97
Settings (Using Web UI)
Overview of Web UI........................................................ 106
Layout of Web UI from PC/Mobile Device......................109
Network Settings............................................................112
Setting Wi-Fi Spot..........................................................121
Wi-Fi Settings................................................................. 124
ECO Settings................................................................... 140
Security Settings............................................................ 143
Advanced Settings.......................................................... 147
Maintenance Settings..................................................... 167
Checking Information......................................................196