6
• Only power the product with the voltage corresponding to the markings on
the product.
• Wipe the battery terminals with a clean dry cloth if they are dirty.
• Non-rechargeable batteries are not to be recharged.
• Do not short-circuit a battery.
• Children of less than 8 years should be kept away.
• Cleaning and user maintenance shall not be done by children without
supervision.
• Make sure to match the (+) and (-) polarity markings.
• Do not clean the inside of the product.
• For more detailed information about disposal of your old battery, check the
local rules and regulations for the correct disposal instructions.
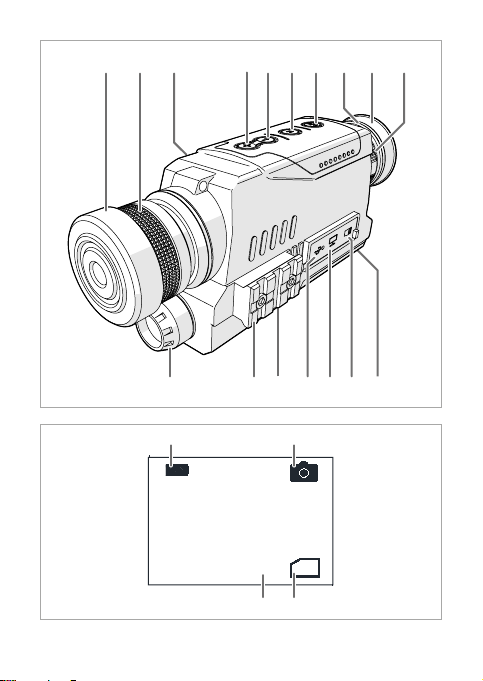
Setting up the product
1. Remove the battery cover Ai.
2. Insert 3 type AA batteries (not included) into the battery compartment. Make
sure that the battery polarity (+/-) matches the polarity markings inside the
battery compartment.
3. If you want to save photos or videos, insert a 4-32 GB Class 10 microSD card
into the microSD card slot Au.
4. Place back Ai.
5. Press the power button A7.
Look through the ocular lens A9. The screen lights up.
4If the screen does not light up, check if the batteries are charged and have
been installed correctly.
Using the product
4Rain, fog, snow or smoke can negatively inuence the viewing distance and
image quality.
1. Remove the objective lens cover A1.
4Leave the lens cover A1on during daylight.
2. Press A7to switch on the product.
4The product starts up in observation mode.
3. Look through the ocular lens A9.
4. Rotate the diopter ring Aqto adjust the light sensitivity.
5. Rotate the focus ring A2to adjust the focus distance.
6. Press the up and down buttons A45 to adjust the digital zoom.
4In dark environments, the infrared lamp switches on automatically.