Page | 2
NeedleSmart Pro Manual, Revision 1
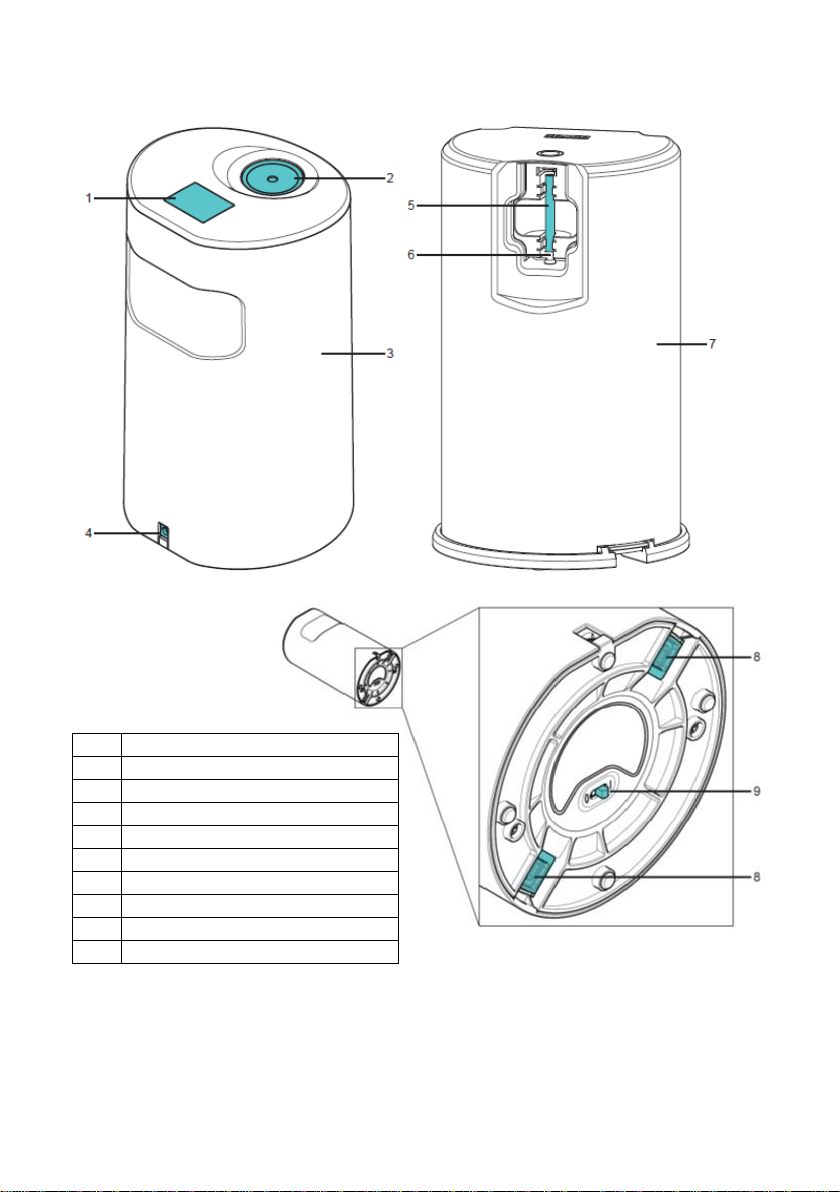
Product Description
The NeedleSmart™Professional (NS Pro) device employs advanced technology to process and
melt hypodermic sharps or needles, rendering them non-sharp and suitable for safe disposal in
accordance with local practices.
Warnings⚠
•This device is intended for use by responsible users only, and is not to be used by children.
•Do NOT insert foreign bodies/fluids into the device - see Limitations and Needle Range.
•Do NOT discharge contents of the syringe into the device.
•Do NOT use in Potentially Explosive Areas and Environments.
•Do NOT incinerate or short circuit the device.
•In the event of fire, do NOT extinguish the device with water.
•Do NOT submerge the device in liquids.
•Only use the included charger, or replacements supplied by NeedleSmart Ltd., to charge
the device.
•When you first receive your NS Pro device, it will be configured for compatibility with an
inventory of needles or sharps that you have told us that you will process. It is
IMPORTANT that needles or sharps of a smaller or larger size (length, diameter or gauge)
are not introduced to the NS Pro device without prior consultation with, and approval
from, NeedleSmart Ltd.
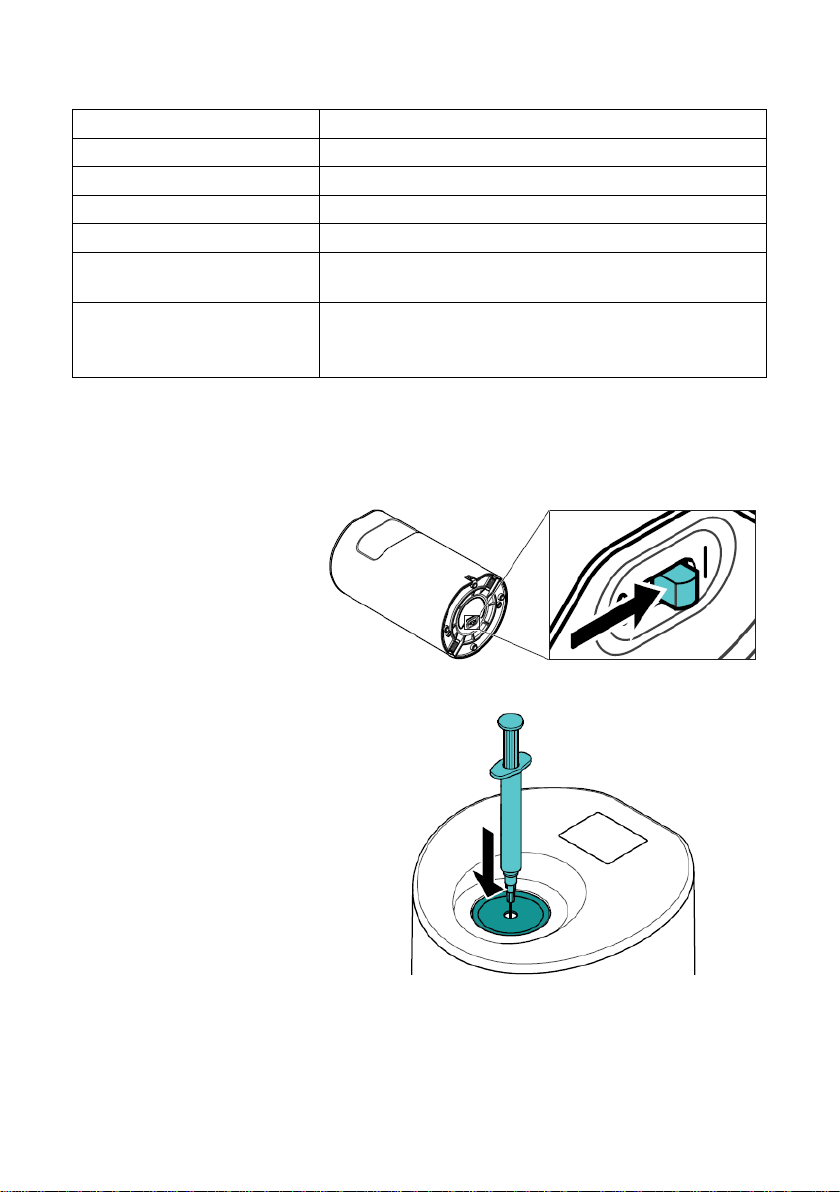
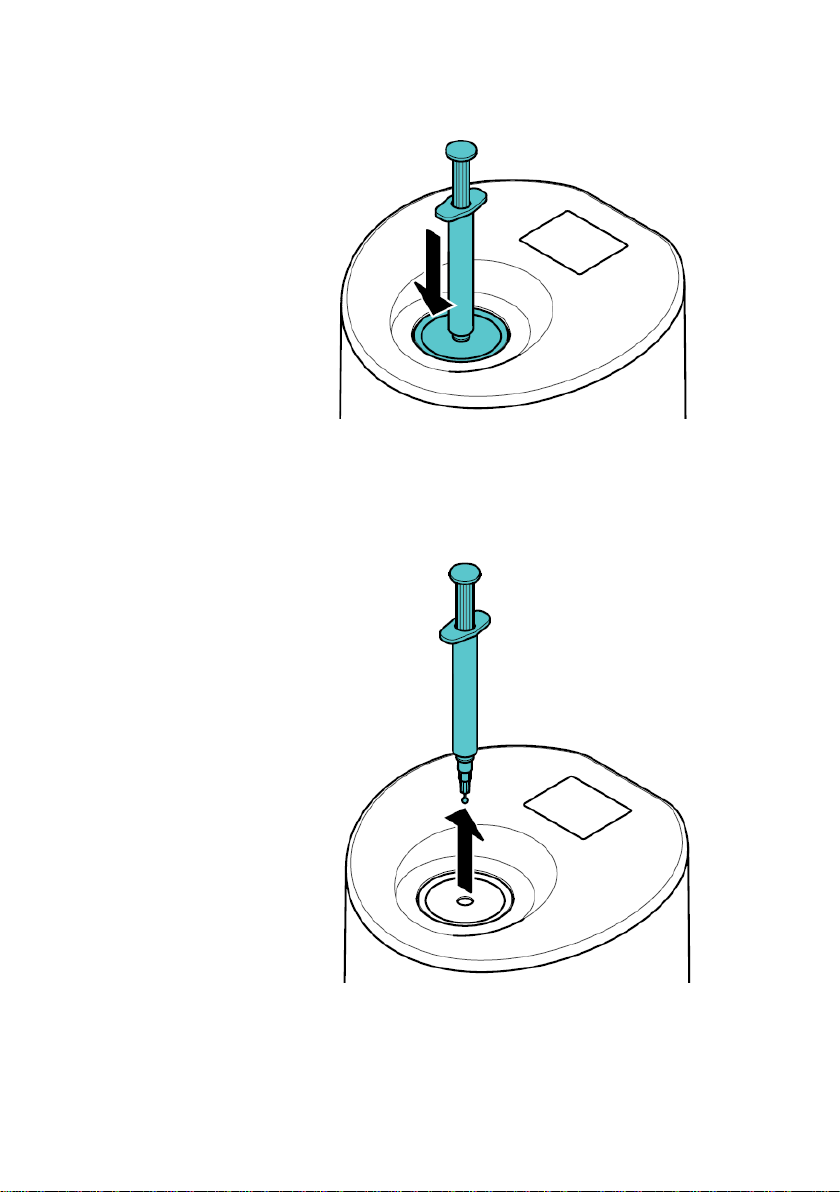
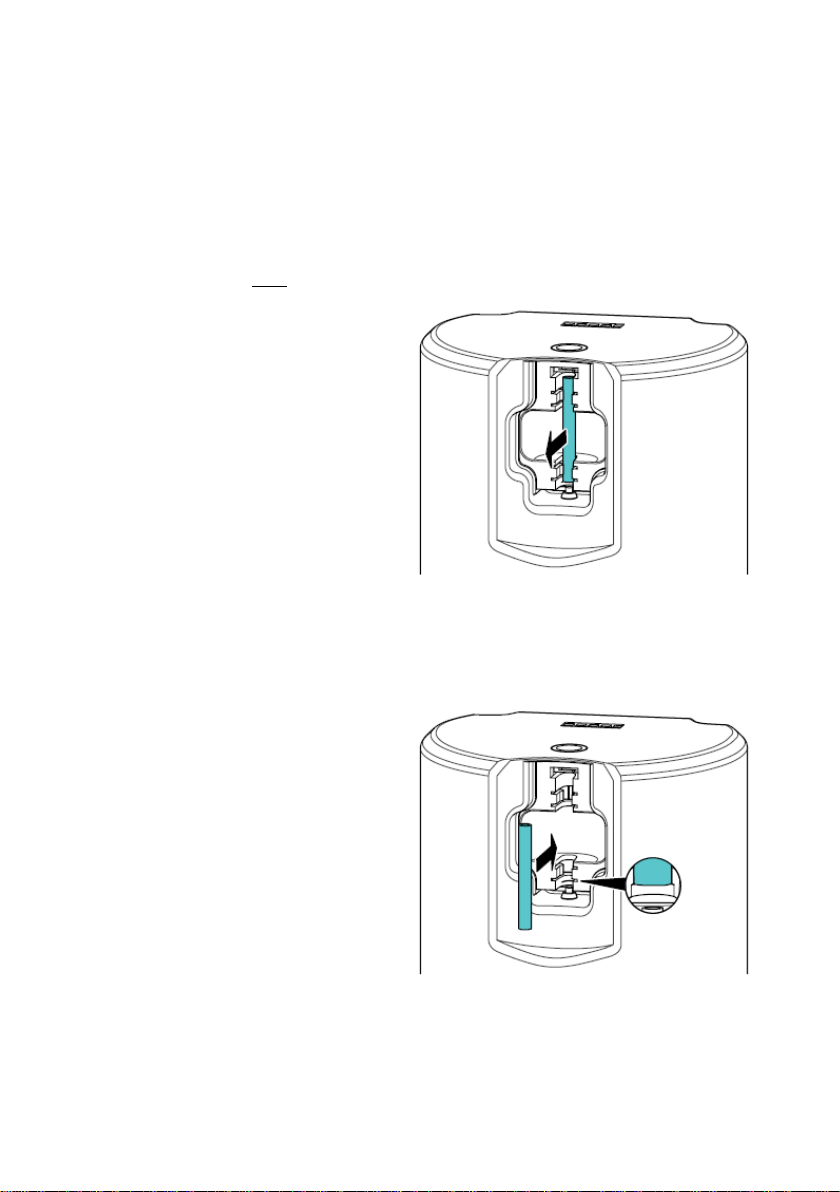
•The device contains no user-serviceable parts, excluding the replaceable quartz tube. The
device does not require any form of disassembly during standard maintenance
procedures.
Limitations
•The device must not be connected to a mains power supply while in use;
•The device must not be used while connected to a mains power supply;
•Not suitable for the disposal of flammable, radioactive, cytostatic or cytotoxic materials;
•Not suitable for use in areas where a high magnetic field is present;
•Operating temperature: +5⁰C to +40⁰C
Needle Range
The NS Pro device is compatible for use with the following range of commonly used needle
configurations:
If your NS Pro device is configured for use with standard (non-safety) needles:-
21G –25G (Green, Blue, Orange) with needle length ⅝” –1½” (16mm –38mm)
If your NS Pro device is configured for use with safety needles:-
21G –25G (Green, Blue, Orange) with needle length 1” – 1½” (25mm – 38mm).
IMPORTANT: Please note that needles outside of the range described above will not be
processed by the device and should not be inserted into the device.