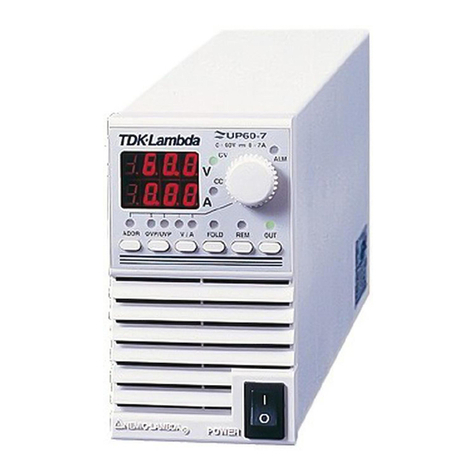
Nemic-Lambda ZUP6-33 User manual

USER'S MANUAL
ZERO-UP
200W/400W/800W
Programmable DC Power S pplies
Constant Voltage/Constant C rrent
TESTING EQUIPMENT
65SA
LISTED
USC
TUV Rheinland
geprufte
Sicherheit
.. ..
DENSEI-LAMBDA
B ilt-in RS232 & RS485 Interface
with GPIB option.

We Nemic-Lambda Ltd., located at Karmiel I dustrial Zo e, Israel, declare u der our sole
respo sibility that the product:
Product Name: Programmable Regulated Power Supplies, ZUP Series
Models:
Co forms to the followi g product specificatio s:
Safety: EN61010-1/04.93, EN61010-1 A2/07.95
UL3111-1
Electromag etic Emissio s:
EN55011:1991 Co ducted Emissio s: Class B
Radiated Emissio s: Class A
IEC1000-4-2:1995 4.0KV CD, 4.0KV AD
IEC1000-4-3:1995 3V/m
IEC1000-4-4:1995 1.0KV AC Power Li es
0.5KV Commu icatio Li es
IEC1000-4-5:1995 2.0KV AC Power Li es
1.0KV AC to Grou d
1.0KV Commu icatio Li es
IEC1000-4-6:1996 3V
IEC1000-4-11:1994
IEC1000-3-2:1995 Class A
IEC1000-3-3:1995
The product herewith complies with the requireme ts of the Low Voltage Directive 73/23/EEC a d the
EMC directive 89/336/EEC for Electrical Equipme t used i Measureme t Co trol a d Laboratory
e viro me ts, a d carries the CE mark accordi gly.
Our importer to the EU is Couta t Lambda Limited, located at Ki gsley Ave ue, Ilfracombe, Devo
EX34 8ES, UK. Further, all products covered by this declaratio are ma ufactured by processes which
e sure co ti ued complia ce of the products with the requireme ts of the Low voltage a d the EMC
directives.
Name of Authorized Sig atory:
Sig ature of Authorized Sig atory:
Positio of Authorized Sig atory:
Date:
Place where sig ed:
Adam Rawicz-Szczerbo
Ma agi g Director,Couta t Lambda
Ilfracombe, UK
ZUP6-33
ZUP10-20
ZUP20-10
ZUP36-6
ZUP60-3.5
ZUP6-66
ZUP10-40
ZUP20-20
ZUP36-12
ZUP60-7
ZUP6-132
ZUP10-80
ZUP20-40
ZUP36-24
ZUP60-14
KARMIEL INDUSTRIAL ZONE, POB 500, ZC-20101, ISRAEL.
TEL: 972-4-9887491 FAX: 972-4-9887487
DECLARATION OF CONFORMITY

TABLE OF CONTENTS: ZUP SERIES
SAFETY INSTRUCTIONS .....................................................................
WARRANTY ..........................................................................................
CHAPTER 1. General Information
CHAPTER 2. Specifications
CHAPTER 3. Installation
......................................................
1.1 User manual content
1.2 Introduction
1.2.1 General description
1.2.2 Configurations
1.2.3 Control via the serial communication port
1.2.4 Output connections
1.2.5 Analog voltage programming
1.2.6 Parallel operation
1.2.7 Cooling and mechanical construction .....................................
1.3 Accessories
1.3.1 General
1.3.2 Serial link cables
1.3.3 AC cables
1.3.4 Front panel outputs option
................................................................
2.1 200W/400W Series
800W Series...................................................................................
2.2 Supplemental characteristics .........................................................
.....................................................................
3.1 General
3.2 Initial inspection
3.2.1 Mechanical inspection
3.2.2 Preparation for use
3.3 AC source requirements
3.4 Cooling and placement
3.5 Rack mounting
3.6 Power connection
3.7 Connecting the load .......................................................................
3.7.1 Selecting wire size
3.7.2 Wire termination .....................................................................
3.7.3 Single load connection, local sense
3.7.4 Single load connection, remote sensing ................................
3.7.5 Multiple load connections, radial distribution method
3.7.6 Multiple load connections with distribution terminals .............
3.7.7 Grounding outputs
3.8 External control connector
3.8.1 General
3.8.2 Pin description .......................................................................
3.8.3 Technical description
3.8.4 Default connections................................................................
3.9 Repackaging for shipment
pg. 2
pg. 1
pg. 5
pg. 6
pg. 7
pg. 9
pg. 11
pg. 12
pg.13
pg.14
pg.15
pg.16
pg.17
pg.18

Table 4-1: Front panel controls and indicators .......................................
4.2.2 Rear panel ............................................................................
4.2.3 Rear panel connections description .....................................
4.3 Turn-on Checkout Procedure
4.3.1 General
4.3.2 Prior to operation
4.3.3 Constant Voltage check
4.3.4 Constant Current check ........................................................
4.3.5 OVP check
4.3.6 UVP check
4.3.7 Foldback check
4.3.8 Output On/Off
4.3.9 Address setting
4.3.10 Local/Remote Operation
4.4 Local Operation ...............................................................................
4.4.1 Introduction
4.4.2 Constant Voltage Operation
4.4.3 Constant Current Operation
4.4.4 Automatic Crossover ..............................................................
4.4.5 Over Voltage protection (OVP)
4.4.6 Under Voltage Protection (UVP)
4.4.7 Foldback Protection ................................................................
4.4.8 Output On/Off Control
4.4.9 Last Setting memory ...............................................................
4.4.10 Output Voltage & Current programming by external resistor
4.4.11 Output Voltage Programming by external voltage .................
4.4.12 Output Current programming by external voltage
4.4.13 Auto Parallel operation...........................................................
4.4.14 Series Operation ....................................................................
4.4.15 Output good signal.................................................................
.....................................
5.1 Introduction
5.2 Configuration
5.2.1 Address setting
5.2.2 RS232 or RS485 selection
5.2.3 Baud rate setting
5.2.4 Local/remote selection
CHAPTER 5. RS232 & RS485 remote control
.................................................
4.1 Introduction
4.2 Controls and Indicators
4.2.1 Front Panel
CHAPTER 4. Operating Instructions.
pg.23
pg.22
pg.24
pg.25
pg.26
pg.27
pg.28
pg.29
pg.30
pg.32
pg.33
pg.37
pg.38
pg.35
TABLE OF CONTENTS: ZUP SERIES
3.10 Outline drawings: ZUP 200W & 400W series.................................
3.11 Outline drawing: ZUP 800W series...............................................
3.12 Outline drawing: front panel connector option ...............................
pg.19
pg.20
pg.21

5.4.1 Introduction
5.4.2 RS485 cable
5.4.3 Linking power supplies
5.5 ZUP series command set description
5.5.1 ID control commands...............................................................
5.5.2 Initialization control
5.5.3 Output control..........................................................................
5.5.4 Status control ..........................................................................
5.5.4.1 Registers structure
5.5.4.2 Status control commands ....................................................
5.6 Communication Protocol..................................................................
5.6.1 General information
5.6.2 Accessing a ZUP unit
5.6.3 End of message
5.7.Service Request..............................................................................
..................................................................
6.1 Introduction
6.2 Units under warranty
6.3 Periodic Maintenance
6.4 Adjustment and calibration
6.5 Part replacement and repairs
6.6 Fuse ratings
.....................................................................
CHAPTER 6. Maintenance
USER’S MANUAL INDEX
pg.45
pg.42
pg.46
pg.43
pg.47
pg.49
pg.48
pg.50
5.7.1 Service Request (SRQ)
5.7.2 Service Request message
5.7.3 Service Request enable/disable commands
TABLE OF CONTENTS: ZUP SERIES
5.3 Remote programming via RS232.....................................................
5.3.1 Introduction
5.3.2 Rear panel connectors pinout
5.3.3 RS232 cable ............................................................................
5.3.4 Linking power supplies
5.4 Remote programming via RS485 .....................................................
pg.39
pg.40
pg.41

WARRANTY SERVICE
WARRANTY
DISCLAIMER
LIMITATION OF WARRANTY
TRADEMARK INFORMATION
This product must be returned to an authorized Nemic-Lambda service facility for repairs or other
warrantyservice.Forproductsreturnedto Nemic-Lambda for warranty service,thebuyershallprepay
shipping charges to Nemic-Lambda and Nemic-Lambda shall pay the shipping charges to return the
producttothebuyer.
ThisNemic-Lambdaproductiswarrantedagainstdefectsinmaterialsand workmanshipforaperiodof
threeyearsfromdateofshipment.Duringthewarrantyperiod,Nemic-Lambdawill,atit’soption, either
repairorreplaceproductswhichprovetobedefective.
The information contained in this document is subject to change without notice. Nemic-Lambda shall
not be liable for errors contained in this document or for incidental or consequential damages in
connection with the furnishing, performance or use of this material. No part of this document may be
photocopied, reproduced or translated into another language without the prior written consent of
Nemic-Lambda.
Thewarrantyshallnotapplytodefectsresultingfromimproperorinadequateusageormaintenanceby
the buyer , buyer supplied products or interfacing. The warranty shall not apply to defects resulting
from unauthorized modifications or from operation exceeding the environmental specifications of the
product.
Nemic-Lambda does not warrant the buyers circuitry or malfunctions of Nemic-Lambda products
resulting from the buyer’s circuitry. Furthermore, Nemic-Lambda does not warrant any damage
occurringasaresultofthebuyer’scircuitryorthebuyer’s-suppliedproducts.
Nootherwarrantyisexpressedorimplied.
Microsoft andWindows aretrademarksofMicrosoftCorporation.
1

SAFETY INSTRUCTIONS
CAUTION
INSTALLATION CATEGORY
GROUNDING
FUSES
LIVE CIRCUITS
PART SUBSTITUTIONS & MODIFICATIONS
ENVIRONMENTAL CONDITIONS
INPUT RATINGS
The following safety precaution must be observed during all phases of operation, service and repair of
this equipment. Failure to comply with the safety precautions or warnings in this document violates
safetystandardsofdesign,manufactureandintendeduseofthisequipmentandmayimpairthebuilt-in
protectionswithin.
Nemic-Lambdashallnotbeliableforuser’sfailuretocomplywiththeserequirements.
The ZUP Series has been evaluated to INSTALLATIONCATEGORY II. Installation Category (over
voltage category) II: local level, appliances, portable equipment etc.. With smaller transient over
voltagesthanInstallationCategory(overvoltagecategory)III.
ThisproductisaSafety Class1instrument.Tominimizeshockhazard,theinstrumentchassismustbe
connected to an electrical ground. The instrument must be connected to the AC power supply mains
through a three conductor power cable, with the ground wire firmly connected to an electrical ground
(safetyground)atthepoweroutlet.
For instruments designed to be hard - wired to the supply mains, the protective earth terminal must be
connected to the safety electrical ground before an other connection is made. Any interruption of the
protective ground conductor, or disconnection of the protective earth terminal will cause a potential
shockhazardthatmightcausepersonalinjury.
FusemustbechangedbyauthorizedNemic-Lambdaservicepersonnelonly.Forcontinuedprotection
againstriskoffire,replaceonlywiththesametypeandratingoffuse.Refertomaintenanceinstructions
inchapter6forfuserating.
Operating personnel must not remove the instrument cover. No internal adjustment or component
replacement is allowed by non-Nemic-Lambda qualified service personnel. Never replace
components with power cable connected. To avoid injuries, always disconnect power, discharge
circuitsandremoveexternalvoltagesourcesbeforetouchingcomponents.
PartsubstitutionsandmodificationsareallowedbyauthorizedNemic-Lambdaservicepersonnelonly.
Forrepairsormodifications,theinstrumentmustbereturnedtoaNemic-Lambdaservicefacility.
TheZUPseriessafetyapprovalappliestothefollowingoperatingconditions:
*Indooruse * Ambienttemperature:0 Cto50 C
*Maximumrelativehumidity:90%(nodewdrop) * Altitude:upto3,000m
*Pollutiondegree2
OO
Do not use AC supply which exceeds the input voltage and frequency rating of this instrument. The
input voltage and frequency rating of the ZUP Series is; 100-240V~, 50/60Hz. For safety reasons, the
mainssupplyvoltagefluctuationsshouldnotexceed+/-10%ofnominalvoltage.
2

SAFETY INSTRUCTIONS
SAFETY SYMBOLS
Instructionmanualsymbol.Theinstrumentwill bemarkedwiththissymbolwhenitis
necessaryfortheusertorefertotheinstructionmanual.
Indicates hazardous voltage.
Indicates ground terminal.
The WARNING signdenotesahazard.Anattentiontoaprocedureiscalled.
Notfollowingprocedurecorrectlycouldresultinpersonalinjury.
AWARNINGsignshouldnotbeskippedandallindicatedconditionsmustbe
fullyunderstoodandmet.
The CAUTION signdenotesahazard.Anattentiontoaprocedureiscalled.
Not following procedure correctly could result in damage to the equipment.
Do not proceed beyond a CAUTION sign until all indicated conditions are
fullyunderstoodandmet.
FCCCOMPLIANCENOTICE:
Note:Thisequipment has been tested and found to complywiththelimitsforaClass Adigital
device,pursuanttopart15oftheFCCRules.Theselimitsaredesignedtoprovidereasonable
protection against harmful interference when the equipment is operated in a commercial
environment.Thisequipmentgeneratesuses, and can radiate radio frequencyenergyand,if
not installed and used in accordance with the instruction manual, may cause harmful
interference to radio communications. Operation of this equipment in a residential area is
likely to cause harmful interference in which case the user will be required to correct the
interferenceathisownexpense.
!
WARNING
CAUTION
3

OUTPUT TERMINALS COVER
After connection of the load wires ( refer to par. 3-7 ), attach the plastic cover to the rear panel of the
powersupply,usingtwoselftappingscrewssuppliedwiththeunit.RefertoFig.1-1fordetails.
Fig.1-1:Terminals coverassembly
REAR PANEL
LOAD WIRES
PLASTIC COVER
WARNING
Hazardous voltages may exist at the output terminals of the 60V models.
Attach the terminals cover, supplied with the unit, to the chassis after
connecting the load wires as described below.
SAFETY INSTRUCTIONS
4

CHAPTER 1 GENERAL INFORMATION
1.1 USER’S MANUAL CONTENT
1.2 INTRODUCTION
1.2.1 General description
1.2.2 Configurations
1.2.4 Output connections
1.2.5 Analog voltage programming
1.2.6 Parallel operation
1.2.3 Control via the serial communication port
This user’s manual contains the operating instructions, installation instructions and specifications of
the ZUP series. For information related to operation with GPIB control, refer toNemic-Lambda GP485
user’smanual.
TheZUPseriesarewiderangeoutputswitchingpowersupplieswithlaboratoryperformance.TheZUP
series is power factor corrected and operates from worldwide AC voltage range continuously.Output
voltageandcurrentarecontinuouslydisplayedandLEDindicatorsshowthecompleteoperatingstatus
ofthepowersupply.The frontpanelcontrolsallowtheuser tosettheoutputparameters,theprotection
levels (over-voltage / under-voltage)and arm the foldback protection to disable the output if the unit
switchesfromConstant-voltagemodetoConstant-currentmode.
TheZUPcanbeconfiguredintoaprogrammablepowersystemofupto31DCoutputsusingthebuilt-in
RS232 or RS485 communication port in the power supply.In a GPIB system the GP485 controller can
controlupto31ZUPunitsinasingleGPIBaddress.
Output connections are made to rear panel bus-bars. Either the positive or negative terminal may be
grounded or the output may be floated. The maximum potential (including the output voltage) that
either output terminal is from ground must not exceed 60V. Local or remote sense may be used. In
remotesense,themaximumvoltagedroponeachwireis0.5V.
Analog inputs are provided at the rear panel for analog voltage programming of output voltage and
current, and On/Off control. Inputs are provided for resistive programming of the output voltage and
current.
ZUP unitsofthesameoutputvoltageandcurrentratingcanbe paralleledinmaster-slave
configuration
withautomaticcurrentsharingforpower-uppurposes.
Thefollowingparameterscanbeprogrammedviatheserialcommunicationport:
1.Outputvoltagesetting
2.Outputcurrentsetting
3.OutputOn/Off
4.Armingorreleaseofthefoldbackprotection
5.Over-voltageprotectionsetting
6.‘Soft’under-voltagelimit
7.Outputvoltagemeasurement
8.Outputcurrentmeasurement
9.Powersupplystart-upmode
(lastsettingorsafemode)
10.Over-voltageprotectionsettingread
11.Under-voltagelimitread
12.Remote/LocalControl
5

1.3.1 General
1.3.4 Front Panel Outputs option
1.3.3 AC Cables
1.3.2 Serial link cables
1.3 ACCESSORIES
Accessoriesaredeliveredwiththepowersupplyorseparatelyuponordering.
Belowarelistedpossible accessoriesandorderingnumbers.
PARTNo. DESCRIPTION
NL100 19”rack,3Uheight
NL101 Blankpanelfor19”rack
NL102 Additionalinstructionmanual
PART No. MARKET DESCRIPTION
NC301 USAandJapan 15A,125V,unshielded,2mtyp.length,withIEC320connectoronone
sideandNEMA-5-15Pconnectortheonotherside.
NC302 Europe 10A,250V,unshielded,2mtyp.length,withIEC320connectoronone
sideandINT’L7standardVII,dualearthingontheotherside.
NC303 General 10A,250V,unshielded,2mtyp.length,withIEC320connectoronone
sideandunterminatedstrippedwiresontheotherside.Usethecable
onlywithplugapprovedbythenationalsafetystandardsofthecountry
ofusage.
In cases where load connection at the front panel is required, optional Front Panel output Jacks for a
load current of 20A maximum is available. Please note that the power supply height is increased with
thisoption.Refertooutlinedrawing(par.3.12)fordetails.
ORDERNo. DESCRIPTION
ZUP /L 20AFrontPanelOutput Jacks
Seriallinkcable,forlinkingpowersuppliesbyRS485communicationisprovidedwiththepowersupply
accordingtoorder.Cabledescription:0.5m typ.length,shielded,EIA-568Atypeplugs,8contacts.
Refertopar.5.3.4,fordetails.
1.2.7 Cooling and mechanical construction
The Zup series is fan cooled. Upon installation take careto allow free air flow intothe power supply via
the front panel and out of the power supply via the rear panel. The ZUP series is contained in a
compact, lightweight package which allows for easy installation and space saving in the application
6

V
A
W
-
-
mV
mV
mS
-
-
mS
mS
mS
-
-
mA
-
-
-
-
-
-
V
-
-
-
-
-
-
A
-
-
%
A
MODEL
OUTPUT VOLTAGE (*1)
OUTPUT CURRENT (*2)
RATED OUTPUT POWER
LOAD REGULATION
LINE REGULATION
RMS RIPPLE
RIPPLE
RECOVERY TIME (*4)
TEMPERATURE COEFFICIENT
TEMPERATURE DRIFT
(5Hz-1MHz Bandwidth)
(pk to pk 20MHz Bandwidth)
LOAD REGULATION
LINE REGULATION
RMS RIPPLE
TEMPERATURE COEFFICIENT
TEMPERATURE DRIFT
(5Hz-1MHz Bandwidth)
INPUT VOLTAGE (*8)
INPUT CURRENT (*6)
INPUT CURRENT HARMONICS
POWER FACTOR (TYP)
EFFICIENCY (*6)
INRUSH CURRENT (*7) 100/200V
VOLTAGE
CURRENT
STATUS
UP PROGRAMMING RESPONSE TIME
FULL LOAD
NO LOAD
RESOLUTION
ACCURACY
RESOLUTION
ACCURACY
VOLTAGE
CURRENT
CONSTANT
VOLTAGE
CONSTANT
CURRENT
DOWN
PROGRAMMING
RESPONSE TIME
PROGRAM-
MING
(*3)
DISPLAY
OVERVOLTAGE PROTECTION (*5)
HOLD UP TIME
OUTPUT PROTECTIONS
INPUT
ZUP60-
7
0 ~ 7
10
5.6 / 2.7
80 / 84
0 ~ 12
15
5.6 / 2.7
80 / 84
0 ~ 20
30
5.6 / 2.7
79 / 83
0 ~ 40
50
5.6 / 2.7
79 / 82
0 ~ 66
0.005% +2mV from no load to full load, constant input voltage
0.005% +1mV from 85-132VAC or 170-265VAC, constant load
5
50
30ppm/ C from rated voltage following 30-minute warm-up
0.01% +2mV change in output over 8-hour interval under constant line, load and ambient
temperature following 30-minute warm-up
50mS (From zero volts to full scale, resistive load, current setting at max.)
50
100
5.6 / 2.7
74 / 77
15 15 15 15 15
ZUP60-
3.5
0 ~ 3.5
5
2.9 / 1.4
75 / 79
0 ~ 6
7.5
2.9 / 1.4
76 / 80
0 ~ 10
15
2.9 / 1.4
74 / 78
0 ~ 20
25
2.9 / 1.4
73 / 77
0 ~ 33
198 396 200 400 200 400 216 432 210 420
50
3.0 / 1.5
69 / 72
15 / 30 15 / 30 15 / 30 15 / 30 15 / 30
ZUP36-
12
ZUP36-
6
ZUP20-
20
ZUP20-
10
ZUP10-
40
ZUP10-
20
ZUP6-
66
250
0 - 7.5
1
350
0 -13
0.5
400
0 - 24
0.2
0.01% + 5mA for load voltage change equal to unit voltage rating , constant input voltage.
0.01% +2mA from 85-132VAC or 170-265VAC, constant load
20mS at 100V/200VAC, rated output voltage and output current
100ppm/ C from rated current following 30 minute warm-up
O
Better than 0.028% of rated output voltage
0.02% + 5mV 0.02% + 8mV 0.02% + 12mV 0.02% + 26mV 0.02% + 35mV
0.4% + 40mA
Better than 0.03% of rated output current
0.02% +5mA change in output over 8-hour interval under constant line, load and ambient
temperature following 30 minute warm-up
3 digits (6V, 20V, 36V, 60V) 3.5 digits (10V) accuracy: 0.2% +/- 2 digits
3 digits accuracy: 0.5% +/- 3 digits
CV/CC, Alarm, Fold, Local/Remote, ON/OFF
Over Voltage, Over Temperature, Foldback
85 ~ 265VAC Continuous, 47 ~ 63Hz
Complies with EN61000-3-2, Class A
0.99 at 100/200VAC, 100% Load
500
0 - 40
0.2
750
0 - 66
0.2
0 ~ 6 0 ~ 10 0 ~ 20 0 ~ 36 0 ~ 60
ZUP6-
33
CHAPTER 2 SPECIFICATIONS
2.1 SPECIFICATIONS: 200W/400W Series
7
O

-
-
-
-
-
-
Kg
mm
-
-
-
-
-
-
-
-
-
-
-
-
-
-
-
OPERATING TEMPERATURE
OPERATING HUMIDITY
STORAGE TEMPERATURE
STORAGE HUMIDITY
VIBRATION (*9)
SHOCK
WEIGHT
SIZE (WxHxD)
OUTPUT ON/OFF
OUTPUT GOOD
OUTPUT VOLTAGE PROGR.
OUTPUT CURRENT PROGR.
REMOTE SENSING
COMMUNICATION INTERFACE
ENVIRON-
MENT
MECHANI-
CAL
EXTERNAL
FUNCTIONS
SAFETY STANDARDS
EMC STANDARDS
APPROVALS
NOTES:
* 1 MINIMUM VOLTAGE IS GUARANTEED TO MAXIMUM 0.2% OF THE RATED OUTPUT VOLTAGE.
* 2 MINIMUM CURRENT IS GUARANTEED TO MAXIMUM 0.4% OF THE RATED OUTPUT CURRENT.
* 3 GIVEN FOR CONTROL OF THE OUTPUT VIA THE SERIAL COMMUNICATION OR VIA FRONT PANEL CONTROLS.
* 4 TIME FOR RECOVERY TO WITHIN +/- 50mV AGAINST CURRENT CHANGE OF 50% TO 100%.
* 5 INVERTER SHUT DOWN METHOD, MANUAL RESET BY AC INPUT RECYCLING.(OVP WILL SHUT DOWN OUTPUT).
* 6 AT 100V/200V AND MAXIMUM OUTPUT POWER.
* 7 FOR 200W UNITS - AT COLD START Ta = 25OC.
* 8 FOR CASES WHERE CONFORMANCE TO VARIOUS SAFETY SPECS, (UL, IEC ETC.) ARE REQUIRED TO BE DESCRIBED
AS 100-240VAC (50/60Hz) ON NAME PLATE.
* 9 WHEN MOUNTED WITH MOUNTING SCREWS.
CONDUCTED EMI
RADIATED EMI
SERIAL OPERATION
PARALLEL OPERATION
COOLING
WITHSTAND VOLTAGE
ISOLATION RESISTANCE
ZUP60-
7
3.23.23.23.23.2
ZUP60-
3.5
2.92.92.92.92.9
ZUP36-
12
ZUP36-
6
ZUP20-
20
ZUP20-
10
ZUP10-
40
ZUP10-
20
ZUP6-
66
0 ~ 50 C: 100% Load.
O
-20 ~ 70 C
O
30 ~ 90% RH ( No Dewdrop )
10 ~ 95% RH ( No Dewdrop )
Less than 20G
10 ~ 55Hz, Amplitude (sweep 1min) Less than 2G, X,Y, Z, 1 hour each.
70 x 124 x 350.
By TTL Signal or Dry Contact - refer to instruction manual
Open collector - refer to instruction manual
By Voltage ( 0 ~ 4V ) or by Resistance ( 0 ~ 4K ) refer to instruction manual
By Voltage ( 0 ~ 4V ) or by Resistance ( 0 ~ 4K ) refer to instruction manual
Possible, maximum 0.5V drop on each load wire
RS232 and RS485 Built-in, IEEE488 Optional
UL 3111-1, EN61010-1
EN 61326-1, IEC 61326 -1, FCC part 15 (class A)
Master - slave method: up to 5 units, refer to instruction manual
Up to 2 units, refer to instruction manual
More than 100MOhm at 25 C and 70% R.H.
O
EN55022-B, FCC-B, VCCI-2
Forced air by blower fan, (blower fan is mounted within unit)
EN55022-A, FCC-A, VCCI-1
Input-Chassis: 2.0kVAC 1 min. Input-Output: 3.0kVAC 1 min. Output-Chassis: 500VAC 1min.
ZUP6-
33
2.1 SPECIFICATIONS: 200W/400W Series continued
8

V
A
W
-
-
mV
mV
mS
-
-
mS
mS
mS
-
-
mA
-
-
-
-
-
-
V
-
-
-
-
-
-
A
-
-
%
A
MODEL
OUTPUT VOLTAGE (*1)
OUTPUT CURRENT (*2)
RATED OUTPUT POWER
LOAD REGULATION
LINE REGULATION
RMS RIPPLE
RIPPLE
RECOVERY TIME (*4)
TEMPERATURE COEFFICIENT
TEMPERATURE DRIFT
(5 z-1M z Bandwidth)
(pk to pk 20M z Bandwidth)
LOAD REGULATION
LINE REGULATION
RMS RIPPLE
TEMPERATURE COEFFICIENT
TEMPERATURE DRIFT
(5 z-1M z Bandwidth)
INPUT VOLTAGE (*7)
INPUT CURRENT (*6)
INPUT CURRENT ARMONICS
POWER FACTOR (TYP)
EFFICIENCY (*6)
INRUS CURRENT 100/200V
VOLTAGE
CURRENT
STATUS
UP PROGRAMMING RESPONSE TIME
FULL LOAD
NO LOAD
RESOLUTION
ACCURACY
RESOLUTION
ACCURACY
VOLTAGE
CURRENT
CONSTANT
VOLTAGE
CONSTANT
CURRENT
DOWN
PROGRAMMING
RESPONSE TIME
PROGRAM-
MING
(*3)
DISPLAY
OVERVOLTAGE PROTECTION (*5)
OLD UP TIME
OUTPUT PROTECTIONS
INPUT
ZUP60-14
0 ~ 14
20
11.2 / 5.4
80 / 84
0 ~ 24
30
11.2 / 5.4
80 / 84
0 ~ 40
60
11.2 / 5.4
79 / 82
0 ~ 80
100
11.2 / 5.4
77 / 81
0 ~ 132
792 800 800 864 840
200
11.2 / 5.4
74 / 77
30
0.005% +2mV from no load to full load, constant input voltage
0.005% +1mV from 85-132VAC or 170-265VAC, constant load
5
80
30ppm/ C from rated voltage following 30-minute warm-up
O
0.01% +2mV change in output over 8-hour interval under constant line, load and ambient
temperature following 30-minute warm-up
50
ZUP36-24
ZUP20-40
ZUP10-80
ZUP6-132
250
0-7.5
1
100
8
70
5
350
0-13
0.5
90
8
60
5
400
0-24
0.2
0.07% + 10mA for load voltage change equal to unit voltage rating , constant input voltage.
0.01% +5mA from 85-132VAC or 170-265VAC, constant load
20mS at 100V/200VAC, rated output voltage and output current
100ppm/ C from rated current following 30 minute warm-up
O
0.05% +10mA change in output over 8-hour interval under constant line, load and ambient
temperature following 30 minute warm-up
3 digits (6V, 20V, 36V, 60V) 3.5 digits (10V) accuracy: 0.2% +/- 2 digits
3.5 digits (132A), all others 3 digits accuracy: 0.5% +/- 3 digits
CV/CC, Alarm, Fold, Local/Remote, ON/OFF
Over Voltage, Over Temperature, Foldback
85 ~ 265VAC Continuous, 47 ~ 63 z
Complies with EN61000-3-2, Class A
0.99 at 100/200VAC, 100% Load
500
0-40
0.2
750
0-66
0.2
0 ~ 6 0 ~ 10 0 ~ 20 0 ~ 36 0 ~ 60
2.1 SPECIFICATIONS: 800W Series
Better than 0.028% of rated output voltage
0.4% + 40mA
Better than 0.03% of rated output current
60mS (From zero volts to full scale, resistive load, current setting at max.)
0.02% + 5mV 0.02% + 8mV 0.02% + 12mV 0.02% + 26mV 0.02% + 35mV
9

-
-
-
-
-
-
Kg
mm
-
-
-
-
-
-
-
-
-
-
-
-
-
-
-
OPERATING TEMPERATURE
OPERATING HUMIDITY
STORAGE TEMPERATURE
STORAGE HUMIDITY
VIBRATION (*8)
SHOCK
WEIGHT
SIZE (WxHxD)
OUTPUT ON/OFF
OUTPUT GOOD
OUTPUT VOLTAGE PROGR.
OUTPUT CURRENT PROGR.
REMOTE SENSING
COMMUNICATION INTERFACE
ENVIRON-
MENT
MECHANI-
CAL
EXTERNAL
FUNCTIONS
APPLICABLE SAFETY STANDARDS
APPLICABLE EMC STANDARDS
CONDUCTED EMI
RADIATED EMI
SERIAL OPERATION
PARALLEL OPERATION
COOLING
WITHSTAND VOLTAGE
ISOLATION RESISTANCE
ZUP60-
14
5.8
ZUP36-
24
ZUP20-
40
ZUP10-
80
ZUP6-
132
0 ~ 50 C: 100% Load.
O
-20 ~ 70 C
O
30 ~ 90% RH ( No Dewdrop )
10 ~ 95% RH ( No Dewdrop )
Less than 20G
10 ~ 55Hz, Amplitude ( sweep 1min ) Less than 2G, X,Y, Z, 1hour each.
140 x 124 x 350 refer to outline drawing
By TTL Signal or Dry Contact - refer to instruction manual
Open collector - refer to instruction manual
By Voltage ( 0 ~ 4V ) or by Resistance ( 0 ~ 4K ) refer to instruction manual
By Voltage ( 0 ~ 4V ) or by Resistance ( 0 ~ 4K ) refer to instruction manual
Possible, maximum 0.5V drop on each load wire
RS232 and RS485 Built-in, IEEE488 Optional
UL 3111-1, EN61010-1
EN 61326-1, IEC 61326 -1, FCC part 15 (class A)
Master - slave method: up to 5 units, refer to instruction manual
Up to 2 units, refer to instruction manual
More than 100MOhm at 25 C and 70% R.H.
O
EN55022-B, FCC-B, VCCI-2
Forced air by blower fan, (blower fan is mounted within unit)
EN55022-A, FCC-A, VCCI-1
Input - Chassis: 2.0kVAC 1 min. Input - Output: 3.0kVAC 1 min. Output - Chassis: 500VAC 1 min.
NOTES:
* 1 MINIMUM VOLTAGE IS GUARANTEED TO MAXIMUM 0.2% OF THE RATED OUTPUT VOLTAGE.
* 2 MINIMUM CURRENT IS GUARANTEED TO MAXIMUM 0.4% OF THE RATED OUTPUT CURRENT.
* 3 GIVEN FOR CONTROL OF THE OUTPUT VIA THE SERIAL COMMUNICATION OR VIA FRONT PANEL CONTROLS.
* 4 TIME FOR RECOVERY TO WITHIN +/- 50mV AGAINST CURRENT CHANGE OF 50% TO 100%.
* 5 INVERTER SHUT DOWN METHOD, MANUAL RESET BY AC INPUT RECYCLING. (OVP WILL SHUT DOWN OUTPUT).
* 6 AT 100V/200V AND MAXIMUM OUTPUT POWER.
* 7 FOR CASES WHERE CONFORMANCE TO VARIOUS SAFETY SPECS, (UL, IEC ETC.) ARE REQUIRED TO BE DESCRIBED
AS 100-240VAC (50/60Hz) ON NAME PLATE.
*8 WHEN MOUNTED WITH MOUNTING SCREWS.
2.1 SPECIFICATIONS: 800W Series continued
10

2.2 SUPPLEMENTAL CHARACTERISTICS
The supplemental characteristics give typical but non-warranted performance characteristics. The
supplementalcharacteristicsareusefulinaccessingapplicationsforthepowersupply.Several kinds
ofsupplementalcharacteristicsarelistedbelow.
1.EVALUATIONDATA: Typicalperformanceofthepowersupply.
2.RELIABILITYDATA: Reliabilityperformanceofthepowersupply.
3.IEC1000DATA: PerformanceofthepowersupplyunderIEC1000testconditions.
4.EMIDATA: TypicalEMI(conductedandradiated)performanceofthepowersupply.
The supplemental characteristics data are held in each Nemic-Lambda sales and service facility.For
furtherdetailspleasecontacttheNemic-Lambdaofficenearestyou.
11

CHAPTER 3 INSTALLATION
3.1 GENERAL
3.2 INITIAL INSPECTION
3.2.1 Mechanical inspection
3.2.2 Preparation for use
3.3 AC SOURCE REQUIREMENTS
3.4 COOLING & PLACEMENT
3.5 RACK MOUNTING
3.6 POWER CONNECTION
NOTE
CAUTION
This chapter contains instructions for initial inspection, preparation for use and repackaging for
shipment.ConnectiontoPC,linkingZUPunitsandsettingtheaddressaredescribedinchapter 5.
Prior to shipment this power supply was inspected and found free of mechanical or electrical defects.
Uponunpackingofthepowersupply,inspectforanydamagewhichmayhaveoccurredintransit.Keep
all packing materials until inspection has been completed. If any damage is detected, file a claim with
thecarrierimmediatelyandnotifytheNemic-Lambdasalesorservicefacilitynearestyou.
Themechanicalinspectionshouldconfirmthatthereisnoexteriordamagetothepowersupplysuchas
brokenknobsorconnectorsandthatthefrontpanelandmeterfacearenotscratchedorcracked.
In order to be operational the power supply must be connected to an appropriate AC source. The line
voltagemustbewithinthepowersupplyspecification. DO NOTapplypowerbeforereadingparagraph
3.3.
The ZUP series can be operated from a nominal 100V to 240V, single phase, 47 ~ 63Hz. The input
voltage range and current required for each model is specified in chapter 2. Make sure that under
heavyload,theACvoltagesuppliedtothepowersupplydoesnotfallbelow“lowlimit”specifications.
This power supply is fan cooled. Upon installation ensure sufficient space for air intake (front panel)
andexhaust(rearpanel).Thepowersupplyshouldbeusedinanareawheretheambienttemperature
doesnotexceed+50 C
O
ZUP models can be mounted in a standard 19” rack (3U height). The 200W and 400W models occupy
1/6 rack length. The 800W model occupies1/3 rack length. The power suppliesshould be fixed by M4
screwsreplacingtherubberfeetonthebottomofthepowersupply.Thescrewsmustnotprotrudemore
than6mmintothepowersupply.Refertotheoutlinedrawinginthischapterformountingdetails.
Connection of this power supply to an AC power source should
be made by an electrician or other qualified personnel.
ZUP series power supplies generate a magnetic field which might affect the
operation of other instruments. If your equipment is susceptible to magnetic fields,
do not position adjacent to the ZUP.
12

This power supply is equipped with a three conductor power cable. The third conductor is the ground
conductor.When the cable is plugged-in to an appropriate receptacle, the power supply is grounded.
Under no circumstances should this power supply be operated without an adequate ground
connection. If a two contact receptacle is encountered, it must be replaced by a three contact
receptacle, properly grounded. This operation should be done by a qualified electrician. It is
recommended to keep the AC input wires separate from the DC output and signal wires to avoid
interference.
Tomeet radiated EMI specification, the EMI suppressor clamp should be attached to the AC cable as
closeaspossibletotheACinletofthepowersupply.
WARNING
WARNING
Some components inside the power supply are at AC voltage even when the
On/Off switch is in the “Off” position. To avoid the hazard of electric shock,
disconnect line cord and load and wait 2 minutes before removing cover.
Turn off the AC input power before making or changing any rear panel connection.
Make sure that all connections are securely tightened before applying power.
3.7 CONNECTING THE LOAD
3.7.1 Selecting wire size
Twofactorsmustbeconsideredinselectingwiresize.
1. Wires should be at least heavy enough to avoid overheating while carrying the power supply load
current at the rated load, or the current that would flow in the event the load wire were shorted,
whicheverisgreater.
2.Wiresizeshouldbeselectedtoenablevoltagedropperleadtobelessthan0.5Vattheratedcurrent.
It is recommended to minimize voltage drop on the wires to prevent excessive output power
consumptionfromthepowersupply.
Please refer to Tables 3-1 and 3-2 for maximum wire length to limit voltage drop by American and
Europeanmeasurementsrespectively.
Table 3-1: Maximum wire length for
0.5V drop on lead (in feet)
wire size
AWG
5A
40 20 10 4 1
63 31 15 6 1.7
100 50 25 10 3
160 80 40 16 5
253 126 63 25 8
400 200 100 40 13
640 320 160 64 21
1016 508 254 102 34
14
12
10
8
6
4
2
0
2.526
1.589
0.9994
0.6285
0.3953
0.2486
0.1564
0.0983
Maximum length in feet -
to limit voltage drop to 0.5V or less
10A 20A 50A 150A
Resistivity
Ohm/kft
13

13
Forcurrentnotshownintables3-1and3-2useformula: Maximumlength=500/(current*resistivity)
Wherecurrentisexpressedinampersandresistivityinohms/kmorohms/1000ft.
Table 3-2: Maximum wire length for 0.5V drop on lead (in meters)
cross sect.
area
(mm 2)
5A
12.2 6.1 3.0 1.2 0.4
19.6 9.8 4.9 2.0 0.7
29.5 14.7 7.4 2.9 1.0
51.3 25.6 12.8 5.1 1.7
80.6 40.3 20.2 8.1 2.7
125.8 62.9 31.4 12.6 4.2
177.0 88.5 44.2 17.7 5.9
2.5
4
6
10
16
25
35
8.21
5.09
3.39
1.95
1.24
0.795
0.565
Maximum length in meters -
to limit voltage drop to 0.5V or less
10A 20A 50A 150A
<
Resistivity
Ohm/km
3.7.2 Wire termination
3.7.3 Single load connection, Local Sensing
The wires should be properly terminated with terminals securely attached. DO NOT use non
terminatedwiresforloadconnectionatthepowersupply.
Fig. 3-1 illustrates the connection of a single load to the power supply using local sensing. This
connectionismadeviathe“ExternalControlConnector”locatedon therearpanelofthepowersupply.
Localsensingissuitableforapplicationswhere loadregulationisnotcritical.
Fig.3-1:Singleloadconnection,LocalSensing
14
2
- LS - S
- V
- S +LS
+LS
- LS
+S On/Off +V
- S
COM Output Good
P VRFV
VCVP VRFI
VCCP RCVP
EXTERNAL CONTROL
CONNECTOR
(ZUP rear panel view)
LOAD
POWER
SUPPLY
+
_
RCCP
1
CAUTION
At local sensing, short between +LS or +S to -V or -S or -LS will cause damage to the
power supply. Reversing the sense wires might cause damage to the power supply
at local and remote sensing.
14

3.7.4 Single load connection, Remote Sensing
3.7.5 Multiple load connections, radial distribution method
Remote Sensing is used in cases where, in Constant Voltagemode the load regulation is important at
the load terminals. Use twisted or shielded wires to minimize noise pick-up. If shielded wires are used,
the shield should be connected to the ground at one point, either the power supply chassis or the load
ground. The optimal point for the shield ground should be determined by experimentation. At Remote
Sensing,themaximumvoltagedropallowedattheloadwiresis0.5Vperwire.
In cases of multiple loads connected to one supply, each load should be connected to the power
supply’s output terminals using separate pairs of wires. It is recommended that each pair of wires will
be as short as possible and twisted or shielded to minimize noise pick-up and radiation. The sense
wiresshouldbeconnectedtothepowersupplyoutputterminalsortotheloadwiththemostcriticalload
regulationrequirement.
Fig.3-2:RemoteSensing,singleload.
Fig.3-3:Multipleloadconnectionswithdistributionterminal
2
2
- LS
- LS
+ S
- V
- S
- S
+LS
+LS
+S
+S
On/Off
On/Off
+ V
- S
COM
COM
Output Good
Output Good
P
P
VRFV
VRFV
VCVP
VCVP
VRFI
VRFI
VCCP
VCCP
RCVP
RCVP
EXTERNAL CONTROL
CONNECTOR
(ZUP rear panel view)
EXTERNAL CONTROL
CONNECTOR
(ZUP rear panel view)
LOAD
LOAD #1
LOAD #2
LOAD #3
POWER
SUPPLY
POWER
SUPPLY
To Load Terminals
Shield
+
+
+
+
_
_
_
_
RCCP
RCCP
1
1
+S
- V
+LS
- LS
+V
- S
15
This manual suits for next models
14
Table of contents
Other Nemic-Lambda Power Supply manuals
Popular Power Supply manuals by other brands
Allanson
Allanson AHVPS714-40-MV-PCB Product Specifications and Operating Manual

Huawei
Huawei ETP48400-C9A2 user manual
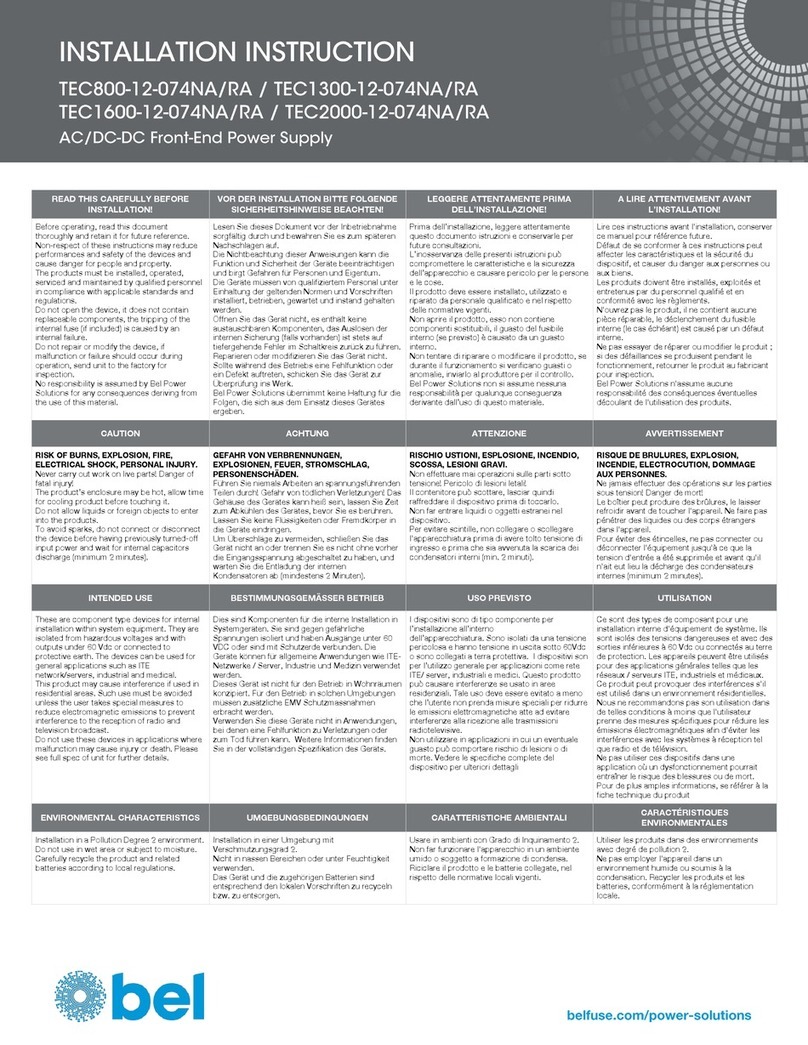
BEL
BEL TEC800-12-074NA installation instructions
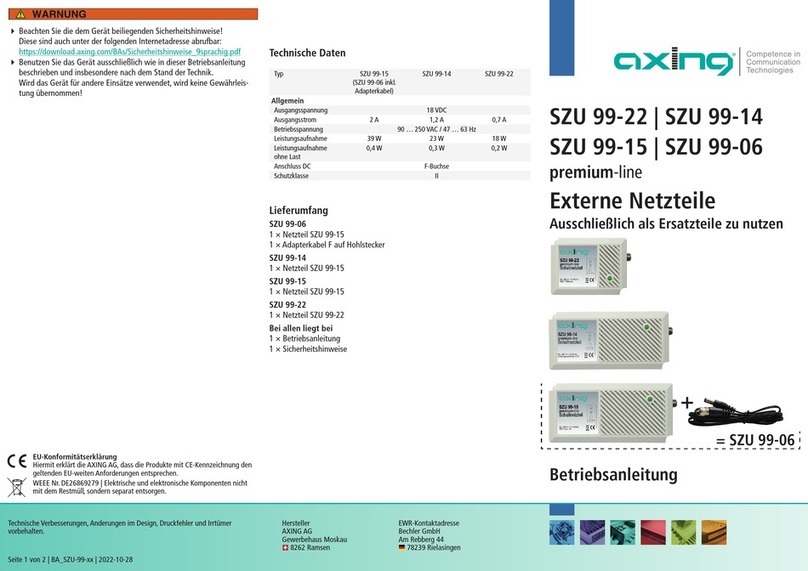
axing
axing ZU 99-22 Operation instructions
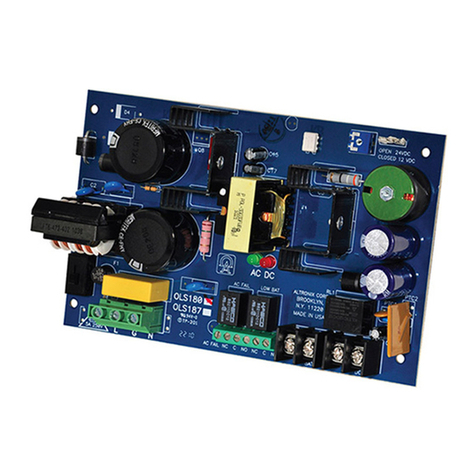
Altronix
Altronix OLS180220 installation guide

Streetwize
Streetwize SWPP17 Usage & Safety Instructions
