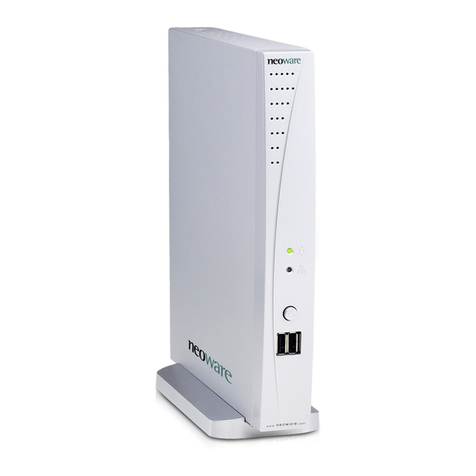
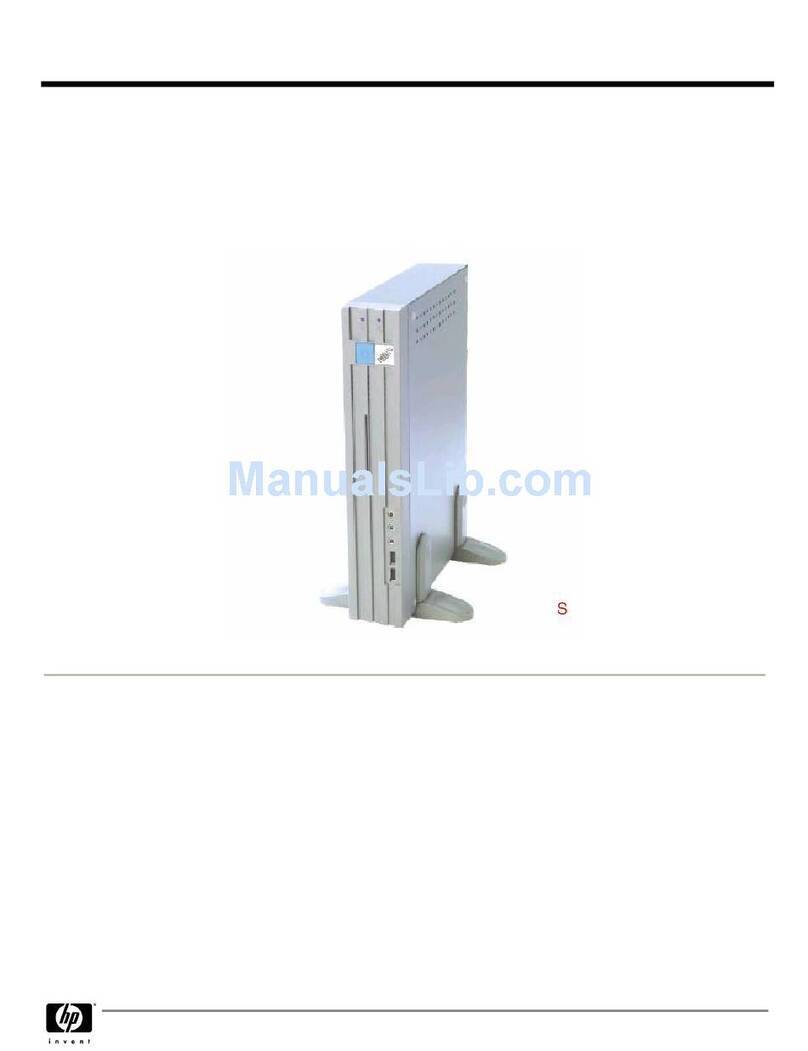
Neoware Neoware e140 - Thin Client User manual

i
NeoLinux User Manual
NeoLinux Thin Clients
User Manual
Release 3.0
Hotkey
Quick Reference Guide
To... Press....
Display the ezConnect Manager desktop Ctrl + Alt + End
Display the next/previous connection Ctrl + Alt + ↑or ↓
Change window focus on current desktop Ctrl + Alt + Tab

ii
© 2004 by Neoware Systems, Inc.
400 Feheley Drive
King of Prussia, PA 19406
610.277.8300
Email:info@neoware.com
Web: For the most recent version of this manual, please visit Neoware’s Web site at
http://www.neoware.com/manuals.html
Copyright © 2004 by Neoware Systems, Inc. This manual is copyrighted by Neoware Systems, Inc.
All rights are reserved. This document may not, in whole or in part, be copied, photocopied, repro-
duced, translated, or reduced to any electronic medium or machine-readable form without prior con-
sent, in writing, from Neoware Systems, Inc.
Neoware, NeoLinux, Neostation, Eon, @work, and @workStation are trademarks of Neoware Sys-
tems, Inc. Java is a registered trademark of Sun Microsystems, Inc. Microsoft and Windows are reg-
istered trademarks of Microsoft Corporation in the United States and/or other countries.
MetaFrame, WinFrame, and ICA are registered trademarks of Citrix Systems, Inc. Other trademarks
used in this manual are the property of their respective owners.
Disclaimer: The information provided in this manual is intended for instructional purposes only and
is subject to change without notice. Neoware Systems, Inc., accepts no responsibility or liability for
errors, omissions, or misleading information that may be contained in this manual.
Production note: This manual was entirely designed, written, edited, and illustrated on Neoware thin
clients using embedded NeoLinux software, Windows 2000 Server with Terminal Services, Citrix
MetaFrame, Adobe Illustrator, Adobe Photoshop, and Adobe FrameMaker.
6.9.2004

FCC regulatory and safety information iii
FCC regulatory and safety information
FCC regulatory and safety information can be found in the Quick-Start Guide that came
with your appliance, and on the Support section of the Neoware website which can be
found at:
http://www.neoware.com/support.html
CANADA ICES/NMB-003 Class/Classe (B)
This Class B digital apparatus complies with Canadian ICES-003.
Cet appareil numérique de la classe B est conform à la norme NMB-003 du Canada.
Neoware Hardware Warranty
Neoware hardware warranties can be found in the Quick-Start Guide that came with your
appliance, and on the Support section of the Neoware website which can be found at:
http://www.neoware.com/support.html

iv Safety Instructions
Safety Instructions
Please read these safety instruction carefully and keep this user’s manual for later refer-
ence.
1Before removing the outer case from the appliance always disconnect the AC power cord to pre-
vent the possibility of dangerous electrical shock.
2Before cleaning, disconnect the appliance from AC power. Do not use liquid or sprayed cleaning
products to clean the unit. Instead, use a moistened sheet or cloth for cleaning.
3Be sure not to expose the appliance to excessive humidity.
4Be sure to install the appliance on a secure surface. A falling appliance could cause injury.
5Place the power cord in such a way to avoid people stepping on it. Do not place anything over
the power cord.
6Be sure to note all cautions and warnings on the appliance.
7If the appliance is not used for a long period of time, disconnect the AC power to avoid damage
caused by voltage transients.
8Never pour any liquid into any appliance openings: This could cause fire or electrical shock.
9If one of the following situation occurs, be sure to get the appliance checked by a qualified ser-
vice technician:
a. The power cord or plug is damaged.
b. Liquid penetrates the appliance case.
c. The appliance is exposed to moisture.
d. The appliance does not work well or you cannot get it to work according to the user’s man-
ual.
e. The appliance has been dropped or damaged.
f. If the appliance has obvious signs of breakage.
10 The appliance should be stored and used only in temperature and humidity controlled environ-
ments. Storing appliances below -20°C (-4°F) or above 60°C (140°F) may cause damage.
11 The sound pressure level at the operators position according to IEC 704-1:1982 is equal or less
to 70dB(A).
12 The input power cord shall be minimum H05VV-F, 3G, 0.75mm², rate minimum 6A.
13 The appliance should be used only where ambient air temperatures are maintained below 40°C.

NeoLinux User Manual
v
Table of Contents
FCC regulatory and safety information iii
CANADA ICES/NMB-003 Class/Classe (B) iii
Neoware Hardware Warranty iii
Safety Instructions iv
Introduction 9
Overview 9
Purpose and intended readers 9
Topics covered 10
What is a Thin Client Appliance? 10
A new way to use Windows 10
ezConnect 10
Neoware thin clients 11
NeoLinux software builds 11
Getting more information 13
The Internet 13
Technical support 13
CHAPTER 1 Setting Up Your Thin
Client 15
Unpacking your Neoware thin client 15
Packaging contents 15
Connecting the components 16
Back panel connectors 16
Connecting the cables 17
Connecting parallel and serial peripheral
devices 17
Connecting USB peripheral devices for use
with Citrix ICA 18
Determining the release version of your
software 19
Accessing the Help | About Status dialog 19
Arranging Your Work Area 21
Getting comfortable 21
CHAPTER 2 Configuring Your
Network Settings 23
Selecting the network settings 23
Do you need to configure? 23
Accessing network settings 23
Network Settings dialog 24
Network Devices tab 24
DNS tab 26

Table of Contents NeoLinux User Manual
vi Table of Contents
ezUpdate tab 28
Advanced tab 31
Saving network settings changes 32
Viewing current network settings 33
Accessing information about status and
configuration 33
The Network tab 34
Configuring the Neoware 802.11b USB Wireless
Ethernet Adapter 34
Factory reset the thin client 35
Power off the thin client 35
Insert the USB Wireless Ethernet Adapter’s
USB connector 35
Power on the thin client 35
Open Network Settings 36
Select the Advanced tab 36
Select the Network Devices tab 36
Disable the on-board Ethernet interface 37
Configure Wireless Settings 37
Wireless Settings 37
Click OK to save settings 39
CHAPTER 3 ezConnect - The
NeoLinux Connection
Manager 41
Managing connections 41
ezConnect Connection Manager 41
Creating connections 42
Editing connections 42
Deleting connections 43
Copying connections 43
Using connections 43
Establishing a connection 43
Ending a connection 44
Switching between connections 44
Session management 44
Appliance properties 45
Security 45
Printers 47
Sound 48
Servers 49
Setting the date, time, and time zone 51
Desktop settings 52
Messages and console 55
Factory reset 55
Connection properties menu 55
Global ICA settings 55
Obtaining information about the desktop
device 57
Accessing device status information 57
General tab 57
The Network tab 58
Snap-Ins tab 59
CHAPTER 4 ICA Connections 61
Configuring ICA connections 61
Creating an ICA connection 61
Editing an ICA connection 65
Using the PNAgent interface 66
Automatically starting and restarting a
PNAgent connection 67
Securing the ezConnect Connection
Manager 67
Log on to the Citrix Server 68

NeoLinux User Manual Table of Contents
Table of Contents vii
CHAPTER 5 RDP 5
Connections 69
Configuring RDP 5 Connections 69
Creating an RDP 5 connection 69
Editing an RDP connection 73
CHAPTER 6 Netscape
Connections 75
Configuring Netscape connections 75
Creating a Netscape connection 75
Editing a Netscape connection 78
Printing Netscape pages 79
CHAPTER 7 Basic Terminal
Connections 81
Configuring Basic Terminal Connections 81
Creating a Basic Terminal connection 82
Editing a Basic Terminal connection 84
CHAPTER 8 X Window
Connections 85
Configuring X Window connections 85
Creating an X Window connection 86
89
Editing an X Window connection 90
CHAPTER 9 IBM 3270/5250
Emulator for
NeoLinux 91
Overview 91
How to determine if the IBM 3270/5250
terminal emulator client is installed in your
software 91
What are IBM 3270 and 5250
emulations? 92
How do I know which emulation I need? 92
IBM 3270/5250 Emulator Setup Wizard 92
Creating an IBM 3270/5250 Emulator
connection 92
Editing an IBM 3270/5250 Emulator
connection 96
Full screen operations with IBM 3270/5250
Emulator 96
What is full screen mode? 96
How do you set full screen mode? 97
Moving between simultaneous full screen
connections 97
Starting new sessions in full screen
mode 98
Windowed operations with IBM 3270/5250
Emulator 98
Moving between windowed connections 99
Starting new sessions in windowed
mode 99
Detailed help on IBM 3270/5250 Emulator
software 99
Global IBM Emulator settings 100
Precedence of settings 101
Accessing Global IBM Emulator
settings 101
3270 Emulation global settings 102
5250 Emulation global settings 103
Locale tab 105

Table of Contents NeoLinux User Manual
viii Table of Contents
CHAPTER 10Custom
Connections 107
Configuring custom connections 107
Creating a Custom connection 107
Editing a Custom connection 109
CHAPTER 11 TeemTalk Terminal
Emulation
Connections 111
Configuring TeemTalk terminal emulation
connections 111
Creating a TeemTalk Terminal Emulation
connection 112
Editing a TeemTalk Terminal Emulation
connection 115
Printing text screens 115
Setting up a text printer 115
CHAPTER 12Using the NeoLinux
Desktop 117
Getting Started 117
Overview 117
Using the Taskbar 118
Using the Desktop Divider 118
Using NeoLinux Windows 119
Using the window controls 119
CHAPTER 13Using the NeoLinux
Print Manager
utility 121
Getting Started 121
Overview 121
Accessing NeoLinux Print Manager
utility 121
Adding printers using Print Manager 123
Open Print Manager utility 123
Adding a local printer 123
Saving changes 128
Adding a network printer 129
Security in Print Manager 130
Printer Jobs dialog 130

NeoLinux User Manual
9
Introduction
This chapter describes the purpose and main topics of this manual, as
well as the basic features of the Neoware thin clients.
Overview
Purpose and
intended readers This manual explains how to use thin client devices that are run-
ning Neoware NeoLinux Software Release 3.0. The intended audi-
ence is primarily system administrators and users of NeoLinux on
thin clients. (To find out which release version of software is run-
ning on your thin client, see “Determining the release version of
your software” on page 19.)

Introduction
10 What is a Thin Client Appliance?
Topics covered Neoware recommends that you read the chapters in this manual in
order. The main topics covered are:
•Unpacking and setting up your thin client.
•Configuring your thin client for your network.
•Changing settings on your thin client.
•Creating and using connections to servers, mainframes, and intra-
nets.
The appendix, Advanced Neolinux Configurations, provides addi-
tional topics that you may need to know.
What is a Thin Client Appliance?
A new way to use
Windows Thin clients (also called “thin client appliances”) are smart devices
that provide access to programs running on network servers. Once a
connection is made to a server, depending on the version of software
installed, you can use your favorite Windows programs such as
MicrosoftOfficeor Adobe Photoshopin the familiar Win-
dowsdesktop, connect to LINUX/UNIX servers, mainframes and
minicomputers via telnet, terminal emulations, and X Window con-
nections, and connect to intranet / Internet applications through a
Web browser.
Generally as you work, your thin client sends keystrokes and mouse
clicks to the server, which responds with screen updates for your
monitor. Most of the processing occurs on the server. Due to the
speed of modern computer networks, this exchange happens as fast
as, and frequently faster than, processing on a personal computer.
Thin clients aren’t difficult to use. If you know how to use a personal
computer, or even if you don’t, you can use a thin client.
ezConnect Neoware ezConnect, the NeoLinux connection manager, consists of
a simple, easy, and highly customizable user interface for Linux that

Introduction
What is a Thin Client Appliance? 11
shields users from the complexity of the Linux operating system. It
has been designed specifically for thin client computing applica-
tions. ezConnect allows users or administrators to create a variety of
connections to run Microsoft Windows applications on servers,
UNIX applications via the X Window protocol, terminal connections
to servers, mainframes and minicomputers, Netscape Navigator
Internet sessions for applications such as kiosks, and custom connec-
tions to launch virtually any Linux application. ezConnect also
allows users to customize the operation of the device.
Neoware thin
clients Neoware thin clients are sleek computing devices that contain no
hard drive, fan, or other moving parts, making them extremely reli-
able, and completely silent. They can be used with standard VGA,
SVGA, and XVGA-type monitors, PS/2 or USB mouse and key-
board, and other pointing devices.
Configurations vary with respect to the specific number of parallel
port, serial port(s), and USB ports that are provided. When available,
these ports may be used for peripheral devices that may include
printers, modems, floppy drives, zip drives, cd-roms, and bar code
scanners. The version of software installed in your thin client will
determine which types of peripherals may be used.
Your thin client can automatically connect to either 10BaseT or
100BaseT (twisted-pair) Ethernet networks, as well as make serial
port connections with or without a modem.
NeoLinux software
builds Your thin client arrives with Neoware’s NeoLinux software inter-
nally pre-installed in the local Flash disk memory of your thin client.
Note: This manual is intended to cover a number of different
Neoware thin client models. Since the primary difference between
models is the client software included with each model, this manual
may contain references to client software packages that are not

Introduction
12 What is a Thin Client Appliance?
included in your particular model. Shown below are the client soft-
ware packages currently provided in Neoware thin client models:
Using NeoLinux, your thin client can initiate simultaneous, multiple
connections (some models are restricted to one session, only) to
Windows Server 2003, Windows 2000 Server, Windows NT Termi-
nal Server, UNIX-based servers, mainframes, midrange computers,
intranets, and the Internet, depending on the software version
installed in the thin client.
Connections to Windows Server 2003, Windows 2000 Server, and
NT-based servers are made via Citrix’s Independent Computing
Architecture (ICA) protocol, as well as Remote Desktop Protocol
(RDP). Access to UNIX-based servers can be made by telnet con-
nections and by X Window protocols. In addition, the optional
TeemTalk suite provides more than 30 terminal emulations.
NeoLinux supports DHCP and BOOTP remote configuration ser-
vices, and NFS file transfer protocol. In some models, a local
NetscapeNavigator browser is also included.
Part Number Model Name ICA RDP TeemTalk Basic VT
Terminal Netscape
Browser XDM /
X.11 R6
BE-02-BA Capio One –Single
Session
X
BE-A2-BB Capio One –Multi-
ple Sessions
XX X
CP4A-AA Capio 500 16/32 X X X
CP4S-CB Capio 500 32/64 X X X X X X
CP4S-EC Capio 500 64/128 X X X X X X
BA-EON2000E-6 Eon 2000 16/32 X X X
BA-EON2000X-6 Eon 2000 16/64 X X X X
BA-EON4000S-6 Eon 4000 32/64 X X X X X X
BA-EON4000T-6 Eon 4000 64/64 X X X X X X
BA-EON4000N-6 Eon 4000 16/64
(Network Boot) XX X X X
BH-02-CB Eon e100 32/64 X X X X X X
BH-02-EC Eon e100 64/128 X X X X X X
BD-02-EB Eon e300 64/64 X X X X X X
FYI
To make Windows con-
nections using ICA, the
server must be running
Citrix MetaFrame, or
WinFrame.

Introduction
Getting more information 13
Getting more information
The Internet Current and archival information about Neoware products, including
the latest software updates, can be found at:
http://www.neoware.com
Also, this user manual and other Neoware documentation are avail-
able on the Neoware Web site for reading or downloading.
Technical support For the quickest response to technical support needs, register your
support need at
http://www.neoware.com/support/support_request.html
You can also call Neoware at +1.610.277.8300.

Introduction
14 Getting more information

NeoLinux User Manual
15
CHAPTER 1 Setting Up Your
Thin Client
This chapter describes how to unpack and set up your Neoware thin client
thin client.
Unpacking your Neoware thin client
Packaging contents Neoware thin client devices are typically is shipped in cartons.
Depending on the shipping configuration, one or more of the fol-
lowing items may be contained in separate shipping cartons (such
as a monitor, keyboard, and mouse):
Neoware Thin Client
•A keyboard with cable attached.
•A mouse with cable attached.
•A power cord.
•A stand for stabilizing your thin client in a vertical orientation.
•Neoware thin client Quick-Start Guide.
Monitor
•A monitor power cord (attached to some monitors).
•A monitor video cable (attached to most monitors).
•A tilt/swivel base, attached or unattached.
When unpacking your thin client, open the cartons carefully,
remove the components, and save the packing materials in the
event you need to repack the device.

Setting Up Your Thin Client
16 Connecting the components
Connecting the components
Back panel
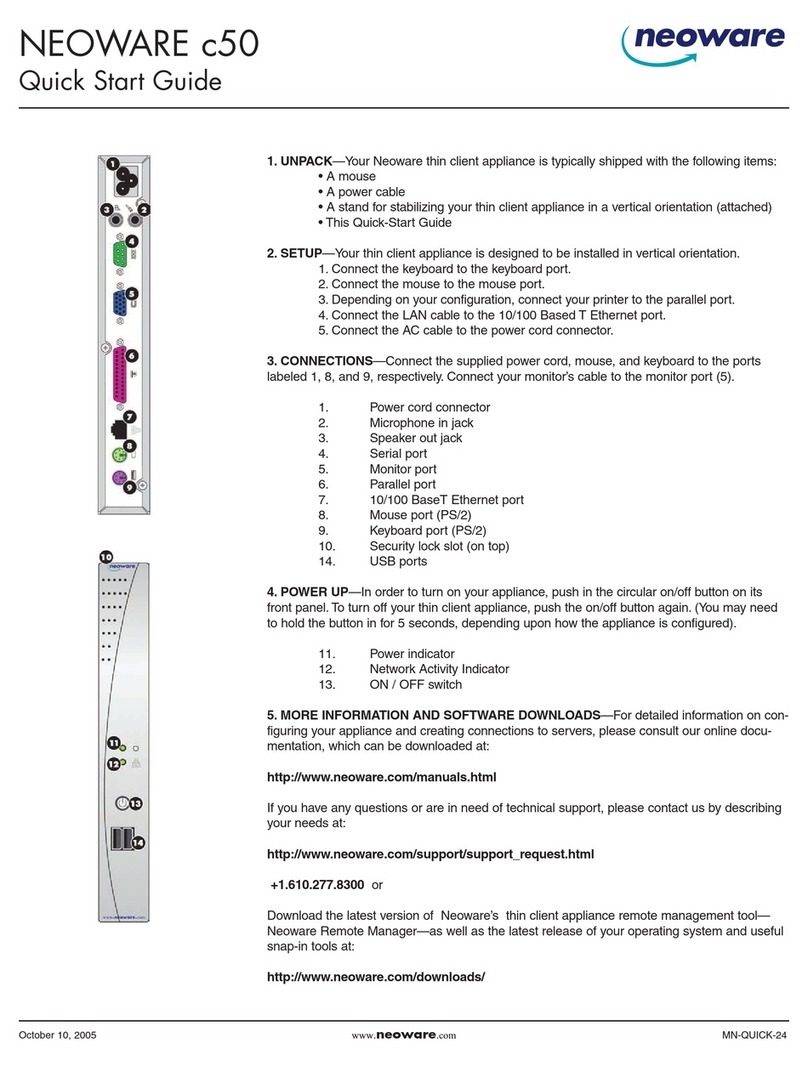
connectors The following bulleted list provides explanations about the different
connections that can be found on the back panels of Neoware thin
clients.
•MOUSE is a PS/2-type mouse port (green-colored connec-
tor marked with the word “MOUSE” or with the icon dis-
played here). NeoLinux also supports USB mice, plugged
into one of the USB ports.
•KEYBOARD is a PS/2-type keyboard port (purple-col-
ored connector marked with the word “KEYBOARD” or
with the icon displayed here).
•LAN is an RJ-45 jack. The thin client automatically
detects and connects to either 10BaseT or 100BaseT
(twisted-pair) Ethernet.
•PARALLEL is a standard DB-25 parallel port for local
printers.
•COM 1 and COM 2 are DB-9, RS-232 serial ports.
Depending upon which software version is loaded in the
thin client, serial ports may be used for peripheral devices such as
modems, personal digital assistants (PDAs), and bar code scan-
ners.
•USB ports (two Type A USB ports). NeoLinux supports
USB mice, including scroll mice. NeoLinux automati-
cally recognizes which type of mouse is attached at bootup. If a
mouse is changed, a reboot is necessary.
•MIC is a 3.5 mm microphone jack.
•LINE IN is a 3.5 mm line audio input jack.
•LINE OUT is a 3.5 mm audio output jack.
•MONITOR is a standard DB-15, high-density, VGA-type
monitor connector.
FYI
The serial and parallel
ports can be used with
ICA and terminal emula-
tion connections.

Setting Up Your Thin Client
Connecting the components 17
•The internal or external power supply connects through the sup-
plied power cord. It automatically detects and accepts from 100
to 240 VAC line voltage.
Connecting the
cables
1Arrange your thin client and monitor in your work area.
2Connect the monitor power cord into a power receptacle.
3Connect the thin client power cord into the socket. Ensure the
thin client is powered off.
4Connect the keyboard cable into the KEYBOARD (purple) port.
5Connect the mouse cable into the MOUSE (green) port.
6Connect the monitor video cable to the MONITOR port.
Don’t overtighten the screws. The video cable connection to the
monitor varies. Some monitors have attached video cables.
7Connect a twisted-pair, 10BaseT or 100BaseT Ethernet cable into
the LAN jack.
Connecting parallel
and serial
peripheral devices
You can connect a modem, printer, bar code scanner, and other
peripheral devices to your thin client.
1If your thin client is powered on, log off all its open connections,
and then power off the device.
2For a local printer, connect its cable to the PARALLEL port. You
can also attach local serial printers to either serial port: COM 1 or
COM 2.
3For an external modem, bar code scanner, or other serial device,
connect its cable to a serial port (COM 1 or COM 2). Which
serial port devices will work with your thin client, depends
entirely upon the software version loaded in the device. Not all
software versions support all serial devices.
4Power on your thin client, and then the peripheral device.

Setting Up Your Thin Client
18 Connecting the components
Connecting USB
peripheral devices
for use with Citrix
ICA
You can connect USB external drives to your NeoLinux thin client,
including floppy drives, zip drives, and CD-ROM drives. (USB
devices are not supported in Capio 504.)
1In the ezConnect (Neoware Connection Manager) menu bar,
select Settings | Connection Properties | Global ICA Settings.
2When the Global ICA Connection Properties tabbed dialog
appears, select the Drive Maps tab.
3Click the Enable Drive Mapping checkbox.
4Click the Add button.
5When the Setup Drive Mapping dialog appears, select the drive
letter to represent the USB peripheral device you are setting up,
and type the path of the drive in the path field. When finished
Note
To install and use USB
peripheral devices, it is
necessary that the USB
Controller settings in
your thin client’s BIOS
be enabled. If upgrad-
ing from an earlier ver-
sion of NeoLinux, you
will need to enable this
setting. For information
on changing this setting
in the BIOS see
“Enabling the USB Con-
troller in the thin client
BIOS” on page 119.
Click
Here

Setting Up Your Thin Client
Determining the release version of your software 19
Click OK.
Note: Depending upon the device you are connecting, the path
will be one of the following:
•Zip drive - /usb/zip
•Floppy Drive - /usb/floppy
•CD-ROM drive - /usb/cdrom
•Other (USB Flash drives, etc.) - /usb/usb-drive
6Click OK in the Global ICA Connection Properties tabbed dialog.
The external USB drive will now work a) when using the NeoLinux
operating system, and b) when connecting to ICA sessions with
MetaFrame servers.
Determining the release version of your software
Accessing the Help
| About Status
dialog
By accessing the Help | About Status dialog using ezConnect Con-
nection Manager you can determine which release version of
NeoLinux your thin client is running.
1In the ezConnect (Neoware Connection Manager) menu bar,
select Help | About Status, or press F3 any time the ezConnect

Setting Up Your Thin Client
20 Determining the release version of your software
Connection Manager screen is visible on-screen.
2The About information box appears. This box shows which
release version of NeoLinux is installed in your thin client, and
which release version of ezConnect Connection Manager is
installed.
Click
Here
NeoLinux
Release
Information
ezConnect
Release
Information
Other manuals for Neoware e140 - Thin Client
2
This manual suits for next models
4
Table of contents
Other Neoware Server manuals

Neoware
Neoware Neoware c50 - Thin Client User manual

Neoware
Neoware Neoware c50 - Thin Client User manual

Neoware
Neoware Neoware c50 - Thin Client User manual

Neoware
Neoware Neoware c50 - Thin Client User manual

Neoware
Neoware Neoware c50 - Thin Client User manual

Neoware
Neoware Neoware c50 - Thin Client User manual