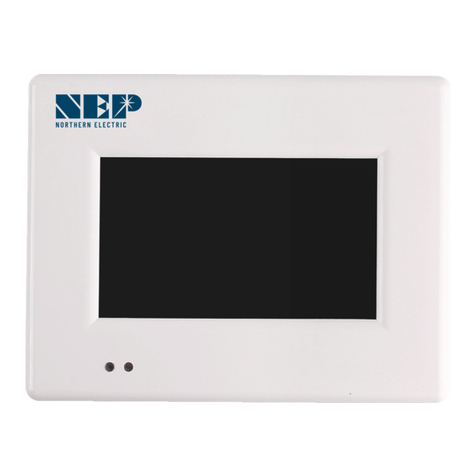
NEP BDG?256 User manual

BDG-256 Quick Start Guide
INSTALLATION
Check the BDG-256/BDG-256P3 shipping box for the following items:
●BDG-256/BDG-256P3 Communications Gateway
●AC power cord (BDG-256)
●BDG-256/BDG-256P3 Communications Gateway Installation and Operation Manual and
Warranty
Outdoor Installation
●When installed outdoors, the BDG-256 must be housed inside the included weather-proof
box.
Indoor Installation
Connecting to Internet
Method 1: Using Included Wi-FI booster (recommended)
●Plug the Booster directly into the same outlet as the Gateway or into an outlet within 5ft of the
Gateway.
●Insert the TP-Link (Black USB) into the bottom of the Gateway
●Go to Settings and select "System Config". Make sure to click on the box next to Engineer Mode. A
pop-up will then ask for a password. The password is "1,2,3,4".
●Go back to Settings and select Ethernet, then select WPS, and finally select Yes to set the Gateway to
WPS mode.
●The screen should have a pop-up that says “Looking to Connect”
●Go to the booster and click the white button on the bottom of the unit next to the ethernet port.
Make sure you click and release this button.
●Within two minutes the gateway should say Connected.
●Before disconnecting click “okay” to Reboot the Gateway
●After the reboot is finished, unplug the booster and plug it in to the outlet next to the router.
●Connect the booster to the router via ethernet cable (make sure to use the cord provided in the box)
●Make sure all 3 icons on the booster are lit up blue.
Go back to the Gateway and open settings and select Network Test. Run a Network Test to make sure
the connection is Good.
Scroll to the left of the setting's screen and click on Date & Time. Make sure you select the box next
to "Synchronize with internet clock".
Note: The Booster must be plugged directly into an outlet and cannot be used with extension
cables.
Note: Wait for the system to restart after connecting before moving the Booster.
Method 2: Using WPS (for supported routers with WPS)
Plug the wireless adapter to BDG-256 gateway, and wait for several seconds for several seconds
Press the WPS button on the router for 2 seconds, and for most routers, the WPS button would
flash at this point
Within 2 minutes, return to the BDG-256 gateway, click on Setting/Ethernet, and press “WPS” (the
red button). If the gateway reports the WPS setup is successful, the IP address on the gateway
screen will be updated instead of 0.0.0.0 within 5 minutes
Method 3: Using AP Mode
Note: This method only applies to BDG-256 gateways with firmware version “20170701-01” or
later, and with the “TP-LINK” WiFi dongle shipped inside the BDG-256 box.
●Click on the AP button on the BDG-256 gateway and follow the instructions to reboot the
gateway. Note that after reboot the IP address at the bottom of the gateway is
192.168.99.1
●Search for a WiFi network named NEP-xxxxxxxxxxxxxx (xxxxxxxxxxxxxx is the gateway SN)
on a phone or computer, and link the phone or computer to this WiFi network, the
password is 12345678
●Log on to the webpage: http://192.168.99.1/wifi Enter password gateway
●The pull down menu SSID List shows all available WiFi networks. Click on Search WiFi may
rescan the available WiFi networks. If the WiFi network is “hidden” and does not show in
the list, the network name can also be input manually on the line of SSID
●Click on Save. Uncheck AP on the BDG-256 gateway touch screen and then reboot the
gateway following instructions
Test Internet Connection
To test the Wi-Fi connection of the gateway, navigate to the Menu and select Network Test, then
select Execute on the gateway. The gateway will then check the network connection and report
whether the connection is "Good" or "Bad."
Mobile App

A
Commissioning
Inverter/RSD Serial Input
➔Before beginning the process of serial input, it is crucial to have a complete site
map to determine the order in which serial numbers will be inputted. It is
important to note that the module connected to the longer DC connection on
the inverter will end in 1, while the module connected to the shorter DC
connection will end in 0.
6.1.A Manually on Device
●Navigate to Setting →COM ID on the gateway, where a list of empty cells and inverter
numbers will be displayed on the left side.
●To input serial numbers, locate the values between the dashes from the list of serials on
your site map. For example: 21508-0005F130-U. Once the serial number is inputted and
saved, the gateway will prompt a reboot.
Using USB Barcode Scanner
●NEP offers a barcode scanner that can simplify the process of inputting serial numbers. To
use the scanner, plug it into the gateway's USB port and navigate to the COM ID screen as
in section 6.1.A. Scan the barcode of the desired module into the Inverter1 cell, and
repeat until all serial numbers have been input. Make sure to note which module
corresponds to each serial number for easier identification later on. Once all serials have
been input, the gateway will prompt for a reboot.
Using Web Browser
●Another option for serial input is through a web browser. This method requires the
gateway to be assigned an IP address and connected to WiFi. To begin, access the web
browser on your device (such as a phone or laptop) and enter the gateway's IP address
followed by "/module" (e.g. http://192.168.99.1/module)
●Once on the module input screen, you can easily input the serial numbers using your
keyboard or barcode scanner.
Installer Registration on Website
●If you are new to using NEP products, please visit our registration page at
https://user.nepviewer.com/pv_manager/register.php?lang=en to create an account for
yourself or your company. We recommend providing as much detail as possible to help us
better understand your needs.
●Once you have registered, please contact NEP Support via email at
an installer account. This will allow you to access additional features and resources to
help you better manage your NEP products.
Homeowner Registration
To start using NEP products, homeowners can register for an account by visiting
https://user.nepviewer.com/pv_manager/register.php?lang=en. Once they have created their
account, they can begin to enjoy the benefits of NEP's solar products.
Pre-Commissioning Setup
Begin by connecting the BDG-256 gateway to the internet using one of the three methods
outlined in the "BDG-256 Quick Installation Guide."
Once connected, enter the serial numbers of the inverters using one of the three
methods described in the same guide.
Note: It is recommended to input the serial numbers and connect to the internet in a
warehouse or homeowner's garage using a standard 120V outlet before installing the
gateway onto the home's 240V wiring.
Create a Site on NEP Website
1. Access your installer account on the NEP website at
https://user.nepviewer.com/pv_manager/login.php using your registered email
and log in to your account. Then, click on the "Add Site" button to create a new
site.
2. Fill out all the necessary fields in the site creator, including the serial number of
the gateway, which can be found on the top-left of the gateway bezel or by
navigating to Menu > Software on the gateway. If you have multiple gateway
serial numbers, click the "Add" button above the serial number field to add
more.
3. Provide a name for the site and enter its accurate coordinates to receive precise
weather data on the following page
4. On the last page of the site creator, provide any additional information that you
deem necessary and then click the "Create Site" button to create the site.
Verify and Map Site
1. Once you have confirmed the creation of the site on the NEP website, navigate to your
dashboard where you should be able to see it.
2. Click on the site to access its information and then click on "Open Viewer." The site's
production data should now be visible on the first page. Note that it may take up to two
hours for the gateway and inverters to fully register with the website.
3. To access the module view, click on the dial. Here, you should see each microinverter
listed. If you cannot see them, verify that the microinverters are listed on the device's
ComID menu or allow more time for them to register.
4. You can customize the site layout by navigating to Layout > Manage Layout. From here,
you can drag modules as needed and change their orientation. You can also add different
zones for various roofs or sections of the same roof from the Layout tab.
Commission the Gateway and Confirm Site Setup
commissioning appointment for the gateway and to confirm that the site was set up correctly.
Grant Homeowner Access to Module View (Optional)
Note that homeowners do not have access to the module view by default. If you would like to grant
598-9901.
Videos and Support
Other manuals for BDG?256
5
This manual suits for next models
2
Other NEP Gateway manuals
Popular Gateway manuals by other brands
Zhejiang Third Net Technology Co.
Zhejiang Third Net Technology Co. TN-IVS-8000 user manual
2N
2N EasyGate Pro user manual
Lantronix
Lantronix X303 quick start guide
ZyXEL Communications
ZyXEL Communications USG-100@USG-200 - V2.20 ED 2 manual
ICP DAS USA
ICP DAS USA HRT-710 user manual
Inovonics
Inovonics EN6080 user manual
