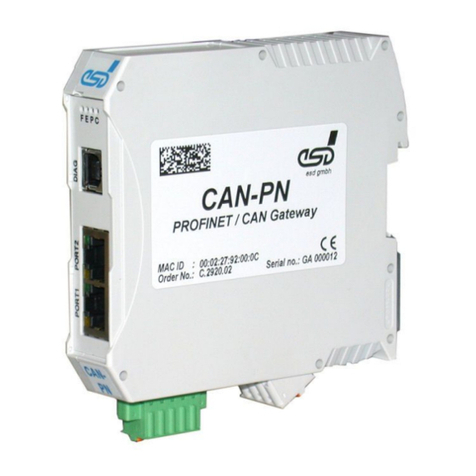
ESD CANopen-PN User manual

CANopen-PN
PROFINET IO / CANopen Gateway
Manual
to Product C.2921.02
CANopen-PN Manual • Doc. No.: C.2921.21 / Rev. 1.6 Page 1 o 105
esd electronic system design gmbh
Vahrenwalder Str. 207 • 30165 Hannover • ermany
http://www.esd.eu
Phone: +49 (0) 511 3 72 98-0 • Fax: +49 (0) 511 3 72 98-68

N O T E
The in ormation in this document has been care ully checked and is believed to be entirely reliable.
esd electronics makes no warranty o any kind with regard to the material in this document, and
assumes no responsibility or any errors that may appear in this document. In particular
descriptions and technical data speci ied in this document may not be constituted to be guaranteed
product eatures in any legal sense.
esd electronics reserves the right to make changes without notice to this, or any o its products, to
improve reliability, per ormance or design.
All rights to this documentation are reserved by esd electronics. Distribution to third parties, and
reproduction o this document in any orm, whole or in part, are subject to esd electronics's
written approval.
© 2020 esd electronics gmbh, Hannover
esd electronics gmbh
Vahrenwalder Str. 207
30165 Hannover
Germany
Phone: +49-511-372 98-0
Fax: +49-511-372 98-68
E-Mail: in [email protected]
Internet: www.esd.eu
This manual contains important in ormation and instructions on sa e and e icient
handling o the CANopen-PN. Care ully read this manual be ore commencing any work
and ollow the instructions.
The manual is a product component, please retain it or uture use.
Trademar Notices
CANopen® and CiA® are registered community trademarks o CAN in Automation e.V.
PROFINET® is a registered trademark o PROFIBUS and PROFINET International (PI).
ARM® is a registered trademark o Advanced RISC Machines, Ltd or its subsidiaries.
All other trademarks, product names, company names or company logos used in this manual are reserved by their
respective owners.
Page 2 o 105 Manual • Doc. No.: C.2921.21 / Rev. 1.6 CANopen-PN

Document file: I:\Texte\Doku\MANUALS\CAN\CANopen-PN\English\CANopen-PN_Manual_en_16.odt
Date of print: 2020-07-24
Document type
number: DOC0800
Firmware version: CANopen-PN irmware rom rev.1.0.6
Document History
The changes in the document listed below a ect changes in the hardware as well as changes in
the description o the acts, only.
Revision Chapter Changes versus previous version Date
1.2
6 Notes concerning PROFINET IO services revised or inserted
2015-06-04
6.1.9 Note concerning bit rate updated
6.2.1 Description o the Error Codes revised
9., 10. Chapter updated
1.3
- Sa ety In ormation revised
2015-11-27
4. Note to compatibility o CANopen-PN irmware and speci ic GSDML
Composer versions inserted
5.1.3 New chapter „Compatibility CANopen-PN Firmware and GSDML Composer“
5.2 Note to compatibility o CANopen-PN irmware and speci ic GSDML
Composer versions inserted
5.7 Note to CommunicationCyclePeriod inserted
5.11 New chapter “Using GSDML File and CANopen-PN Gateway with the TIA
Portal“
1.4
- Classi ication o warning messages moved and revised
2017-05-08
4. Warning message concerning power supply inserted
5.1 Note on CANopen-Slave inserted
5.6 “CANopen-PN” inserted in irst sentence
1.5 1.1 Note on CANopen Slave unctions deleted 2017-07-20
15. New PROFINET Certi icate
1.6 14. New Declaration o Con ormity 2020-07-24
15. New PROFINET Certi icate
Technical details are subject to change without urther notice.
CANopen-PN Manual • Doc. No.: C.2921.21 / Rev. 1.6 Page 3 o 105

Classification of Warning Messages and Safety Instructions
This manual contains noticeable descriptions, warning messages and sa ety instructions, which
you must ollow to avoid personal injuries or death and property damage.
This is the sa ety alert symbol.
It is used to alert you to potential personal injury hazards. Obey all sa ety messages
and instructions that ollow this symbol to avoid possible injury or death.
DANGER, WARNING, CAUTION
Depending on the hazard level the signal words DANGER, WARNING or CAUTION are used to
highlight sa ety instructions and warning messages. These messages may also include a warning
relating to property damage.
DANGER
Danger statements indicate a hazardous situation which, i not avoided, will result in
death or serious injury.
WARNING
Warning statements indicate a hazardous situation that, i not avoided, could result in
death or serious injury.
CAUTION
Caution statements indicate a hazardous situation that, i not avoided, could result in
minor or moderate injury.
NOTICE
Notice statements are used to noti y people on hazards that could result in things other than
personal injury, like property damage.
NOTICE
This NOTICE statement contains the general mandatory sign and gives in ormation that
must be heeded and complied with or a sa e use.
INFORMATION
INFORMATION
Notes to point out something important or use ul.
Page 4 o 105 Manual • Doc. No.: C.2921.21 / Rev. 1.6 CANopen-PN

Safety Instructions
●When working with the CANopen-PN ollow the instructions below and read the manual care ully
to protect yoursel rom injury and the CANopen-PN rom damage.
●Do not open the housing o the CANopen-PN.
●The permitted operating position is speci ied as shown (Figure: 47). Other operating positions are
not allowed.
●Never let liquids get inside the CANopen-PN. Otherwise, electric shocks or short circuits may
result.
●Protect the CANopen-PN rom dust, moisture and steam.
●Protect the CANopen-PN rom shocks and vibrations.
●The CANopen-PN may become warm during normal use. Always allow adequate ventilation
around the CANopen-PN and use care when handling.
●Do not operate the CANopen-PN adjacent to heat sources and do not expose it to unnecessary
thermal radiation. Ensure an ambient temperature as speci ied in the technical data.
●Do not use damaged or de ective cables to connect the CANopen-PN and ollow the CAN wiring
hints in chapter: "Correctly Wiring Electrically Isolated CAN Networks".
●In case o damages to the device, which might a ect sa ety, appropriate and immediate
measures must be taken, that exclude an endangerment o persons and domestic animals and
property.
●Current circuits which are connected to the device have to be su iciently protected against
hazardous voltage (SELV according to EN 60950-1).
●The CANopen-PN may only be driven by power supply current circuits, that are contact
protected. A power supply, that provides a sa ety extra-low voltage (SELV or PELV) according to
EN 60950-1, complies with this conditions.
Qualified Personnel
This documentation is directed exclusively towards personnel quali ied in control and automation
engineering.
The installation and commissioning o the product may only be carried out by quali ied personnel,
which is authorized to put devices, systems and electric circuits into operation according to the
applicable national standards o sa ety engineering.
Conformity
The CANopen-PN meets the demands o the EU regulations and EMC standards printed in the
con ormity declaration at the end o this manual.
Data Safety
This device is equipped with an Ethernet or other inter ace which is suitable to establish a
connection to data networks. Depending on the so tware used on the device, these inter aces may
allow attackers to compromise normal unction, get illegal access or cause damage.
esd does not take responsibility or any damage caused by the device i operated at any networks.
It is the responsibility o the device's user to take care that necessary sa ety precautions or the
device's network inter ace are in place.
Intended Use
The intended use o the CANopen-PN is the operation as PROFINET IO / CANopen Gateway.
The guarantee given by esd does not cover damages which result rom improper use, usage not in
accordance with regulations or disregard o sa ety instructions and warnings.
● The CANopen-PN is intended or indoor operation only.
● The operation o the CANopen-PN in hazardous areas, or areas exposed to potentially explosive
materials is not permitted.
● The operation o the CANopen-PN or medical purposes is prohibited.
CANopen-PN Manual • Doc. No.: C.2921.21 / Rev. 1.6 Page 5 o 105

Service Note
The CANopen-PN does not contain any parts that require maintenance by the user. The CANopen-PN does
not require any manual con iguration o the hardware. Unauthorized intervention in the device voids warranty
claims.
Disposal
Devices which have become de ective in the long run have to be disposed in an appropriate way or have to
be returned to the manu acturer or proper disposal. Please, make a contribution to environmental protection.
Typographical Conventions
Throughout this manual the ollowing typographical conventions are used to distinguish technical terms.
Convention Example
File and path names /dev/null or <stdio.h>
Function names open()
Programming constants NULL
Programming data types uint32_t
Variable names Count
Number Representation
All numbers in this document are base 10 unless designated otherwise. Hexadecimal numbers have a pre ix o 0x, and
binary numbers have a pre ix o 0b. For example, 42 is represented as 0x2A in hexadecimal and 0b101010 in binary.
Abbreviations
Abbreviation Term Description
DCF Device Con iguration File
EDS Electronic Data Sheet Description ile or CANopen devices
GSD General Station Description Description ile or PROFINET devices
GSDML General Station Description
Markup Language
Language o the GSD iles (XML-based)
PDO Process Data Object
RTR Remote Transmission Request
SDO Service Data Object
XML Extensible Markup Language
Page 6 o 105 Manual • Doc. No.: C.2921.21 / Rev. 1.6 CANopen-PN

Table of contents
Sa ety Instructions...........................................................................................................................5
1. Overview....................................................................................................................................12
1.1 Description o CANopen-PN................................................................................................12
2. PCB View with Connectors.........................................................................................................13
3. LEDs.......................................................................................................................................... 14
3.1 Position o the LEDs............................................................................................................14
3.2 Indication o the LEDs..........................................................................................................14
3.2.1 CANopen Indicator States...........................................................................................15
4. Hardware Installation .................................................................................................................16
5. So tware Con iguration with the GSDML Composer...................................................................17
5.1 Description o the GSDML Composer..................................................................................17
5.1.1 Features o the GSDML Composer.............................................................................18
5.1.2 System Requirements.................................................................................................18
5.1.3 Compatibility o CANopen-PN Firmware and GSDML Composer................................18
5.1.4 So tware Installation....................................................................................................19
5.1.4.1 GSDML Composer...............................................................................................19
5.1.4.2 CAN Inter ace and Tools under Windows.............................................................19
5.1.4.2.1 Con iguration/Test o the CAN Inter ace under Windows..............................20
5.2 GSDML Composer Quick Start............................................................................................22
5.3 Main Window o the GSDML Composer..............................................................................23
5.4 Menu Bar o the GSDML Composer....................................................................................24
5.4.1 Menu Item File, General Options.................................................................................24
5.4.2 Menu Item View...........................................................................................................25
5.4.3 Menu Item Settings.....................................................................................................25
5.4.3.1 Project settings.....................................................................................................25
5.4.4 Menu Item Window......................................................................................................25
5.5 Device Library......................................................................................................................26
5.5.1 Add CANopen Devices to the current Project..............................................................26
5.5.2 Edit Device Library......................................................................................................27
5.6 CANopen Network Editor.....................................................................................................28
5.6.1 Display Options...........................................................................................................29
5.6.2 Device Context Menu..................................................................................................29
5.7 Con iguration o the CANopen Net with the CANopen Manager..........................................30
5.8 Output.................................................................................................................................. 33
5.9 Con iguration o a CANopen Slave via Device Editor...........................................................34
5.9.1 Device In ormation......................................................................................................34
5.9.2 RPDO Mapping...........................................................................................................35
5.9.2.1 Change Mapping Parameter via Buttons .............................................................36
5.9.3 TPDO Mapping............................................................................................................37
5.9.4 Manager Settings........................................................................................................38
5.9.5 SYNC/Emergency.......................................................................................................39
5.9.6 Heartbeat/Guarding.....................................................................................................40
5.9.7 Object Lists (various)...................................................................................................41
5.9.8 EDS Device In o..........................................................................................................42
5.9.9 EDS File In o...............................................................................................................42
5.9.10 EDS Comments.........................................................................................................42
5.10 Insert the GSD File in the SIMATIC-Manager ...................................................................43
5.11 Using GSDML File and CANopen-PN Gateway with the TIA Portal...................................47
5.11.1 Quick Start................................................................................................................47
5.11.2 Installation o the GSDML File...................................................................................48
5.11.3 Insert CANopen-PN Hardware and Network Con iguration.......................................50
5.11.4 Compile and Download Hardware and So tware.......................................................53
CANopen-PN Manual • Doc. No.: C.2921.21 / Rev. 1.6 Page 7 o 105

6. Control via PROFINET IO..........................................................................................................55
6.1 CANopen Manager Services via PROFINET IO..................................................................55
6.1.1 Upload SDO (Index 0xB711).......................................................................................57
6.1.2 Download SDO (0xB713)............................................................................................59
6.1.3 Con igure SDO Timeout (0xB715)...............................................................................60
6.1.4 Start Node (0xB731)....................................................................................................60
6.1.5 Stop Node (0xB732)....................................................................................................60
6.1.6 Set Node to Pre-Operational (0xB733)........................................................................61
6.1.7 Reset Node (0xB734)..................................................................................................61
6.1.8 Reset Communication (0xB735)..................................................................................61
6.1.9 Initialize Gateway (0xB751).........................................................................................62
6.1.10 Set Heartbeat Producer (0xB754).............................................................................62
6.1.11 Set Node-ID (0xB755)...............................................................................................63
6.1.12 Start Emergency Consumer (0xB756).......................................................................63
6.1.13 Stop Emergency Consumer (0xB757).......................................................................63
6.1.14 Get Version (0xB762)................................................................................................64
6.1.15 Reset Controller (0xB771).........................................................................................64
6.1.16 Start Controller (0xB772)...........................................................................................65
6.1.17 Stop Controller (0xB773)...........................................................................................65
6.2 PROFINET IO Diagnosis.....................................................................................................66
6.2.1 Emergency Mapping...................................................................................................67
7. Technical Data...........................................................................................................................69
7.1 General Technical Data.......................................................................................................69
7.2 Microcontroller.....................................................................................................................70
7.3 CAN Inter ace......................................................................................................................70
7.4 PROFINET IO Inter ace.......................................................................................................71
7.5 DIAG, Serial Inter ace via USB Inter ace.............................................................................71
7.6 So tware Support.................................................................................................................72
8. Inter aces and Connector Assignments......................................................................................73
8.1 CAN.....................................................................................................................................73
8.2 PROFINET IO......................................................................................................................74
8.3 24V-Power Supply Voltage..................................................................................................75
8.4 24V and CAN via InRailBus ................................................................................................76
8.5 DIAG....................................................................................................................................76
8.6 Conductor Connection/Conductor Cross Sections...............................................................77
9. Correctly Wiring Electrically Isolated CAN Networks..................................................................78
9.1 Standards concerning CAN Wiring......................................................................................78
9.2 Light Industrial Environment (Single Twisted Pair Cable).....................................................79
9.2.1 General Rules.............................................................................................................79
9.2.2 Cabling........................................................................................................................80
9.2.3 Branching....................................................................................................................80
9.2.4 Termination.................................................................................................................80
9.3 Heavy Industrial Environment (Double Twisted Pair Cable).................................................81
9.3.1 General Rules.............................................................................................................81
9.3.2 Device Cabling............................................................................................................82
9.3.3 Branching....................................................................................................................82
9.3.4 Termination.................................................................................................................82
9.4 Electrical Grounding.............................................................................................................83
9.5 Bus Length...........................................................................................................................83
9.6 Examples or CAN Cables...................................................................................................84
9.6.1 Cable or light industrial Environment Applications (Two-Wire)...................................84
9.6.2 Cable or heavy industrial Environment Applications (Four-Wire)................................84
10. CAN Troubleshooting Guide.....................................................................................................85
10.1 Termination........................................................................................................................85
10.2 Electrical Grounding...........................................................................................................86
Page 8 o 105 Manual • Doc. No.: C.2921.21 / Rev. 1.6 CANopen-PN

10.3 Short Circuit in CAN Wiring................................................................................................86
10.4 CAN_H/CAN_L-Voltage ....................................................................................................86
10.5 CAN Transceiver Resistance Test.....................................................................................87
10.6 Support by esd...................................................................................................................87
11. CANopen Firmware..................................................................................................................88
11.1 De inition o Terms.............................................................................................................88
11.2 NMT-Boot-up.....................................................................................................................89
11.3 The CANopen Object Directory..........................................................................................89
11.4 Accessing the Communication Parameters via SDO Telegrams........................................90
11.5 Accessing the Process Data via PDOs..............................................................................92
11.6 Important CANopen Telegrams.........................................................................................93
11.7 Implemented CANopen Objects o CANopen-PN..............................................................94
11.7.1 CiA Speci ication CiA 301 Objects ............................................................................94
11.7.2 Objects o CiA Speci ication CiA 302-2 .....................................................................96
12. Appendix InRailBus (Option)....................................................................................................97
12.1 Connector Assignment ......................................................................................................97
12.2 Using InRailBus (Option)....................................................................................................98
12.3 Installation o the Module Using InRailBus-Connector.......................................................98
12.3.1 Connecting Power Supply and CAN Signals to CBX-InRailBus...............................100
12.3.2 Connection o the Power Supply Voltage................................................................100
12.3.3 Connection o CAN..................................................................................................101
12.4 Removal o the CAN-CBX Module rom InRailBus...........................................................101
13. Re erences............................................................................................................................. 102
14. Declaration o Con ormity.......................................................................................................103
15. PROFINET IO Certi icate.......................................................................................................104
16. Order In ormation...................................................................................................................105
CANopen-PN Manual • Doc. No.: C.2921.21 / Rev. 1.6 Page 9 o 105

Index of Tables
Table 1: Indication o the RJ45-LEDs.............................................................................................................14
Table 2: Indication o the LEDs F, E, P and C................................................................................................15
Table 3: SDO abort codes.............................................................................................................................. 58
Table 4: Supported data types according to PROFINET IO............................................................................59
Table 5: Emergency Mapping......................................................................................................................... 67
Table 6: CANopen Emergency Codes and Classes.......................................................................................68
Table 7: CANopen Error Register...................................................................................................................68
Table 8: General data o the module..............................................................................................................69
Table 9: Microcontroller units..........................................................................................................................70
Table 10: Data o the CAN inter ace...............................................................................................................70
Table 11: Data o PROFINET IO inter ace......................................................................................................71
Table 12: Data o the USB inter ace............................................................................................................... 71
Table 13: Conductor connection/Conductor cross section..............................................................................77
Table 14: Recommended cable lengths at typical bit rates (with esd-CAN inter aces) ..................................83
Table 15: Implemented CANopen objects o the CANopen-PN gateway........................................................95
Table 16: Order in ormation.......................................................................................................................... 105
Table 17: Available manuals......................................................................................................................... 105
Page 10 o 105 Manual • Doc. No.: C.2921.21 / Rev. 1.6 CANopen-PN

List of Figures
Figure 1: Block circuit diagram o CANopen-PN............................................................................................12
Figure 2: Connecting diagram o CANopen-PN..............................................................................................13
Figure 3: Front panel view with LEDs.............................................................................................................14
Figure 4: Block circuit diagram GSDML Composer........................................................................................17
Figure 5: Component selection during setup..................................................................................................19
Figure 6: CAN Control Panel.......................................................................................................................... 20
Figure 7: CANreal........................................................................................................................................... 21
Figure 8: Main window o the GSDML Composer...........................................................................................23
Figure 9: Dialogue Project settings................................................................................................................. 25
Figure 10: Device Library................................................................................................................................ 26
Figure 11: Toolbar o the Device Library.........................................................................................................27
Figure 12: CANopen Network Editor window with manually positioned slaves...............................................28
Figure 13: CANopen Manager window...........................................................................................................30
Figure 14: Output window............................................................................................................................... 33
Figure 15: Device Editor with page Device in ormation (Example: CAN-CBX-PT100)..................................34
Figure 16: PDO Mapping................................................................................................................................ 35
Figure 17: Manager Settings...........................................................................................................................38
Figure 18: Object list....................................................................................................................................... 41
Figure 19: Install GSD iles............................................................................................................................. 43
Figure 20: Select GSD ile.............................................................................................................................. 44
Figure 21: CANopen Manager properties.......................................................................................................45
Figure 22: Node Con iguration........................................................................................................................45
Figure 23: RPDO TPDO ................................................................................................................................ 46
Figure 24: Extras/Manage GSD......................................................................................................................48
Figure 25: Window Manage general station description iles..........................................................................48
Figure 26: Select the path to the older...........................................................................................................48
Figure 27: Activate check-box......................................................................................................................... 49
Figure 28: Installation was completely success ul..........................................................................................49
Figure 29: Devices and networks.................................................................................................................... 50
Figure 30: Choose the version (detail) ...........................................................................................................51
Figure 31: Program window with new CANopen-PN in the window Network view..........................................51
Figure 32: Net view (detail)............................................................................................................................. 52
Figure 33: Select IO controller........................................................................................................................ 52
Figure 34: Compile Hardware and So tware (detail).......................................................................................53
Figure 35: Download hardware and so tware to device (detail)......................................................................53
Figure 36: Toolbar with button Go online .......................................................................................................54
Figure 37: Main window with device overview................................................................................................54
Figure 38: CAN wiring or light industrial environment....................................................................................79
Figure 39: Example or proper wiring with single shielded single twisted pair wires.......................................80
Figure 40: CAN wiring or heavy industrial environment.................................................................................81
Figure 41: Example o proper wiring with single shielded double twisted pair cables.....................................82
Figure 42: Simpli ied diagram o a CAN network............................................................................................85
Figure 43: Simpli ied schematic diagram o ....................................................................................................86
Figure 44: Measuring the internal resistance o CAN transceivers.................................................................87
Figure 45: Mounting rail with bus connector...................................................................................................98
Figure 46: Mounting CAN-CBX modules........................................................................................................98
Figure 47: Mounted CAN-CBX module...........................................................................................................99
Figure 48: Mounting rail with InRailBus and terminal plug............................................................................100
Figure 49: Connecting the power supply voltage to the CAN-CBX station....................................................100
Figure 50: Connecting the CAN signals to the CAN-CBX station.................................................................101
CANopen-PN Manual • Doc. No.: C.2921.21 / Rev. 1.6 Page 11 o 105

Overview
1. Overview
1.1 Description of CANopen-PN
Figure 1: Block circuit diagram o CANopen-PN
The CANopen-PN o ers a ast and reliable link o PROFINET IO® controllers to a CANopen
network. The gateway operates as a PROFINET IO device with a maximum o 1440 bytes input
data and 1440 bytes output data on the PROFINET IO bus.
The CANopen-PN is designed according to Pro ibus International Document TC2-09-0002
(CANopen-Integration_7012_d07_Jul09) [6].
The irmware controls the connection o CAN bus units via the CANopen® protocol [2] to
PROFINET IO, thus the CANopen-PN can be e.g. connected to a SIMATIC-S7. The number o
CAN participants is not limited by the CANopen-PN. The device is CANopen master.
The CANopen implementation supports CANopen master unctions according to CiA® 302-2 [3].
The CANopen-PN module works with an ERTEC400 ARM® processor or the PROFINET IO
communication, which bu ers the PROFINET IO data in a local SDRAM.
Furthermore the CANopen-PN uses a SPEAr320 ARM®-processor, with integrated CAN controller,
that controls the CANopen side and bu ers the data in a local DDR2-RAM.
The irmware and the con iguration iles are stored in the lash.
The high-speed CAN inter ace (compatible to ISO 11898-2) allows a maximum data-trans er rate
o 1 Mbit/s.
The 100 BASE-TX PROFINET IO inter ace is compatible to IEEE802.3 and runs at 100 Mbit/s.
The PROFINET IO and the CANopen inter ace are electrically isolated against the other
components. The PROFINET IO inter ace is equipped with two RJ45 sockets in accordance with
the standard. An Ethernet switch is integrated in the ERTEC400.
The CAN inter ace is connected via a 5-pin COMBICON connector with spring-cage connection.
The module can be con igured via the GSDML Composer, which is a PROFINET IO con iguration
tool. Additionally, the esd CAN tools (CANreal, CANplot, CANrepro, CANscript, COBview) can be
used or CAN diagnostics.
Page 12 o 105 Manual • Doc. No.: C.2921.21 / Rev. 1.6 CANopen-PN
ERTEC400
ERTEC400
32 MB
SDRAM
32 MB
SDRAM
PORT 1
RJ45
100BASE-TX
PORT 2
RJ45
100BASE-TX
PHY
PHY
PHY
PHY
Combicon 5.08
Power Supply
In-Rail-Bus
Connector
DIAG
USB-B
Electrical Isolation
Physical
CAN
Layer
ISO11898-2
Physical
CAN
Layer
ISO11898-2
64MB DDR2
RAM
64MB DDR2
RAM
Power Supply
24 V=
+5V=
+5V=
DC/DC
Converter
5-pole
Open style
Connector
4 MB
SPI-Flash
4 MB
SPI-Flash
LEDs
SPEAr320
SPEAr320
C A N
ERTEC400
ERTEC400
32 MB
SDRAM
32 MB
SDRAM
PORT 1
RJ45
100BASE-TX
PORT 2
RJ45
100BASE-TX
PROFINET IO
PHY
PHY
PHY
PHY
Combicon 5.08
Power Supply
In-Rail-Bus
Connector
C A N
DIAG
USB-B
Electrical Isolation
Physical
CAN
Layer
ISO11898-2
Physical
CAN
Layer
ISO11898-2
64MB DDR2
RAM
64MB DDR2
RAM
Power Supply
24 V=
+5V=
+5V=
DC/DC
Converter
5-pole
Open style
Connector
8 MB
SPI-Flash
8 MB
SPI-Flash
LEDs
SPEAr320
SPEAr320
C A N
32 MB
SDRAM
32 MB
SDRAM
16 kB
EEPROM
16 kB
EEPROM

LEDs
3. LEDs
3.1 Position of the LEDs
Figure 3: Front panel view with LEDs
3.2 Indication of the LEDs
PROFINET IO RJ-45 soc et LEDs of PORT1 and PORT2
LED Colour Indicator state Meaning
Lin green o no Ethernet connection
on Ethernet connection is established
Activity yellow
o no Ethernet connection
blinking Ethernet connection is established, data is trans erred
on Ethernet connection is established
Table 1: Indication o the RJ45-LEDs
Page 14 o 105 Manual • Doc. No.: C.2921.21 / Rev. 1.6 CANopen-PN

LEDs
LEDs F, E, P and C
LED Colour Function Indicator
state State / Meaning LED-Name in
PCB
Fyellow PROFINET IO
Force
o
there is no requirement o the
PROFINET IO-controller or the
identi ication o the unit LED1A
blinking Requirement o the PROFINET IO controller
or identi ication o the unit
Ered CANopen
Error
o no error -
the CANopen-PN is in working condition
LED1B
single lash
Warning Limit Reached -
At least one o the error counters o the
CAN controller has reached or exceeded
the warning level (too many error rames)
double lash Error Control Event -
a Heartbeat- or Nodeguard error occurred
on the CAN controller is Bus off
Pgreen PROFINET IO o no valid PROFINET IO link LED1C
on valid PROFINET IO link is established
Cgreen CANopen
Status
blinking PREOPERATIONAL
LED1D
single lash STOPPED
on OPERATIONAL
Table 2: Indication o the LEDs F, E, P and C
The indicator states o the CANopen LEDs are described in chapter 3.2.1.
3.2.1 CANopen Indicator States
Description o the CANopen indicator states (according to CiA 303 [7]):
Indicator State Indication
on LED on
o LED o
blinking LED blinking with 2.5 Hz
single lash LED 200 ms on, 1000 ms o
double lash LED 200 ms on, 200 ms o , 200 ms on, 1000 ms o
CANopen-PN Manual • Doc. No.: C.2921.21 / Rev. 1.6 Page 15 o 105

Hardware Installation
4. Hardware Installation
To put the CANopen-PN into operation, please ollow the installation notes.
Step Procedure see
page
Read the safety instructions at the beginning of this document
carefully, before you start with the hardware installation! 5
Danger
Hazardous Voltage - Risk o electric shock due to unintentional contact
with uninsulated live parts with high voltages inside o the system into
which the CANopen-PN is to be integrated.
→
→
All current circuits which are connected to the device have to be
su iciently protected against hazardous voltage (SELV according to
EN 60950-1) be ore you start with the installation.
Ensure the absence o voltage be ore starting any electrical work.
1. Mount the CANopen-PN module and connect the inter aces (power
supply voltage, CAN, PROFINET IO). 13
2. Please note that the CAN bus has to be terminated at both ends! esd
o ers special T-connectors and termination connectors. Additionally the
CAN_GND signal has to be connected to earth at exactly one point in
the CAN network.
A CAN participant with a CAN inter ace which is not electrically isolated
corresponds to the grounding o the CAN-GND.
78
3. I you use the InRailBus, read chapter 12. “Appendix InRailBus (Option)” 97
INFORMATION
I you want to use the CAN inter ace and the esd CAN tools under
Windows® (see chapter 5.1.4.2 “CAN Inter ace and Tools under
Windows"), install the so tware now as described in chapter "5.1.4
So tware Installation".
19
4. Switch on the 24 V-power supply voltage o the CANopen-PN.
5. End o hardware con iguration
NOTICE
To guarantee a proper operation o the CANopen-PN make absolutely
sure to use version 1.0.6 o the GSDML Composer, that is compatible
with the CANopen-PN irmware version 1.0.6, be ore you start with the
so tware con iguration!
-
... Start with the so tware con iguration now
(For a so tware quick start see chapter 5.2 “GSDML Composer Quick
Start“)
22
Page 16 o 105 Manual • Doc. No.: C.2921.21 / Rev. 1.6 CANopen-PN

Software Configuration with the GSDML Composer
5. Software Configuration with the GSDML Composer
5.1 Description of the GSDML Composer
The GSDML Composer is designed to generate and parametrize a GSD ile or the CANopen-PN.
Figure 4: Block circuit diagram GSDML Composer
The con iguration o the CANopen side o the gateway is per ormed with the GSDML Composer,
the PROFINET IO side is usually con igured via a so called engineering tool (e.g. SIMATIC-S7).
The CANopen-PN is CANopen master and cannot be used as CANopen slave. The internal
CANopen slave is implicitly used by the PROFINET slave.
The EDS iles with in ormation about the CANopen slaves which are required on CANopen side,
must be imported in the GSDML Composer.
The GSD ile or the description o CANopen-PN as PROFINET IO slave, which is used on
PROFINET IO side, is generated with the GSDML Composer.
Thus the GSD ile contains all in ormation, the PROFINET IO control needs or the operation o the
Gateway, and the in ormation, the CANopen Manager integrated in the gateway needs or his
CANopen net.
CANopen-PN Manual • Doc. No.: C.2921.21 / Rev. 1.6 Page 17 o 105
CANopen-PN
CANopen
Master/Slave
PN
Slave
CAN Ethernet
GSDML
Composer
... ...
EDS
GSD
GSD
PN
Engineering-
Tool
PN
Slave
PN
Slave
CANopen
Slave
CANopen
Slave
PN
IO-Controller

Software Configuration with the GSDML Composer
5.1.1 Features of the GSDML Composer
•Windows application with intuitive operation
•CANopen device library based on EDS iles
•CANopen Network Editor or graphic overview and con iguration o the CANopen networks
•Device editor or easy con iguration o the CANopen objects
◦PDO Mapping, Error Control Services (Node guarding, Heartbeat), etc.
•Export o the DCF iles o the parametrized CANopen Slaves
•Export o the GSD ile containing the complete con iguration, or the usage o the esd
CANopen-PN gateway with the corresponding CANopen net in PROFINET IO
5.1.2 System Requirements
Operating system Microso t Windows XP or newer with Microso t .NET Framework
Version 3.5
Hard disk memory space approx. 12 MB (CAN Tools approx. 42 MB)
Random access memory according to recommendations or the operating system used
5.1.3 Compatibility of CANopen-PN Firmware and GSDML Composer
NOTICE
To guarantee a proper operation o the CANopen-PN make absolutely sure to use
version 1.0.6 o the GSDML Composer, that is compatible with the CANopen-PN
irmware version 1.0.6, be ore you start with the so tware con iguration!
Page 18 o 105 Manual • Doc. No.: C.2921.21 / Rev. 1.6 CANopen-PN
Software Configuration with the GSDML Composer
5.1.4 Software Installation
The so tware installation is started by calling the ollowing installation program on the data CD
(which is contained in the scope o delivery):
CANopen-PN_X_X_X_Setup.exe (X according to the version o the GSDML Composer)
INFORMATION
Administrator rights are required or the installation.
5.1.4.1 GSDML Composer
The GSDML Composer will be automatically installed with the setup speci ied above. A ter
so tware installation the program can be started, e.g. via the Windows start menu.
5.1.4.2 CAN Interface and Tools under Windows
Optionally a Windows driver together with its tools can be installed, to use the CAN inter ace o the
CANopen-PN under Windows.
There ore select Incl. tools for CAN diagnostics in the Select Components window during
installation, see Figure 5:
Figure 5: Component selection during setup
RNDIS driver: Provides a network inter ace under Windows, which represents the inter ace to
CANopen-PN.
CAN driver: Provides the esd CAN-API (“NTCAN”) via a TCP/IP connection.
esd CAN-SDK: Amongst others it contains so tware or the CAN diagnostics, especially
CANreal, which will be used or testing (5.1.4.2.1).
INFORMATION
The CAN driver and the CAN-SDK will not be automatically deleted i the CANopen-PN
so tware is removed. There ore use “So tware” o the Windows system administration
and remove “EtherCAN […] Host Driver” and “CAN SDK or Windows”.
CANopen-PN Manual • Doc. No.: C.2921.21 / Rev. 1.6 Page 19 o 105

Software Configuration with the GSDML Composer
5.1.4.2.1 Configuration/Test of the CAN Interface under Windows
First connect the CANopen-PN with your PC via USB. Windows will detect the device and provide
a new network inter ace (by means o the RNDIS driver which is installed with the setup).
The CAN so tware uses the CAN API, which is provided in this case via a TCP/IP connection –
which irst has to be con igured: There ore start “Program/esd/EtherCAN/CAN Control
Panel” in the start menu:
Figure 6: CAN Control Panel
When the CAN Control Panel window is opened it does already contain the entry o the Net
number in the ield Virtual CAN port. The Net number is 100 or the CANopen-PN (also
ETHopen_PN, see Figure 7).
The IP address is de ined or the CANopen-PN by esd. In the ield TCP/IP configuration the
ollowing IP address has to be entered: 192.168.7.1
Do not change the other settings (see NTCAN API Manual Part 2 or details).
Now you can use e.g. CANreal (part o the esd CAN SDK) or testing. It can be started with the
start menu entry ”Program/esd/CAN SDK/CANreal“.
Page 20 o 105 Manual • Doc. No.: C.2921.21 / Rev. 1.6 CANopen-PN
This manual suits for next models
1
Table of contents
Other ESD Gateway manuals
Popular Gateway manuals by other brands

Kiwi
Kiwi TLG8411V1 user manual

IBM
IBM High Rate Wireless LAN Gateway quick start guide

CARLO GAVAZZI
CARLO GAVAZZI UWP 4.0 Getting started guide

National Instruments
National Instruments MON-10496 user guide

Patton electronics
Patton electronics Patton SmartNode 2400 Series Specification sheet

SICK
SICK Flexi Gateway GCAN1 operating instructions