Basic operation en
9
6. Use the or button to set the current month.
7. Use the button to return to the "Month" setting.
8. Use the button to select the next setting.
9. Use the button to navigate to the next row.
10. Use the or button to set the current year.
11. Use the button to return to the "Year" setting.
12. Use the button to select the next setting.
Setting the water hardness
1. Use the button to navigate to the bottom row.
2. Use the or button to set the water hardness
range.
3. Use the button to return to the "Water hardness"
setting.
4. Press .
aThis saves the water hardness range.
aInitial configuration is now complete.
6.3 Calibrating the appliance
The boiling point of water depends on the air pressure.
During the calibration process, the appliance adjusts to
the pressure conditions in the location where it is in-
stalled. Large amounts of steam may be generated dur-
ing the calibration process.
Running the calibration process
Notes
¡Do not open the appliance door while calibration is
in progress. Otherwise, the Calibration is interrup-
ted.
¡If you move house, restore the appliance's basic
factory settings once it is installed so that it can ad-
apt to its new location. Repeat the procedures for
initial configuration and calibration.
¡Your appliance will retain these calibration settings
even in the event of a power failure or disconnection
from the mains. Recalibration is not necessary.
Requirement:The cooking compartment is cold or at
room temperature.
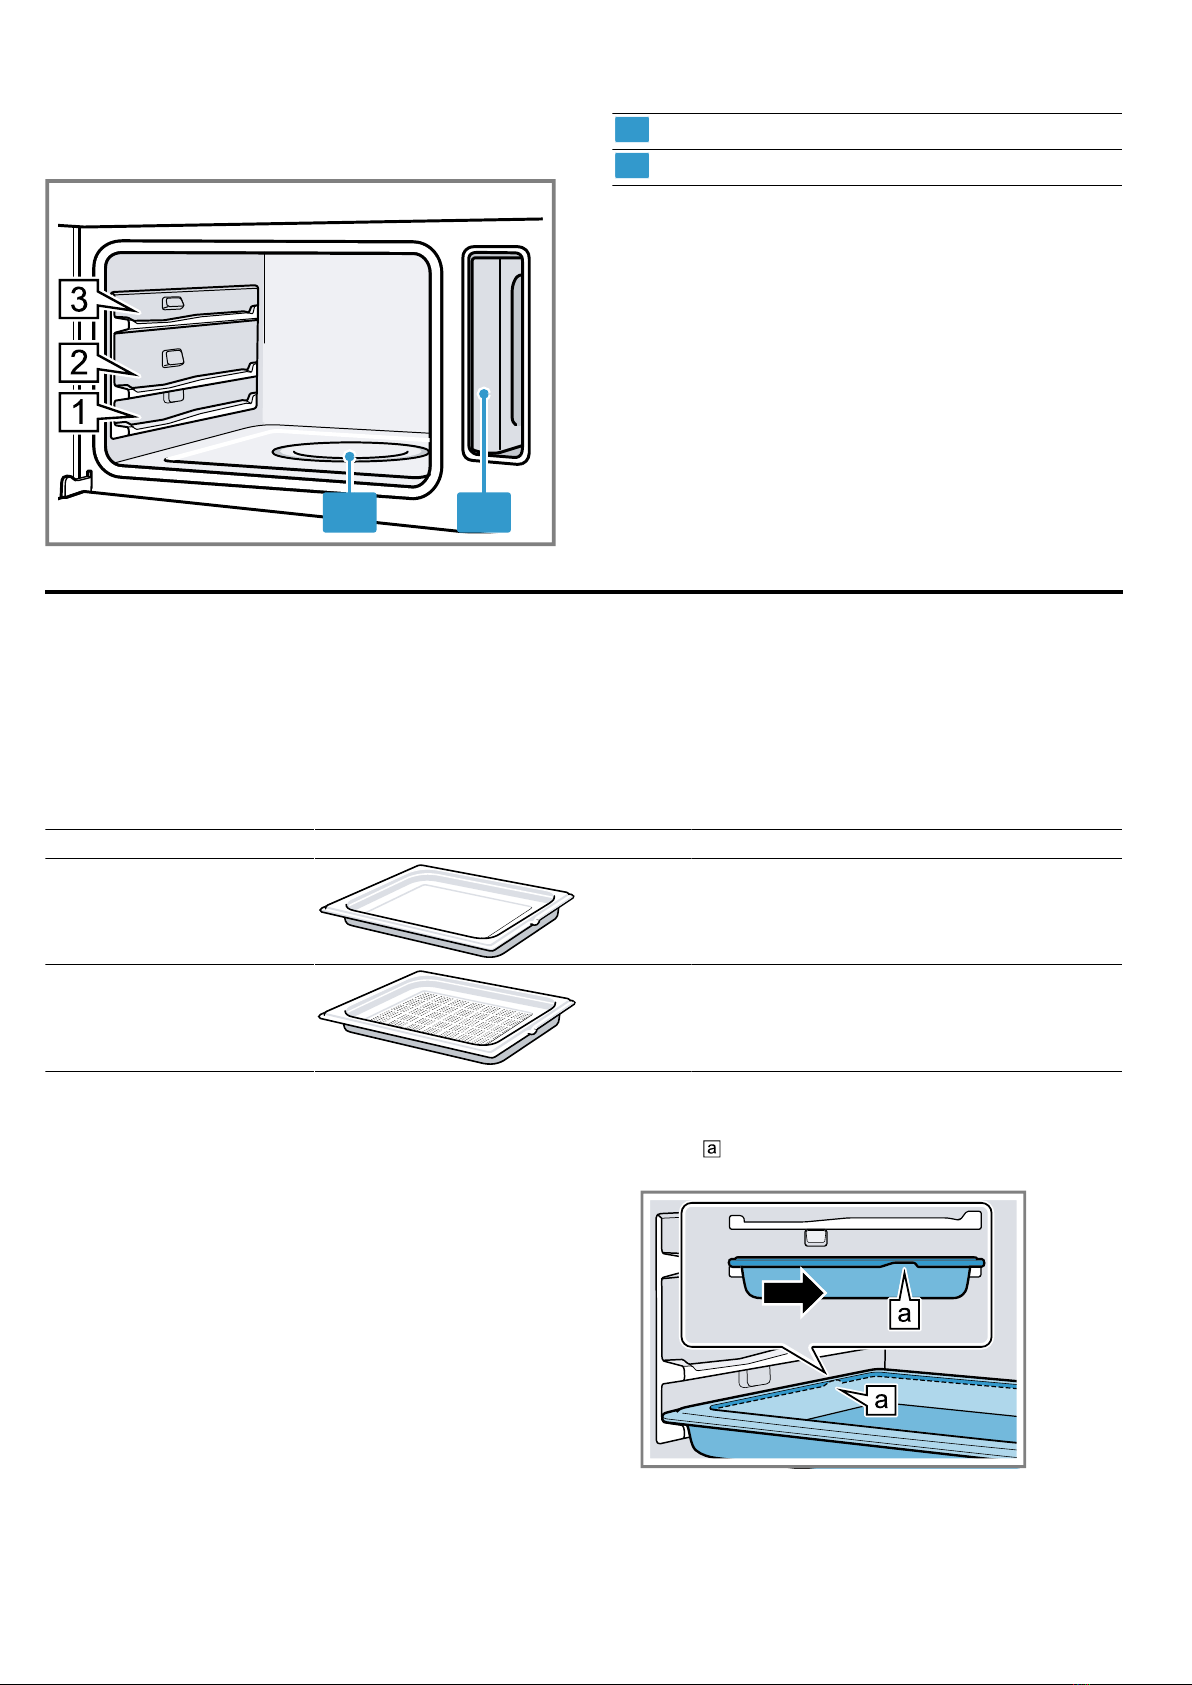
1. Remove the accessories and any leftover packaging
(e.g. polystyrene pellets) from the cooking compart-
ment.
2. Wipe the smooth surfaces in the cooking compart-
ment with a soft, damp cloth.
3. Press to switch on the appliance.
4. Fill the water tank.
→"Filling the water tank", Page9
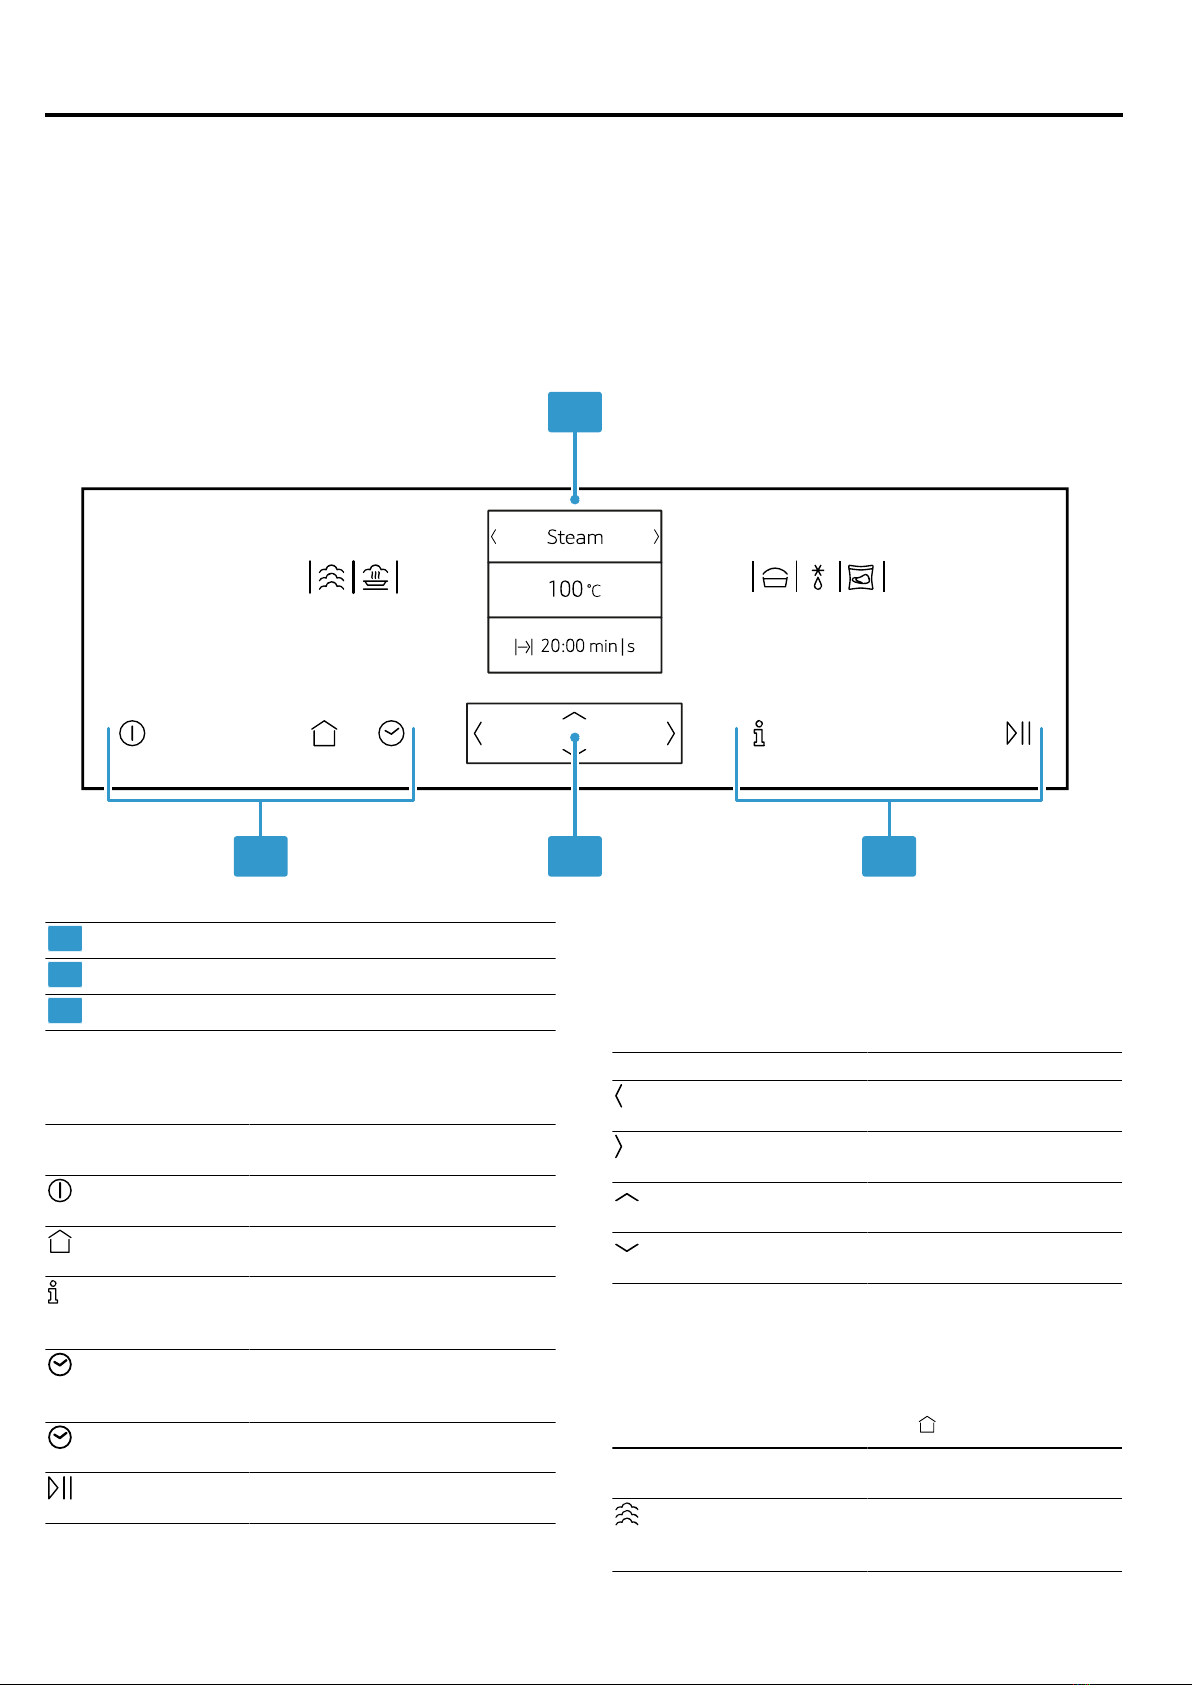
5. Set the required heating function, temperature and
cooking time.
→"Setting the heating function and temperature",
Page10
Setting Value
Heating function Steam
Temperature 100°C
Duration 20minutes
6. Press to switch the appliance off.
7. Wait until the cooking compartment has cooled
down.
6.4 Cleaning the cooking compartment
Requirement:The cooking compartment is cold or at
room temperature.
1. Clean the smooth surfaces with soapy water and a
dish cloth.
2. Empty and dry the water tank.
3. Dry the cooking compartment.
6.5 Cleaning the accessories
▶Clean the accessories with soapy water and a dish
cloth or soft brush.
7 Basic operation
7.1 Switching on the appliance
▶Press to switch the appliance on.
Notes
¡In the basic settings, you can specify whether the
heating functions or the main menu should appear
when you switch on the appliance.
→"Basic settings", Page16
¡If you do not perform any actions on the appliance
for an extended period, it will automatically switch it-
self off.
7.2 Switching off the appliance
▶Press to switch the appliance off.
Notes
¡The residual heat indicator will appear on the dis-
play while the cooking compartment is still hot.
→"Residual heat indicator", Page9
¡The cooling fan will continue to run until the cooking
compartment has cooled down.
→"Cooling fan", Page6
7.3 Residual heat indicator
After you have switched off the appliance, the display
shows the residual heat.
Display Meaning
-h- Residual heat (between
60°C and 100°C)
7.4 Filling the water tank
The water tank is located next to the cooking compart-
ment. You will need to fill the water tank before starting
any operation that uses steam.
WARNING‒Risk of scalding!
Hot steam may escape when you open the appliance
door. Steam may not be visible, depending on the tem-
perature.
▶When opening the door, do not stand too close to
the appliance.
▶Open the appliance door carefully.
▶Keep children at a safe distance.
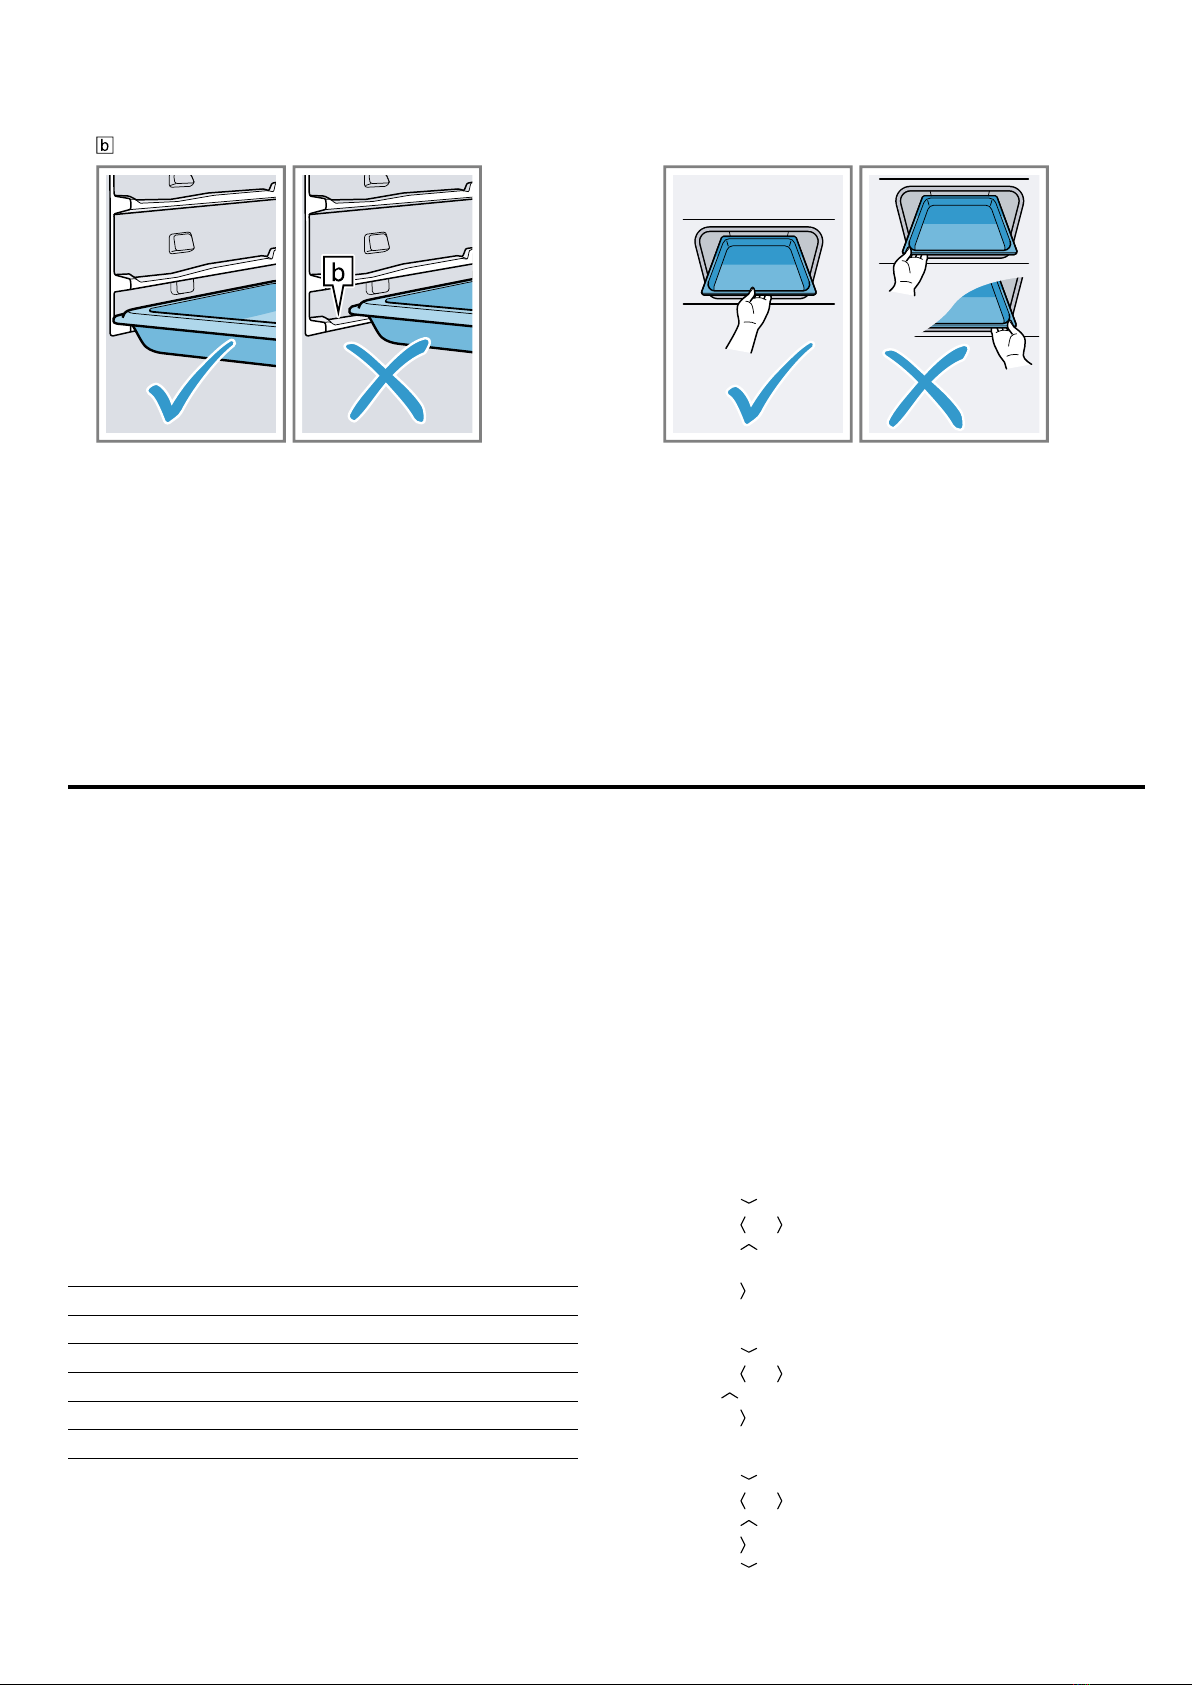
The water in the evaporator dish is still hot even after
the appliance has been switched off.