Nero 600 Plus User manual

Nero 600 plus Steam/Dry Iron
Stainless Steel Soleplate
Code: 742611
INSTRUCTION MANUAL
IMPORTANT SAFEGUARDS
Before using this electrical appliance, these basic precautions should always be followed:
1. Read all instructions and save for future reference.
2. Before using check that the voltage of wall outlet corresponds to the one shown on the
rating plate.
3. Burns may occur from touching hot metal parts, hot water, or steam. Use caution when
you turn a steam iron upside down as there may be hot water in water tank.
4. If any part is damaged it must be replaced by the manufacturer or an authorized service
agent or a qualified technician in order to avoid a hazard.

5. Don’t operate any appliance with a damaged cord or plug, after the appliance
malfunctions, or if it is dropped or damaged in any manner. Return the appliance to the
nearest authorized service facility for examination, repair or electrical or mechanical
adjustment.
6. Do not let cord hang over edge of table or hot surface.
7. The plug of power cord must be removed from outlet before water tank is filled with
water.
8. Unplug from outlet when not in use, before filling with water or cleaning.
9. Do not operate the iron for any reason other than its intended use.
10. To protect against risk of electric shock, do not immerse the iron in water or other
liquids.
11. Close supervision is necessary for any appliance being used by or near children.
12. Do not leave iron unattended when connected into power supply or on an ironing
board.
13. Do not use outdoors.
HOUSEHOLD USE ONLY
Soleplate
Stainless steel soleplate for heating and ironing the garment.
Spraying nozzle
When pressing the spray button, water is sprayed from this outlet.
A. Soleplate
B. Spraying nozzle
C. Water filling inlet
D. Steam button
E. Spraying button
F. Steam shot button
G. Cord bushing
H. Indicator light
I. Temperature dial
J.
Self-cleaning button

Water tank inlet
Fill tank with water via this inlet. Ensure water does not exceed the Max. level (250ml) as
indicated on water tank.
Variable steam button
Move the button to select the desired steam output for each garment - if selecting the “off”
position, the iron will operate without steam.
Spraying button
Pressing this button provides a fine mist spray to dampen hard-to-iron fabrics.
Steam shot button
Pressing this button provides a powerful shot of steam to eliminate stubborn wrinkles.
3600 cord bushing
Cord bushing allows free movement of power cord in any direction with great
manoeuvrability when ironing.
Indicator light
When indicator light is illuminated, it indicates that the iron is heating; it will shut off when
the iron has reached selected temperature.
Temperature dial
Turn the dial to change the iron temperature when required.
USING YOUR STEAM IRON
BEFORE FIRST USE
1. Remove any sticker, protective foil or storage cover from the soleplate.
2. Heat up the iron to maximum temperature and iron over a piece of damp cloth for several
minutes for the purpose of removing any residue on the soleplate.
Note: It is normal for the iron to emit a mild odour when used for the first time.
Operation
1. Hold the iron in a tilted position, then fill the water tank using a measuring cup. It is
recommended that you use purified water with less calcium particles. Ensure you do not
exceed Max. level in the tank. (refer Figure 1).
2. Press down cover of water tank and you will hear a click when it is in the correct position.
3. Connect plug to outlet and turn temperature dial to your desired setting, depending on
the fabric of your garment. The indicator light will be illuminated. (refer Figure 2).
4. Ensure the steam button is in dry position (refer Figure 3), then place the iron vertically
(Refer Figure 4).

Figure 1 Figure 2
Figure 3 Figure 4
5. Once soleplate has reached the preset temperature, indicator light will switch off and you
can set the steam button to your desired steam output or dry position and begin ironing.
WARNING: Do not touch hot soleplate at any time.
6. Press spraying button a couple of times to moisten the laundry if necessary.
7. Steam shot function is best used at maximum temperature, as it helps remove stubborn
creases.
8. This iron has an anti-drip function: if ironing garments for long periods, the soleplate
temperature will lower and the iron will stop emitting steam automatically to ensure no
water droplets are released from the soleplate.
9. “Steam shot” can also be applied when holding the iron in a vertical position. This is
useful for removing creases from hung clothes, curtains, etc.

CLEANING AND MAINTENANCE
After ironing
1. Disconnect power supply and empty any water left in the water tank.
2. Allow the iron to completely cool down, then wipe off flakes or any other deposits on the
soleplate with a damp cloth or a non-abrasive (liquid) cleaner.
3. Clean the upper part of iron with a damp cloth.
4. Always store the emptied iron horizontally on a stable surface with a cloth protecting the
soleplate.
Self-clean function
Clean the unit regularly according to hardness of water and usage frequency.
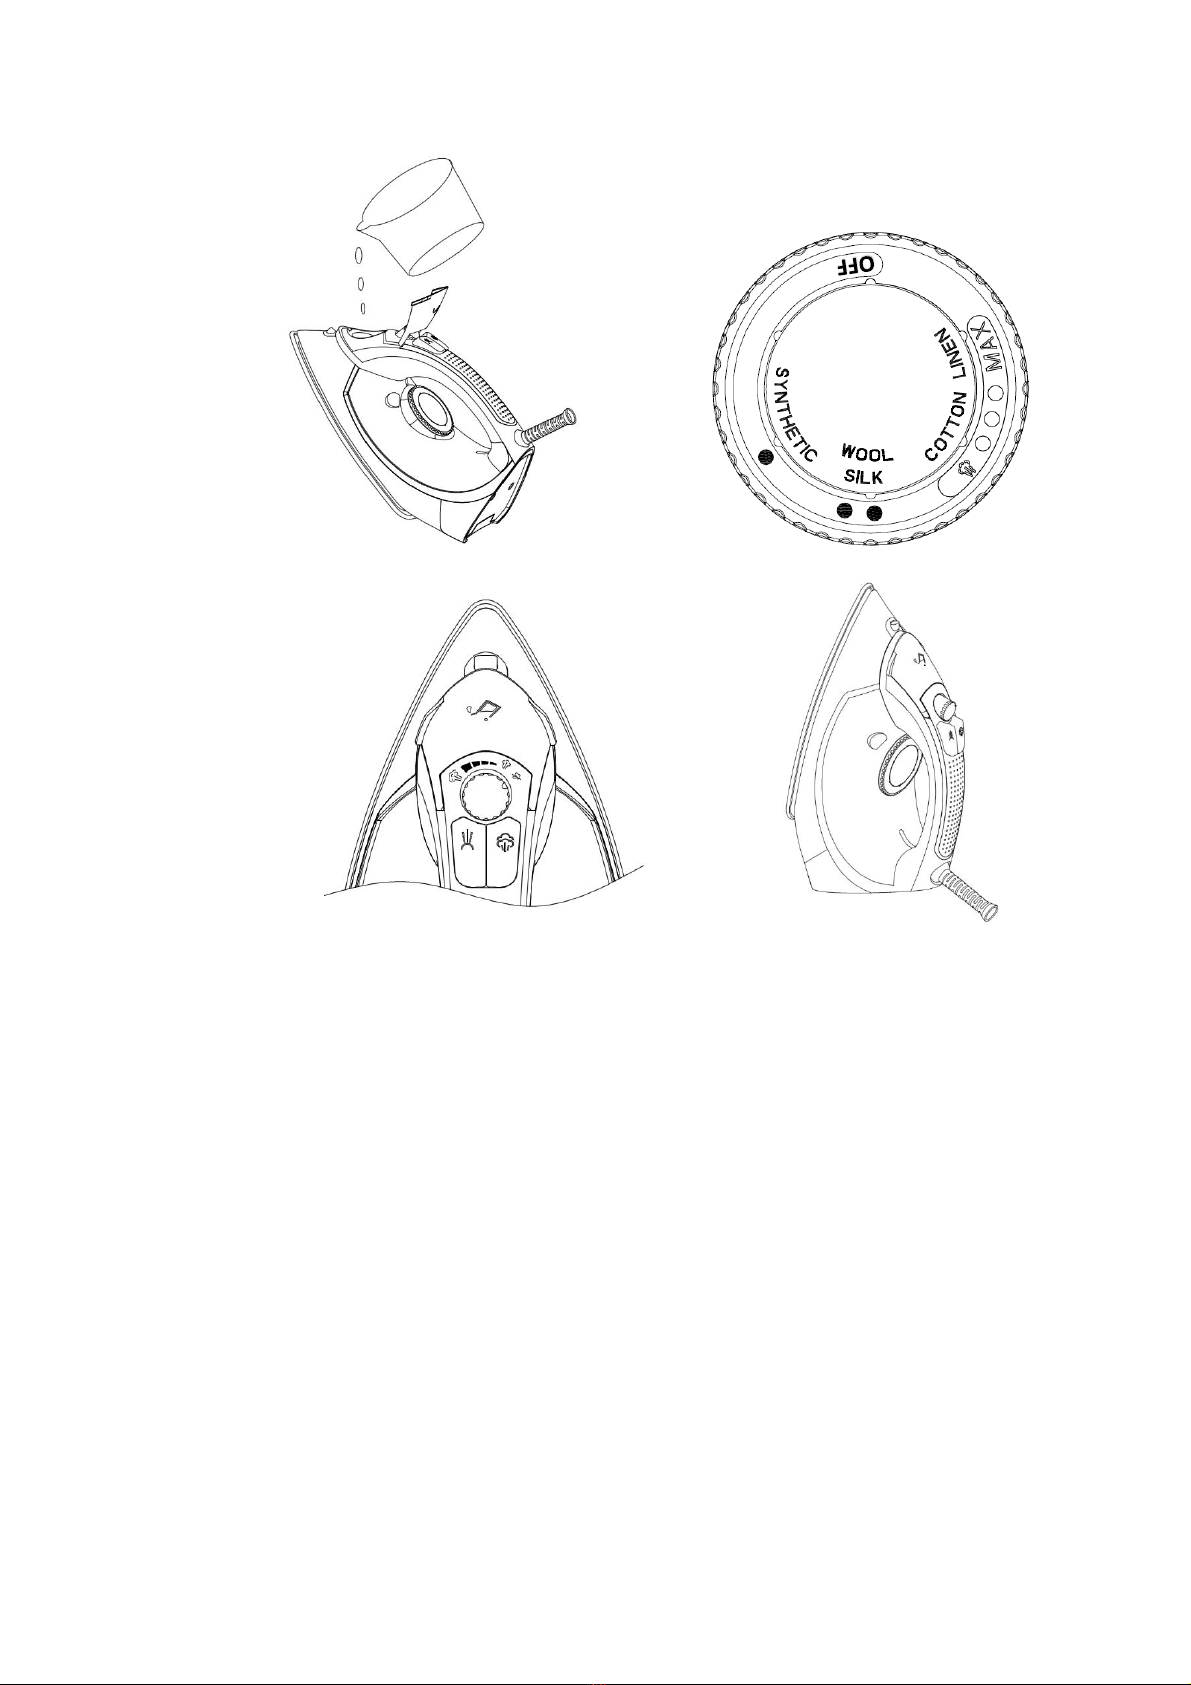
1. Fill the water tank and set the temperature selector to Max. position.
2. Connect to power supply and indicator light will be illuminated. Ensure Steam button is in
the Dry position, then place iron as in Figure 4.
Warning: never pour white vinegar or other liquid cleaners for eliminating calcium into
water tank.
3. Once the light is off, hold the iron over the sink and turn steam button to SELF CLEAN
position (Figure 3) with a little force. Steam and boiling water will come out of the soleplate
while impurities and flakes will be flushed out.
4. Release the button as soon as water in the water tank has been used up.
Auto-decalcification feature
Inside the appliance is a decalcification box, which can absorb unsoluble calcium ions and
emit soluble natrium ions so that water can be softened. This will slow down the process of
calcium buildup in the iron.
Note: Do not allow the soleplate to be scratched by hard surfaces.
IRONING TIPS
Always check first whether a label with ironing instructions is attached to the
garment. Follow these ironing instructions wherever possible.
The iron heats up more quickly than it cools down, therefore you should begin by
ironing the garments requiring the lowest temperature such as those made of
synthetic fibre.
If the fabric consists of various kinds of fibres, you must always select the lowest
ironing temperature to iron the composition of those fibres.
Silk and other fabrics that are likely to become shiny should be ironed on the inner
side. To prevent staining do not spray water directly onto silk or other delicate
fabrics.

Velvet and other textures that rapidly become shiny should be ironed in one
direction with light pressure applied. Always keep the iron moving while ironing.
Pure woollen fabrics (100% wool) may be ironed with the iron set in steam position.
Preferably set steam button to the maximum position and use a dry cloth as a mat.
Note: when ironing woollen fabrics, shining of the fabric may occur. It is preferable to turn
the article inside out and iron the reverse side.
ADDITIONAL TABLE
Symbol
Fabric
Temp.
Variable
steam
Steam shot
Spraying
water
Imported By R. Weatherdon & Co Pty Ltd
Sydney - Australia
www.weatherdon.com.au
Made in China
0
MAX
Synthetic
fibres/Silk
Wool
Cotton
Linen
Note: the symbol means:"This article cannot be ironed!”
X
Table of contents
Other Nero Iron manuals
Popular Iron manuals by other brands

Bosch
Bosch Sensixx'x DA70 operating instructions

Russell Hobbs
Russell Hobbs 14584 Instructions and warranty

Kompernass
Kompernass SILVERCREST operating instructions

POLTI
POLTI Vaporella Quick & Comfort QC110 instruction manual

SEVERIN
SEVERIN BA 3210 Instructions for use

Grundig
Grundig SI 3350 instruction manual