NES miHealth User manual

Total
WellNES System
Quickstart Guide


Content
What’s in the Box? ............................................................
Getting Started ................................................................
NES ProVision: Software Requirements ..........................
Installing the NES ProVision Software ............................
NES miHealth ....................................................................
Get to know your NES miHealth......................................
Inserting battery and turning on for the first time .........
Scanning a Client .............................................................
ER’s on the NES miHealth ..................................................
Selecting an ER Function ...............................................
Run Screen - Using an ER Function ................................
The Clinic in a Box ............................................................
NES Portal .........................................................................
Ordering Infoceuticals on the NES Portal ......................
Other useful links ............................................................
3
5
5
9
9
11
13
15
15
16
17
19
19
22
6

What’s in the Box?
ProVision Scanner
USB Key
3
NES Manuals

4
SOMETHING MISSING?
Contact your local support at: www.neshealth.com/contact-us
NES miHealth
miHealth Battery miHealth Cable

Getting Started
NES ProVision: System Requirements
The computer system specifications required to run the ProVision
software are as follows:
Windows XP (Service Pack 2 or higher), Windows Vista, Windows 7,
Windows 8, Windows 8.1
1024x768 minimum screen resolution
One free USB port
2GB RAM (recommended)
5GB free hard disk space (recommended)
NES ProVision can also be run on an Apple Mac. It will, however, require
you to either dual boot with a Windows operating system, or use a
virtual PC application such as VMWare Fusion, which allows for
Windows to be run within the Apple environment. NES ProVision can
then be installed within this Windows environment.
5

w w w
Installing the NES ProVision Software
Step 1 - Plug your NES ProVision installation USB key into your
computer/laptop and connect to the internet.
Step 2 - With the installation USB key inserted, your computer should
automatically display the menu shown above.
Click ‘Open folder to view files’
1
1
If the menu doesn’t automatically show, click the Start menu then
Computer (or My Computer), double-click on the USB drive
labeled ‘NESProVision’ or ‘NES Health’.
6

Step 4 - Input your License Number in the box provided.
Step 3 - In the folder that opens,
Double click on the file named ‘InstallProVision’.
Proceed through the installation process. This may take a few minutes.
Double-click the ‘NES ProVision’ icon on your desktop to launch
ProVision.
2
2
7

Step 5 - Next, input your details on the Settings screen, then hit ‘Save
and Close’.
You now have NES ProVision installed and unlocked.
NEXT...
set-up your NES miHealth.
8

NES miHealth
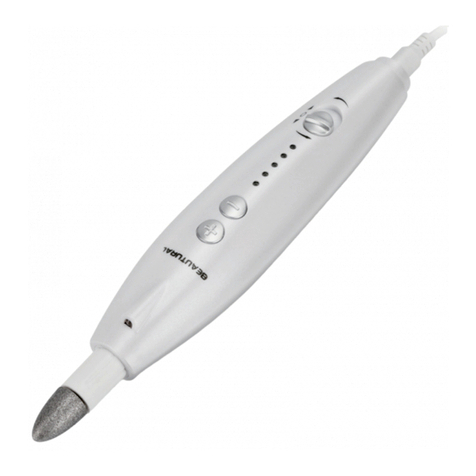
Get to know your NES miHealth
External
electrode port
Side buttons/
energy amplitude
Accessory port
Power button
Back button/
reduce energy
amplitude
Edge Electrodes
Touch Screen
Forward button/
increase energy
amplitude
Start & stop/
activation button
Micro USB
connection &
charging port
Front View
9

Stylus
Main Electrodes
Battery
Compartment
Rear View
10

Inserting battery and turning on for the first time
Locate the battery compartment on the back of the NES miHealth and
carefully slide it out.
11
Next, plug in miHealth battery as shown above.
Replace the battery compartment, then press the Power button to turn
on your miHealth.
If the charge level is low, plug in your miHealth, using the cable
provided, and charge for 3 hours.

Once your miHealth is on, you must calibrate the electrodes.
Press the Settings icon found on the bottom right of the
screen.
Press Calibrate Electrodes, and follow the instructions on screen.
NEED MORE INFO?
Check out the in-depth NES miHealth User Guide
1
2
1
2
12

Scanning a Client
Step 1 - With your computer on, plug the NES Scanner or the miHealth
into the USB port of your computer and start up your ProVision Software.
Step 2 - Navigate to the ‘Add Client’ screen.
Input the client’s information on the Client Screen, then click Save.
13

To perfect your scanning technique view the videos and webinars
on the Quantum Health training site -
www.quantumhealthtraining.com
Step 3 - Ask your client to place their hand on the Scanner and click
the ‘Scan’ button to begin scanning the Human body-field.
Ensure that the client keeps their hand on the scanner until the scan is
complete.
Step 4 - The client’s scan is now complete and the ER screen will be
displayed.
14

ER’s on the NES miHealth
Selecting an ER Function
2
3
With the miHealth switched on -
Touch the ER folder on the Home screen using your finger or the
stylus provided.
The next screen will display all ER functions.
Use the scroll bar on the right to look through the ER functions by
dragging the gray bar up and down.
You can also scroll through the functions using the ‘Side Buttons’.
To select an ER, highlight your desired function by touching it.
To proceed to the Run screen, press the ‘Forward Button’.
4
1
1
23
4
15

Run Screen - Using an ER Function
REMINDER...
Get training! Sign up to the next training event in your region.
16
Click this icon to toggle
between on-body
and off-body mode.
Once you are ready, click
the ‘Start/Stop Button’.
Place the miHealth device
on (on-body) or over
(off-body) the area you
want to treat.
To stop, double-click the
‘Stop/Start Button’.
To select the next ER, simply
click the ‘Previous Button’.
1
1
2
3
4
2
4
3

The Clinic in the Box
Reassess
Rejuvenate
Step 1 - Use ProVision to assess or re-assess the flow of energy and
information in the body-field and to highlight distortions and
imbalances.
Step 2 - Use the NES miHealth to
rejuvenate the body’s energy flow
through releasing any energy
blockages or trigger points.
17

18
Re-imprint
Step 3 - Re-imprint the body-field back towards its original blueprint by
providing the recommended protocol of Infoceuticals.

NES Portal
Ordering Infoceuticals on the NES Portal
Enter the following address into a web browser eg. Google Chrome.
www.neshealth.com/portal
Input your email address and
password in the login box
provided, then click the
‘LOG IN’ button.
If you have forgotten your
password, click on the
‘Click here to reset your
password’ link and follow
the instructions to reset
your password.
You will be presented with your Home page (as seen above).
Click on the ‘Shop’ button to view all items in the shop.
1
19
1
Table of contents
