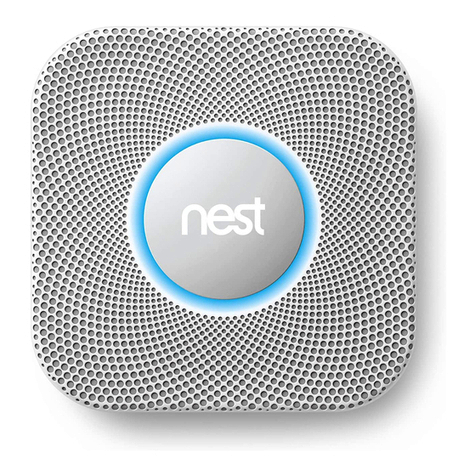
nest A0124 Installation instructions

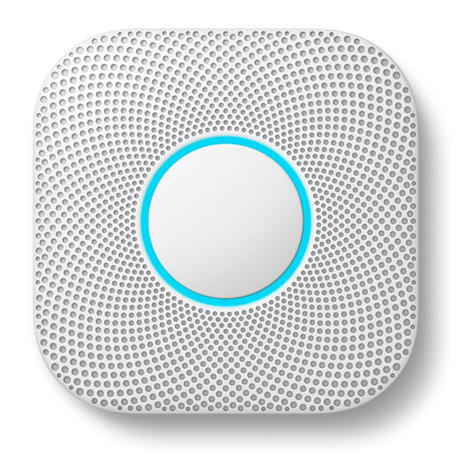
Nest Protect (Battery)
Smoke and carbon monoxide alarm
User Guide
Let’s get started.

2

3
TABLE OF CONTENTS
Meet your Nest Protect . . . . . . . . . . . . . . . . . . . . . . . . . . . . . . . . . . . . . . . . . . . . . . . . . . . . . . . . . . . . . . . . . . . . . . . . . . . . . . . . . . . . . . . . . . . . . . . . . 4
Setup and installation . . . . . . . . . . . . . . . . . . . . . . . . . . . . . . . . . . . . . . . . . . . . . . . . . . . . . . . . . . . . . . . . . . . . . . . . . . . . . . . . . . . . . . . . . . . . . . . . . . 6
Location in your home. . . . . . . . . . . . . . . . . . . . . . . . . . . . . . . . . . . . . . . . . . . . . . . . . . . . . . . . . . . . . . . . . . . . . . . . . . . . . . . . . . . . . . . . . . . . . . . . . . . 8
Placement on the ceiling or wall . . . . . . . . . . . . . . . . . . . . . . . . . . . . . . . . . . . . . . . . . . . . . . . . . . . . . . . . . . . . . . . . . . . . . . . . . . . . . . . . . . . . . 10
Heads-Up and Emergency Alarms . . . . . . . . . . . . . . . . . . . . . . . . . . . . . . . . . . . . . . . . . . . . . . . . . . . . . . . . . . . . . . . . . . . . . . . . . . . . . . . . . .12
Daily Use and Emergency Preparation . . . . . . . . . . . . . . . . . . . . . . . . . . . . . . . . . . . . . . . . . . . . . . . . . . . . . . . . . . . . . . . . . . . . . . . . . . . . .14
General Maintenance . . . . . . . . . . . . . . . . . . . . . . . . . . . . . . . . . . . . . . . . . . . . . . . . . . . . . . . . . . . . . . . . . . . . . . . . . . . . . . . . . . . . . . . . . . . . . . . . . . 16
Safety. . . . . . . . . . . . . . . . . . . . . . . . . . . . . . . . . . . . . . . . . . . . . . . . . . . . . . . . . . . . . . . . . . . . . . . . . . . . . . . . . . . . . . . . . . . . . . . . . . . . . . . . . . . . . . . . . . . . . . 20
Limited Warranty . . . . . . . . . . . . . . . . . . . . . . . . . . . . . . . . . . . . . . . . . . . . . . . . . . . . . . . . . . . . . . . . . . . . . . . . . . . . . . . . . . . . . . . . . . . . . . . . . . . . . . .28
Visit nest.com/au/protectbasics to learn more about installing, using and troubleshooting
Nest Protect.

Nest Protect Back plate 4 mounting screws
4
Inside the box, you’ll find:
MEET YOUR NEST PROTECT
Nest Protect is designed to detect smoke and
carbon monoxide in a residential environment.
It has multiple sensors to help it understand
what’s happening in your home, including a
Split-spectrum Sensor to detect a wide range
of slow-smouldering and fast-flaming fires.
The installation of this apparatus should be
carried out by a competent person. This guide
covers the installation of Nest Protect (Battery)
– Model number A0124.
REQUIREMENTS
You need Wi-Fi, an iOS or Android phone or
tablet and a free account in order to use some
Nest Protect features: spoken room names,
wireless mobile notifications and software
updates. During setup, Wi-Fi and a free account
are required for wireless interconnect and room
naming. After all the Nest Protects in your home
are connected, they can communicate with
each other without Wi-Fi.

The siren enables
Nest Protect to
alert you with a loud
emergency sound.
The speaker allows
Nest Protect to speak
with a human voice.
The light ring changes
colour to alert you.
Push the Nest button
to silence alarms or
run a test.
Micro-USB connector
(not for normal use).
Battery compartment:
Six AA Energizer®Ultimate
Lithium batteries (L91).
13.5 cm
3.9 cm
5

6
SETUP AND INSTALLATION
1. Get the Nest app
Before you install your Nest Protect on the
ceiling or wall, you’ll need to set it up with the
Nest app. Download the app from the App
Store or Google Play and create a free account.
You can use a phone or tablet for setup.
2.Set up Nest Protect
The Nest app will guide you through each
step: scanning the Nest Protect QR code,
connecting it to the Internet and connecting
it to other Nest Protects in your home. Go to
nest.com/au/installprotect to watch the video.
Tip: Set everything out on a table for easy setup.

Already added New
7
4.Test before you install
Once you’ve finished setting up all your
Nest Protects, make sure that they’ve been
added to your account. Push the Nest button
on one Protect and follow the instructions.
All your Protects should speak up. Now you can
install them on the ceiling or wall.
3.Have more Nest Protects?
The Nest app will ask you if you have additional
Nest Protects to set up. If you do, it’ll take you
through a faster setup. Make sure that you keep
all your Protects together until they’re all set up
and ready to be installed.
Tip: To double-check a Protect’s room name, press
the Nest button once. You’ll hear the location that you
assigned to it during setup. It’ll say something like,
“Ready in the bedroom.”
Tip: Your Nest Protect came packed in a plastic
cover. Keep the cover on so that your Protect stays
clean until you install it.

BEDROOMMASTER
BEDROOM
LIVING/
FAMILY
ROOM
KITCHEN
GARAGECELLAR
HALL
AT TIC
MASTER BEDROOMLIVING/
FAMILY
ROOM
DINING
ROOM
KITCHEN
BEDROOMBEDROOM
8
Location in your home
We recommend placing a smoke alarm
on every floor and a carbon monoxide
alarm in every room containing a fuel-
burning appliance.
The Nest Protect smoke and carbon
monoxide alarm should be installed:
• On every floor (smoke alarms are required
by law in certain residences).
• In every room containing a fuel-burning
appliance (recommended for CO alarms).
• In every bedroom.
• In remote rooms that are used often but
which may be too far away for anyone to
hear an alarm.
• Outside unused rooms, like the boiler room.
Nest Protect should be installed at least 3 m
(10 ft) away from hobs or cooking appliances.
Make sure that there is a clear space
around all installed Nest Protects so that
they are not obstructed.
Nest Protect should NOT be installed in
unfinished attics or garages.

9
5.Remove your old smoke alarm
You may have to twist the alarm to release it.
Remove it carefully to avoid damaging your
ceiling or wall. Unscrew and remove the back
plate if there is one.
6.Install the Nest back plate
Screw the Nest back plate directly into the
wall or ceiling with the Nest screws. The Nest
screws are self-tapping so there’s usually no
need to drill pilot holes in plaster, wood and
other relatively soft materials. Make sure that
the screws are driven all the way in and are
snug against the back plate.
Tip: Your old smoke alarm might make a loud noise
when you disconnect it.
Tip: All smoke alarms prefer to live in a dust free area,
so remove any dust before you install Nest Protect.

Figure 1
BEST
ON CEILING
30 cm
Minimum
NOT IN
THIS AREA
OK
ON WALL
15 cm
Minimum
60 cm
Maximum
ANYWHERE IN
THIS AREA
90 cm
ANYWHERE IN
THIS AREA
90 cm
Figure 2
Figure 3
10
Placement on the ceiling or wall
Installation on the ceiling is recommended.
Use the back plate as a guide to mark where
the screws will go. Make sure that it’s at
least 30 cm (12 inches) away from the wall.
Placement on a sloping ceiling
If you have a sloping, pitched or cathedral
ceiling, Nest Protect should be 90 cm
(35 inches) from the highest peak.

1
1
2
2
11
7. Install your Nest Protect
Line up the three tabs on the back of your
Nest Protect with the notches on the
back plate. Hold your Protect against the
back plate and turn it clockwise. Continue
turning until it’s square with the wall or
ceiling. Install the rest of your Protects if
you have more.
8.Press to test
Press the Nest button on one Protect.
It will tell you what to do next. Every Nest Protect
in the house should speak up, confirming that
they’re connected to each other.
Tip: If you ever need to remove your Nest Protect (for
cleaning or battery replacement), turn it anticlockwise
until it disconnects from the back plate.

12
HEADSUP AND EMERGENCY ALARMS
ALERTS
When Nest Protect has something to say, it
will speak to you and light up instead of just
beeping. Nest Protect has two kinds of voice
alerts: Heads-Up and Emergency Alarm.
When smoke or carbon monoxide levels
are heightened but haven’t yet reached
Emergency Alarm levels, Nest Protect can
sound a Heads-Up as an early warning.
Nest Protect will pulse yellow and tell you
where there’s smoke or carbon monoxide.
You’ll get an Emergency Alarm when smoke
or carbon monoxide reach critical levels.
Nest Protect will pulse red, tell you what
room the emergency is in and sound a loud
alarm. If there’s both smoke and CO present,
the smoke alarm will take priority.
SILENCING
Heads-Up alerts and Emergency Alarms can
be silenced by using the Nest app or pressing
the Nest button. Only silence an alarm once you
have checked conditions at the Nest Protect
that first sounded the alarm. Do not silence
Nest Protect by removing the batteries. This will
disable the alarm so that it cannot sense smoke
or carbon monoxide, leaving you at risk.
Because there are many different types of fires,
you may experience an Emergency Alarm
without having first experienced a Heads-Up
alert. This means that critical levels of smoke or
CO occurred extremely quickly and Nest Protect
had to sound the Emergency Alarm.
HAVE MORE THAN ONE NEST PROTECT?
After all the Nest Protects in your home are
connected to each other, if there’s a Heads-Up
or an Emergency Alarm in one room, they’ll all
tell you what the danger is and which room it’s in.
If multiple Nest Protects are interconnected,
a Heads-Up alert or Emergency Alarm can be
silenced only at the Nest Protect that originally
sounded the alert. You’ll need to go to that room
to silence all the Nest Protects in your home.
Always check the conditions near the Nest
Protect that first detected the smoke or carbon
monoxide before silencing it.

(Alarm siren)
“EMERGENCY. THERE’S
SMOKE IN THE
[ROOM NAME].”
WHAT YOU HEAR
ALERTSSILENCING
WHAT IT MEANS WHAT TO DO
“PLEASE BE AWARE.
THERE’S SMOKE IN THE
[ROOM NAME]. THE
ALARM MAY SOUND.”
Smoke levels are rising. Put out the source of the
smoke. Then use the Nest
app or press the Nest
button to silence the alert.
Open a window or door
to get fresh air. Then use
the Nest app or press the
Nest button to silence
the alert.
Get out of the house
immediately.
Make sure you’re safe and
have put out the source of
smoke or carbon monoxide.
Make sure you’re safe and
have put out the source of
smoke or carbon monoxide.
1) Keep calm and open all
doors and windows.
2) Stop using all fuel-burning
appliances and ensure
that they are turned off.
3) Evacuate the premises
if the CO alarm continues
to sound.
4) Once outside, call the
fire brigade, or dial 000
in Australia, or 111 in
New Zealand.
Carbon monoxide
levels have been high
for a while.
You’ve silenced an alert.
Nest Protect will now
keep quiet, unless smoke
or carbon monoxide
remains at critical levels.
Smoke or carbon
monoxide levels
are decreasing.
The carbon monoxide in
the room has reached
critical levels.
“PLEASE BE AWARE.
THERE’S CARBON
MONOXIDE IN THE
[ROOM NAME]. THE
ALARM MAY SOUND.”
(Alarm siren)
“EMERGENCY. THERE’S
CARBON MONOXIDE
IN THE [ROOM NAME].
MOVE TO FRESH AIR.”
“SMOKE ALARM SILENCED.”
“CARBON MONOXIDE
ALARM SILENCED.”
“THE ALARM IS OVER.”
YELLOW pulses.
YELLOW pulses.
RED pulses.
RED pulses.
YELLOW or
RED pulses.
GREEN pulses.
WHAT YOU SEE
The smoke in the
room has reached
critical levels.
Alarm signal and voice messages comply with
ISO 8201. Voice messages do not comply with
AS 3786:2014, Section 4.21.
13
HEADSUP AND EMERGENCY ALARMS

14
DAILY USE
NIGHTLY PROMISE
Nest Protect continuously tests itself, so you
don’t have to wonder if it’s working. Nightly
Promise reports on every Protect in your home.
When you turn off the lights for the night, Nest
Protect will glow green for a moment – this
means that everything is working. If it glows
yellow, one of the Protects in your home needs
your attention. For instance, the batteries are
low, Wi-Fi is down or there’s a problem with the
sensors. Just push the Nest button or use the
Nest app to see what’s wrong.
PATHLIGHT
Nest Protect usually has its light turned off, but
it can light your way as you walk underneath it
in the dark. You can enable or disable Pathlight
and set its brightness with the Nest app.
EMERGENCY PREPARATION
TESTING
We recommend running a weekly manual test.
During a test, all interconnected Nest Protects
in your home check their sensors, power, Wi-Fi
connection, light ring, emergency siren, speaker
and microphone.
When you run a test, Nest Protect will give you
a countdown before sounding the alarm so that
you have time to move away from the loud noise.
Test procedure:
1. Press the Nest button on a Protect. The blue
light should turn on and it will speak to you.
2. When it says “Press to test”, press the button
a second time.
3. Nest Protect will say: “This is only a test.
The alarm will sound.”
4. Ensure that the alarm sounds and the light
illuminates on each Protect.
5. Once Nest Protect has made sure it’s
working, it’ll tell you that everything’s OK.
If you have interconnected Protects, all
of them should speak.
SOUND CHECK
Nest Protect can automatically perform a
monthly test to confirm that its speaker and
siren are working properly. You can choose to
enable this option during initial setup with the
app, but you can change it at any time. For more
information, please visit nest.com/soundcheck
DAILY USE AND EMERGENCY PREPARATION

Nest Protect has
tested its sensors,
power and Wi-Fi to
confirm that they are
working correctly.
DAILY USEEMERGENCY
PREPARATION
GREEN light
pulses once
when you turn off
the room lights
for the night.
WHITE light.
Spinning
BLUE light
Sleep well, thanks
to Nightly Promise.
Pathlight lights your
way at night as you
pass under it.
To set up or run
a manual test.
“READY IN THE [ROOM
NAME]. PRESS TO TEST.”
WHAT YOU HEAR WHAT IT MEANS WHAT TO DOWHAT YOU SEE
Press the Nest button.
Nest Protect will walk you
through the next steps.
15
DAILY USE AND EMERGENCY PREPARATION
WARNING
• DO NOT stand close to the alarm when
the siren is sounding. Exposure at close
range may be harmful to your hearing.
When testing, move away before the siren
starts sounding.
• If you have been away from home for a
long period of time, such as on holiday,
test Nest Protect by pressing the Nest
button twice.
• If the alarm ever fails to test correctly,
have it replaced immediately! If the alarm
is not working properly, it cannot alert
you to a problem.
• DO NOT use a match, cigarette or any other
makeshift fire to test the smoke alarm.
• NEVER use vehicle exhaust to test the
CO alarm! Exhaust may cause permanent
damage and will void your warranty.
• NEVER use an open flame of any kind
to test this alarm. You might accidentally
damage or set fire to the unit or to
your home.

3
2
1
6
5
4
3
2
1
6
5
4
16
2. Open the battery door on
the back of your Protect.
3. Replace the batteries.
Align the + positive and
- negative ends with the
markings in the battery
compartment.
4. Close the battery
compartment. Do not force the door closed.
5. Hold your Protect against the back plate
and turn it clockwise until you feel it grip.
6.
Use the Nest app to run a Safety Checkup,
or press the Nest button on your Protect
and follow the instructions to test.
GENERAL MAINTENANCE
CLEANING YOUR NEST PROTECT
Nest Protect has been designed to be as
maintenance free as possible, but you
should keep it clean. As with any smoke
alarm, dust build-up on the outside or
inside of Nest Protect can stop it from
working properly.
To clean Nest Protect:
1.Remove it from the wall or the ceiling
(turn anticlockwise until it comes off
the back plate).
2. Wipe the outside with a clean, slightly damp
cloth. Don’t use any soaps or solvents.
3.Place your Protect on a soft, dry cloth
with the Nest button facing down. Open
the battery compartment door and
remove the batteries. Remove the screws
and lift off the back. Be careful not to
lose the screws.
4. Gently vacuum the inside. Make sure that
you clean all the way around the mesh
sides of the smoke chamber (the large
metal circle).
Note: Never use detergents or solvents
(like glass cleaner) on your Nest Protect
and do not spray air fresheners, hair spray
or other aerosols near it. Do not get water
inside the alarm or paint over it.
REPLACING THE BATTERIES
Nest Protect uses six AA Energizer®
Ultimate Lithium batteries (L91).
These batteries can be purchased at
your local retailer.
1. Twist Nest Protect anticlockwise
until it disconnects from the back plate.
WARNING
• Use only the AA Energizer® Ultimate
Lithium batteries (L91) specified by Nest.
Use of a different battery model will have
a detrimental effect on the operation
of the smoke alarm. The alarm may not
operate properly with other batteries.
Never use rechargeable batteries, as they
may not provide a constant charge.
• Never remove the batteries from a
battery-operated alarm to stop an
unwanted alarm (caused by cooking
smoke, etc.). Removing batteries disables
the alarm so that it cannot sense smoke
or carbon monoxide, leaving you at risk.

GENERAL MAINTENANCE
YELLOW pulses. Low battery. Change Nest Protect’s
batteries now.
“THE BATTERY IS LOW IN
THE [ROOM NAME].
REPLACE THE BATTERY
NOW.” Single chirp
every 60 seconds.
Nest Protect has tested
its sensors, and there is
a problem.
Clean according to
instructions on p.16. If the
problem persists, replace
Nest Protect.
“THE SENSORS HAVE
FAILED IN THE [ROOM
NAME]. REPLACE NEST
PROTECT NOW.” Single
chirp every 60 seconds.
Nest Protect has expired
and reached the end of
its life.
Replace Nest Protect now.
“NEST PROTECT HAS
EXPIRED. REPLACE NEST
PROTECT NOW.” Two
chirps every 60 seconds.
There’s a problem with
Nest Protect’s siren.
Replace Nest Protect now.
“NEST PROTECT CANNOT
SOUND THE ALARM IN
THE [ROOM NAME].” Two
chirps every 60 seconds.
YELLOW pulses. Change Nest Protect’s
batteries soon.
Low battery.
“THE BATTERY IS LOW IN
THE [ROOM NAME].
REPLACE THE BATTERY
SOON.”
YELLOW pulses.
YELLOW pulses.
WHAT YOU HEAR WHAT IT MEANS WHAT TO DOWHAT YOU SEE
YELLOW pulses.
17
WARNING
• The alarm will not operate without
battery power. The alarm cannot work
until you install the batteries in the
correct position (Match + to +, and - to -).
• This device contains lithium batteries.
If tampered with, the battery may be
short circuited and create a risk of fire.
Never attempt to open or damage the alarm.
• Danger of explosion if battery is incorrectly
replaced. Replace only with Energizer Lithium
AA (L91) batteries or Panasonic FR6SJ batteries.
• Replace all batteries at once and only use new,
unused batteries as replacements.
• Do not expose batteries to excessive heat or fire.
GENERAL MAINTENANCE

18
SERVICING
If your Nest Protect needs servicing, contact
our support team first at nest.com/help to get
a returns number and delivery information.
EXPIRY
Like any smoke and CO alarm, Nest Protect
has a limited life. You will need to replace
Nest Protect after at most 10 years with
a brand-new Protect. You can check the
replacement date written on the back of
your Protect to see when it will expire.
About two weeks before it expires, Nest Protect
will light up with a yellow light. Press the Nest
button and it will say, “Nest Protect has expired.
Replace it now.” Buy a new alarm and recycle the
expired one. Make sure that you test your new
Protect once it’s installed.
RECYCLING AND DISPOSAL
Nest recognises its responsibility to minimise
the environmental impact of its operations
and products. Once Nest Protect has expired,
you will need to recycle it according to local
regulations. Please visit nest.com/au/recycle
to learn more about Nest’s commitment to
environmental responsibility and to find where
you can safely recycle your Nest Protect.
The WEEE symbol means that your product
should be disposed of separately from general
household waste, in accordance with local
laws and regulations. When Nest Protect
reaches the end of its life, take it to a collection
GENERAL MAINTENANCE
point designated by your local authority. Some
collection points accept products free of charge.
The separate collection and recycling of your
product will help conserve natural resources and
ensure that it is recycled in a manner that protects
human health and the environment.
RESETTING NEST PROTECT
You can reset Nest Protect to erase all your
settings and reset the wireless interconnection
with other Protects. You may want to do this when
you move to a new home. Follow the steps below
on each Nest Protect that you want to reset.
1. Press and hold the Nest button on your Protect.
It will chime and the light will turn blue.
2. Keep holding the button until your Protect
begins to say its version number. Then release
the button.
3. Nest Protect will start a verbal countdown and
tell you that it’s erasing all settings. You can
cancel the reset by pressing the Nest button
during the countdown.
4. It will restart after a few seconds.
Your Nest Protect will still detect smoke and
carbon monoxide after being reset.
Go to nest.com/au/protect/reset for complete
reset instructions.
TECHNICAL SPECIFICATIONS
• Temperature range: 5 °C (41 °F) to 45 °C (113 °F).
• Humidity range: 20% RH to 80% RH
(non-condensing).

19
Model numbers A0124 and A0125 will display a
visual indicator only on the device(s) detecting
emergency levels of smoke or CO. Nest Protect’s
wireless interconnect will not work with smoke
or CO alarms from other brands.
WARNING
• The range and proper operation of any
wireless device will vary depending on its
surroundings.
• Nest Protect alarms are not to be used
outdoors or to transmit between buildings.
The alarms will not communicate properly
in those conditions.
• Metal objects and metallic wallpaper
may interfere with signals from wireless
alarms. Test your Nest Protects with metal
doors opened and closed.
Note: Nest Protect can be used as a single-
station or multiple-station alarm. You can have
up to 18 interconnected Protects in each home
that’s in your account.
WIRELESS INTERCONNECT
Nest Protects connect wirelessly to each other so
that when one speaks, they all speak. This means
that when one Protect raises any kind of alert,
every Protect in the house will tell you which room
the smoke or CO is in. For example, if you’re in the
bedroom and the alarm goes off in the basement,
the Nest Protect in the bedroom will tell you
where the smoke or CO is. To silence the alert, go
to the room where the alarm was triggered. All the
Nest Protects in the house can be silenced from
there. Either press the button on the Nest Protect
or use the Nest app to silence the alarm.
Nest Protect does not have a wire for interconnect
because it connects wirelessly. There’s no need to
connect any Protect wire to the interconnect wire
coming from the ceiling or wall.
Nest Protects can generally communicate
with each other if they’re 15 m (50 feet) or less
apart inside a home. Some features of a home
may reduce Protect’s wireless interconnect
range, including the number of floors, number
and size of rooms, furniture, type of building
materials, suspended ceilings, ductwork, large
metal appliances and metal studs. This kind
of interference can be overcome by adding
more Protects that can route wireless signals
around obstructions.
Nest Protect – Battery (model numbers A13 and
A0124) and Nest Protect – Mains Connected 240 V
(model numbers A14 and A0125) are compatible
and can be interconnected wirelessly. When
interconnected, model numbers A13 and A14 will
display a visual indicator if any Nest Protect
in the structure is in Emergency Alarm mode.

20
ALARM LIMITATIONS
LIMITATIONS OF SMOKE ALARMS
Alarms reduce deaths resulting from house fires
worldwide. However smoke alarms can only
work if they are properly located, installed and
maintained, and if smoke reaches the alarms.
• Smoke alarms may not wake all individuals.
Make sure that you create an escape plan and
that you practise fire drills with all members
of the family.
• Smoke alarms cannot work without power.
If they are powered by batteries, the smoke
alarms cannot work if the batteries are
missing, dead or disconnected. If they are
wired, the smoke alarms cannot work during
a long power cut and once the backup battery
is dead. Nest Protect will warn you in advance
when batteries are running low so that you can
replace them.
• Smoke will not be able to reach the smoke
sensor while the dust cover is in place. The
dust cover must be removed.
• Smoke alarms cannot detect fires if the smoke
does not reach the alarms. For example, if a
door is closed, smoke may not reach the smoke
alarm. This is why you should have a smoke
alarm in each bedroom and in the hallways, as
bedroom doors may be closed at night.
• Smoke alarms may not be heard. Although the
smoke alarm comes with a loud, 85-decibel
siren, it may not be heard if: 1) people have
consumed alcohol or drugs, 2) the alarm is
drowned out by noise from stereos, TVs,
traffic, air conditioners or other appliances,
3) residents are hearing impaired or have
high-frequency hearing loss associated with
ageing. Special smoke alarms should be
SAFETY
Table of contents
Other nest Smoke Alarm manuals
Popular Smoke Alarm manuals by other brands

Brigit Systems
Brigit Systems BRS-SC installation instructions

System Sensor
System Sensor A310E Installation and maintenance instructions

Red Arrow
Red Arrow SMAS-P2 installation instructions

Universal Security Instruments
Universal Security Instruments 2975 user manual

Siemens
Siemens DI-3 Installation/Wiring Instructions

Cavius
Cavius 2107-001 manual