nest PROTECT User manual

Nest Protect (Wired 120V ~ 60Hz)
Detects smoke and carbon monoxide (CO)
User’s Guide
ATTENTION: Please read carefully and save this User’s Guide in a safe place.
Page: 1

2
TABLE OF CONTENTS
Meet your Nest Protect . . . . . . . . . . . . . . . . . . . . . . . . . . . . . . . . . . . . . . . . . . . . . . . . . . . . . . . . . . . . . . . . . . . . . . . . . . . . . . . . . . . . . . . . . . . . . . . . . 3
Location in your home. . . . . . . . . . . . . . . . . . . . . . . . . . . . . . . . . . . . . . . . . . . . . . . . . . . . . . . . . . . . . . . . . . . . . . . . . . . . . . . . . . . . . . . . . . . . . . . . . . . 5
Placement on the ceiling or wall . . . . . . . . . . . . . . . . . . . . . . . . . . . . . . . . . . . . . . . . . . . . . . . . . . . . . . . . . . . . . . . . . . . . . . . . . . . . . . . . . . . . . . 6
Placement on a sloped ceiling . . . . . . . . . . . . . . . . . . . . . . . . . . . . . . . . . . . . . . . . . . . . . . . . . . . . . . . . . . . . . . . . . . . . . . . . . . . . . . . . . . . . . . . . 7
Setup and installation . . . . . . . . . . . . . . . . . . . . . . . . . . . . . . . . . . . . . . . . . . . . . . . . . . . . . . . . . . . . . . . . . . . . . . . . . . . . . . . . . . . . . . . . . . . . . . . . . . 8
Operating instructions. . . . . . . . . . . . . . . . . . . . . . . . . . . . . . . . . . . . . . . . . . . . . . . . . . . . . . . . . . . . . . . . . . . . . . . . . . . . . . . . . . . . . . . . . . . . . . . . . 12
Heads-Up and Emergency Alarms . . . . . . . . . . . . . . . . . . . . . . . . . . . . . . . . . . . . . . . . . . . . . . . . . . . . . . . . . . . . . . . . . . . . . . . . . . . . . . . . . .14
Wireless interconnect. . . . . . . . . . . . . . . . . . . . . . . . . . . . . . . . . . . . . . . . . . . . . . . . . . . . . . . . . . . . . . . . . . . . . . . . . . . . . . . . . . . . . . . . . . . . . . . . . . 15
Testing Nest Protect. . . . . . . . . . . . . . . . . . . . . . . . . . . . . . . . . . . . . . . . . . . . . . . . . . . . . . . . . . . . . . . . . . . . . . . . . . . . . . . . . . . . . . . . . . . . . . . . . . . . 16
General maintenance . . . . . . . . . . . . . . . . . . . . . . . . . . . . . . . . . . . . . . . . . . . . . . . . . . . . . . . . . . . . . . . . . . . . . . . . . . . . . . . . . . . . . . . . . . . . . . . . . . 17
Safety. . . . . . . . . . . . . . . . . . . . . . . . . . . . . . . . . . . . . . . . . . . . . . . . . . . . . . . . . . . . . . . . . . . . . . . . . . . . . . . . . . . . . . . . . . . . . . . . . . . . . . . . . . . . . . . . . . . . . . 19
Alarm limitations . . . . . . . . . . . . . . . . . . . . . . . . . . . . . . . . . . . . . . . . . . . . . . . . . . . . . . . . . . . . . . . . . . . . . . . . . . . . . . . . . . . . . . . . . . . . . . . . . . . . . 19
Installation code . . . . . . . . . . . . . . . . . . . . . . . . . . . . . . . . . . . . . . . . . . . . . . . . . . . . . . . . . . . . . . . . . . . . . . . . . . . . . . . . . . . . . . . . . . . . . . . . . . . . .21
AC installation warnings. . . . . . . . . . . . . . . . . . . . . . . . . . . . . . . . . . . . . . . . . . . . . . . . . . . . . . . . . . . . . . . . . . . . . . . . . . . . . . . . . . . . . . . . . . . . 22
Carbon monoxide (CO) precautions . . . . . . . . . . . . . . . . . . . . . . . . . . . . . . . . . . . . . . . . . . . . . . . . . . . . . . . . . . . . . . . . . . . . . . . . . . . . . .24
Fire safety precautions . . . . . . . . . . . . . . . . . . . . . . . . . . . . . . . . . . . . . . . . . . . . . . . . . . . . . . . . . . . . . . . . . . . . . . . . . . . . . . . . . . . . . . . . . . . . . 26
Industry Canada (IC) compliancenotice . . . . . . . . . . . . . . . . . . . . . . . . . . . . . . . . . . . . . . . . . . . . . . . . . . . . . . . . . . . . . . . . . . . . . . . .27
Mobile notifications . . . . . . . . . . . . . . . . . . . . . . . . . . . . . . . . . . . . . . . . . . . . . . . . . . . . . . . . . . . . . . . . . . . . . . . . . . . . . . . . . . . . . . . . . . . . . . . . .27
Limited Warranty. . . . . . . . . . . . . . . . . . . . . . . . . . . . . . . . . . . . . . . . . . . . . . . . . . . . . . . . . . . . . . . . . . . . . . . . . . . . . . . . . . . . . . . . . . . . . . . . . . . . . . . . 28
Page: 2

Nest Protect Backplate 120V connector
4 mounting screws
3 wire nuts
3
MEET YOUR NEST PROTECT
Inside the box you’ll find:
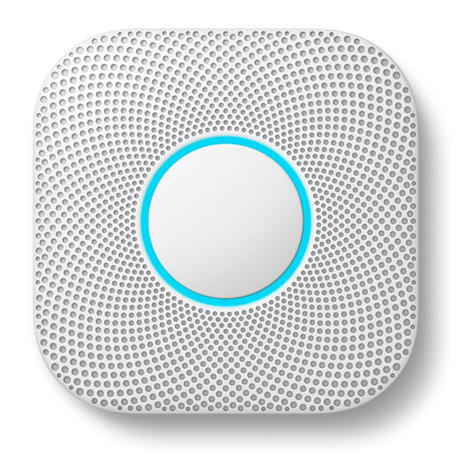
Nest Protect is designed to detect smoke and carbon monoxide in a residential environment.
It has multiple sensors to help it understand what’s happening in your home and a photoelectric
sensor to detect slow, smoldering fires. Nest Protect can be used as a single station or multiple
station alarm.
This guide covers the installation of Nest Protect (Wired) - Model number O5C-C.
REQUIREMENTS
Wi-Fi, an iOS or Android smartphone or tablet, and a free Nest Account are required for wireless
mobile notifications and software updates. During set up, Wi-Fi and free Nest Account are required
for wireless interconnect and room naming. After all the Nest Protects in your home are connected,
they can communicate with each other without Wi-Fi.
Page: 3

13.4 cm
(5.28")
4.1 cm
(1.63")
4
Horn enables Nest Protect
to alert you with a loud
emergency sound.
Speaker allows Nest Protect
to speak with a human voice.
Light ring changes
color to alert you.
Push the Nest button to
hush alarms and run a test.
Micro-USB connector
(not for normal use).
AC connector pins for the
120V connector.
Backup battery
compartment:
3 AA Energizer® Ultimate
Lithium batteries (L91).
Page: 4

BEDROOM MASTER
BEDROOM
LIVING/
FAMILY
ROOM
KITCHEN
GARAGEBASEMENT
HALL
ATTIC
5
LOCATION IN YOUR HOME
Smoke alarms should be installed in the following areas:
• On every floor, including finished attics and basements.
• Inside and outside every sleeping area.
• At the top of the first-to-second floor stairway and on the basement ceiling near the entry
ofthestairs.
• In homes with more than 93 square meters (1,000 square feet) on one level,
additional alarms may be required.
Nest Protect should be installed at least 3 m (10 ft) away from cooktops or cooking appliances.
Nest Protect should NOT be installed in unfinished attics or garages.
Page: 5

Figure 1
30.5cm
12"
Maximum
BEST
HERE
10cm
4"
Minimum
10cm
4"
Minimum
NOT IN
THIS AREA
CEILING
SIDE
WALL
OKAY
HERE
NE
ST LOGO
IS UPRIGHT
6
PLACEMENT ON THE CEILING OR WALL
Installing on the ceiling is recommended. Mark where the screws will go using the base as a guide.
Make sure it’s at least 10cm (4in) away from the wall.
Page: 6

Figure 2
NEST LOGO
IS UPRIGH
T
NOT IN
THIS AREA
NE
ST PROTECT
(SEE NOTE)
TOP OF
NEST PROTECT 20cm – 7.9"
MAXIMUM
90cm
35.4"
Figure 3
7
PLACEMENT ON A SLOPED CEILING
If the slope of your ceiling is more than 19 degrees, there’s a triangle of dead air below the peak that
should be avoided. To check where the dead air ends, think of the peak of your ceiling as the top
point of the triangle. The side of the triangle is your wall. The base of the triangle connects the wall
to the slope of your ceiling. When the base is 90cm (35.4in) long, you get the outline of the dead air.
Your smoke alarm should be installed on the ceiling or wall not more than 20cm (7.9in) below the
dead air.
NOTE: Nest Protect may be located either on the ceiling or on the wall.
Page: 7

Already Added New
8
The installation of a smoke/CO alarm should be
made by a qualified electrician, and all wiring
used to install this alarm should be made in
accordance with CSA C22.1, Canadian Electrical
Code, Part I, Safety Standard for Electrical
Installations and/or applicable codes in your
local jurisdiction.
For a complete set of instructions and
warnings, refer to page 21.
SETUP AND INSTALLATION
(Professional installation recommended)
Tip: Lay everything out on a table for an easy installation.
1. Get the Nest app
Before you install your Nest Protect on the
ceiling or wall, you’ll need to set it up with
the Nest app. Download the app from the
Apple App Store, Google Play or the Amazon
App Store and create a free Nest Account.
3.Have more Nest Protects?
The Nest app will ask you if you have additional
Nest Protects to set up. If so, it’ll take you
through a shorter setup. Make sure to keep
track of which Protects you’ve already set up
and where you’re going to install them.
2.Set up Nest Protect with
the Nest app
The Nest app will guide you through each step:
scanning the Nest Protect QR code, connecting
it to the Internet, and connecting it to other
Nest Protects in your home.
Watch the video at nest.com/ca/installprotect.
Page: 8

Breaker box
Your old smoke
alarm might
make a really
loud noise when
you disconnect it.
22
1
9
5.Turn off power
Protect yourself and avoid blowing a fuse.
Switch off the correct circuit breaker or remove
the fuse from the fuse box.
6.Remove your old smoke alarm
To prevent electrical shock, make sure the
green power light is off on the alarm. You may
have to twist the alarm to release it. Carefully
remove it to prevent ceiling or wall damage.
7. Remove the old base
Unscrew the base plate from the electrical box.
Save the screws for later.
WARNING
ELECTRICAL SHOCK HAZARD
Failure to turn off the power may result in
serious electrical shock, injury and death.
4.Test before you install
Once you’re done setting up all of your Nest
Protects, test they’re added to your Nest Account
by pushing the Nest button on one Nest Protect
and follow the instructions to test. If they’re all
added, every Nest Protect will speak up.
Now you can install them on the ceiling or wall.
Page: 9

White:
Neutral line
Black:
Power line
Bare copper
Red/orange/yellow:
Interconnect
Tabs face away from
the ceiling or wall.
1cm (3/8”)
The exposed wire
should be straight.
10
9.Attach the Nest 120V connector
Hold the white wire ends together, cap them
with a wire nut and twist clockwise until secure.
Do the same with the black wires. There’s no
need for the red/orange/yellow wire. Simply cap
it with a wire nut and twist until secure.
10. Install Nest Protect backplate
Screw the backplate to the existing electrical
box, reusing the existing screws. (Alternately,
you can screw the plate directly into the wall
orceiling with the Nest screws.)
11. Connect power
Plug the 120V connector into the back of your
Nest Protect.
8.Remove the old connector
Unscrew the wire
nuts to detach the
120V connector
from your old
smoke alarm.
Page: 10

Breaker box
22
11
11
12. Mount your Nest Protect
First, tuck any excess wiring into the electrical
box and push Nest Protect onto the backplate.
Give it a slight twist clockwise. It’ll CLICK
into place.
13. Switch power back on or replace
the fuse
14. Press to test
Press the Nest button on one Nest Protect and
follow the spoken instructions to test.
They should all speak to you, confirming
that they’re in range of each other.
Page: 11

SETUPALERTS
WHAT YOU HEAR WHAT YOU SEE ON
NEST PROTECT
WHAT IT MEANSWHAT TO DO
To setup or run a
manual test.
Smoke levels are rising.
Carbon monoxide levels are
rising. This Heads-Up will
occur if carbon monoxide
levels stay at 70ppm for
60-240 minutes.
The smoke in the room has
reached emergency levels.
The carbon monoxide in
the room has now reached
emergency levels.
“READY. PRESS TO TEST.”
“HEADS-UP. THERE’S
SMOKE IN THE (ROOM
NAME). THE ALARM
MAY SOUND.”
“HEADS-UP. THERE’S
CARBON MONOXIDE IN
THE (ROOM NAME). THE
ALARM MAY SOUND.”
(ALARM SOUND)
“EMERGENCY. THERE’S
SMOKE IN (ROOM NAME).”
(ALARM SOUND)
“EMERGENCY. THERE’S
CARBON MONOXIDE IN
(ROOM NAME). MOVE TO
FRESH AIR NOW.”
BLUE rotates.
YELLOW pulses.
YELLOW pulses.
RED pulses.
RED pulses.
Press the Nest button.
Nest Protect will walk you
through next steps.
Stand under Nest Protect
and press the Nest button
to hush the alert. Then put
out the source of the smoke.
Stand under Nest Protect
and press the Nest button
to hush the alert. Open a
window or door to get fresh
air, then find the CO leak
and stop it.
Get out of the
house immediately.
1) Operate reset/silence
button (Nest button).
2) Call your fire dept. or 91
1.
3) Move to fresh air.
3) Do not reenter the
premises until the
emergency services
tell you to. Refer to
page 25 for complete
instructions.
12
OPERATING INSTRUCTIONS
When the Nest Protect smoke and carbon monoxide (CO) alarm has something to say, it will speak to you
in words and colors instead of just beeping. It has two kinds of alerts: Heads-Up and Emergency Alarms.
• Nest Protect can see smoke or carbon monoxide levels rising. So before it turns on an Emergency
Alarm, Nest Protect gives you a friendly spoken Heads-Up to warn you in advance. It pulses yellow
and speaks to you, telling you what and where the danger is.
• When smoke or carbon monoxide reach dangerous levels, Nest Protect tells you where the
emergency is and pulses red, in addition to making a loud alarm sound. This is an Emergency Alarm.
Page: 12

YELLOW pulses.Low battery. Change the batteries
of Nest Protect soon.
YELLOW pulses.Nest Protect batteries
have been depleted.
It will chirp.
Change the batteries
of Nest Protect now.
“THE BATTERY IS LOW
IN THE (ROOM NAME).
REPLACE THE BATTERY
SOON.”
“THE BATTERY IS VERY
LOW IN THE (ROOM
NAME). REPLACE
THE BATTERY NOW.”
SINGLE CHIRP EVERY
60 SECONDS.
TROUBLE SIGNALS
YELLOW or
RED pulses.
You’ve hushed an alert.
Nest Protect will now keep
quiet, unless smoke or
carbon monoxide reaches
dangerous levels.
Make sure you’re safe and
have put out the source of
smoke or carbon monoxid
e.
SILENCING
“SMOKE ALARM HAS
BEEN HUSHED.”
“CARBON MONOXIDE
ALARM HAS BEEN
HUSHED.”
You turn off the room
lights for the night,
and the GREEN light
pulses once.
Nest Protect has tested
its sensors and batteries
to confirm they are
working correctly.
Sleep well.
WHITE light. Pathlight lights your way at
night as you pass under it.
WHAT YOU HEAR WHAT YOU SEE ON
NEST PROTECT
WHAT IT MEANSWHAT TO DO
GREEN light above
the Nest logo.
Nest Protect is working.
The green light means
AC power is connected.
EVERY DAY
Nest Protect has tested
its sensors and there is
a problem. It will chirp.
Clean with compressed
air. If the problem
persists, replace it.
Nest Protect has expired
and reached its end of life.
Replace Nest Protect.
“THE SENSORS HAVE
FAILED IN THE (ROOM
NAME). REPLACE NEST
PROTECT NOW.”
SINGLE CHIRP EVERY
60 SECONDS.
“NEST PROTECT HAS
EXPIRED. REPLACE IT
NOW.” TWO CHIRPS
EVERY 60 SECONDS.
13
Page: 13

14
WHICH ALERTS CAN BE SILENCED
• Heads-Up alerts can be hushed by using
the Nest button.
• Emergency Alarms cannot be hushed by using
the Nest button if smoke reaches acritical level.
• Because there are many different types of
fires, you may experience an Emergency Alarm
without having first experienced a Heads-Up
alert. This means that dangerous levels of
smoke or CO occured extremely quickly and
Nest Protect must sound the Emergency Alarm.
• After the Nest Protects in your home are
connected to each other, whenever there’s
a Heads-Up or an Emergency Alarm in one
room, they will all tell you what and where the
danger is. So go to that room and press the
button on the Nest Protect there to hush every
Nest Protect in the home. This will ensure that
you will identify the source of the danger in
thatroom.
HEADSUP AND EMERGENCY ALARMS
ALERTS
Nest Protect has two kinds of voice alerts:
Heads-Up and Emergency Alarms. A Heads-
Up is a friendly warning before conditions get
dangerous. Nest Protect pulses yellow and tells
you where smoke or carbon monoxide is.
An Emergency Alarm occurs when smoke or
carbon monoxide reach dangerous levels.
Nest Protect pulses red, makes a loud alarm
sound and tells you what room the emergency
is in. The smoke alarm takes precedence when
carbon monoxide is also present.
Page: 14

15
Nest Protect wireless interconnect will not
work with other products from other brands.
WARNING
• The range and proper operation of any
wireless device will vary depending on
itssurroundings.
• Nest Protect alarms are not to
be used outdoors or to transmit
between buildings. The alarms
will not communicate properly in
thoseconditions.
• Metal objects and metallic wallpaper
may interfere with signals from wireless
alarms. Test your Nest Protects with
metal doors opened and closed.
PATHLIGHT
Usually Nest Protect has its light turned off,
butit will light your way as you walk underneath
it in the dark. You can enable or disable
Pathlight from the Nest app.
WIRELESS INTERCONNECT
Nest Protects connect wirelessly to each other
so that when one speaks, they all speak. That
means when one Nest Protect raises any kind
of alerts, every Nest Protect in the house will
tell you in which room the smoke or CO is in. For
example, if you’re in the bedroom and the alarm
goes off in the basement, the Nest Protect in
the bedroom will speak up and relay that alarm
so that you know where the danger is. To silence
the alert, go to that room and press the button
on the Nest Protect there. That will hush every
Nest Protect in the house.
Nest Protect’s 120V connector does not have
a red/orange/yellow wire for interconnect as it
connects wirelessly. There’s no need to connect
any wire to the red/orange/yellow interconnect
wire from the ceiling/wall.
Nest Protects can typically communicate with
each other if they’re up to 15m (50ft) apart
inside a home. Some features of a home may
reduce their range, including the number of
floors, number/size of rooms, furniture, type
of building material, suspended ceilings,
ductwork, large metallic appliances and
metal studs. This kind of interference can be
overcome by adding more Nest Protects that
can route wireless signals around obstructions.
Nest Protect - Battery (model number 05A-C)
and Nest Protect - Wired 120V (model
number 05C-C) are compatible and can be
interconnected wirelessly.
Page: 15

16
TESTING NEST PROTECT
SELFMONITORING
Nest Protect continuously tests itself, so you
don’t have to wonder if it’s working.
When you turn out the lights for the night,
Nest Protect will glow green for a moment –
that means everything is working. If it glows
yellow, this means Nest Protect has detected
something wrong that needs your attention.
Just push the Nest button to hear its warning:
either the batteries are low, Wi-Fi has been down
or there is an issue with its sensors.
TEST NEST PROTECT MANUALLY
Safety regulations require you to perform a
weekly manual test.
After installation, test Nest Protect by pressing
the Nest button twice. Before sounding the
alarm, Nest Protect will give you a countdown so
that you have time to move away from the alarm.
WARNING
DO NOT stand close to the alarm when
the horn is sounding. Exposure at close
range may be harmful to your hearing.
When testing, step away when horn
starts sounding.
Test procedure
• Press the Nest button twice to start a test.
• Nest Protect will say: “This is only a test.
Thealarm will sound.”
• Once the Nest Protect you’ve tested has made
sure it’s working, it’ll tell you everything’s okay.
If they are interconnected, every Nest Protect
will speak up in the house. Walk to each one to
make sure you hear them.
WARNING
• If the alarm ever fails to test correctly,
have it replaced immediately! If the alarm
is not working properly, it cannot alert you
to a problem.
• DO NOT use a match, cigarette or any other
makeshift fire to test the smoke alarm.
• To test the CO alarm, NEVER use vehicle
exhaust! Exhaust may cause permanent
damage and voids your warranty.
• NEVER use an open flame of any kind
totest this alarm. You might accidentally
damage or set fire to the unit or to
yourhome.
Page: 16

17
GENERAL MAINTENANCE
CLEANING YOUR NEST PROTECT
Like any photoelectric smoke alarm, Nest
Protect can get dusty. Do not clean it with
detergents or solvents (like Windex®) and do
not spray air fresheners, hair spray or other
aerosols near it. To dust Nest Protect:
• Remove it from the wall or the ceiling.
• Unscrew the battery door.
• Pass a can of compressed air back and forth
across the entire backplate and alarm.
• Blow compressed air around the black circle
that says Nest. This is the smoke chamber.
Do not get water inside the alarm or paint over it.
RESETTING NEST PROTECT
You can reset Nest Protect to erase all your
settings and reset the wireless interconnection
between Nest Protects. You may want to do this
before you move to a new house.
You’ll need to press and hold the Nest button
on Nest Protect to erase its settings. Follow the
steps below for each Nest Protect you want to
reset. You can’t erase the settings on your Nest
Protect from the Nest app.
• Press and hold the Nest button. Nest will chime
and glow blue.
• Keep holding the button until Nest Protect says
its version number. Then release the button.
• Nest Protect will start a verbal countdown and
tell you it’s erasing all settings. You can cancel by
pressing the Nest button during the countdown.
• After a few seconds it will restart.
Your Nest Protect will still detect smoke and
carbon monoxide after being reset. You can see
complete instructions at nest.com/protect/reset.
BACKUP BATTERY
In case of power outage, Nest Protect will use
itsbackup battery.
3 AA Energizer® Ultimate Lithium batteries (L91).
These backup batteries can be purchased
atyour local retailer.
Nest Protect will let you know its backup
batteries are getting low before they need to
be replaced. Instead of lighting up green during
Nightly Promise, it’ll glow yellow. Once you
press the Nest button, Nest Protect will say,
“The battery islow. Replace the battery soon.”
WARNING
Use only batteries specified by Nest.
Use of a different battery model will
have a detrimental effect on the smoke
alarm operation.
Never disconnect a wired alarm to stop
an unwanted alarm (caused by cooking
smoke, etc.). Removing power disables
the alarm so it cannot sense smoke, and
removes your protection. Instead open
a window or fan the smoke away from
the unit.
The backup battery cannot work until
you install the battery in the correct
position (Match “+” to “+” and “-” to “-”).
Page: 17

1. First battery
2. Second battery
3. Third battery. This
battery will push the
bracket into place.
1
2
3
1
2
3
18
REPLACING THE BACKUP BATTERIES
1. Remove your Nest Protect from its backplate.
2. Using a Phillips screwdriver, unscrew the two
screws from the battery door on the back of
Nest Protect.
3. Replace the batteries. Make sure to use
Energizer Ultimate Lithium batteries and
install them in the right order. If you install
them out of order, you may not be able to close
the battery compartment.
4. Reattach the battery door by sliding it into the
tabs located on the opposite side from
the batteries, replacing the screws and then
reattaching Nest Protect back to its base.
5. Press the Nest button to run a test.
SERVICING
Step 1: Before sending Nest Protect for service,
visit nest.com/ca/support.
Step 2: If your Nest Protect needs servicing, first
contact our support team to get a return number.
Step 3: Send it to
Nest Labs
Nest Labs c/o Ingram Micro Logistics Br40
88 Foster Crescent
Mississauga, ON L5R 4A2
Canada
RECYCLING AND DISPOSAL
Visit www.nest.com/ca/recycle.
EXPIRATION
Nest Protect has a limited life like any smoke/
CO alarm. Nest Protect’s lifetime is 7 years.
Youwill need to replace Nest Protect after
7years with a brand new Nest Protect. Check
the date of replacement written on the back
ofNest Protect.
WARNING
You’ll no longer be protected from smoke or
CO if you don’t replace your Nest Protect.
About two weeks before it expires, Nest Protect
will light up with a yellow light. Press the
Nest button and it will say, “Nest Protect has
expired. Replace it now.” Buy a new alarm and
recycle the expired one. Make sure you test your
new Nest Protect once it’s installed.
Page: 18

19
ALARM LIMITATIONS
LIMITATIONS OF SMOKE ALARMS
Alarms reduce deaths resulting from home fires
worldwide. However smoke alarms can only
work if they are properly located, installed and
maintained, and if smoke reaches the alarms.
• Smoke alarms may not waken all individuals.
Make sure you create an escape plan and you
practice fire drills with all members of the family.
• Smoke alarms cannot work without power.
If they are powered by batteries, the smoke
alarms cannot work if the batteries are missing,
dead or disconnected. If they are wired, the
smoke alarms cannot work during a long power
outage and once the back up battery is dead.
Nest Protect will warn you in advance when
batteries are running low so that you can
replace them.
• Smoke will not be able to reach smoke sensor
while the dust cover is in place. The dust cover
must be removed.
• Smoke alarms cannot detect fires if the smoke
does not reach the alarms. For example, if a
door is closed, smoke may not reach the smoke
alarm. This is why you should have a smoke
alarm in each bedroom and in the hallways as
bedroom doors may be closed at night.
• Smoke alarms may not be heard. Although
the smoke alarm comes with a loud horn of
85 decibels, it may not be heard if : 1) people
have consumed alcohol or drugs, 2) the alarm
is drowned by noise from stereo, TV, traffic, air
conditioner or other appliances, 3) residents
are hearing impaired or have high frequency
hearing loss associated with aging. Special
smoke alarms should be installed for those
who are hearing impaired.
SAFETY
Page: 19

20
• This smoke alarm is not intended to alert
hearing impaired residents. Alarms specifically
designed for the hearing impaired, which
feature devices like flashing strobe lights or
low frequency devices are available to alert the
hearing impaired in case of fire.
• This smoke alarm alone is not a suitable
substitute for complete fire detection
systems in places housing many people—like
apartment buildings, condominiums, hotels,
motels, dormitories, hospitals, long-term
health care facilities, nursing homes, day care
facilities, or group homes of any kind—even if
they were once single-family homes. It is not a
suitable substitute for complete fire detection
systems in warehouses, industrial facilities,
commercial buildings, and special-purpose
non-residential buildings which require special
fire detection and alarm systems. Depending
on the building codes in your area, this smoke
alarm may be used to provide additional
protection in these facilities.
LIMITATIONS OF CARBON MONOXIDECOALARMS
• NEVER ignore your carbon monoxide alarm if it
alarms. Refer to “What to do in case of a carbon
monoxide alarm” for more information. Failure
to do so can result in injury or death.
• This CO alarm is designed for use inside a
single-family home or apartment. It is not
meant to be used in common lobbies, hallways,
or basements of multi-family buildings unless
working CO alarms are also installed in each
family living unit. CO alarms in common areas
may not be heard from inside individual family
living units.
• This CO alarm alone is not a suitable substitute
for complete detection systems in places
which house many people, like hotels or
dormitories, unless a CO alarm is also placed
ineach unit.
• DO NOT use this CO alarm in warehouses,
industrial or commercial buildings, special-
purpose non-residential buildings, or airplanes.
This CO alarm is specifically designed for
residential use, and may not provide adequate
protection in non-residential applications.
• Some individuals are more sensitive to CO
than others, including people with cardiac or
respiratory problems, infants, unborn babies,
pregnant mothers, or elderly people can be
more quickly and severely affected by CO.
Members of sensitive populations should
consult their doctors for advice on taking
additional precautions.
• The silence feature is for your convenience
only and will not correct a CO problem. Always
check your home for a potential problem after
any alarm. Failure to do so can result in injury
ordeath.
Page: 20
Other manuals for PROTECT
7
Table of contents
Other nest Smoke Alarm manuals