manuals.online logo
Brands
  1. Home
  2. •
  3. Brands
  4. •
  5. Network Thermostat
  6. •
  7. Thermostat
  8. •
  9. Network Thermostat DirectConnect NetX X Series User manual

Network Thermostat DirectConnect NetX X Series User manual

240299-00Pg 1 © 2020 Network Thermostat All Rights Reserved
NetX™ DirectConnect™
Local Area LAN Conguration Guide
A NetX X-Series IP Thermostat can be congured for direct connection
(DirectConnect™) for local area network (LAN) use, with or without a LAN
installed at the time of setup. All you need is a computer with an Ethernet
port and an Ethernet patch cable.
CATTENTION: DO NOT INSTALL the thermostat until you have all the
necessary network information.
STEP 1: INSTALL THE THERMOSTAT BACKPLATE
Turn off the power to the HVAC unit and
follow the detailed instructions included
with the thermostat. Make sure the wires
are connected to the correct terminals. In
addition to the thermostat wires, there are
three (3) wires from the Backplate. Connect
the RED wire to the R terminal (along with
the Red wire in the thermostat cable), the
BLACK wire to the 24(c) terminal (along
with the common wire in the thermostat
cable), and the WHITE wire to the X1
terminal. These wires are shipped in the
proper locations and are noted here for
completeness.
STEP 2: SET YOUR COMPUTER FOR AD HOC MODE
1. Disconnect your computer from your existing network.
2. Setup your computer’s Network Settings as follows
• IP 169.254.1.2 (Green Arrow)
• Subnet 255.255.0.0 (Red Arrow)
STEP 3: CONNECT COMPUTER DIRECTLY TO THERMOSTAT
Plug in an ethernet cable directly between your computer and the
thermostat (it will auto-detect with or without a crossover cable)
Once the thermostat is connected to
your network, the backplate LEDs will
indicate the following status:
Green LED (Network Connection
Indicator):
Blinking: This indicates the Backplate is
in Ad Hoc Mode
Red LED (Faceplate Connectivity
Indicator):
Solid: The backplate is powered.
ANOTE: If both LEDs are not on, refer
to the troubleshooting section of this
instruction sheet.
STEP 4: INSTALL THE THERMOSTAT ONTO THE BACKPLATE
Follow the instruction guide to install the thermostat onto the backplate.
WINDOWS OS MAC OS
240299-00Pg 2 © 2020 Network Thermostat All Rights Reserved
STEP 5: CONFIGURE THERMOSTAT CREDENTIALS
Browse to 169.254.1.1 (Thermostat default when not
on a network)
Create and add your username and password for the
thermostat. Click on the “Save Credentials” button
to save your information. You will be taken to the
login page for the thermostat.
Log in to the thermostat and proceed to Step 6.
STEP 6: UPDATE NETWORK SETTINGS ON
THERMOSTAT
1. Click on the “Conguration” menu bar link on
the upper right
2. Click the “Network Settings” Button on the right
side of the page
3. Un-click the “Enable DHCP to set your static IP information
4. Add the static IP address of the thermostat here
5. Add the Gateway address
6. Add the Subnet Mask
7. Add the Primary DNS
8. Add the Secondary DNS
9. Click the “Save and Reboot” button
STEP 7: CONNECT THERMOSTAT TO LOCAL NETWORK
While the thermostat is rebooting, disconnect your computer from the
thermostat. Recongure your computer to join its regular network. You can
now connect your thermostat to its new network when it is operational.
STEP 8: VALIDATE IP ADDRESS
When your new network is available, use your browser and connect to the IP
address you set Step 6. If you see the login page, you are all set. If not, refer
to the Troubleshooting Guide on the next page.
< –– Troubleshooting on next page –– >
240299-00Pg 3 © 2020 Network Thermostat All Rights Reserved
TROUBLESHOOTING
Here is a chart showing the Green and Red LED status.
RECOVERY MODES
There are two options for recovery mode: Soft Reset and Factory Reset. Soft
Reset only changes your network settings while all other settings are retained.
Factory reset, removes all your changes and returns your IP Backplate to it
original factory conguration. See below how to use each reset.
Soft Reset
Press and hold the SETUP button (yellow arrow) for 10 seconds. When both
the Green LAN LED (green arrow) and Red STAT LED (red arrow) ash
together, release the SETUP button and the IP Backplate will remove the
network settings and reboot. Follow the instructions in STEP 6 above to
congure your IP Backplate.
ANOTE: This reset maintains your current username and password.
Factory Reset
Press and hold the SETUP button (yellow arrow) until both the Green LAN
LED (green arrow) and Red STAT LED (red arrow) ash together, release the
SETUP button. While the LEDs are ashing simultaneously, press the SETUP
button with three short presses and the IP Backplate will remove ALL
programming and reboot. Follow the instructions in STEP 2 through STEP 6
above to congure your IP Backplate.
Green LED
(Network Connection Indicator)
Red LED
(Faceplate Connectivity Indicator)
ON: Backplate is connected to your router
Backplate is not communicating
with the Faceplate (the Faceplate
is not on the Backplate) since last
backplate reset.
BLINKING: Indicates backplate is still at the ad hoc IP
address of 169.254.1.1. Backplate is not
getting a DHCP address your router.
Faceplate is removed and has
communicated with the backplate
since the last backplate reset.
OFF:
No network connection from a 'reboot',
the Green LED will remain off until the
Backplate makes a connection to the
router with valid security credentials.
There is no power connected to
the backplate.

Other Network Thermostat Thermostat manuals
Network Thermostat GE22-NX User manual

Network Thermostat

Network Thermostat GE22-NX User manual

Network Thermostat NetX X7C-WIFI Assembly instructions

Network Thermostat

Network Thermostat NetX X7C-WIFI Assembly instructions

Network Thermostat RP32-NX Technical specifications

Network Thermostat

Network Thermostat RP32-NX Technical specifications

Network Thermostat NetX X Series Assembly instructions
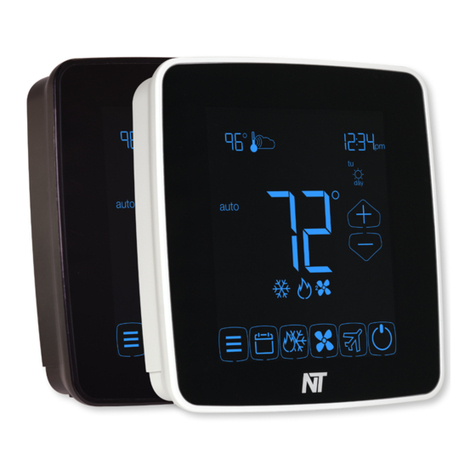
Network Thermostat

Network Thermostat NetX X Series Assembly instructions

Network Thermostat NetX User manual

Network Thermostat

Network Thermostat NetX User manual
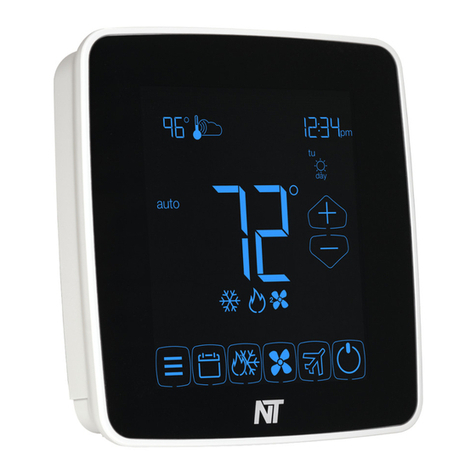
Network Thermostat NetX X7 Series Installation and operating instructions

Network Thermostat

Network Thermostat NetX X7 Series Installation and operating instructions

Network Thermostat NetX X5-CFA Manual

Network Thermostat

Network Thermostat NetX X5-CFA Manual

Network Thermostat TEC-N2 Series User manual
Network Thermostat

Network Thermostat TEC-N2 Series User manual

Popular Thermostat manuals by other brands

Mercury PR0091 installation guide

Mercury

Mercury PR0091 installation guide

Honeywell WIFI 9000 COLOR TOUCHSCREEN user manual

Honeywell

Honeywell WIFI 9000 COLOR TOUCHSCREEN user manual

Honeywell RTH8500D - 7-Day Touchscreen Universal Programmable... owner's guide

Honeywell

Honeywell RTH8500D - 7-Day Touchscreen Universal Programmable... owner's guide

Belimo EXT-HA-8023M Series user manual

Belimo

Belimo EXT-HA-8023M Series user manual

Siemens RDS120 manual

Siemens

Siemens RDS120 manual

Lux Products LUXPRO PSPHA732 Series Installation and operating instructions

Lux Products

Lux Products LUXPRO PSPHA732 Series Installation and operating instructions

OJ Electronics OCC4 user manual

OJ Electronics

OJ Electronics OCC4 user manual

Honeywell EasyStat T8400A1002 Gebruiksaanwijzing

Honeywell

Honeywell EasyStat T8400A1002 Gebruiksaanwijzing

Trane Nexia TCONT624AS42DA user guide

Trane

Trane Nexia TCONT624AS42DA user guide

oventrop 1152651 manual

oventrop

oventrop 1152651 manual

Step warmfloor EPI-LX-TC Installation & operation manual

Step warmfloor

Step warmfloor EPI-LX-TC Installation & operation manual

Trane ProSpace THT03191 installation instructions

Trane

Trane ProSpace THT03191 installation instructions

Web Comfort WEB-T32P Specifications

Web Comfort

Web Comfort WEB-T32P Specifications

Siemens Acvatix RTN81 Mounting instructions

Siemens

Siemens Acvatix RTN81 Mounting instructions

White Rodgers 1F90W-51 Installation and operating instructions

White Rodgers

White Rodgers 1F90W-51 Installation and operating instructions

POLYPOOL EASY TOUCH PP1467 User instructions

POLYPOOL

POLYPOOL EASY TOUCH PP1467 User instructions

Honeywell TH3110D1008 - Digital Thermostat, 1h user manual

Honeywell

Honeywell TH3110D1008 - Digital Thermostat, 1h user manual

I WARM MCS 300 user manual

I WARM

I WARM MCS 300 user manual

manuals.online logo
manuals.online logoBrands
  • About & Mission
  • Contact us
  • Privacy Policy
  • Terms and Conditions

Copyright 2025 Manuals.Online. All Rights Reserved.