Neugent LP-04120 User manual

DVR Server Installation Manual

2
Before Use
This manual explains how to install the DVR to the user’s PC system.
In order to obtain the full use of this equipment’s functions, this manual should
be read carefully from start to end and the installation should be carried out in
the right order.
This manual may not be copied without permission.
The manufacturer is not responsible for any damage caused by use of
unauthorized parts or use of the equipment without following the user’s
manual.
This equipment complies with the specifications of CE (Europe) and
FCC (USA).
Precautions for Safety
Do not install the equipment in a place with a great deal of moisture, dust
or soot.
Do not install the equipment in a location subject to direct sunlight, or a
location near heat sources.
Keep the equipment away from vibration or material with strong magnetic
forces.
Normal range of working temperature is 5°C ~ 40°C.
Avoid a place of high temperature and humidity.
Operate in a place with steady foundation and good ventilation.
Avoid mechanical shock to the equipment.
Power must be switched off and unplugged before installation to prevent
electric shock or damage to the equipment.
Do not place any liquid such as water, coffee and drink on the equipment.
Maintain a suitable gap around the equipment for ventilation, which is
necessary for safe operation.

3
I.
I. I.
I. Summary of Product
What is a DVR?
DVR stands for digital video recorder. Digital video recorders run on
computers and are equipped with one or more video capture cards, that
record and compress video (and/or audio) to a hard-drive based storage
medium.
Reliability
Digital security solutions, like the DVR, offer reliability because these
solutions are based on computer hardware and software. Digital security
solutions require fewer pieces working together compared to old VCRs,
thus making it less prone to wear and tear. Video can be also stored
directly onto hard drives without much hassle.
Reduced Maintenance Costs
Digital security hardware is designed as a self-contained unit, eliminating
the need for quads, switchers, multiplexers, time-lapse VCRs, motion
detectors and remote monitoring devices. With fewer pieces needed to
work together, it enables such digital solutions to be supported and
maintained by less people. Digital solutions also allow most diagnostics,
updates and adjustments to be done remotely, thus reducing overall costs.
Constant Quality
Digital security solutions are very stable and reliable as a medium for
video storage. You wouldn't have to worry about video quality degradation.
More Efficient
With digital security solutions, you do not need to change and replace
tapes. You do not need to clean recording heads to ensure correct
recording. Digital security solutions saves you time and money, because
you can overcome serious problems associated with failing to carry out
some of the tasks you need to do for legacy systems. Moreover, while
quads and switchers make recording multiple cameras possible, cameras
are recorded one at a time in timed segments. With digital security
solutions, you can record all cameras simultaneously.
Flexible Network Monitoring
Network cameras offer remote monitoring from anywhere in the world.
Because you can monitor from anywhere, you need not hire a permanent
in-house staff to sit and watch at the installed base. You also eliminate
costly in-house cable runs. Digital security solutions also offer centralized
monitoring of all cameras.

4
II. Package Contents and CPU
Requirements to build DVR Systems
Card Model#: LP-16480, PCI Video Capture Card, 16 ports with audio
Quantity Package Contents
1 16 channel video capture
card – 16 cm x 12 cm
1 Audio cable connector
1 Set of 16 video input cable
1 Set of 16 audio input cable
1 Watchdog cable
1
CD Installer for DVR Server,
Remote Client and Backup
Viewer

5
Card Model#: LP-08240, PCI Video Capture Card, 8 ports with audio
Quantity Package Contents
1 8 channel video capture
card – 16 cm x 12 cm
1 Set of 8 video and audio
input cable
1 Watchdog cable
1
CD Installer for DVR Server,
Remote Client and Backup
Viewer

6
Card Model#: LP-04120, PCI Video Capture Card, 4 ports with audio
Quantity Package Contents
1 4 channel video capture
card – 16 x 12 cm
1 Set of 4 video and audio
input cable
1 CD Installer for DVR Server,
Remote Client and Backup
Viewer

7
Specifications and Minimum System
Requirements
LP-04120 LP-08240 LP-16480
4 video ports DVR card
with audio
8 video ports DVR card
with audio
16 video ports DVR card
with audio
Video Input
Accepts NTSC/PAL
video formats
4 channel video input
Accepts NTSC/PAL
video formats
8 channel video input
Accepts NTSC/PAL
video formats
16 channel video input
Video Output 1 channel output
Compression ISO/IEC 14496-2 MPEG4 SOP@LEVEL 1,2,3
Dual Speed Full Hardwired MPEG4 Core
Capture Speed
& Resolution
(NTSC) : 120 frames per
second @ 360x240; 120
frames per second @
720x480;
(PAL) : 100 frames per
second @ 360x288; 100
frames per second @
720x576
(NTSC) : 240 frames
per second @
360x240; 120 frames
per second @ 720x480;
(PAL) : 200 frames per
second @ 360x288; 100
frames per second @
720x576
(NTSC) : 480 frames
per second @
360x240; 120 frames
per second @ 720x480;
(PAL) : 400 frames per
second @ 360x288; 100
frames per second @
720x576
Display Speed 120 fps (NTSC) / 100 fps
(PAL)
240 fps (NTSC) / 200
fps (PAL)
480 fps (NTSC) / 400
fps (PAL)
Audio Input 4 channel G.723 Voice
CODEC
8 channel G.723 Voice
CODEC
16 channel G.723 Voice
CODEC
Audio Output None None None
CPU Intel Pentium 4 2.4GHz Intel Pentium 4 2.4GHz Intel Pentium D 2.6GHz
RAM 512MB or higher
VGA NVIDIA graphics card with at least 32MB
HDD 7200RPM or more
Power Supply At least 500w
*Subject to change without prior notice.

8
General Components for Video Capture Card
1 Video Out For connection to TV or CRT monitor
2
Audio Out
Mixed out. To listen to live or playback
audio, make sure you have speakers or
headphones attached to the PC soundcard
3 DB-25 Female For connection to video input cable
4 20-Pin Connector/s For connection to audio-video cable and
sensor & relay connections
*Picture taken is an LP-16480.

9
III. Hardware Installation
Installing Video Capture Card to PC
Step 1: Insert the video capture card into an empty PCI slot. (If you purchase
card with audio, please see Connecting Audio Connector.)
Step 2: Turn on your computer to start software installation.
Connecting Audio Connector (for non-built-in or separate audio connector)
Step1: Connect the video capture card and audio connector using the audio
cable connector. One end of the audio cable connector should be connected to
the first set of pins of the video capture card, as shown. One end should be
connected to the audio connector.
Step 2: Attach/Insert the video capture card to an empty PCI slot. You will also
need to attach the audio connector to your system. To do this, simply insert a
screw on the metal plate of the audio connector to the back panel of your system.
Step 3: Turn on your computer to start software installation.

10
Connecting Video Input and Audio Input Cables
Step 1: Connect the video input cable to the video capture card (DB-25 male to
DB-25 female). (The cameras will be connected to this video input cable.)
Step 2: Connect the audio input cable to the audio card (DB-25 male to DB-25
female).
Connecting the Watchdog Cable
Step 1: Connect the white connector of the watchdog cable to the video capture
card reset jumper.
Step 2: Connect the black connector of the watchdog cable to the reset jumper
of the motherboard.

11
IV. Software Installation
A. Linux Operating System Installation
Step 1. Insert the Fedora Core 9 installer in the PC CD-ROM/DVD-ROM. The
installer will execute automatically.
Step 2. Choose Install or upgrade an existing system to start the installation.
Step 3. You will be asked if you want to test the CD media. You can skip this part
if you are sure that the CD media is ok.
12
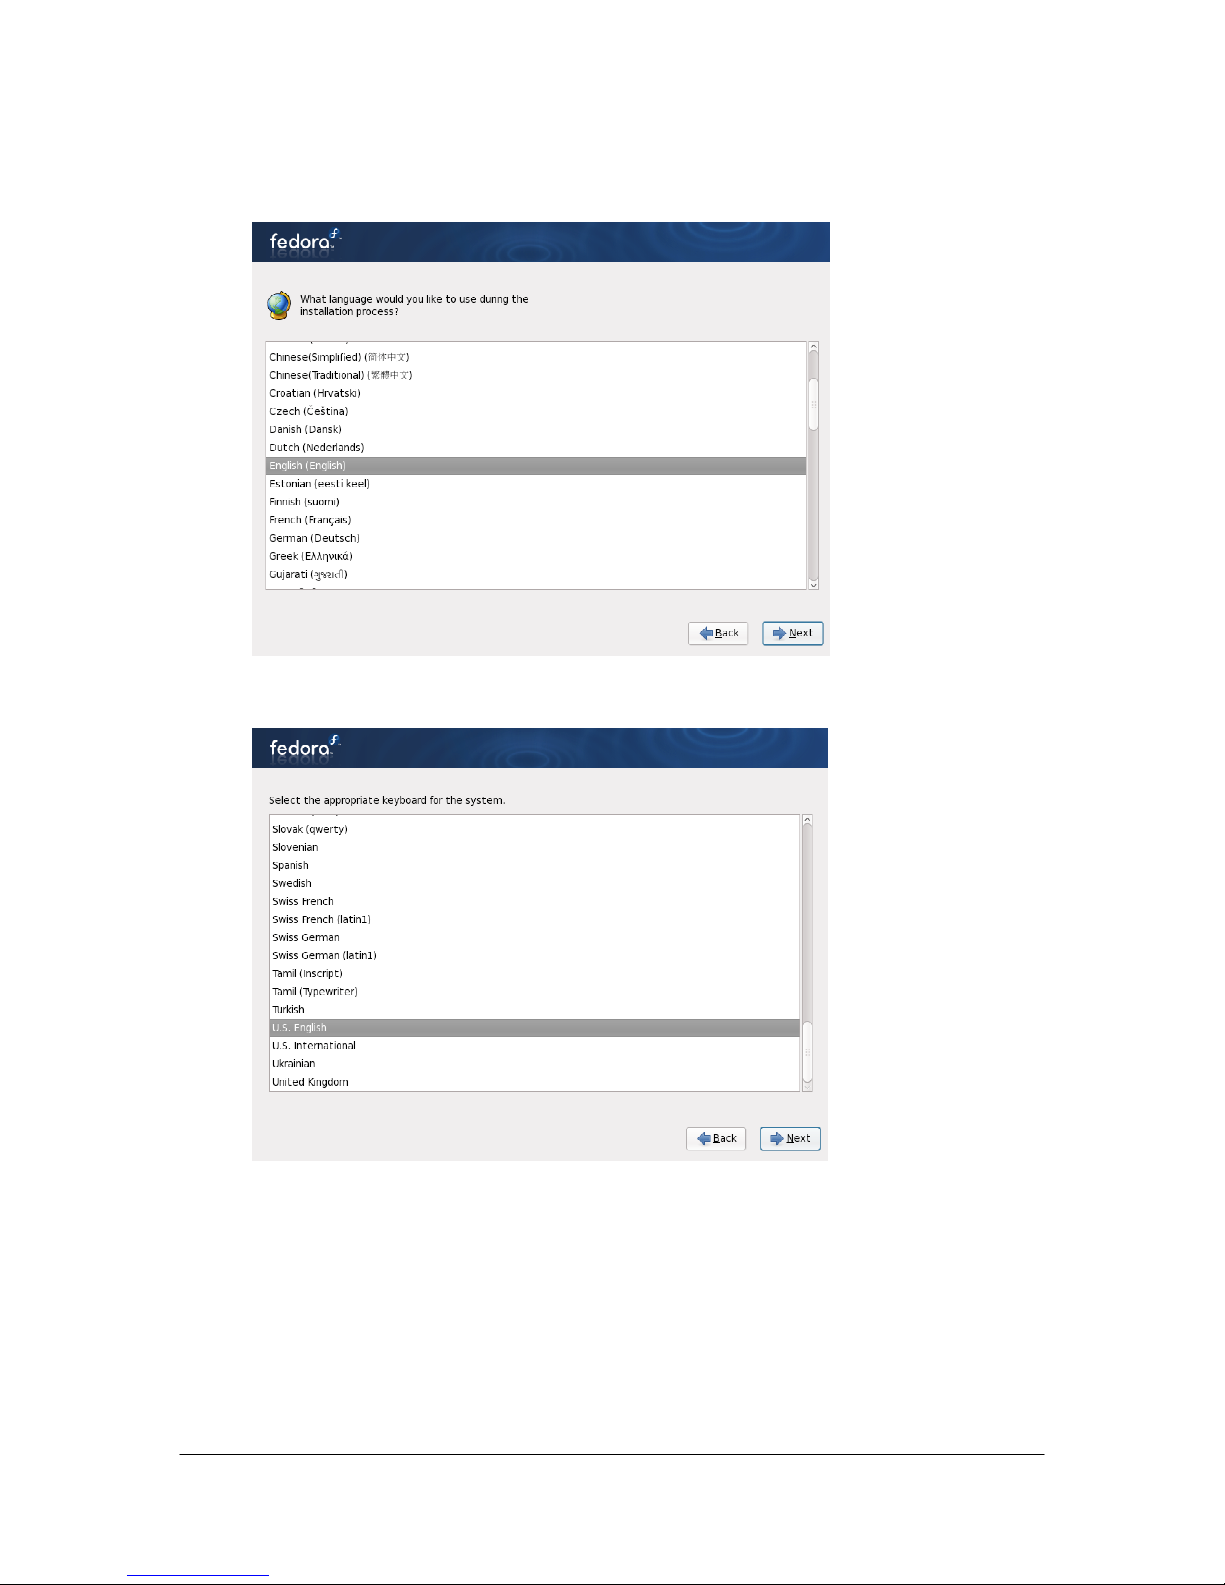
Step 4. Choose the language to be used for the installation. The default
language chosen will also be the default language of the OS installed.
Step 5. Choose appropriate keyboard for the system.

13
Step 6. Choose how the server will connect to the network.
Step 7. Select the nearest city in your time zone. You can click on the map
directly.
14
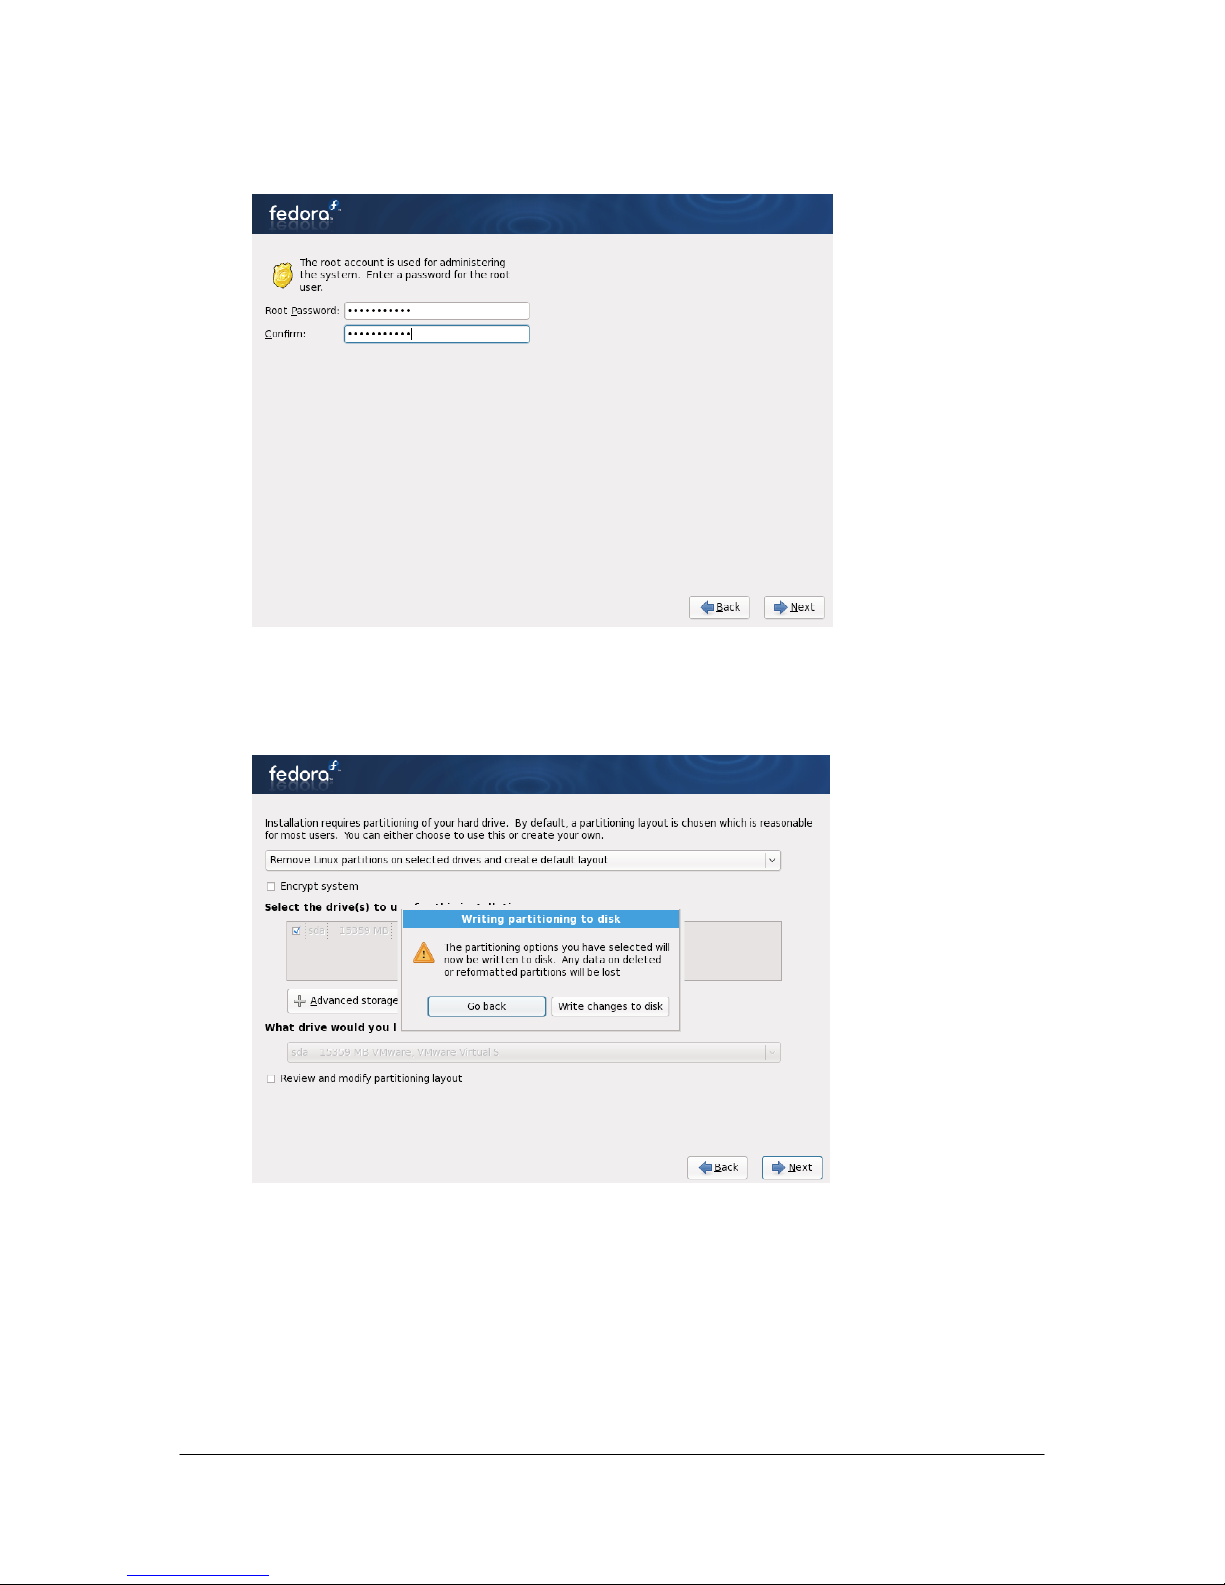
Step 8. Specify the password for the root account.
Step 9. Choose the default partition setting if you are new to Linux. You can
choose manual partition if you are an expert in Linux.
The next few screens will all be about partitioning the hard disk. If you chose the
default partition setting, all default settings are ok.
15
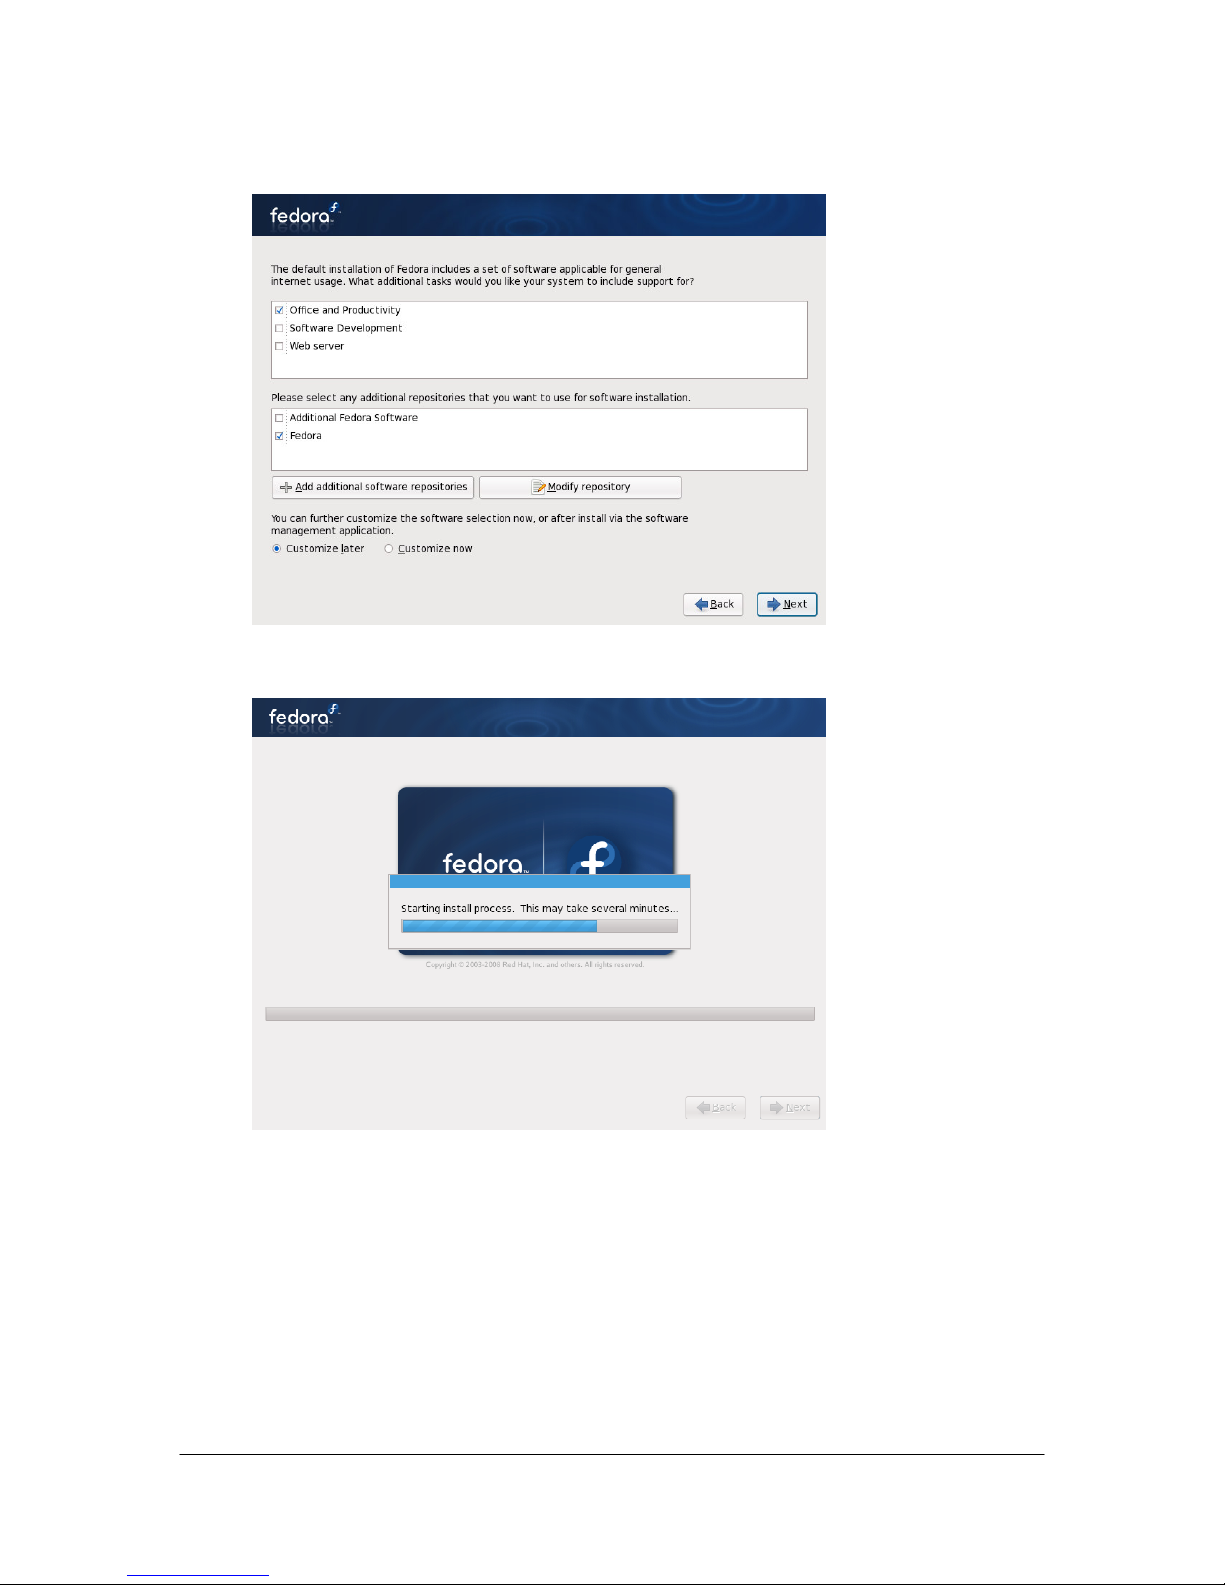
Step 10. Select the Office and Productivity option as well as the Fedora option.
Step 11. Installation will begin after the Next button is clicked.
16
B. Linux Operating System Configuration
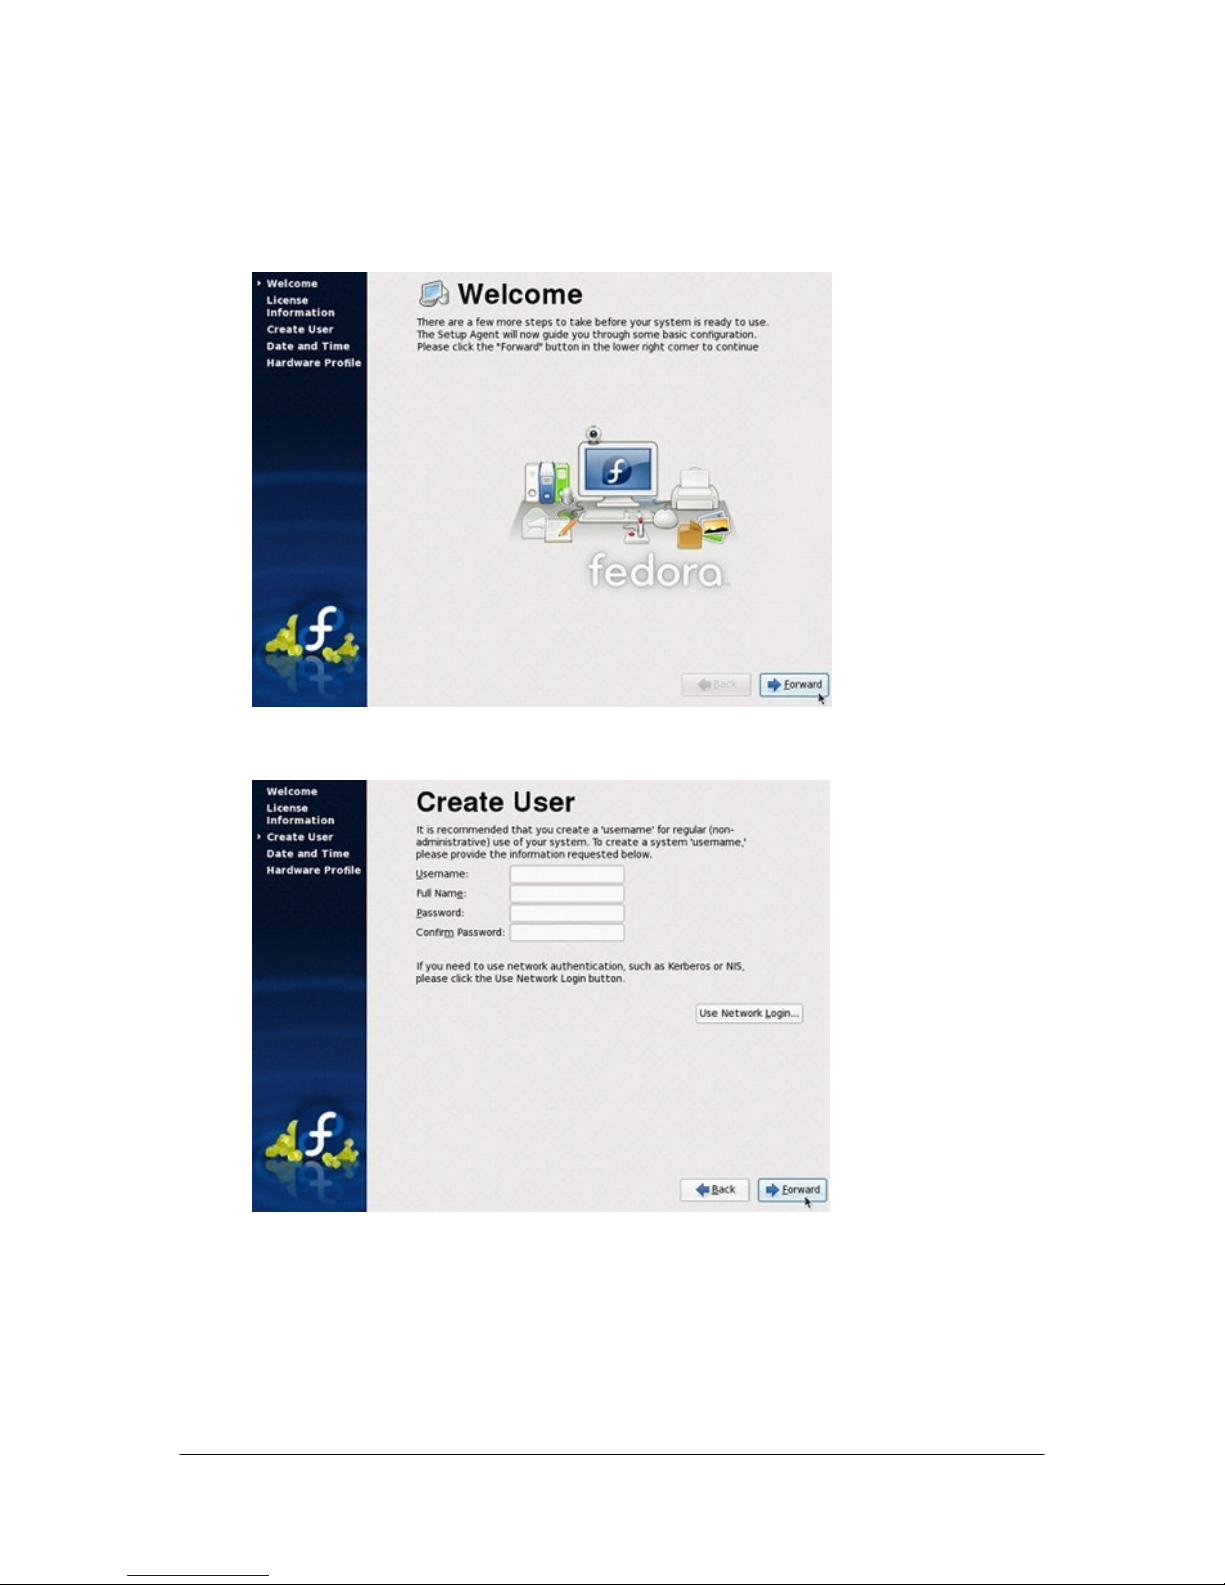
Step 12. After reboot, you will need to configure the system. Click Forward when
you see the following screen.
Step 13. Create a user if you wish then click on Forward.
17
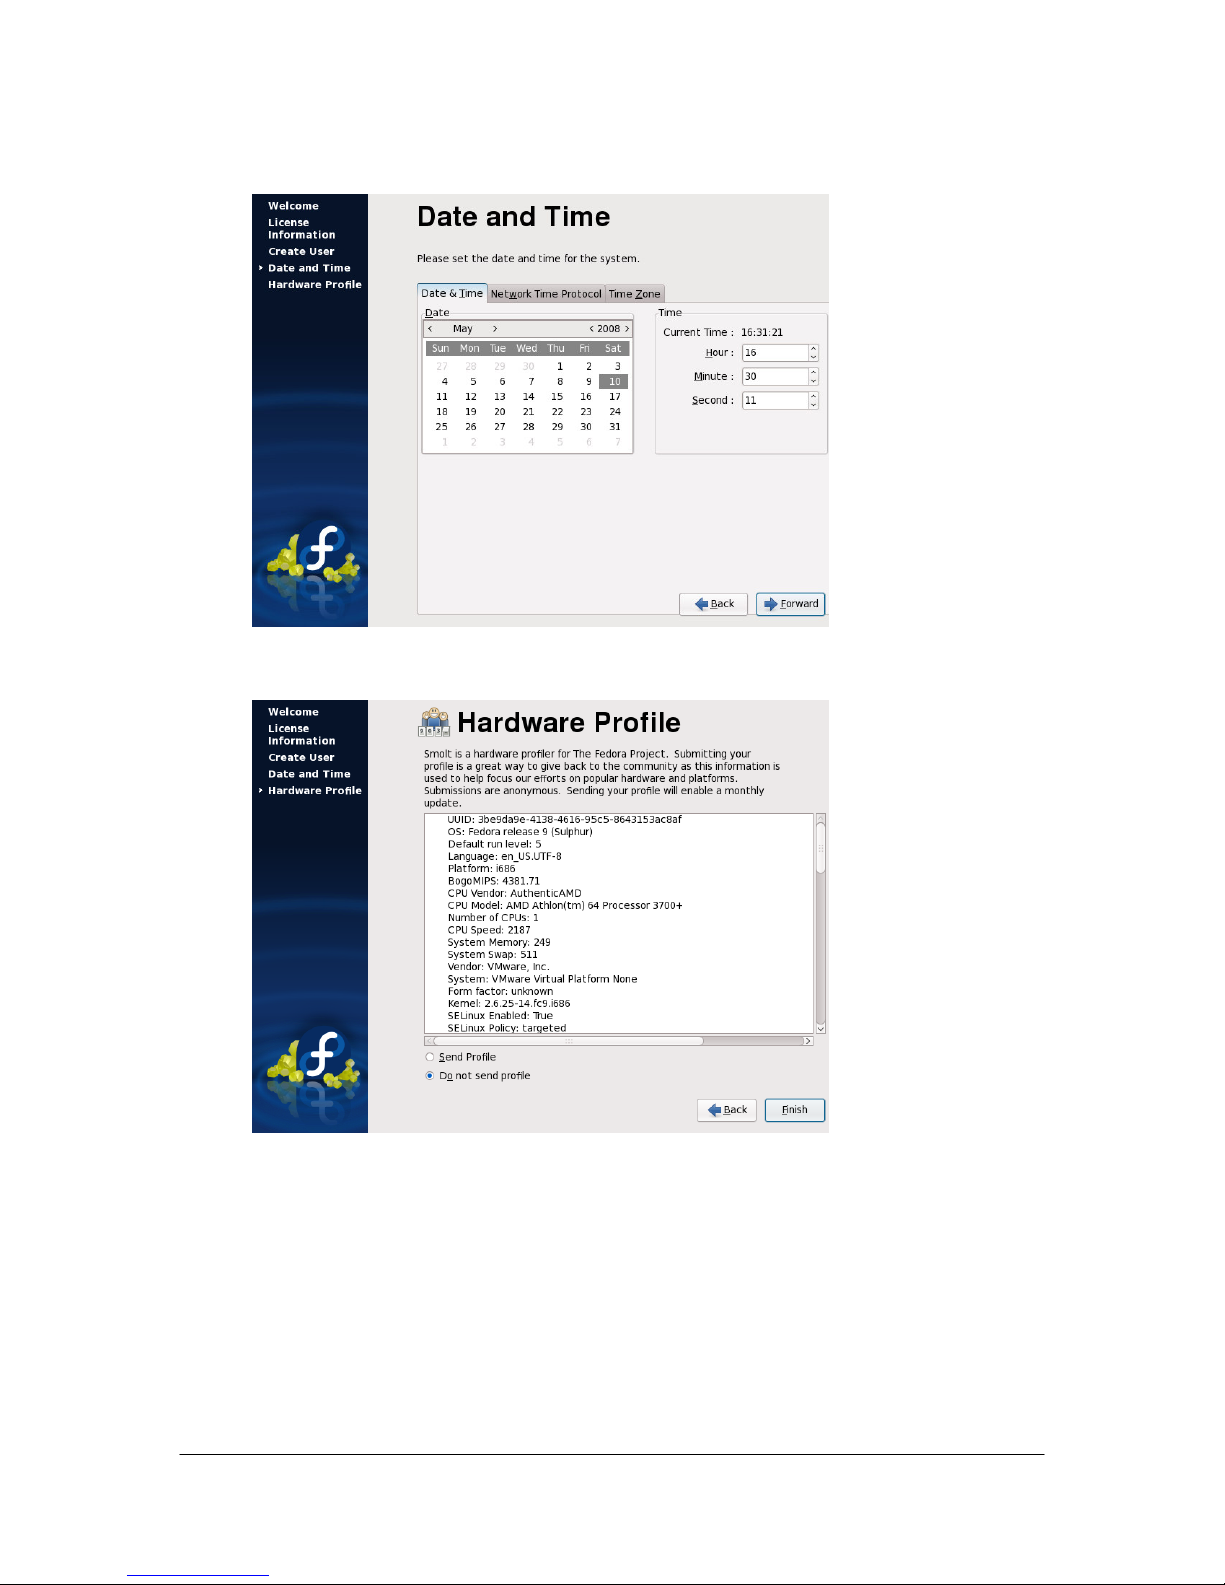
Step 14. Set the correct date and time.
Step 15. Choose if you want to send the profile or not then click on Forward.

18
DVR Software Installation
Step 16. Login to the server as root. A warning will appear about using the root
account. Ignore it and continue on.
Step 17. Insert the DVR installer CD in the PC CD-ROM. If the installer does not
run automatically, browse the CD and double-click on DVR Install. Once the
installation completes, the server will reboot. After reboot, the DVR will start
automatically.
This manual suits for next models
2
Table of contents
Popular Security System manuals by other brands

HIK VISION
HIK VISION DS-K1F600-D6E-F-S user manual

GSM Activate
GSM Activate 2G RF PIR manual

GSM Activate
GSM Activate e-CO Series quick start guide

Fire-Lite
Fire-Lite FIRE-LITE 411UDAC Installation, programming, troubleshooting and operating instruction manual

DualLite
DualLite LZ Series installation instructions

Verkada
Verkada BP41 install guide


