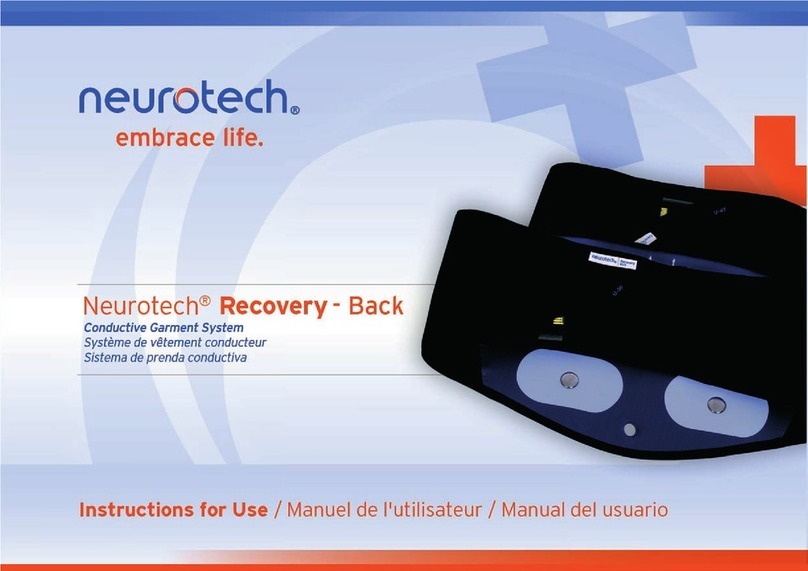
Neurotech Kneehab XP User manual

Kneehab+ Garment IM Rev 2_Layout 1 01/03/2012 12:41 Page 3

2
INTRODUCTION & CONTACT DETAILS
Introduction
Dear Customer
Thank you for choosing the Kneehab®XP Conductive Garment from neurotech®. Kneehab XP was developed to facilitate the
frequent and correct positioning and repositioning of large, multiple, and/or difficult to reach stimulation sites associated with
the
quadriceps area of the leg.
The pack contains your Kneehab XP conductive garment, a set of conductive gel pads and a user manual.
The conductive gel pads need to be replaced periodically and are readily available by contacting your local Neurotech supplier.
If you have further questions regarding Kneehab XP, please contact your prescribing physician, the Neurotech distributor that
provided you with Kneehab XP or contact your Neurotech team at the address/phone number below.
Yours sincerely,
The Neurotech Team.
If you have questions or require further information please contact:
neurotech®
A Division of Bio-Medical Research Ltd.
PO Box 5179
Hoboken, NJ 07030
Tel: 800-901-5667
Web: www.neurotech.us
Kneehab+ Garment IM Rev 2_Layout 1 01/03/2012 12:41 Page 4

3
TABLE OF CONTENTS
1.0 Safety Information __________________________________________________
2.0 Contraindications ____________________________________________________
2.1 Warnings ____________________________________________________________
2.2 Precautions __________________________________________________________
3.0 Frequently Asked Questions __________________________________________
4.0 Getting to Know Kneehab XP _________________________________________
4.1 Kneehab XP Pack Contents ____________________________________________
4.2 Description of Garment ________________________________________________
5.0 Setting-Up a Kneehab XP Treatment __________________________________
5.1 Step-By-Step Treatment Guide _________________________________________
6.0 System Maintenance _________________________________________________
7.0 Technical Specifications & Accessories ________________________________
8.0 Warranty ____________________________________________________________
4
4
5
5
6
7
7
7
8
10
11
12
13
Kneehab+ Garment IM Rev 2_Layout 1 01/03/2012 12:41 Page 5

4
SAFETY INFORMATION
1.0 Safety Information
Validity
The information and technical data contained in this document relates to the Kneehab XP conductive garment provided with this
User Manual. The information and technical data disclosed in this document are proprietary to Bio-Medical Research Ltd. (BMR
Ltd.) and may only be used and disseminated for the purposes and to the extent specifically authorized in writing by
the company.
Disclaimers
All items of equipment manufactured and sold by Neurotech, and are rigorously checked and tested prior to shipment. However,
the use of this equipment is outside of the control of the company. Neurotech only accepts responsibility for the safety, reliability
and performance of the equipment when it is operated in accordance with the instructions herein and within the given
specifications. Therefore, the user must bear full responsibility for any actions arising out of the use or misuse of this equipment.
Any modifications, repairs or servicing must be undertaken by authorized Neurotech personnel.
Kneehab XP is designed by and manufactured for Neurotech. Copyright © 2012 by Neurotech, all rights reserved. Neurotech is a
registered trademark of BMR Ltd.
The sale and/or operation of this equipment is subject to legislation in a number of localities. Compliance with this legislation
rests with the importer, dealer, or user of the equipment as appropriate.
Prescription Required:
Caution: In the United States of America federal law restricts the device to sale or use by, or on the order of, a physician or other
practitioner licensed by the laws of the state in which he/she practices.
Intended Use: Kneehab XP Conductive Garment
The Kneehab XP Conductive Garment and associated accessories are indicated for use with Neurotech stimulators to facilitate
the frequent and correct positioning and repositioning of large, multiple, and/or difficult to reach stimulation sites associated
with the quadriceps area of the leg.
2.0 Contraindications Warnings & Precautions
Contraindications
• This device must not be used on persons with cardiac pacemakers, defibrillators, or other implanted metallic or
electronic devices.
Kneehab+ Garment IM Rev 2_Layout 1 01/03/2012 12:41 Page 6

5
Warnings
• The long term effects of prolonged use of electrical stimulation are unknown;
• This garment should not be applied to any part of the body except for the quadriceps (thigh) as instructed. Stimulation applied
over the neck, across the chest or head may cause an adverse reaction;
• Conductive gel pads should be applied only to normal, intact, clean skin. Conductive gel pads should not be applied over open
wounds or over swollen, infected, or inflamed areas or skin eruptions, e.g., phlebitis, thrombophlebitis, varicose veins, etc;
• Conductive gel pads should not be shared with other persons. Each person should have their own set of conductive gel pads;
otherwise, undesirable skin reactions may occur;
• Self-adhesive conductive gel pads should be replaced if they no longer stick firmly to the skin; and
• Stimulation should not be applied when in the bath or shower.
Precautions
• Some persons may experience skin irritation or hypersensitivity due to the electrical stimulation or electrical conductive medium (gel).
• This device should be kept out of the reach of children; and
• The device should be used only with the conductive gel pads, and accessories recommended for use by the manufacturer.
Adverse Reactions
• Skin irritation and burns beneath the conductive gel pads have been reported with the use of stimulation conductive gel pads
applied to the skin.
Do not use Kneehab XP if:
• Positioning the conductive gel pads necessitates placement over areas at which drugs/ medicines are administered by injection
(short term or long term) e.g. Hormone treatment.
Note:
• For hygiene reasons, the Conductive Garment and conductive gel pads are for single-person use only.
Important
• There is a separate Kneehab XP garment for use with the right or left leg. Under no circumstances should the left garment be
used on the right leg or vice versa. A letter printed on every garment (L or R) indicates which leg that garment is designed for
i.e. L: left, R: right;
• Position your Kneehab XP only as outlined in this User Manual. Ensure the light-blue binding at the narrow end of the garment
is placed just above the kneecap;
• Do not adjust the Kneehab XP garment when it is connected to an electrical stimulation device, which has been switched on;
pause the device, make the adjustment then recommence treatment;
• The safety information provided in this User Manual must be followed.
SAFETY INFORMATION
Kneehab+ Garment IM Rev 2_Layout 1 01/03/2012 12:42 Page 7

6
FREQUENTLY ASKED QUESTIONS
3.0 Frequently Asked Questions
Q: What is Kneehab XP?
A: The Kneehab XP Conductive Garment is an innovative, garment-based solution specifically designed to facilitate the
frequent and correct positioning and repositioning of multiple conductive gel pads for the treatment of the quadriceps area
of the leg.
Q: How often should I use Kneehab XP?
A: Your prescribing physician will advise you on the duration of your treatment program.
Q: Can Kneehab XP be used in conjunction with other forms of therapy?
A: Kneehab XP can be used as an adjunct to most forms of therapy for knee injuries. See page 2 of this manual for Contraindications
(situations when Kneehab XP should not be used).
Q: How often should I replace the conductive gel pads?
A: This depends on a number of factors including skin type, storage conditions and regularity of use. With proper care, as per this
manual and typical use, the gel pads have an estimated usage of approximately one month. Please store the conductive gel pads
in accordance with the instructions on page 11 of the User Manual.
Q: How do I position Kneehab XP on the leg?
A: See pages 8-10 of this User Manual for full instructions on positioning Kneehab XP on the leg.
Q: Can Kneehab XP be used on other body parts?
A: No. Kneehab XP should only be used as directed in this User Manual and not applied to any other body parts.
Q: How should I care for my Kneehab XP?
A: See page 11 of the User Manual for full instructions on caring for your Kneehab XP unit.
Q: Who should I contact if I have additional queries?
A: Contact your prescribing clinician or your Neurotech team if you have any questions regarding usage of Kneehab XP
Conductive Garment.
Q: What should I do if I experience an adverse reaction?
A: If any irritation, skin reaction, hypersensitivity or other adverse reaction is experienced, discontinue use and contact your
prescribing clinician. A slight reddening of the skin is normal under the conductive gel pads during and for a short time after
treatment. This should disappear within approximately 30 minutes.
Kneehab+ Garment IM Rev 2_Layout 1 01/03/2012 12:42 Page 8

7
PACK CONTENTS & GARMENT INFORMATION
4.0 Getting to Know Kneehab XP Conductive Garment System
Kneehab XP is an easy to use, conductive garment-based solution, specifically designed
for home use.
4.1 Kneehab XP Pack Contents
1. Kneehab XP Conductive Garment:
Universally sized garment, which fastens around your thigh, above the kneecap, for
quick and easy use. It contains a connector socket, into which the Controller is plugged.
Please ensure you have the correct garment (Left/ Right leg) before using
the Kneehab XP Conductive Garment.
2. Kneehab XP Conductive Gel Pads:
The conductive gel pads are placed on the garment to conduct signals from the
Controller to the quadriceps muscles.
3. Kneehab XP User Manual:
The Kneehab XP User Manual provides a guide to product use and safety information.
4.2 Description of the Kneehab XP Garment
The inside of the garment has been printed with conductive gel
pads placement guides, showing you exactly where to place the 4
conductive gel pads. Two of the locations will vary depending on your
size (A/aand B/b).
For example, the correct position for the large conductive gel pads if
you are tall is marked ‘A’, whereas a smaller person would place the
same conductive gel pad within the area marked ‘a’.
See pages 9-10 for full details on how to determine your correct
conductive gel pads placement.
1
2
3
A/a
B/b
Kneehab+ Garment IM Rev 2_Layout 1 01/03/2012 12:42 Page 9

SETTING-UP A TREATMENT
8
5.0 Setting-Up A Kneehab XP Treatment
Step 1 – Correct Conductive Garment confirmation
Important:
The correct garment MUST be used for the leg being treated. L is printed on the garment designed
specifically for the left leg. The printed figure of a human also shows the garment positioned on the
left leg (Fig. a). R is printed on the garment designed specifically for the right leg. The printed figure of
a human also shows the garment positioned on the right leg (Fig. b).
Please check now to ensure you have the correct garment for the leg to be treated. If the garment you
have is not for the correct leg, please contact your prescribing physician or the Neurotech
distributor that provided you with Kneehab XP.
Step 2 – Initial garment fitting
•Sit down with your leg as straight as possible. For the best fit and most effective treatment it is
important to have your leg as straight as possible during garment fitting.
•Place the garment on your leg so that the light blue binding lies just above the kneecap (approx.
0.5cm/ 0.25”) and the printed median line lies along the center of your thigh (Fig. c).
•Fasten both pairs of straps (Fig. d). For the best fit, fasten the pair of straps closest to the kneecap
first. When the straps are fastened the garment should have a comfortable yet firm fit.
Step 3 – Sizing determination
With the garment still fastened to your leg, sit upright with your knee bent at 90° (Fig.e).
To d e te r m ine length sizes:
•If the whole garment lies flat along the length of your thigh (Fig. e), you are a tall fit and must
place the large rectangular conductive gel pad within the area marked ‘A’.
•If you have to fold down the top of the garment at the groin (Fig. f), you are a small fit and must
place the large rectangular conductive gel pad within the area marked ‘a’.
Fig. a Fig. b
Fig. c
Median
Line
Light
Blue
Binding
Fig. d
Kneehab+ Garment IM Rev 2_Layout 1 01/03/2012 12:42 Page 10

9
SETTING-UP A TREATMENT
To determine width sizes:
There is a line printed on the garment near one end of the straps to help you determine whether you
are a wide or a narrow fit. If you have difficulty seeing this line, there is also a gap in the fastening
material to help you (Fig. g).
While the garment still fastened to your leg, sit upright with your knee bent at 90° (Fig.e).
•If the strap does not overlap the printed line, or if you can still feel the gap, you are a wide fit and
must place the L-shaped conductive gel pad within the area marked ‘B’.
•If the strap does overlap the printed line, or if you cannot feel the gap, you are a narrow fit and
must place the L-shaped conductive gel pad within the area marked ‘b’.
Step 4 – Adhesive Conductive Gel Pad Placement
•Remove the garment from your thigh and place it on a flat surface with the white conductive gel pad
placement guides facing you.
•Kneehab XP is supplied with a pack of four conductive gel pads. Remove these from their plastic bag.
•Remove the liners from the
patterned
side of the conductive gel pads (Fig. h). Keep these liners for later.
•Stick the conductive gel pads onto the garment within their respective printed outlines.
•Do not remove the liners from the
black
sides of the conductive gel pads yet.
Important:
•Place the largest conductive gel pad within outline “A” or “a” depending on your sizing,
determined in Step 4.
•Place the L-shaped conductive gel pad within outline “B” or “b” depending on your sizing,
determined in Step 4.
•The remaining two conductive gel pads should be placed within their respective matching outlines (Fig. i).
•Ensure that all conductive gel pads lie perfectly within the conductive gel pad placement guides
on the garment.
•Ensure the metal studs are completely covered by all of the conductive gel pads.
•Press the edges of each conductive gel pad firmly onto the garment to ensure good adhesion.
•Replacement conductive gel pads are available from the distributor that provided you with this
product or Neurotech.
Your K n eeh a b XP is n ow set up a n d ready fo r conn e cti o n to a s uitab l e stim u l at i o n device.
Fig. g - Line & Gap
Fig. f
Fig. e
Fig. h
Fig. i
Kneehab+ Garment IM Rev 2_Layout 1 01/03/2012 12:42 Page 11

STEP-BY-STEP TREATMENT GUIDE
10
5.1 Step-By-Step Treatment Guide
Step 1 - Garment Fitting
Using mild soap and water, cleanse the area where you will be placing the garment. The conductive
gel pads do not adhere well to dirt, oil, creams or other cosmetics on the skin. Ensure the skin is dry.
Remove the liners from the
black
side of each conductive gel pad (Fig. a). Do not dispose of these
liners, as they will need to be placed back onto the conductive gel pads between treatment sessions.
Sit down with your leg as straight as possible. For the best fit and most effective treatment it is
important to have your leg as straight as possible during garment fitting.
Place the garment on your leg so that the light blue binding lies just above the kneecap (approx.
0.5cm/ 0.25”) and the printed median line lies along the center of your thigh (Fig. b).
Fasten both pairs of straps. For the best fit, fasten the pair of straps closest to the kneecap first. When
the straps are fastened the garment should have a comfortable yet firm fit.
If you are a very narrow fit, the straps may overlap some of the conductive gel pads. However, for an
effective and safe treatment, it is important that the whole surface of all four conductive gel pads are
in contact with the skin. You can eliminate the overlapping problem by folding the straps inwards at
the printed line before fastening (Fig. c).
Important Note:
Caution is required when using Kneehab XP because the strong quadriceps contraction it elicits may
cause involuntary lower leg movement. If not otherwise directed by your prescribing physician we
recommend using Kneehab XP while sitting with your leg bent at an angle between 0-60 degrees (fig
d) and your foot secured firmly to prevent lower leg movement.
Fig. a
Fig. d
Fig. c
Fig. b
Median
Line
Light
Blue
Binding
60˚
Kneehab+ Garment IM Rev 2_Layout 1 01/03/2012 12:42 Page 12

11
PROGRAM INFORMATION & SYSTEM MAINTENANCE
6.0 System Maintenance & Storage
Caring for your Kneehab XP - Washing Instructions:
Kneehab XP is washable but you must first remove the Controller and conductive gel pads. Replace the liners on
the
patterned
side of each conductive gel pad until you are ready to use your Kneehab XP again. You must always follow the
instructions on the label when washing the garment.
Never machine wash your Kneehab XP garment. Hand wash in lukewarm water and NEVER wring to remove water.
This protects the internal composition of the garment from damage.
Do not use any bleach when washing your Kneehab XP garment.
Do not dry clean your Kneehab XP garment.
Do not tumble dry your Kneehab XP garment. The garment should be dried on a flat surface. Do not dry over anything
hot (e.g. a radiator or any other direct heat source). Ensure the garment is completely dry before use. The straps should
be fastened prior to washing.
The Kneehab XP garment should not be ironed.
Storage
Remove the garment by carefully peeling the conductive gel pads off your leg. Ensure that the conductive gel pads remain attached
to the garment. Place the garment on a flat surface with the conductive gel pads facing upward and replace the liners on the
black
side of each one. If the conductive gel pads have lifted from the garment, press the edges back into position. Close the
straps on the garment, ensuring that the conductive gel pads all remain flat. Store the garment, with the conductive gel pads
still attached, on a flat surface in a cool dry place.
Repair, Service & Modification
Access to the interior is not required for maintenance purposes.
If your Kneehab XP garment is damaged, you should not use it, but should return it to the distributor that provided you with this
product or Neurotech for repair or replacement. Repairs, service and modifications may not be carried out by anyone other
than qualified service personnel authorized by Neurotech. Neurotech will not accept any responsibility if these guidelines and
instructions are not followed.
Kneehab+ Garment IM Rev 2_Layout 1 01/03/2012 12:42 Page 13

TECHNICAL INFORMATION & ACCESSORIES
12
7.0 Technical Information & Accessories
Kneehab XP Adhesive Conductive Gel Pads: Type: 613/ 614/ 615/ 616
Kneehab XP uses conductive gel pads which have been specifically designed for this unit. Replacement conductive gel pads are
available. To order replacement conductive gel pads, please contact the Neurotech or the Neurotech distributor that provided
you with Kneehab XP. Only conductive gel pads specified by Bio-Medical Research Ltd. for use with Kneehab XP may be used.
All adhesive conductive gel pads are provided with their own instructions where necessary, including cleaning, storage and
care instructions. With proper care, as per this manual and typical use, the gel pads have an estimated usage of approximately
one month.
Disposal of Conductive Gel Pads
Used conductive gel pads must never be disposed of in a fire, but in accordance with your country’s national laws governing the
disposal of such items. Return all other contents to Bio-Medical Research Ltd or the Neurotech distributor who provided you
with Kneehab XP.
Product Type: Kneehab XP: Right Leg (1274-3311)
Kneehab XP: Left Leg (1274-3321)
Intended use: Conductive Garment
Garment Material:
Outer Fabric: 100% Nylon
Inner Fabric: 70% Polychloroprene, 30% Polyurethane
Binding: 82% Nylon, 18% Elastane
Fastenings: 100% Nylon
Environmental Specifications:
Operating Range: Temperature: 10 to 35°C / 55 to 95°F
Humidity: 20 to 65% RH
Storage Range: Temperature: 0 to 55°C / 32 to 131°F
Humidity: 10 to 90% RH
Kneehab+ Garment IM Rev 2_Layout 1 01/03/2012 12:42 Page 14

13
TECHNICAL INFORMATION
European Union only
This symbol on your Kneehab XP is to indicate
conformity to the requirements of the Medical
Device Directive (93 / 42 / EEC). 0366 is the
number of the notified body (VDE).
Disposal of device
At the end of the product lifecycle, do not throw out this
product with the normal household garbage, but bring it
to a collection point for the recycling of electronic
equipment.
Some product materials can be re-used if you bring them
to a recycling point. By re-using some parts or raw
materials from used products you can make an important
contribution to the protection of the environment.
Please contact your local authorities if you need more
information about collection points in your area.
Waste Electrical and Electronic Equipment can have
potentially harmful effects on the environment. Incorrect
disposal can cause harmful toxins to build up in the air,
water and soil and can be harmful to human health.
8.0 Warranty
neurotech® offers a warranty of 6 months for the Kneehab XP
Conductive Garment *. Should your Kneehab XP develop a fault
within the specified time, Neurotech will replace or repair your
Kneehab XP garment free of charge, provided that it:
•has been used for its intended purpose and in the manner
described in this instruction manual.
•has not been connected to an unsuitable power source.
•has not been subjected to misuse or neglect.
•has not been modified or repaired by anyone other than an
approved neurotech® distributor or agent.
This warranty complements existing national guarantee obligations
and does not affect your statutory rights as a consumer.
*excludes electrodes.
0366
Kneehab+ Garment IM Rev 2_Layout 1 01/03/2012 12:42 Page 15

14
Kneehab+ Garment IM Rev 2_Layout 1 01/03/2012 12:42 Page 16

15
Kneehab+ Garment IM Rev 2_Layout 1 01/03/2012 12:42 Page 17

Kneehab+ Garment IM Rev 2_Layout 1 01/03/2012 12:42 Page 2
Other manuals for Kneehab XP
2
This manual suits for next models
1
Table of contents
Other Neurotech Personal Care Product manuals
