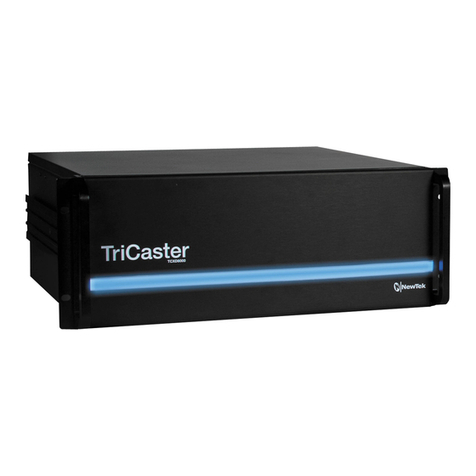
NewTek TriCaster 8000 CS User manual


Revised –June 4, 2013
Trademarks: NewTek, TriCaster, TriCaster XD, TCXD8000, TriCaster 8000, TriCaster TCXD8000, TCXD850, TCXD850
EXTREME, TriCaster TCXD850 EXTREME, TriCaster 850 EXTREME, TriCaster EXTREME, TriCaster 850, TCXD450, TCXD450
EXTREME, TriCaster TCXD450 EXTREME, TriCaster 450 EXTREME, TriCaster 450, TCXD455, TriCaster 455, TriCaster
TCXD455, TriCaster 855, TCXD855, TriCaster TCXD855, IsoCorder, TCXD300, TriCaster 300, TriCaster TCXD300, TCXD40,
TriCaster 40, TriCaster TCXD40, TriCaster PRO, TriCaster STUDIO, TriCaster BROADCAST, TriCaster DUO, ProTek, ProTek
Care, ProTek Elite, iVGA, SpeedEDIT, 3PLAY, 3Play, 3Play 4800, 3PXD4800,3Play 820, 3PXD820, 3Play 425, 3PXD425, 3Play
330, 3PXD330, LiveText, DataLink, LiveSet, TriCaster Virtual Set Editor, TriCaster VSE, LiveMatte, TimeWarp, VT, VT[3],
VT[4], V[T5], Video Toaster, Toaster, Inspire 3D, 3D Arsenal, Aura, LightWave, LightWave 3D and LightWave CORE are
trademarks, service marks, and registered trademarks of NewTek. All other brand names, product names, or trademarks
belong to their respective holders.

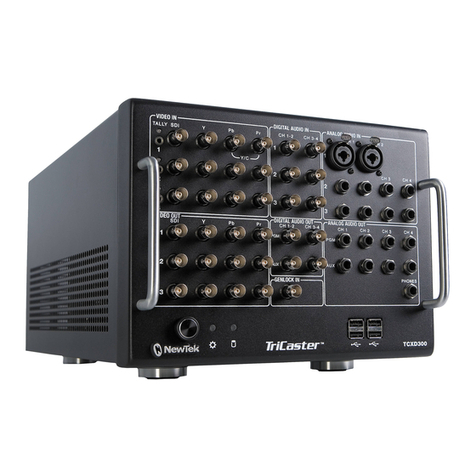
TriCaster 8000 CS
AVID®Artist Mix
TriCaster 450/850 CS
TimeWarp 850 TW
TriCaster 40 CS
TimeWarp TW-42
LiveControlLC-11

TABLE OF CONTENTS
1About This Manual.............................................................................................................. 1
1.1 Manual Organization ........................................................................................................ 1
A.1 A Control Surface for Every Need ...................................................................................... 2
2Welcome and Setup............................................................................................................3
2.1 Welcome ...........................................................................................................................3
2.2 Something for Everyone .................................................................................................... 3
2.2.1 Primary Control......................................................................................................... 3
2.2.2 Instant Replay ........................................................................................................... 4
2.3 Installation ........................................................................................................................ 4
2.3.1 Making the Connection............................................................................................. 4
3TriCaster™ 8000 CS.............................................................................................................. 7
3.1 Walkthrough .....................................................................................................................7
3.1.1 Switcher Rows........................................................................................................... 8
3.1.2 MAIN TRANSITION Controls......................................................................................9
3.1.3 MEDIA PLAYERS....................................................................................................... 13
3.1.4 POSITIONER............................................................................................................. 15
3.1.5 M/Es........................................................................................................................ 17
3.2 Features and Controls ..................................................................................................... 20
3.2.1 Connecting to TriCaster ..........................................................................................21
3.2.2 Delegates and Synchronization...............................................................................21
3.2.3 Switcher Controls.................................................................................................... 21
3.2.4 MAIN TRANSITION Group ....................................................................................... 23
3.2.5 M/E Controls ...........................................................................................................25
3.2.6 POSITIONER Group.................................................................................................. 29
3.2.7 MEDIA PLAYERS Group ........................................................................................... 32
3.2.8 Record Group .......................................................................................................... 34
3.3 Special Buttons................................................................................................................34
3.3.1 MACRO....................................................................................................................34

3.4 T-Bar Illumination ........................................................................................................... 35
3.4.1 M/E TRANSITION –Lighting .................................................................................... 35
3.4.2 MAIN TRANSITION ..................................................................................................36
4Avid® Artist Mix ................................................................................................................ 37
4.1 Installing AVID® Artist Mix Software............................................................................... 38
4.2 Connecting Artist Mix......................................................................................................38
4.3 Getting started................................................................................................................ 39
4.3.1 Panel Layout............................................................................................................ 40
4.3.2 NUDGE .................................................................................................................... 41
4.3.3 BANK ....................................................................................................................... 41
4.3.4 Level Control ........................................................................................................... 42
4.3.5 Knob Set Selectors ..................................................................................................42
4.3.6 Balance/Pan Control ...............................................................................................43
4.3.7 Mono/Talk...............................................................................................................43
4.3.8 Solo & Mute ............................................................................................................43
4.3.9 Follow...................................................................................................................... 44
4.4 Audio Groups................................................................................................................... 44
4.5 EQ Control ....................................................................................................................... 44
4.6 Compressor/Limiter......................................................................................................... 45
4.7 CHAN Mode..................................................................................................................... 46
4.8 FLIP Mode ....................................................................................................................... 47
4.9 INSERT (Mic)....................................................................................................................47
4.10 Locking Channels.............................................................................................................49
4.11 Audio Presets .................................................................................................................. 50
5TriCaster™ 450 CS & 850 CS............................................................................................... 51
5.1 Walkthrough ...................................................................................................................52
5.1.1 Switcher Rows......................................................................................................... 52
5.1.2 Transition ................................................................................................................ 53
5.1.3 Local Controls.......................................................................................................... 53

5.1.4 Media Players..........................................................................................................58
5.1.5 Positioner ................................................................................................................ 59
5.1.6 Virtual Inputs........................................................................................................... 61
5.2 Features and Controls ..................................................................................................... 64
5.2.1 Connecting to TriCaster ..........................................................................................65
5.2.2 Delegates and Synchronization...............................................................................65
5.2.3 Switcher Controls.................................................................................................... 66
5.2.4 Transition Group ..................................................................................................... 68
5.2.5 Virtual Input Group ................................................................................................. 71
5.2.6 Positioner Group ..................................................................................................... 74
5.2.7 Media Player Group ................................................................................................ 78
5.2.8 Record Group .......................................................................................................... 79
5.2.9 Qualifier Buttons..................................................................................................... 80
6TriCaster™ 40 CS ............................................................................................................... 81
6.1 Features and Controls ..................................................................................................... 81
6.1.1 Connecting to TriCaster ..........................................................................................82
6.1.2 Delegates and Synchronization...............................................................................82
6.1.3 Switcher Delegates ................................................................................................. 83
6.1.4 SHIFT & ALT............................................................................................................. 84
6.1.5 Transitions...............................................................................................................85
7Timewarp™ ....................................................................................................................... 89
7.1 Walkthrough ...................................................................................................................90
7.1.1 Setting Up ............................................................................................................... 90
7.1.2 Recording and Playing Replays ............................................................................... 91
7.2 Features and Controls ..................................................................................................... 91
7.2.1 Overview ................................................................................................................. 92
7.2.2 DDR Delegate ..........................................................................................................93
7.2.3 Edit group................................................................................................................ 94
7.2.4 Play Speed............................................................................................................... 94
7.2.5 Marking Group ........................................................................................................ 95
7.2.6 ALT and Qualifiers ...................................................................................................97
7.2.7 Record toggle .......................................................................................................... 98

7.2.8 DDR options ............................................................................................................ 99
7.2.9 Preset (DDR Playlist) ............................................................................................... 99
7.2.10 Transport (Clip controls) .........................................................................................99
7.2.11 Tips and Tricks.......................................................................................................100
8TriCaster™ LC-11 ............................................................................................................. 103
8.1 Overview ....................................................................................................................... 103
8.1.1 LC-11 Variants .......................................................................................................103
8.2 Switcher Section............................................................................................................105
8.2.1 Selecting Switcher Sources ................................................................................... 106
8.2.2 Auto and Take .......................................................................................................107
8.3 Transition Section..........................................................................................................108
8.3.1 Fade and FX...........................................................................................................108
8.3.2 SPEED and FX ........................................................................................................109
8.3.3 FTB and ALT........................................................................................................... 109
8.3.4 Fade All & Take All ................................................................................................ 110
8.4 Overlay Section –TriCaster SD ...................................................................................... 110
8.4.1 The Joysticks ......................................................................................................... 111
8.4.2 DDR1, DDR2 & TXT Knobs .....................................................................................111
8.4.3 EXT, DDR 1, DDR 2 and TXT Buttons .....................................................................111
8.4.4 Fade & Take (Overlay)...........................................................................................112
8.5 Overlay Section –TRICASTER™ 300, 450, 850, 455 AND 855........................................112
8.5.1 Joysticks ................................................................................................................ 112
8.5.2 DDR, Still and Titles Knobs ....................................................................................112
8.5.3 Mode Buttons .......................................................................................................113
8.5.4 Fade & Take (Overlay)...........................................................................................115
Credits .................................................................................................................................... 117


Page | 1
1ABOUT THIS MANUAL
Estimates are that between 60 and 97% of the human race hate
reading manuals. Most prefer to jump right in, maybe asking a
friend for occasional help … and who can blame them?
This manual attempts to tell you what you need to know in a
friendly, concise way, and also provides a comprehensive reference
section you can turn to when you need finer detail.
1.1 MANUAL ORGANIZATION
Even if you hate reading, please take a moment to peruse this section, which explains the
manual’s organization. You may find you can escape with a minimum of reading (or, if you are a
devout reader, you can be the hero others turn to for expert advice).
The manual is structured as follows:
Part I –Getting Started:Part 1 provides an introduction to TriCaster™ Control Surfaces – a
brisk jog through fundamentals including an overview of control surface categories and
models, and their installation.
Part II –The Control Surfaces
oTriCaster™ 8000 CS: A striking new control surface designed specifically to
provide primary control of the revolutionary TriCaster™ 8000 model live
production system.
oTriCaster™ 450 & 850 CS: This section will familiarize you with two very
similar control surfaces designed specifically to provide primary control of
TriCaster™ 455 and 855 model live production systems.

Page | 2
oTimeWarp
TriCaster™ 850 TW:Turn here for everything you need to know
about this powerful instant replay control surface designed exclusively
for TriCaster™.
TimeWarp™ TW-42: This section includes coverage of the original
NewTek TimeWarp™ instant replay controller.
oTriCaster™ LC-11:A discussion of the primary control surface designed for
use with the standard definition model TriCaster Studio™ and TriCaster
Broadcast™ live production systems.
Note: The original TriCaster™ RS-8 (or TriCaster™ VM) control surface is no
longer in production and is not covered.
A.1 A CONTROL SURFACE FOR EVERY NEED
This User Guide discusses multiple TriCaster™control surfaces, including TriCaster™ 8000 CS, 450
and 850 CS, TriCaster™ 850 TW, and several others.
Two of these (TriCaster™ 450 and 850 CS) are virtually identical as respects operations and
control layouts, and we will consider them together in Part II. Others sections cover various CS
models in turn. We’re very confident you’ll find one or more of these devices to be just excellent
for your live production needs.

Page | 3
2WELCOME AND SETUP
This chapter introduces the different control surfaces offered by
NewTek®, helping you to see how they complement your
TriCaster™ and bring added ability to your production setup.
The section also includes brief notes on connecting TriCaster™
control surfaces for use with your live production system.
2.1 WELCOME
NewTek TriCaster™systems provide unrivalled live production power. With a TriCaster™control
surface in front of you, all of that power is right at your fingertips. These sleek yet rugged control
surfaces deliver precise control over the video layers constituting your program. Quickly and
confidently perform your switching operations. Advanced TriCaster control surfaces manage
transitions on a per layer basis, govern the background composition, overlay and overlay
transitions, multi-layer virtual input configuration and zoom, control multiple Media Players,
record, stream and grab features, Auxiliary output, and even more.
2.2 SOMETHING FOR EVERYONE
TriCaster control surfaces can be grouped into two categories offering either primary switcher
control or instant replay functionality.
2.2.1 PRIMARY CONTROL
At the time of writing, three devices fall into this category, as follows:
TriCaster 8000 CS: A full-function control surface matched to the TriCaster 8000 live
production system.

Page | 4
TriCaster 850 CS: A full-function control surface designed to complement TriCaster 855,
along with TriCaster 850 and 850 EXTREME™.
TriCaster 450 CS: Similar to the above but, slightly more compact, being designed for use
with TriCaster 455, 450 and 450 EXTREME™ (which have less inputs).
TriCaster LC-11: This control surface was designed for use the standard definition
TriCaster Studio and TriCaster Broadcast models.
2.2.2 INSTANT REPLAY
NewTek provides potent instant replay solutions in the form of its dedicated 3Play™ systems, but
for less demanding installations many have found their TriCaster-based TimeWarp™ control
surfaces (which take advantage of TriCaster’s integrated recording and playback capabilities)
quite valuable.
TriCaster 850 TW: The perfect complement to either TriCaster 850 CS or TriCaster 450
CS, this instant replay controller is equally capable of performing as a solo act alongside
any high definition TriCaster live production system.
TriCaster™ TW-42: This is NewTek’s original TimeWarp™ device. While originally
supplied for use with the standard definition TriCaster lineup, it also provides
workmanlike instant replay functionality with high definition TriCaster models.
2.3 INSTALLATION
2.3.1 MAKING THE CONNECTION
Simply connect the TriCaster control surface unit to your NewTek TriCaster using the USB cable
supplied. There is no need to install drivers, or configure the software. Recognition of the
control surface is automatic.
POWER CONSIDERATIONS
The power requirements of TriCaster control surfaces vary, but generally speaking are not
inconsequential. TriCaster 8000CS alone utilizes a standard AC power connection, in addition to

Page | 5
its USB control connection. All other control surfaces are powered by their USB cable. In the
latter case, connecting the unit using a USB cable longer than the one originally supplied can
diminish available power to the point where problems could ensue, including connection
recognition failure or operational problems.
To avoid problems, we strongly recommend that the control surface be connected to a powered
USB hub using a short USB cable, in turn connecting the USB hub to a USB port on the TriCaster.
(See also Section 5.2.1.)
Important Note: So-called USB extenders are not recommended, having proven less reliable than
long USB cables (with powered hub, as discussed above). This is because each added connector in
the circuit introduces ‘reflections’ that can degrade the signal. In this configuration, the control
surface may seem reliable for some time, but then fail unexpectedly. (If this should happen,
disconnecting and reconnecting the control surface may temporarily restore functionality).


Page | 7
3TRICASTER™ 8000 CS
This spectacular and innovative control surface is the perfect
complement to your TriCaster 8000.
The discussion that follows provides a quick hands-on tour of its
major components and functions, followed by more detailed
information.
Figure 1
TriCaster 8000’s unparalleled integration of advanced live production technologies offers many
exciting new creative possibilities. Fittingly, an incredibly powerful and innovative control
surface is included with the system. TriCaster™ 8000 CS provides more than just control; it goes
well beyond the norm in providing useful feedback. You’ll quickly find yourself at home with its
features and functions.
3.1 WALKTHROUGH
We discussed connecting your control surface to TriCaster™ back in Section 2.3. (Please take
time to review this information if your installation requires use of a longer USB cable than the
one supplied with your control surface.)
Please open a TriCaster session, and let’s proceed to gain some hands-on experience.

Page | 8
3.1.1 SWITCHER ROWS
Figure 2
Let us focus our attention on the main Switcher rows first. You’ll notice that these correspond
exactly to their user interface representations on the Live Desktop, with both PGM (Program) and
PVW (Preview) rows. Just above there is a third row labeled DSK. We’ll make selections in all
three rows momentarily.
1. Press the control surface button for Camera 1 on the PGM row (if you don’t have live
sources connected at the moment, it will be fine to substitute a Media Player with a
suitable video clip cued up for this exercise).
2. Select Camera 2 (or a different Media Player) on the PVW row.
3. In the Live Desktop, add a title page to the GFX 1 (Graphics) Media Player –choose
something like a lower third (anything that does not completely obscure the screen will
do for now).
4. Add a similar title page to GFX 2.
5. Back on the control surface, press DSK 1 in the MAIN DSK DELEGATE control group.
6. Press the GFX 1 button in the DSK row. This assigns that Media Player module to the
DSK 1 channel.
7. Now press DSK 2 in the MAIN DSK DELEGATE control group.
8. Press the GFX 2 button on the DSK row to assign to DSK 2.

Page | 9
3.1.2 MAIN TRANSITION CONTROLS
Now we’re ready now to test the Main Transition controls, located to the right of the Switcher
rows and Main DSK Delegates. The Transition controls on TriCaster 8000 CS are slightly simplified
as compared to the same controls in the user interface.
Figure 3
Figure 4
Let’s begin our exploration of switching with the Downstream Key video channel controls.
Click the DSK 1 AUTO button, observing Program output as you do so. Not surprisingly (since the
GFX 1 player is assigned to DSK 1) the currently selected item in the GFX 1 playlist transitions in,
now to appear above the BKGD video layer.
Note that while the Live Desktop shows transition bins for the four DSK video layers, the control
surface does not. Even so, you can adjust individual DSK transition settings in various ways as
follows.

Page | 10
9. Click the BKGD delegate button in the MAIN TRANSITION> DELEGATE control group.
10. Twist the Select knob below (next to Fade) to cycle through the current entries in the
BKGD Transition Bin.
11. Click the DSK 1 button in the MAIN TRANSITION> DELEGATE control group.
12. Again, twist the Select knob, and choose a different transition for DSK 1 –choose one
that is in a different numeric place in the bin than the BKGD selection below.
13. Now press the BKGD and DSK 1 delegate buttons together, multi-selecting them.
14. Twist Select again, slowly, click by click –the selections advance together.
15. Rotate the nearby Rate knob (just above the main Auto button), and keep an eye on the
Transition Duration time displays in the Live Desktop. Observe that the transition
duration for both delegates changes as you do so.
16. Now push the Rate knob a few times (as though it was a button). As you do so, watch
the Transition speed of both selected delegates in the user interface. The settings will
cycle through the presets (in the Speed menu) each time you press Rate.
17. In the user interface, open the Duration menu for the BKGD layer so you can see the
state of the Reverse option for the transition.
18. Push the Select knob (as though it was a button). Doing so toggles the Reverse
transition mode for this transition; you’ll be able to see this in the menu you opened.
19. Open the Transition Speed menu for the BKGD layer on the Live Desktop.
20. Locate the SHIFT, CTRL and ALT buttons, to the left of the MAIN TRANSITION control
group. Press ALT and continue to hold it down, and the watch the menu as you push
Select several times in succession. You should see the Ping Pong switch for the current
BKGD transition toggle on or off each time you push Select.

Page | 11
Note: DSK Transitions always Ping Pong. Hence their duration menus have no Reverse or
Ping Pong switches.
21. If necessary, adjust the Live Desktop Workspace options to show the Preview monitor
(next to Program).
22. On the control surface, press the BKGD button in the MAINTRANSITION>DELEGATE
group, resulting in it alone being selected.
23. Press the main Auto button (below the Select knob on the control surface), or operate
the T-bar to perform a BKGD transition.
24. Earlier, we displayed DSK 1, using the dedicated DSK 1 Auto button. The BKGD transition
we just performed did not affect it, so it should still be displayed (if you removed it from
view while experimenting, please restore it before continuing).
25. Press the BKGD, DSK 1 and DSK 2 delegate buttons all together, multi-selecting them.
Take a look at the progress gauge beneath the Delegate button for DSK 1 in the user interface. It
currently indicates that DSK 1 is fully displayed. In contrast, the (empty) progress gauge beneath
DSK 2 tells us that video layer is hidden.
Figure 5
Now cast your eyes over the Preview and Program monitors (Figure 53), and consider how these
displays relate to your current Transition Delegate selections:
The Program monitor shows DSK 1 (which has GFX 1 assigned to it) over the current
BKGD layer.

Page | 12
The Preview monitor shows DSK 2 (which has GFX 2 assigned to it) over the current
Preview row selection.
The Look Ahead Preview monitor (or simply, Preview) is showing us the composition that will
result if we perform a Take or Auto operation right now.
26. Press the DSK 1 and DSK 2 buttons in MAIN TRANSITION>DELEGATE (so that BKGD is no
longer selected).
Note that, when you do this, the Preview monitor no longer shows the Switcher’s Preview row
selection. Why not?
Having de-selected the BKGD delegate, only the DSK 1 and DSK 2 buttons remain lit. Thus only
those two video layers will be affected by a (Main) Take or Auto. The end result of either of those
operations will be as follows:
DSK 1, currently seen on Program will be removed from view (but will re-appear on
Preview).
DSK 2 will be displayed on Program instead.
The BKGD layer will not change; that’s why the Preview correctly predicts no change to
that video layer, instead showing the same BKGD in both the Preview and Program
monitors.
The MAIN TRANSITION>DELEGATE feature provides flexible and convenient video layer
management, providing complete control over your ultimate Program output composition.
One more little detail to note, before we leave the Transition group –FTB, although located
below its MAIN TRANSITION > DELEGATE siblings on the control surface, is nevertheless a
delegate button, just like them.
This manual suits for next models
5
Table of contents
Other NewTek Recording Equipment manuals