Nexgrill 720 User manual

Questions,problems, missing parts? Beforereturningtoyourretailer,call ourcustomerservice
department atCanada:800-648-5864,U.S.: 800-913-8999,8a.m.-5p.m.,PST,Monday-Friday.
OUTDOOR GASGRILL
Thisinstructionsmanual containsimportantinformationnecessaryfortheproper
assemblyandsafeuse oftheappliance.
Readandfollow all warningsandinstructionsbeforeassemblingandusingthe
appliance.
Keepthismanual forfuturereference.
SERIAL#____________________MFG.DATE_____________ PURCHASEDATE:____________
MODEL #720/730-0830 Pages 2-42
19000402A1
GRIL GASEXTÉRIEUR
MODÈLE720/730-0830 Pages43-84
PDF 件使用 "pdfFactory Pro" 试用版本创建 www.fineprint.cn

Desquestions,desproblèmes,despiècesmanquantes? Avant deretournerl’articleau
détaillant,communiquezavecleservice àlaclientèle auCanada:800-648-5864,U.S.: 800-913-8999,
entre8het18hHNP, dulundi auvendrediet entre8het12 h,lesamedi. Assurez-vousd’avoirvotre
numérodesérieenmain.Ce numérosesitue àl’intérieurde laporteavant devotrebarbecue.
2
TableofContents
LightingInstruction..... ...... ...... ...
Careand Maintenance... ...... ...... ..
TroubleShooting . ...... ...... ...... ..
OrderingParts... ....... ..... ....... ..
GrillHints.. ....... ..... ....... ..... .
GrillCookingChart. ..... ....... ...... .
GrillRecipe Suggestion .... ...... .....
LimitedWarranty...... ...... ...... ...
Natural GasConversion…………………
25-26
27
28-29
30
30
30-31
32-33
34
35-42
SafetyInstruction... ....... ..... ......
PackageContentsList. ..... ....... ....
HardwareContents. ... ..... ....... ....
Exploded View..... ....... ..... .......
PartList. ...... ...... ...... ...... ...
AssemblyInstruction... ....... ..... ...
GasHook –Up.... ....... ..... .......
InstallerFinalCheck List. ....... ..... ...
LeakTesting..... ....... ..... ...... .
OperatingInstruction ..... ..... ....... ..
GrillLightingInstruction .... ...... ......
3-6
7-8
9
10
11-12
13-20
21
22
22-23
24
24-25
Cemanueld’instructionscontientd’importantesinformationsessentielles àun
assemblageappropriéetsécuritairedel’appareil.
Lireetrespectertousles avertissementsettoutesles instructionsavant
l’assemblageetl’utilisationdel’appareil.
Conservercemanuel àtitrederéférenceultérieure.
PDF 件使用 "pdfFactory Pro" 试用版本创建 www.fineprint.cn

3
1. Neveroperatethisappliance unattended.
2. Neveroperatethisappliance within10 ft (3m)ofanystructure, combustible
material orothergascylinder.
3. Neveroperatethisappliance within25 ft (7.5m)ofanyflammableliquid.
4. Donotfill cookingvessel beyondmaximumfill line.
5. Heatedliquidsremainatscaldingtemperatures longafterthecookingprocess.
Nevertouchcookingappliance until liquidshavecooledto115ºF(45ºC)orless.
6. Thisappliance isnotintendedforandshouldneverbeusedas aheater.
7. Ifafireshouldoccur, keepawayfromtheappliance andimmediatelycall yourfire
department. Donotattempttoextinguishanoil orgrease firewithwater.
DANGER
Ifyousmell gas:
1. Shutoff gas totheappliance.
2. Extinguishanyopenflame.
3. Openlid.
4. Ifodorcontinues, keepawayfromthe
appliance andimmediatelycall your
gas supplieroryourfiredepartment.
WARNING
1. Donotstoreoruse gasolineor
otherflammableliquidsorvaporsin
thevicinityofthisoranyother
appliance.
2. AnLPcylindernotconnectedfor
use shall notbestoredinthe
vicinityofthisoranyother
appliance.
Failuretocomplywiththese instructionscouldresultinafireorexplosionthat
couldcause seriousbodilyinjury, death, orpropertydamage.
Combustionbyproductsproducedwhenusingthisproductcontainchemicals
knowntotheStates ofCaliforniatocause cancer, birthdefects,orotherreproductive
harm.
Yourgrill will beveryhot. Neverleanoverthecookingarea whileusingyourgrill.
Donottouchcookingsurfaces, grill housing, lidoranyothergrill partswhilethegrill
isinoperation, oruntil thegas grill has cooleddownafteruse.
DANGER
SafetyInstruction
PDF 件使用 "pdfFactory Pro" 试用版本创建 www.fineprint.cn

4
WARNING
ELECTRICALGROUNDINGINSTRUCTIONSforRotisserieMotor-Thisapplianceisequippedwithaplug and shouldbe
pluggeddirectlyintoaproperlygroundedreceptacle. Wheninstalled, must beelectricallygroundedinaccordancewithlocal
codesorintheabsenceof localcodes,withtheNationalElectricalCode, ANSI/NFPA70ortheCanadian ElectricalCode,
CSA C22.1DO NOTcutorremovethegroundingprong fromthisplug.
1. Toprotectagainstelectricshock,donot immersecordorplugsinwaterorotherliquid.
2. Unplugfromtheoutletwhennotinuseandbeforecleaning. Allowtocoolbeforeputtingon ortaking off parts.
3. Donot operateanyoutdoorcookinggasappliancewithadamagedcord, plug,oraftertheappliancemalfunctionsor
hasbeendamagedinanymanner. Contactthemanufacturerforrepair.
4. Donotletthecordhangovertheedgeof atableoftouchhotsurface.
5. Donot usean outdoorcookinggasapplianceforpurposesotherthanintended.
6. When connecting,firstconnectplugtotheoutdoorcookinggasappliancethenplugapplianceintotheoutlet.
7. UseonlyaGroundFaultInterrupt(GFI)protectedcircuit withthisoutdoorcookinggasappliance.
8. Neverremovethegroundingplug orusewithanadapterof2prongs.
9. Useonlyextension cordswitha3pronggroundingplug,ratedforthepoweroftheequipments,andapprovedfor
outdoorusewithaW-Amarking.
SafetyInstruction
WARNING
Donottrylightingthisappliancewithoutreadingthe
“LIGHTING INSTRUCTIONS”sectionof thismanual.
CAUTION:BewareofFlashback
TESTEDINACCORDANCEWITHANSZ21.58aCSA
1.6a-2008STANDARD FOROUTDOORCOOKING GAS
APPLIANCE.THISGRILLISFOROUTDOORUSE ONLY.
CAUTION: Spidersandsmallinsectsoccasionally
spinwebsormakenestinthegrill
burnertubesduringtransitand
warehousing.Thesewebscan lead
togasflowobstruction, whichcould
result inafireinandaroundburner
tubes.Thistypeoffireisknownas
“FLASH-BACK”andcan causeseriousdamagetoyourgrill
and createan unsafeoperatingcondition fortheuser.
Althoughanobstructedburnertubeisnot theonlycauseof
“FLASH-BACK”,itisthemostcommoncause.
Toreducethechanceof “FLASH-BACK”, you mustclean the
burnertubesbeforeassembling yourgrill,andatleastoncea
monthinlatesummerorearlyfallwhenspidersaremost
active. Alsoperformthisburnertubecleaning procedureif
yourgrillhasnotbeenusedforanextendedperiod of time. A
cloggedtubecanbelead toafirebeneaththegrill.
Grill Installation Codes
Check yourlocalbuildingcodesforthepropermethodof
installation. intheabsenceoflocalcodes,thisunitshould
beinstalledinaccordancewiththeNationalFuelGas
Code,ANSIZ223.1/NFPA 54,Storageand Handlingof
LiquefiedPetroleumGases,ANSI/NFPA B149.2orCSA
B149.1NaturalGasand PropaneInstallationCode,and
theNationalElectricalCode,ANSI/NFPA 70.
CorrectLPGasTankUse
LPgasgrillmodelsaredesignedforusewithastandard20
lb.LiquidPropaneGastank,notincludedwithgrill. Never
connectyourgasgrilltoanLPgastankthat exceedsthis
capacity.
Ifanexternal electricalsourceisutilized: Theoutdoor
cooking gasappliance, wheninstalled, must beelectrically
groundedinaccordancewithlocalcodesor,intheabsence
oflocalcodes,withtheNationalElectricalCode,
ANSI/NFPA70, ortheCanadianElectricalCode, CSA
C22.1.
WARNING
Keepanyelectricalsupplycordandthefuelsupplyhose
awayfromanyheatedsurfaces.
NOTE:Thenormalflowof gasthroughtheregulatorand
hoseassemblycancreateahumming noise. Alowvolume
of noiseisperfectlynormalandwillnotinterferewith
operation ofthegrill. Ifhummingnoiseisloud and
excessiveyou mayneedtopurgeairfromthegaslineor
reset theregulatorexcess gasflowdevice. Thispurging
procedureshouldbedoneeverytimeanewLPgastankis
connectedtoyourgrill.
Visuallycheck theburnerflamespriortoeachuse. The
flamesshouldlooklikethispicture.Iftheydonot,refertothe
burnermaintenancypartofthismanual.
PDF 件使用 "pdfFactory Pro" 试用版本创建 www.fineprint.cn

5
SafetyInstructioncontinued
LP-GasSupplySystem
Iftheinformation isnot followedexactly, afireresultingin
deathorseriousinjurycouldoccur.
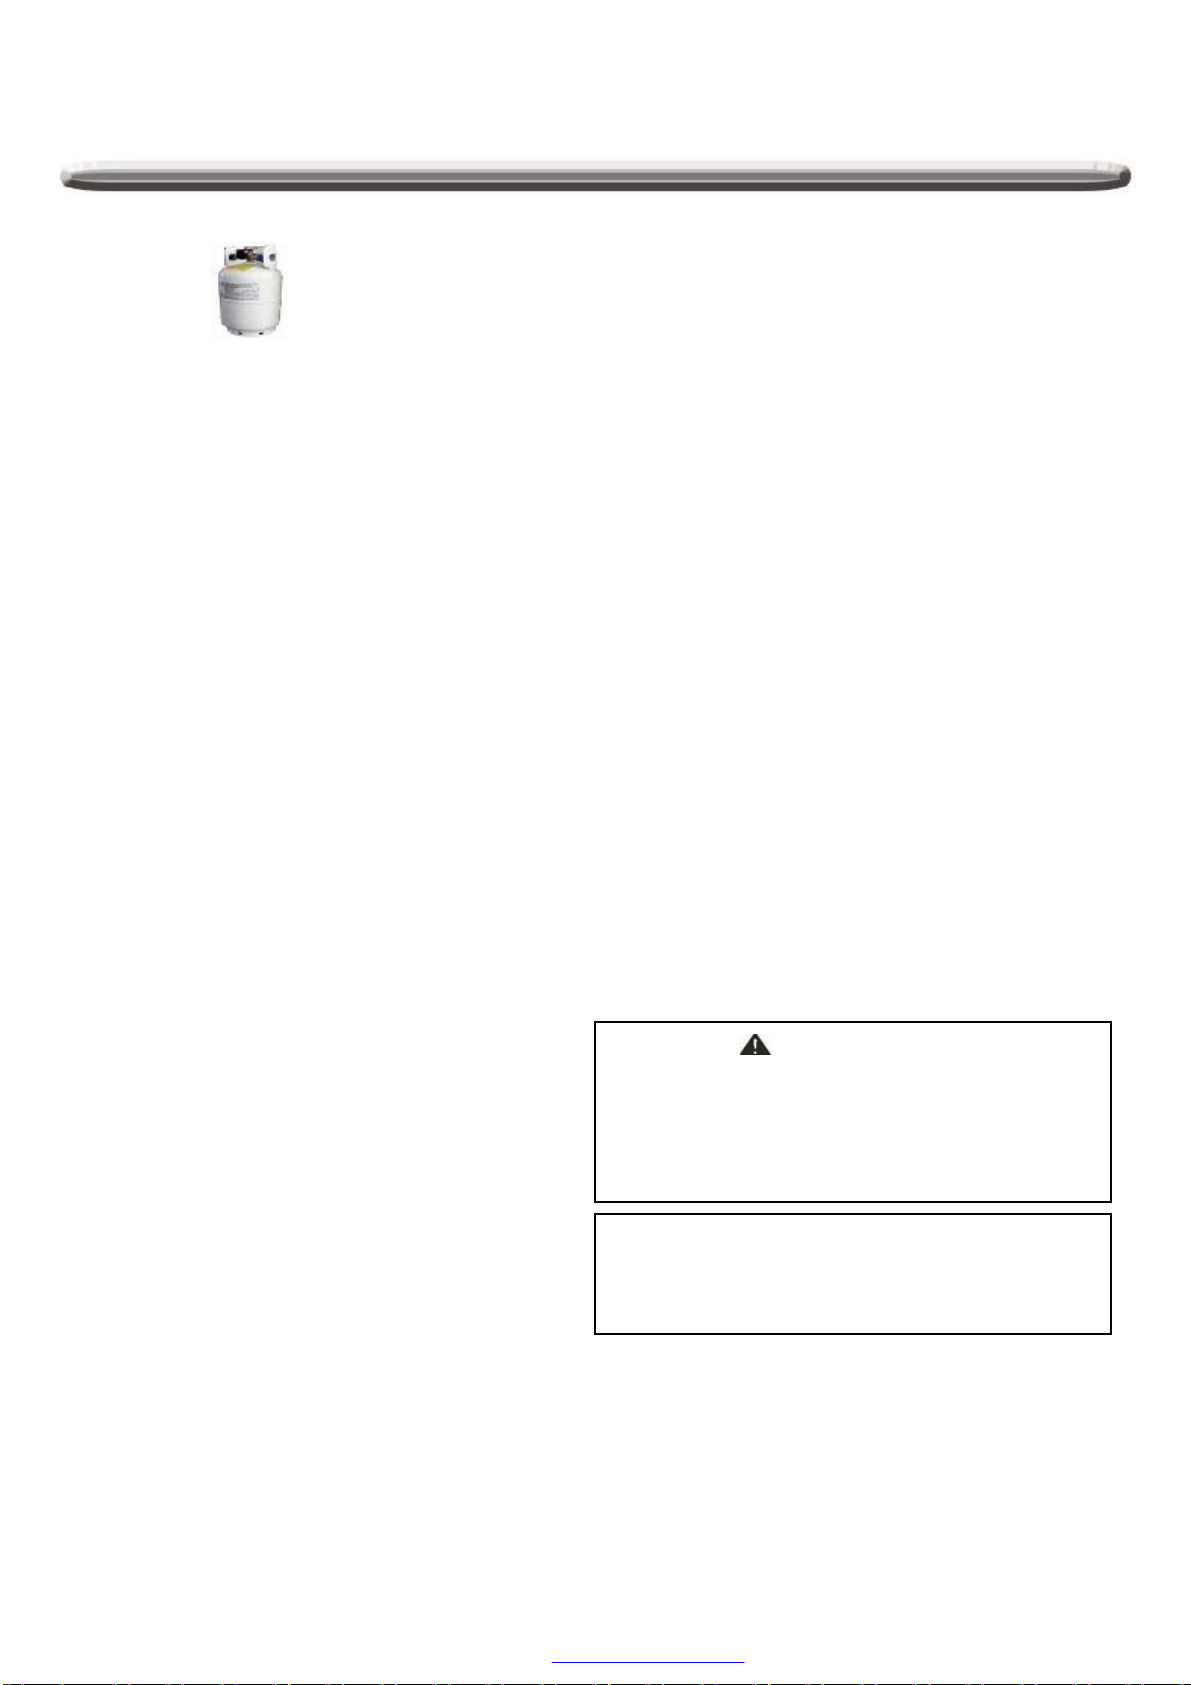
A20lbtankof approximately12-1/4inchesindiameterby18-
1/4incheshighisthemaximumsizeLPgastanktouse.
Thesafetyfeaturepreventsthetankfrombeingoverfilled,
whichcan causemalfunctionoftheLPgastank, regulator
and/orgrill.
TheLPgassupplycylindertobeusedmustbeconstructed
and marked inaccordancewiththespecificationsforLP –
GascylinderoftheU.S.DepartmentofTransportation(DOT)
ortheNationalStandardofCanada,CAN/CSA –B339,
Cylinders,Spheresand TubesforTransportation of
DangerousGoodsandCommission .
TheLPgastankmusthaveashutoff valveterminatinginan
LPvalveoutletthatiscompatiblewithaType1.LPgas
supplycylindermusthaveashutoff valveterminating ina
valveoutlet specifiedforconnectiontypeQCC1in the
standardforcompressed gascylindervalveoutletand inlet
connectionANSI/CGA-V-1asapplicable. LPgassupply
cylindermustbefitted withanOverfillProtection Device
(O.P.D)TheLPgastankmustalsohaveasafetyrelief
devicethat hasadirectconnectionwiththevaporspaceof
thetank.
Thetanksupplysystemmustbearrangedforvapor
withdrawal.
TheLPgastankused musthaveacollartoprotectthetank
valve.
Placedust caponcylindervalveoutletwheneverthecylinder
isnotinuse. Onlyinstallthetypeofdust caponthecylinder
valveoutletthat isprovidedwiththecylindervalve.Other
typesofcaporplugsmayresultinleakageofpropane.
Never connect anunregulatedLPgastanktoyourgasgrill.
Thisoutdoorcookinggasapplianceisequippedwithahigh
capacityhose/regulatorassemblyforconnectiontoa
standard20lb.Liquidpropanecylinder.
HaveyourLPgastankfilledbyareputablepropanegas
dealerandvisuallyinspectedand re-qualifiedateachfilling.
Donot storeaspareLPgascylinderunderornearthis
appliance.
Neverfillthecylinderbeyond 80percentfull.
AlwayskeepLPgastanksinanuprightposition.
Donot storeorusegasolineorotherflammablevaporsand
liquidsin thevicinityofthisoranyotherappliance.
Storageofan outdoorcookinggasapplianceindoorsis
permissibleonlyifthecylinderisdisconnectedand removed
fromtheoutdoorcookinggasappliance.
When yourgasgrillisnotinusethegasmustbeturnedoff at
LPgastank.
Thegasmustbeturnedoff atthesupplycylinderwhenthe
outdoorcookinggasapplianceisnotinuse.
LPgastankmust bestoredoutdoorsinawell-ventilatedarea
and outofreachofchildren. DisconnectedLPgastanksmust
notbestoredinabuilding,garageoranyotherenclosedarea.
DoNot obstructtheflowofventilationairaround thegasgrill
housing.Onlyusetheregulatorand thehoseassembly
supplied withyourgasgrill. Replacement regulatorsandhose
assembliesmustbethosespecifiedinthismanual.
Theregulatorandhoseassemblymustbeinspectedbefore
eachuseof thegrill. Ifthereisexcessiveabrasionorwearor
ifthehoseiscut, itmustbereplacedpriortothegrillbeingput
intooperation.Thereplacementhoseassemblyshallbethat
specifiedbythemanufacturer.
Pressureregulatorand hoseassemblysuppliedwiththe
outdoorcookinggasappliancemustbeused. Never
substituteothertypesofregulator. Contact customerservice
formanufacturerspecifiedreplacementparts.
Thisoutdoorcookinggasapplianceisequippedwitha
pressureregulatorcomplywiththestandardforPressure
RegulatingValvesforLPGasANSI/ UL144.
Donotusebriquettesof anykind inthegrill.
Thegrillisdesignedforoptimumperformancewithouttheuse
ofbriquettes.Donot placebriquettesontheradiantasthiswill
blockoff theareaforthegrillburnerstovent.Adding
briquettescan damageignitioncomponentsandknobs, and
void thewarranty.
Keepthebackand sidecart free and clearfromdebris. Keep
anyelectricalsupplycord, ortherotisseriemotorcordaway
fromtheheatedareasofthegrill.
Neverusethegrill in extremelywindyconditions.Iflocatedin
aconsistentlywindyarea (oceanfront, mountaintop,etc.)a
windbreakwill berequired.Alwaysadheretothespecified
clearance.
Neveruseadentedorrustypropanetank.
Keepanyelectricalsupplycordand thefuelsupplyhoseaway
fromanyheatedsurface.
While lighting,keepyourfaceand handsasfarawayfromthe
grillaspossible.
Burneradjustment shouldonlybeperformedaftertheburner
hascooled.
WARNING
Yourgrill willgetveryhot. Neverlean overthecooking area
whileusingyourgrill.Donottouchcookingsurfaces,grill
housing, lidoranyothergrillpartswhilethegrillisin
operation,oruntilthegasgrillhascooleddownafteruse.
Failuretocomplywiththese instructionsmayresultin
seriousbodilyinjury.
CAUTION: TOENSURECONTINUEDPROTECTION
AGAINSTRISKOFELECTRICSHOCK,CONNECTTO
PROPERLYGROUNDEDOUTLETSONLY,TO REDUCE
THERISKOFELECTRICSHOCK, KEEPEXTENSION
CORD CONNECTIONDRYAND OFFTHEGROUND.
PROPERPLACEMENTANDCLEARANCEOF GRILL
Neveruseyourgasgrillinagarage, porch,shed,
breezewayoranyotherenclosedarea. Yourgasgrill is
tobeusedoutdoorsonly.
DoNotinstall thisunitintocombustibleenclosures.
Minimumclearancefromsidesandbackofunitto
combustibleconstruction,24inches(61cm)fromsides
and 24 inches(61cm)fromback.
DONOT usethisapplianceunderoverheadcombustible
surfaces.Thisoutdoorscookinggasapplianceisnot
intend tobeinstalledinoronrecreational vehiclesand/or
boats.
PDF 件使用 "pdfFactory Pro" 试用版本创建 www.fineprint.cn

6
SafetyInstructioncontinued
INSECTWARNING
Spidersandinsectscannestintheburnersofthisand any
othergrill,andcausethegastoflowimproperly.Thisisa
verydangerouscondition, whichcan causeafiretooccur
behind andbeneaththevalvepanel,therebydamagingthe
grilland makingitunsafetooperate.Inspectthegrillatleast
twiceayear.
WARNING
Keepaspraybottleofsoapywaternearthegassupply
valveandcheck theconnectionsbeforeeachuse.
DO NOTUSE ALUMINUMFOILTO LINETHEGRILL
RACKSORGRILLBOTTOM.
Thiscanseverelyupsetcombustionairflowortrapexcessive
heat inthecontrolarea.
DO NOTLEAVE THEGRILLUNATTENDEDWHILE
COOKING.
SAFETYPRACTICESTOAVOIDPERSONALINJURY
When properlycaredforyourgrillwillprovidesafe, reliable
serviceformanyyears.However, extremecaremustbe
usedasthegrillproducesintenseheat thatcanincrease
accidentpotential.Whenusingthisappliancebasicsafety
practicesmustbefollowed,includingthefollowing:
Donotrepairorreplaceanypartofthegrillunless
specificallyrecommendedinthismanual. Allotherservice
shouldbereferredtoaqualifiedtechnician.
Thisgrillisnot intendedtobeinstalledinoronrecreational
vehiclesorboats.
Childrenshouldnotbeleft aloneorunattendedinanarea
wherethegrillisbeingused.Donotallowthemtosit, stand
orplayinoraroundthegrillatanytime.
Donot storeitemsofinteresttochildrenaroundorbelowthe
grill.
Donot permitclothing,potholdersorotherflammable
materialstocomeincontactwithortooclosetoanygrate,
burnerorhotsurfaceuntilit hascooled. Thefabriccould
igniteandcausepersonalinjury.
Forpersonalsafety, wearproperapparel.Loosefitting
garmentsorsleevesshouldneverbewornwhileusing this
appliance.Somesyntheticfabricsarehighlyflammableand
shouldnotbewornwhilecooking.
Onlycertaintypesofglass,heat-proof glass ceramic,
earthenware, orotherglazedutensilsaresuitableforgrilluse.
Thesematerialsmaybreakwithsuddentemperature
changes. Useonlyonlowormediumheatsettingsin
accordancewiththemanufacturer’sguidelines.
Donot heatunopenedfood containers.Abuild-up of
pressuremaycausethecontainerstoburst.
Useacoveredhandwhenopening thegrilllid.
Neverlean overanopengrill.
When lighting aburner,paycloseattentiontowhatyouare
doing. Makecertainyouareawareofwhichburneryouare
lighting,soyourbodyand clothingremainclearofopen
flames.
When usingthegrill,donottouchthegrillrack,burner
grateorimmediatesurroundingsastheseareasbecome
extremelyhotandcouldcauseburns.Useonlydry
potholders. Moist ordamppotholdersonhot surfacesmay
causesteamburns. Donotuseatowelorbulkyclothin
placeorpotholders. Donotallowpotholderstotouchhot
portionsofthegrillrack.
Greaseisflammable.Let hotgreasecoolbeforeattempting
tohandleit.Donotallowgreasedepositstocollectinthe
greasetrayatthebottomofthegrill’sfirebox. Clean the
greasetrayoften
Donot usealuminumfoiltolinethegrillracks orgrill
bottom.Thiscan severelyupsetcombustion airflowortrap
excessiveheat inthecontrolarea.
Forproperlighting and performanceof theburnerskeep
theburnerportsclean.Itisnecessarytoclean them
periodicallyforoptimumperformance.Theburnerswillonly
operateinoneposition and mustbemountedcorrectlyfor
safeoperation.
Clean thegrillwithcaution.Toavoidsteamburns,do not
useawet spongeorclothtoclean thegrill whileitishot.
Somecleanersproducetoxicfumesorcanigniteifapplied
toahotsurface.
Turnoffgrill controlsandmakecertainthegrilliscool
beforeusing anytypeofaerosolcleaneronoraroundthe
grill.Thechemicalthatproducesthespraying actioncould,
inthepresenceof heat, igniteorcausemetalpartsto
corrode.
Donot usethegrilltocookexcessivelyfattymeatsorother
productswhichpromoteflare –ups.
Donot operatethegrillunderunprotectedcombustible
constructions. Useonlyinwellventilatedareas.Donot use
inbuildings,garages,sheds,breezeways orothersuch
enclosedareas.
Keeptheareasurroundingthegrill free fromcombustible
materialsincluding,fluids,trash, and vaporssuchas
gasolineorcharcoallighterfluid.Donot obstructtheflowof
combustionandventilationair.
WARNING
Thisoutdoorcooking gasapplianceisnotintended
tobeinstalled inoronboats. Andotherrecreational
vehicles.
PDF 件使用 "pdfFactory Pro" 试用版本创建 www.fineprint.cn

7
PackageContentsList
A.Fireboxassembly-1pc B.Left sideshelf -1pc C. Rightside shelf -1pc
D.Greasepan -1pc E.Greasecup-1pc F.Backpanel, middle-1pc
G.Backpanel, bottom-1pc H. Rightside panel-1pc I.Left sidepanel-1pc
J. Cartframe-1pc K. Diagonalbarbarrier-1pc L.Bottompanel -1pc
M.Tankbolt -1pc N. RightTriangle bracket-1pc O.LeftTriangle bracket-1pc
PDF 件使用 "pdfFactory Pro" 试用版本创建 www.fineprint.cn

8
PackageContentsList
P.Swivel caster-1pc Q.Swivel casterwithbrake-1pc R. Stationarycaster-2pcs
S. Right door-1pc T.Left door-1pc U. Doorhandleassembly-2pcs
V.Warming rack -1pc W.Cookinggridwithhole-2pcs X. Flametamer-4pcs
Y.Battery-1pc Z.Greasecupbracket-2pcs
PDF 件使用 "pdfFactory Pro" 试用版本创建 www.fineprint.cn

9
HardwareContents
Item Description Requiredforassembly Extrahardware Total
1/4'' x15mmTrussHead Screwwith
lockingwasher
5/32'' x10mm TrussHead Screwwith
lockingwasher
5/32'' x10mm Flat HeadScrew
5/32'' Flat Washer
2pcs
CC 12 pcs
49pcs
BB
AA 47 pcs
22 pcs 24pcs
2pcs
DD 8pcs 9pcs
13pcs1pc
1pc
PDF 件使用 "pdfFactory Pro" 试用版本创建 www.fineprint.cn

No
.Part(Description) Warranty
coverage
(year)
QT
YNo
.Part(Description) Warranty
coverage
(year) QTY
1Mainlid 1 1 29 Mainmanifold 1 1
2Mainlidscrew 1 2 30 Regulator, LP 1 1
3Burnerpinassembly 1 4 31 Pulseignitermodule 1 1
4Temperaturegauge 1 1 32 Maincontrolpanel 1 1
5Temperaturegauge
Housing 1 1 33 Bezel A 1 4
6Logo 1 1 34 Bezel B(Small) 1 1
7Rotisseriemotorbracket 1 1 35 Control knobA 1 4
8Mainlidhandleseat,left 1 1 36 Control KnobB(Small) 1 1
9Mainlidhandletube 1 1 37 Greasepan 1 1
10 Mainlidhandleseat,right 1 1 38 Greasecup 1 1
11 Flametamer 1 4 39 Warmingrack 1 1
12 Mainburner 5 4 40 Cooking gridwithhole 1 2
13 MainburnerigniterwireA 1 1 41 Back panel,top 1 1
14 MainburnerigniterwireB 1 1 42 Sideshelf, left 1 1
15 MainburnerigniterwireC 1 1 43 Sideshelffrontpanel,left 1 1
16 MainburnerigniterwireD 1 1 44 Back panel,middle 1 1
17 Rotisserieheatshield 1 1 45 Back panel, bottom 1 1
18 Rearbaffle 1 1 46 Sidepanel,left 1 1
19 Rotisserieigniterwire 1 1 47 SwivelcasterwithBrake 1 1
20 RotisserieBurner 1 1 48 Swivelcaster 1 1
21 Rotisserieburnerorificew/
brasselbow 1 1 49 Bottompanel 1 1
22 Rotisserieburnerflexgas
line 1 1 50 Cartframe 1 1
23 Rotisserieburnerigniter
bracket 1 2 51 Doormagnet 1 2
24 Hood buffer 1 2 52 TriangleBracket, left 1 1
25 Mainburnerbowl
assembly Non-
replaceable 153 TriangleBracket,right 1 1
26 Frontbaffle 1 1 54 Doorironpiece 1 1
27 Maingasvalve 1 4 55 Diagonal barbarrier 1 1
28 Rotisseriegasvalve 1 1 56 Tankbolt 1 1
11
PDF 件使用 "pdfFactory Pro" 试用版本创建 www.fineprint.cn

12
PartList
1
11NG orificepack11
Back panel rubber
grommet
65
No
.Part(Description) Warranty
coverage
(year)
Q
T
YNo. Part(Description) Warranty
coverage
(year) QTY
57 Caster 1 2 69a NGGasHosewith
Quick Connector
assembly
sold
separately
with#69
1
58 Sidepanel,right 1 1 69b NG Regulatorassembly 1
59 Sideshelf hooks 1 4 69c TrussHead Screwwith
lock 2
60 Sideshelffrontpanel,
right 1 1 69d Flat washer 2
61 Sideshelf, right 1 1 69e 6 mmNut driver 1
62 Door, right 1 1 69f Hexwrench 1
63 Door,left 1 1 69g 6mm wrench 1
64 Doorhandleassembly 1 2 70 Lightingrod 1
66 Spitfork 1 2 KD-assemblyhardware
pack 1 1
67 Spit rod 1 1 Grillcover 1 1
68 Rotisseriemotor 1 1 Manual 1 1
69 NG conversion kit sold
separately
asset 1
*Naturalgasconversionkit soldseparately
PDF 件使用 "pdfFactory Pro" 试用版本创建 www.fineprint.cn

13
AssemblyInstructions
1.Caster Assembly
Mountthecastersontothebottompanel(L)using
sixteen 1/4-in. x15-mmtruss head screwswith
locking washers(AA).
The swivelcasterwithbrake(Q)shouldbe
positionedundertheleft rearofthe cartbottomand
the swivelcaster(P)shouldbepositionedunder
left front asshowninFig. 1.
The twostationarycasters(R)should be
positionedundertherightside.
Note: Thegapof the twostationarycastersshould
be facingtheinside bottompanel.
Turnoverthe bottompanelforassembling casters.
2.SidePanel Assembly
Usethree 1/4-in.x15-mm truss head
screwswithlockingwashers(AA) to
connectthebottomofthe leftside panel (I)
tothe bottompanel (L).Makethe left side
panelflushwiththe rearof bottompanel
and tighten thescrewsasshowninFig.2.
Repeatfortheright sidepanel(H).
Fig. 2
L
16 xAA
R
P
Q
Fig. 1
I
6xAA
L
H
PDF 件使用 "pdfFactory Pro" 试用版本创建 www.fineprint.cn

14
3. BackPanel,bottomAssembly
a). Position the backpanel,bottom(G)withtheflat
side facing outward. Attachthebackpanel,bottom
(G)tothe bottompanel (L)withthree1/4-in. x15-
mmtruss head screwswithlockingwashers(AA)
asshowninFig.3.
Fig. 3
AssemblyInstructions
G
L
AA7X
b). Usefour1/4-in.x15-mm truss head screws
withlockingwashers(AA)toconnecttheback
panel,bottom(G)tothe rightandleft side
panels(H/I)asshowninFig.3
Fig. 4
4. BackPanel, middleAssembly
a). Usefour1/4-in.x15-mm truss head screws
withlocking washers(AA)toconnect back
panel,middle(F)totherightand leftside
panels(H/I )asshowninFig. 4
F
4xAA
I
H
I
H
PDF 件使用 "pdfFactory Pro" 试用版本创建 www.fineprint.cn

LH
I
15
Fig. 5
Fig.6
AssemblyInstructions
5. Diagonal Bar Barrier Assembly
Usetwo5/32-in.x10-mm truss head screws(BB) to
attachDiagonal BarBarrier(K) tothebottompanel(L)
and upside of theBack panel, bottom(G).Asshown
inFig.5.
L
K
G
2xBB
Fig.7
6. DoorTriangleBracketAssembly
a)Loosen but donot removefour5/32-in. x
10-mm truss head screws(BB) mountthe
LeftSidePanel(I)andBottomPanel(L),
twoscrewson cartRightSide Panel (H)
and twoon theBottomPanel (L).Align the
holesof thetrianglebracket withscrewson
LeftSidePanel(I)andBottomPanel(L).
Then tightenthescrewsasshowninFig.6.
b)Repeatthe stepsa)forattachingthe
trianglebrackettotheRightPanel(H)and
bottomPanel (L)
O
7. CartframeAssembly
Usefour1/4-in.x15-mm truss head
screwswithlockingwashers(AA) to
add thecartframe(J) totheright and
left sidepanels, asshowninFig. 7.
J
4xBB
PDF 件使用 "pdfFactory Pro" 试用版本创建 www.fineprint.cn

S
16
Fig. 8
AssemblyInstructions
Fig.9
a)Attachedthedoorhandle assembly(U)tothe
eachdoor(S/T)using eight 5/32-in. x10-mm
truss head screws(BB), asshowninFig.8.
HINT: Sixscrewsforeachdoor.
HINT: Fourscrewsforeachdoor.
12XCC
8.DoorAssembly
8X
TU
BB
I
H
b). Attachthetwodoor’shingestothe right
and leftsidepanels(I/H)using twelve5/32-
in. x10-mmflatheadscrews(CC)as
showninFig. 9.
PDF 件使用 "pdfFactory Pro" 试用版本创建 www.fineprint.cn

17
Fig.10
AssemblyInstructions
9.InstalltheGrease pan
a). Attachthegreasecupbrackets(Z)tothe
greasepan(D)byusing four5/32-in.x10-mm
truss head screwswithlocking washer(BB.)and four
5/32-inflat washer(DD)asshowninFig.10.
b).Installthegreasepan (D)ontothecart byusing
four5/32”x10mm truss head screws(BB).As
showninFig.11.
c).Installthegreasecup (E) underthe greasetray
(D).AsshowninFig.12.
D
Fig.12
E
4xBB
4xBB
Z
D
4xDD
Fig. 11
PDF 件使用 "pdfFactory Pro" 试用版本创建 www.fineprint.cn

18
Fig.13
AssemblyInstructions
Fig.14
10.FireboxAssembly
a). Removethe fireboxassembly(A) fromthe
cartonandcarefullyplaceontothegrillcart.As
showninFig.13.
A
b)Attachfireboxtotheleft andrightside
panelsbyusing four ¼-in.x15-mm truss
head screwswithlockingwashers(AA).
AsshowninFig. 14. 1xAA
CAUTIONThefireboxassemblyisheavy
andwill require two ormorepeopletolift and
positionontogrillcart. Failure todosomay
resultininjury.
1xAA
1xAA
1xAA
PDF 件使用 "pdfFactory Pro" 试用版本创建 www.fineprint.cn

2xBB
19
11.SideShelvesAssembly
a). Loosen the twoscrewswhichpre-assembled
ontofireboxrightside panel (H)but donot
removeCompletely.Align thebottomkeyholes
on sideshelf (C)withthetwoloosened screwsas
showinFig.15, andthen tighten..
b). Usethree ¼-inx15-mmtruss head screwswith
lockingwasher(AA) tokeeptherightside shelf
inplace(Thesetwo ¼-inscrewsarescrewed
throughthefrontand therearscrewholeswhich
arelocatedonthetop oftherightshelf). As
showninFig.15.
Note:Thetop2screwsof thefireboxshouldbe
screwed fromthe insidetooutsideforrightside
burnershelf. Butthe bottom2screwsshouldbe
tightenedfromoutside toinside.
c).Securetherightside shelf controlpaneland
maincontrolpanel byusing two5/32-inx10-mm
truss head screws(BB) andtwo5/32-inflat
washers(DD). AsshowninFig.15.
Fig.15
Fig16
AssemblyInstructions
C
3xAA
2xDD
2xDD
2xBB
3xAA
d)Repeat step11 toassembleleftside shelf.
AsshowninFig. 16.
H
PDF 件使用 "pdfFactory Pro" 试用版本创建 www.fineprint.cn

Fig.17
V
W
X
12.FlameTamers,CookingGridsInstallation
Placetheflametamers(X),maincookinggrids(W),and
warmingrack(V) intothegrillasshowninFig. 17.
13.LiquidPropaneTankInstallation
Placethe liquidpropanetankintothe hole
inthe bottompanel andtighten thetank
bolt(M) atthebackofthe grilltosecureas
showninFig. 18
Fig.18
M
14. BatteryAssembly
Unscrewthe electronicigniterbuttonandplacethe
battery(Y) intothe housing withthepositiveterminal
(+)facingoutward. Replacetheignition button after
thebatteryhasbeeninstalledasshowninFig.19.
Fig.19
Y
20
AssemblyInstructions
PDF 件使用 "pdfFactory Pro" 试用版本创建 www.fineprint.cn
Other manuals for 720
1
This manual suits for next models
1
Table of contents
Languages:
Other Nexgrill Gas Grill manuals

Nexgrill
Nexgrill 730-0882S User manual

Nexgrill
Nexgrill 720-0459 Quick reference guide

Nexgrill
Nexgrill evolution infrared plus User manual

Nexgrill
Nexgrill 720-0783D User manual

Nexgrill
Nexgrill 720-0896C User manual

Nexgrill
Nexgrill 720-0896 User manual

Nexgrill
Nexgrill 740-0594A User manual

Nexgrill
Nexgrill 720-0888 A User manual